|
Generating Checksheets for Interop Work Documents
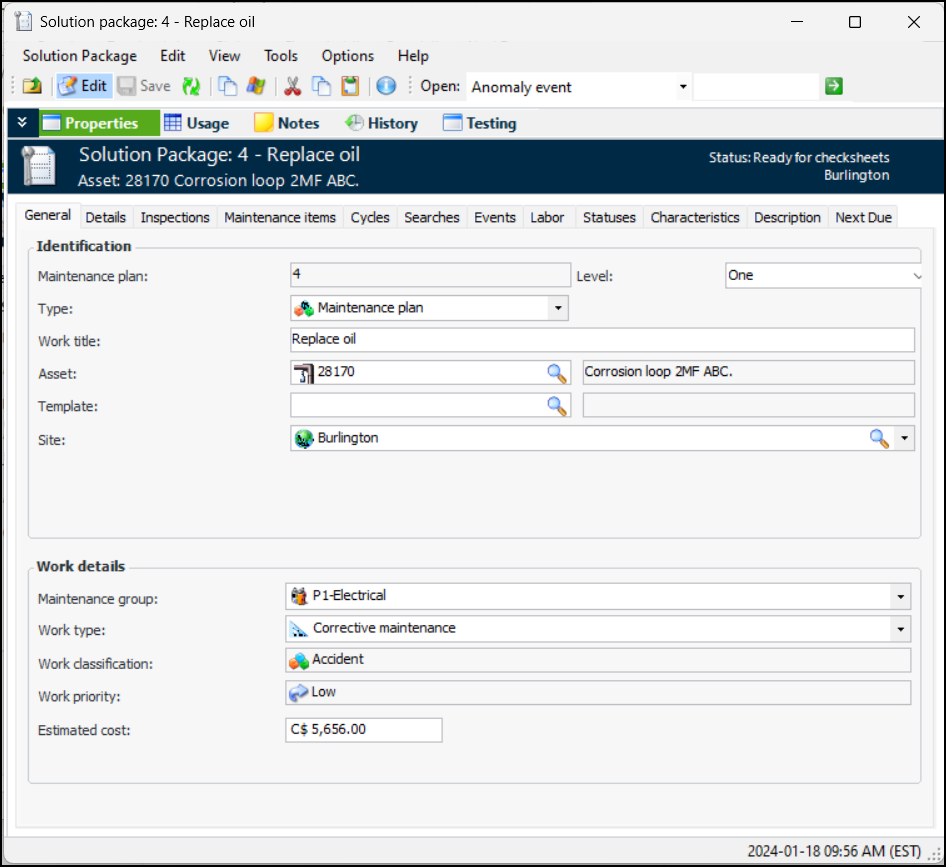
ContentsNote: To create checksheets based on a task template, you must first enable feature 83 in APM. In the Enterprise window, select the Features view and the Enabled Features tab. Click Browse, select “Ability to create a checksheet from a Task Template” and click OK. If APM is running as a smart client, click Refresh Enabled Features on the server. Then restart the client to use the functionality.Note: To generate checksheets based on events (activity code), you must first enable feature 84 in APM. In the Enterprise window, select the Features view and the Enabled Features tab. Click Browse, select “Create checksheets based on recommendations from events on an Interop work order or work request” and click OK. If APM is running as a smart client, click Refresh Enabled Features on the server. Then restart the client to use the functionality.Work Orders with Solution Packages
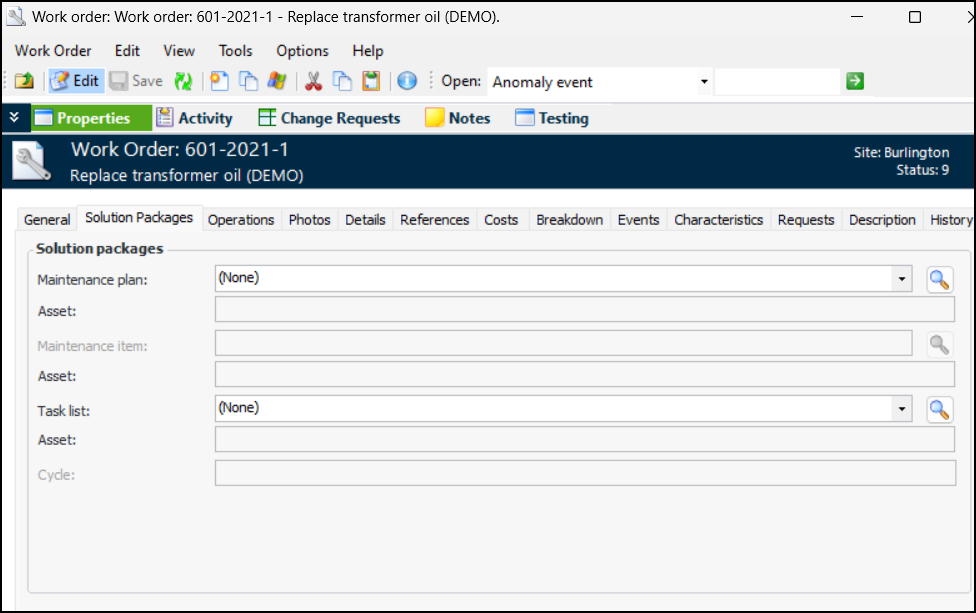
To Prepare Work Orders for Checksheet Generation
1.
3. In this example, solution package levels have been defined as Maintenance plan, Maintenance item, and Task list in the site interoperability profile. For more information, see Setting up Site Interoperability Profiles for AWEIS.
• To change the checksheet creation status, click the Tools menu, click Mark As, and select the status. Possible values are: Ready for checksheets – Tasks and cycles are in place on the solution packageGenerating Checksheets for Work Orders
To Generate Checksheets for One Work Order
1.
3.To Generate Checksheets for the Site
1. On the Site window, click the Tools menu, Inspection Management, and then Create Work Order Checksheets.You can also set up the Create Checksheets for Work Orders scheduled action to evaluate new work orders automatically on a regular basis. For more information, see Creating a Scheduled Action.
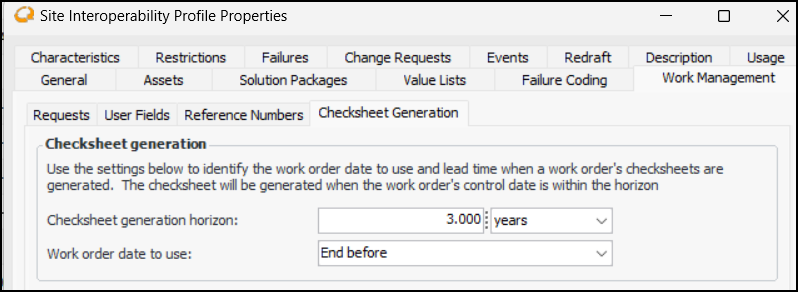
Checksheet Generation Horizon
To Set the Generation Horizon
1. In the Enterprise window, select the Integrations view, the AssetWise Interoperability tab, and then the Interoperability Profiles tab.
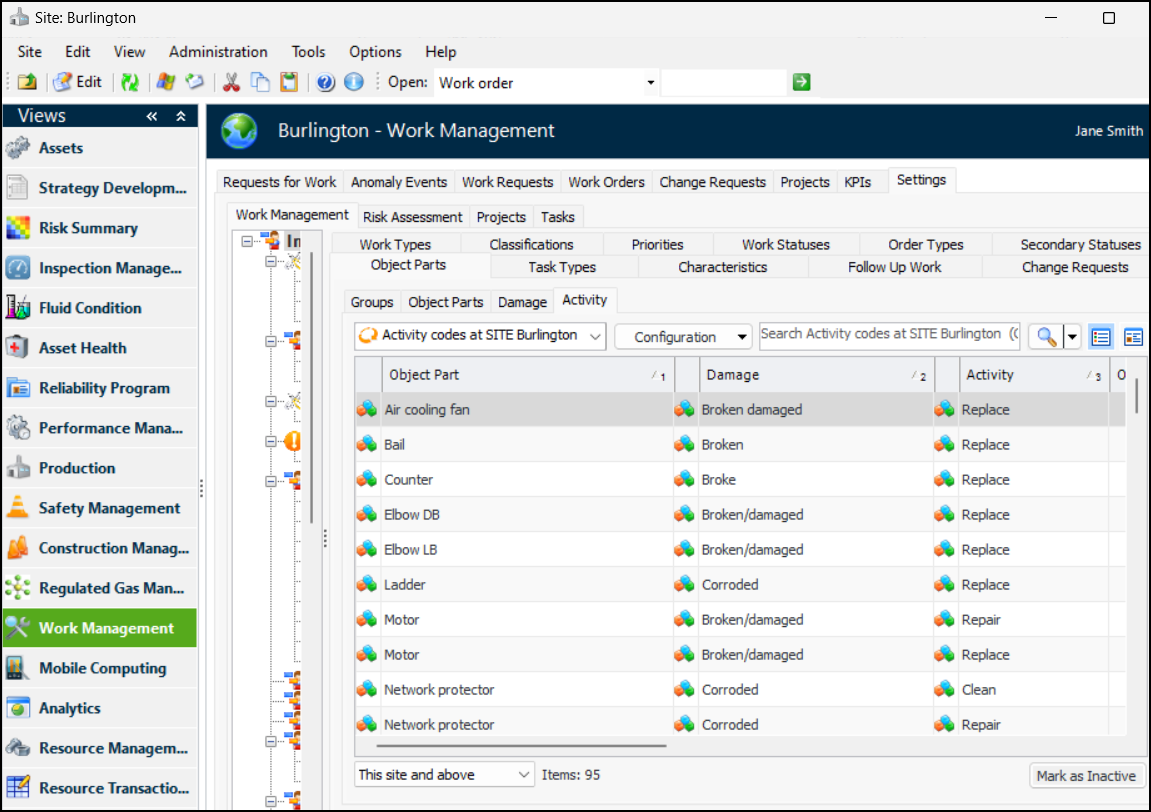
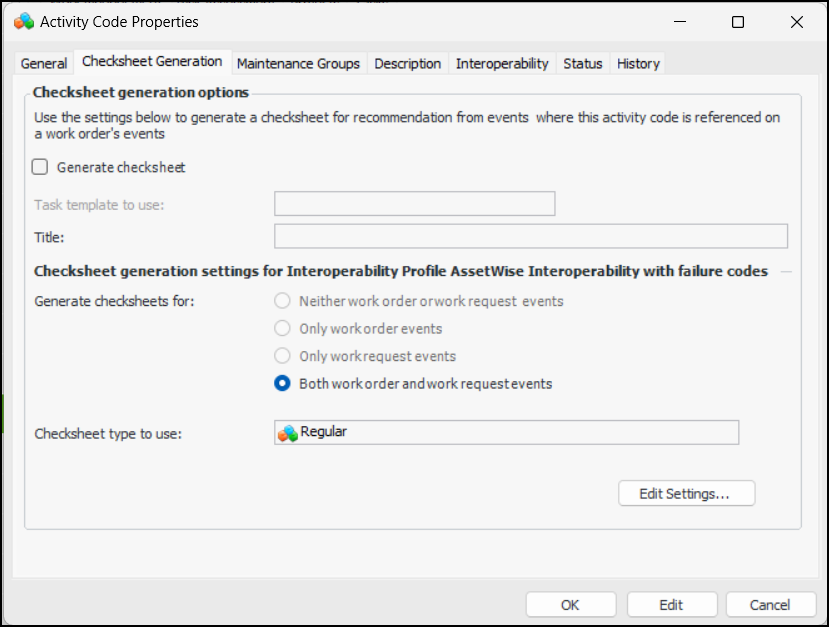
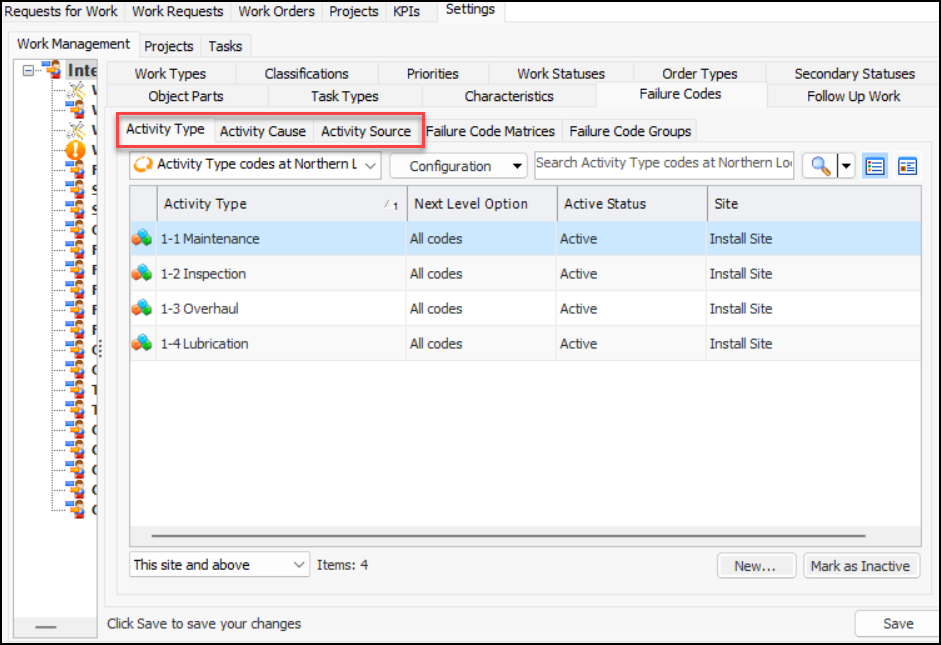
3.Creating Checksheets Based on Activity Codes
To Set up Activity Codes to Generate Checksheets
1. From the Site window, select the Work Management view and the Settings tab. Select the Work Management tab and the Interoperability work management settings node in the tree.Tip: You can also select the Administration menu and then Work Management Settings. The Work Management Settings dialog appears.
2. Select the Object Parts tab and the Activity tab. This tab displays the activity codes for the site. For example:Note that you can only create activity codes in the context of creating object parts and damage codes. For more information, see Setting up Object Parts, Groups, and Related Codes.
4. Select the Checksheet Generation tab.
6. Click Generate checksheet to enable the functionality.
8. The Checksheet generation settings for the site interoperability profile area displays the settings from the profile. Click Edit Settings if you wish to change the profile. The Edit Checksheet Generation Settings dialog appears, where you can make changes.
9. Click OK to save the code and close the Activity Code Properties window.Creating Checksheets Based on Failure Codes
To Set up Failure Codes to Generate Checksheets
1. From the Site window, select the Work Management view and the Settings tab. Select the Work Management tab and the Interoperability work management settings node in the tree.Tip: You can also select the Administration menu and then Work Management Settings. The Work Management Settings dialog appears.
2. Select the Failure Codes tab. This tab displays a tab for each of the failure code levels (up to five) defined in the site interoperability profile. For example:In this example, the failure codes are for “Activity Type”, “Activity Cause”, and “Activity Source”.
3. For each of the failure codes, double-click it to open its Properties dialog. Select the Checksheet Generation tab.
5. Click Generate a checksheet.
7. Click OK to save the failure code instance and close the dialog.