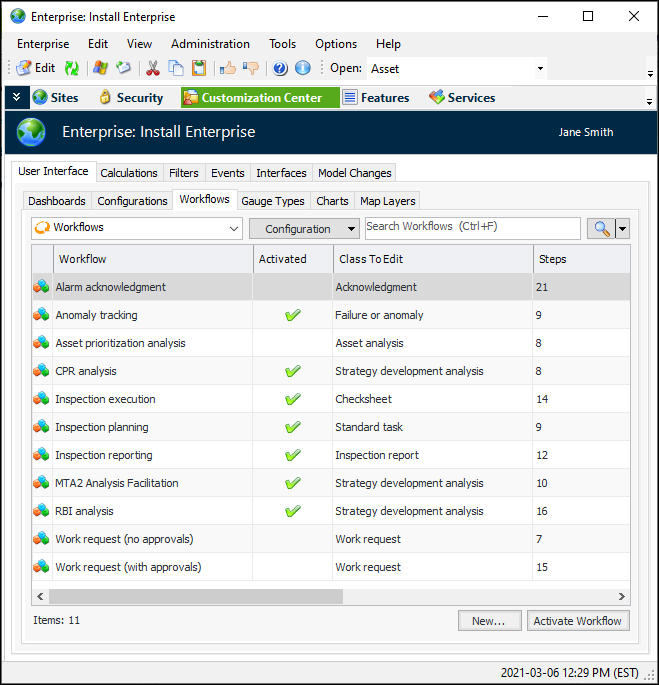
Activating APM Workflows

Activating a workflow makes it available to be added to user roles and site properties. Typically, a workflow is deactivated while it is being developed. When it is ready for testing or general use, you can activate it.
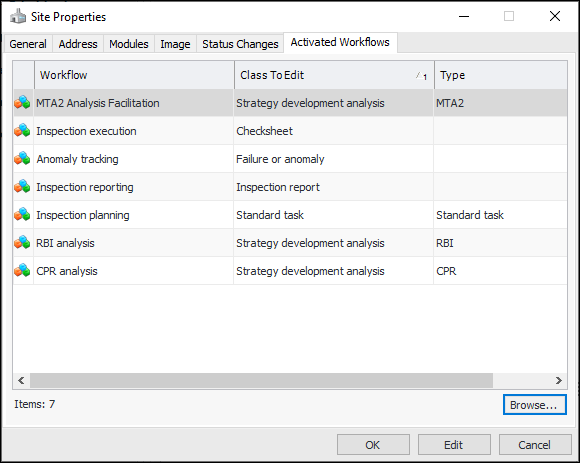
When you have activated the workflows, add them to the sites where they are to be used. You can also add them to user roles, as explained in Creating User Roles.
This topic explains how:

To Activate Workflows

1.
2.
Select the Customization Center view, User Interface tab, and the Workflows tab. This tab lists the workflows that have been created for the enterprise. For example:
3.
Select the workflow in the list and click Activate Workflow. A check mark appears in the Activated column for that workflow.
Tip: To deactivate an active workflow, select it in the table. The De-Activate Workflow button is available. When you click it, a message appears if the workflow is being used by a site. Click Yes to deactivate the workflow and remove it from the site.

To Add Workflows to Sites

1.
In the Enterprise window, select the Sites view, Site Hierarchy tab.
2.
Right-click the site and click Site Properties. The Site Properties dialog appears.
3.
Select the Activated Workflows tab.
4.
Click Browse to open the Browse Workflows dialog. This dialog lists only activated workflows.
5.
Select the workflows for the site and click OK. The workflows are added to the tab. For example: