|
|
What’s New in APM 7.20
Contents
APM Remote
For more information, see “Setting up Remote Users” in APM Remote Setup Guide.Asset Management
Asset Degradation Tracking – Structural Minimum Thickness
Note: Support for structural minimum thickness is available for preview. You must first enable feature 102 to use the functionality in APM. In the Enterprise window, select the Features view and the Enabled Features tab. Click Browse, select “Support structural minimum thickness when calculating an asset’s minimum thickness” and click OK. If APM is running as a smart client, click Refresh Enabled Features on the server. Then restart the client to use the functionality.Manufacturers – Active Status
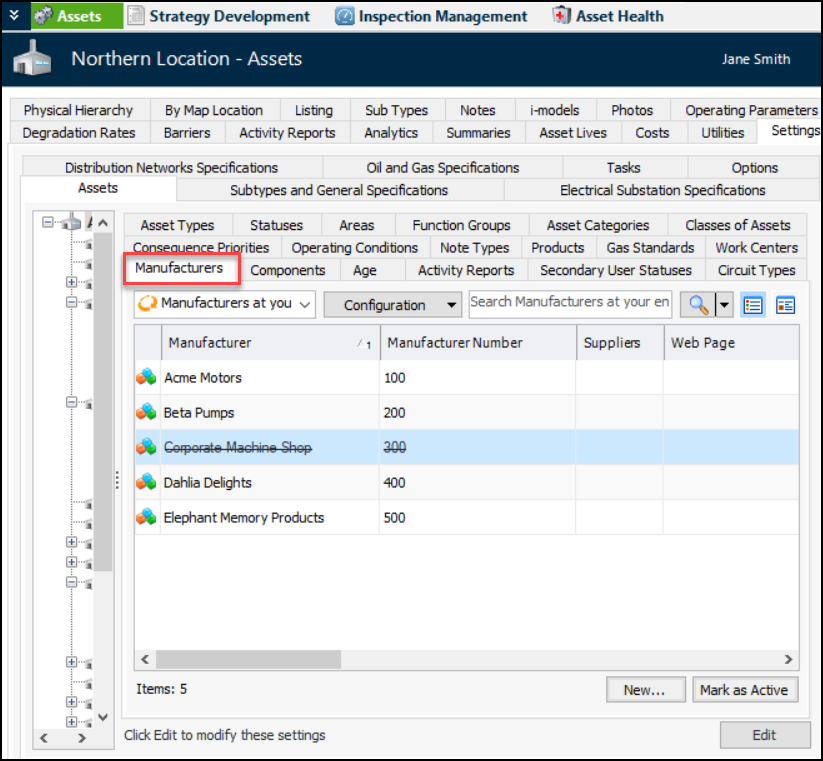
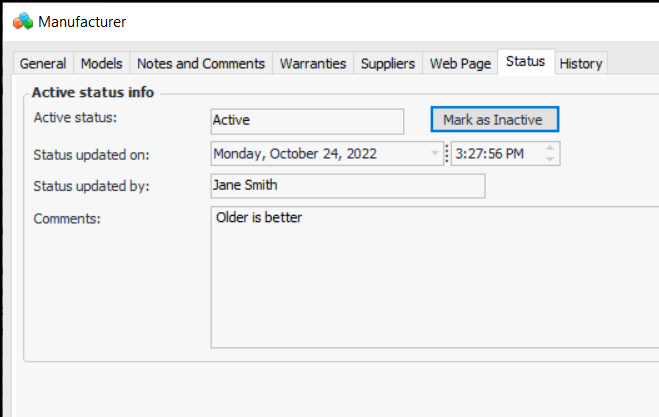
In asset settings, you can now mark individual manufacturers as inactive. Inactive values appear scored-through in the Manufacturers tab. For example:The Manufacturer dialog displays the Status tab, where you can change the active status of the record and see information about the most recent change in status. For example:Asset Specifications – Oil and Gas
Oil and Gas Specifications – Piping and Tank
Oil and Gas Specifications – Platforms – Topside Structural Assets
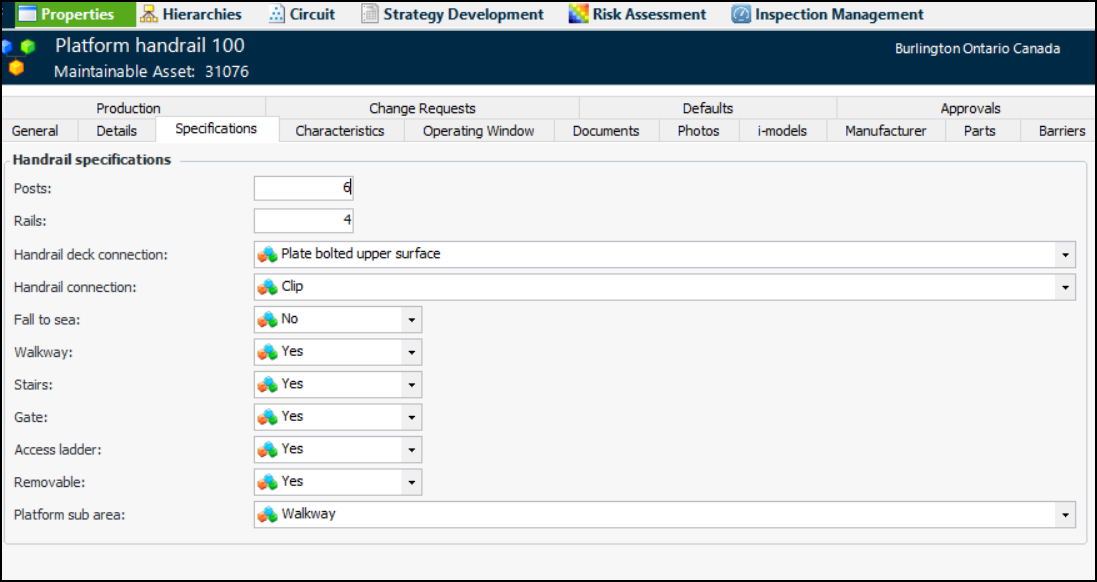
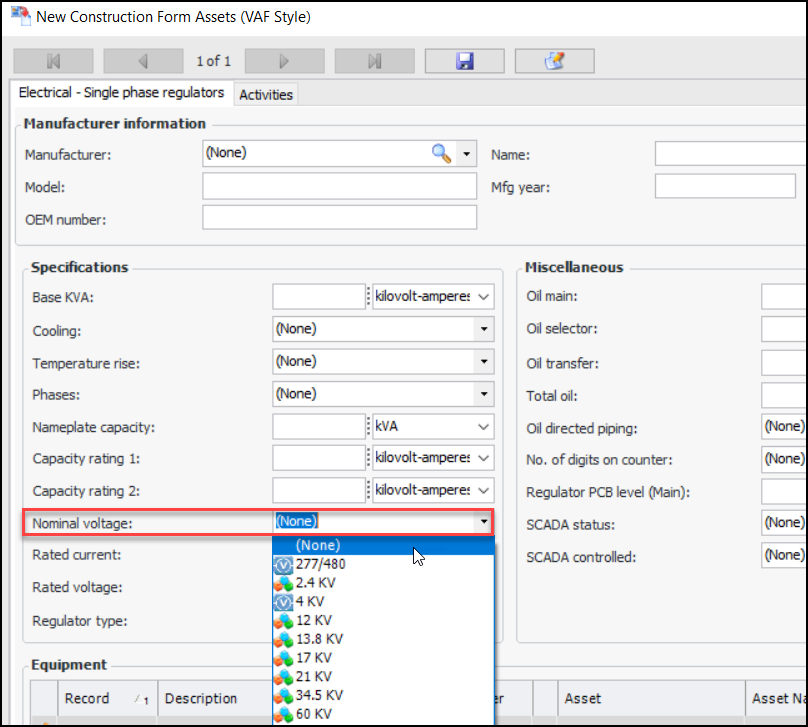
Note: Drilling platform asset specifications are generally available. You must first enable feature 113 to use the functionality in APM. In the Enterprise window, select the Features view and the Enabled Features tab. Click Browse, select “Support for drilling platform asset specifications” and click OK. If APM is running as a smart client, click Refresh Enabled Features on the server. Then restart the client to use the functionality.Assets of the type display the Specifications tab in the Asset window, Properties view. Here is an example of the handrail specification:Beams
Bridge
Crane
Grating
Handrail
Ladder
Mooring Anchor
Mooring Chain
Mooring Connector
Mooring Line
Mooring Rope
Stairs
Tubular
AWEIS – Work Documents
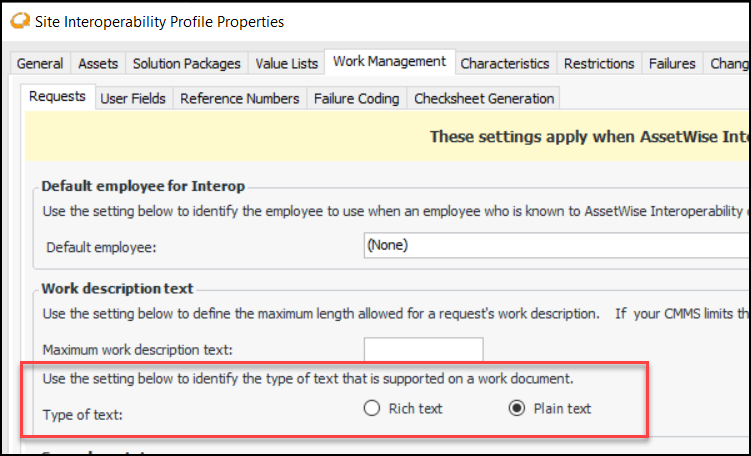
Plain Text Descriptions
Select the Work Management tab and the Requests tab. In the Work description text area, select Plain text:Filter for Maintenance Groups
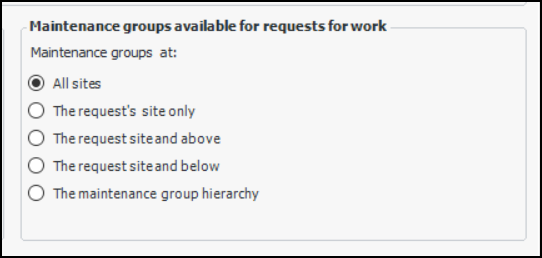
Open the Site Interoperability Profile and click Edit. Select the Work Management tab and the Requests tab. Select the appropriate option:Configuring the APM Environment
For a full list of software and system requirements, see APM Installation Prerequisites.SELECTserver and SES Licensing
Licensing Defaults Changed for New Instances
Default licensing settings have changed because of the coming switch to SES licensing. With 7.20, when you create a smart or thick client instance in the APM Configuration window, Licensing Type is set to “Automatic (SES first, then falls back to SELECT)”.Consequently, if you are using SELECT licensing, when you try to log in to APM with Windows credentials, the login will fail. To use a Windows login, set the instance’s Licensing Type to “SELECT Licensing”.Microsoft® Windows Operating Systems
Database Management Systems
Construction Management
Data Loaders
Asset Condition Analyses
This new data loader is available in the Enterprise window, Data Loaders view, Asset Health tab. The data loader is used to import asset condition analyses. The properties are:
Asset Prioritization Analyses
This new data loader is available in the Enterprise window, Data Loaders view, Strategy Development tab. The data loader is used to import asset prioritization analyses. The properties are:
Assets
Degradation Information
New data loaders for asset and indicator degradation information are available in the Enterprise window, Data Loaders view, Degradation tab. The properties are:
Measurement Point Readings
Note: The Measurement point readings data loader is generally available. You must first enable feature 79 to use the functionality in APM. In the Enterprise window, select the Features view and the Enabled Features tab. Click Browse, select “Data loader for measurement point readings” and click OK. If APM is running as a smart client, click Refresh Enabled Features on the server. Then restart the client to use the functionality.Indicator Due Dates
Degradation Tracking – Settings Window
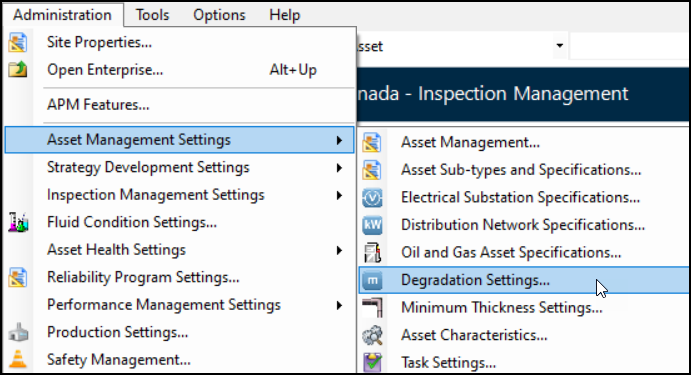
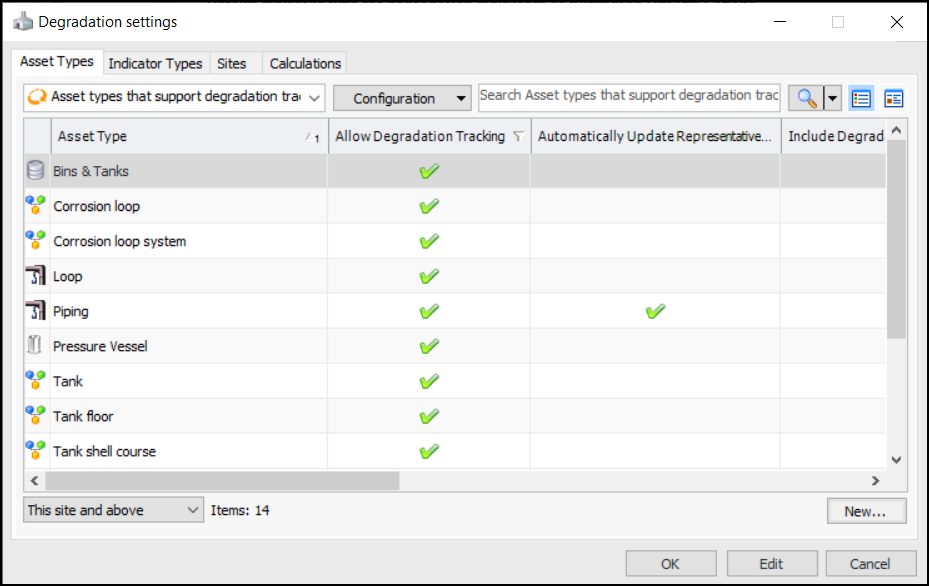
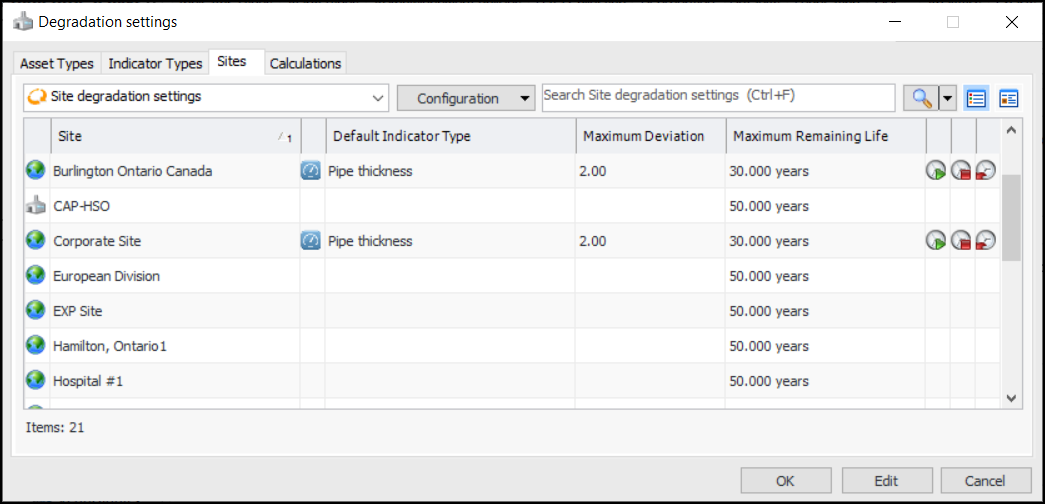
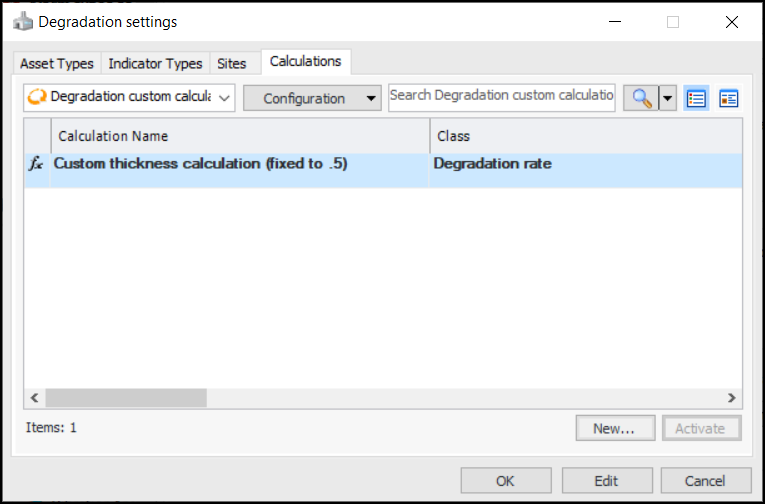
The new Degradation Settings window provides a one-stop location to review and define settings for asset types, indicator types, sites, and calculations. In a Site window, click the Administration menu, Asset Management Settings, and Degradation Settings:On the Asset Types tab, you can see which types support degradation tracking, automatic updates of representative degradation indicators, degradation descriptions, and more.You can select the “Asset types that do not support degradation tracking” configuration, open an asset type, click Edit, and select settings. For example:Similarly, in the Indicator Types tab, double-click an indicator type to adjust its settings:The Sites tab provides a location to view and edit degradation options for all sites in the enterprise:The Calculations tab lists custom degradation calculations. For example:Fluid Condition Tracking
Inspection Management
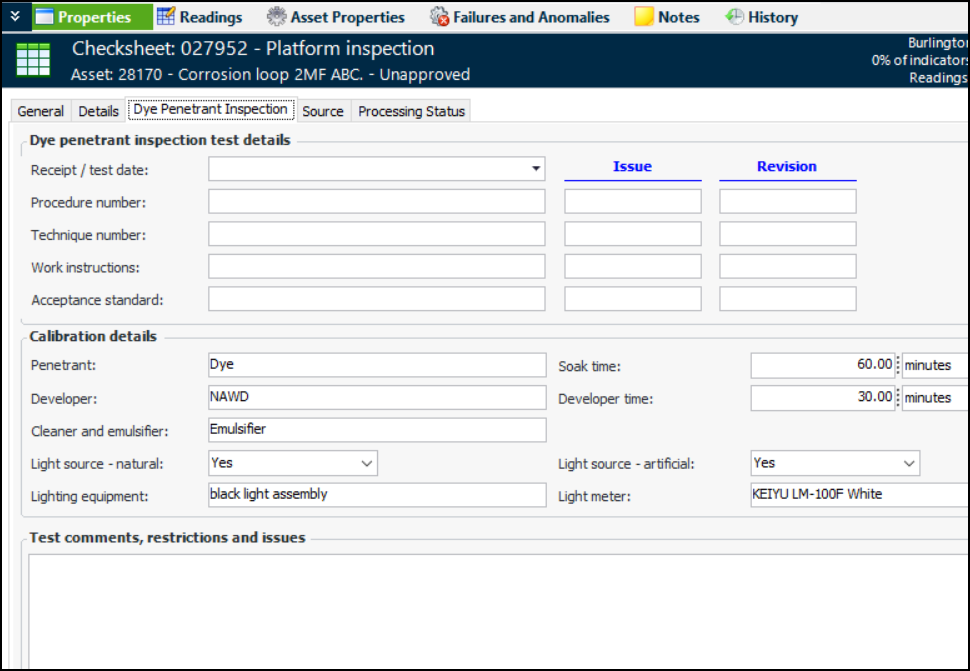
Calibration Templates for Checksheets
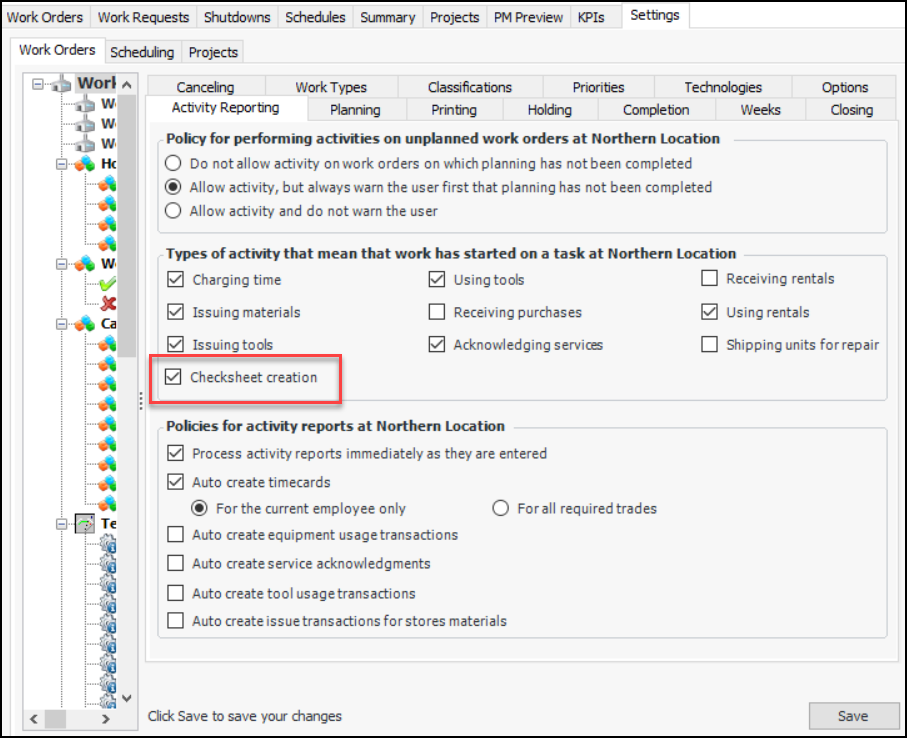
The default values that you add to the template are copied to the appropriate tab in the Checksheet window, Properties view. For example, this checksheet is assigned the Dye Penetrant Inspection subtype. Its Dye Penetrant Inspection tab provides both blank fields to be filled in by the inspector and fields with default values, which the inspector can review and edit as needed.Note: Calibration templates are generally available. You must first enable feature 107 to use the functionality in APM. In the Enterprise window, select the Features view and the Enabled Features tab. Click Browse, select “Calibration template support” and click OK. If APM is running as a smart client, click Refresh Enabled Features on the server. Then restart the client to use the functionality.For information about creating templates and assigning them to subtypes, see Setting up Calibration Templates.Checksheet Creation can Indicate Work has Started – or Not
In the Site window, select the Work Management view, Settings tab, Work Orders tab, and then the Activity Reporting tab. Click Edit to open the site for editing.In the Types of activity that mean that work has started on a task area, clear the option Checksheet creation. Click Save.Publish Indicator Readings for all Indicators
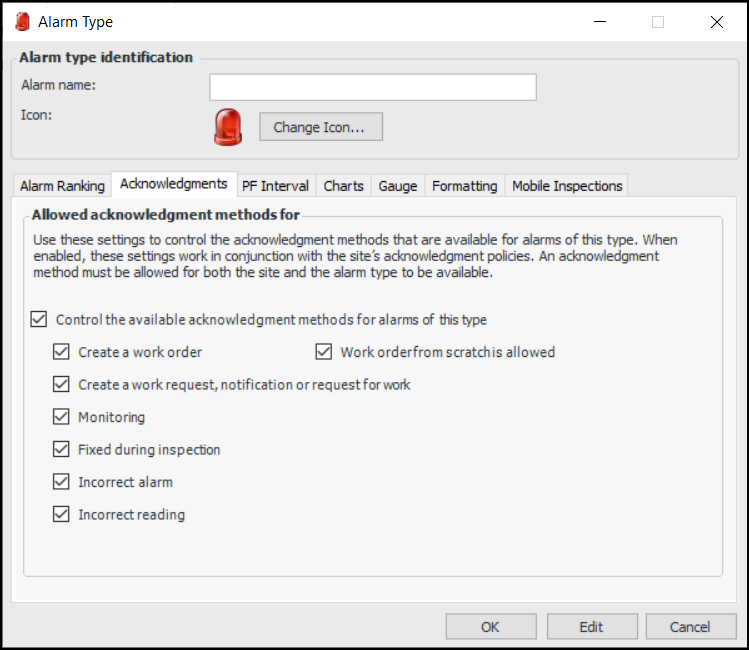
Note: The Publish Indicator Readings functionality is generally available. You must first enable feature 92 to use the functionality in APM. In the Enterprise window, select the Features view and the Enabled Features tab. Click Browse, select “Publish indicator readings to an external system” and click OK. If APM is running as a smart client, click Refresh Enabled Features on the server. Then restart the client to use the functionality.Alarm Type Acknowledgment Rules
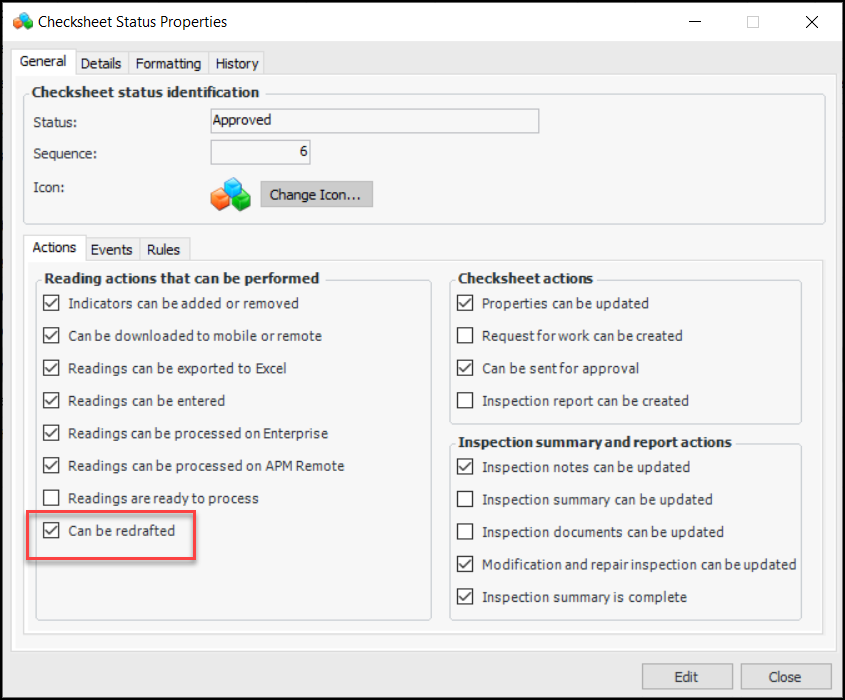
Control Redraft of Checksheets
When the site supports sending checksheets for approval, you can control whether or not approved checksheets can be redrafted based on their statuses. You’ll find this option on the Checksheet Status window, General tab, Actions tab:Note: Control of redrafting a checksheet based on checksheet status is generally available. You must first enable feature 109 to use the functionality in APM. In the Enterprise window, select the Features view and the Enabled Features tab. Click Browse, select “Prevent redrafting of a checksheet based on the checksheet status” and click OK. If APM is running as a smart client, click Refresh Enabled Features on the server. Then restart the client to use the functionality.Performance and Stability Enhancements
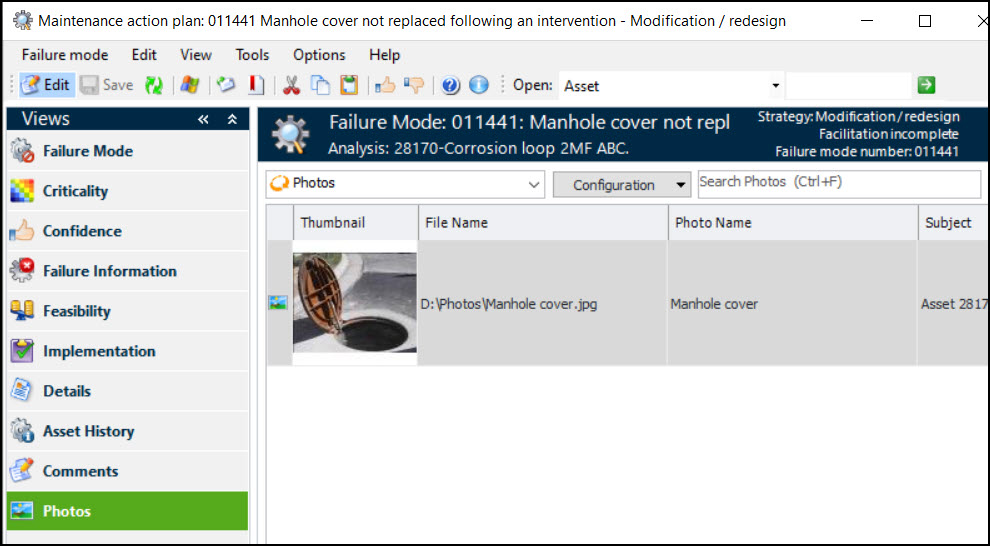
Strategy Development Analysis
You can now add inspection photographs to failure modes and action plans. In the Maintenance Action Plan window, select the Photos view. For example:In the Failure Mode window, select the Photos tab.Photo are listed in the Strategy Development Analysis window, Photos view and the Assets view, Photos tab, identified by the failure mode asset.Task Assignments on Analysis Comments and Asset Notes
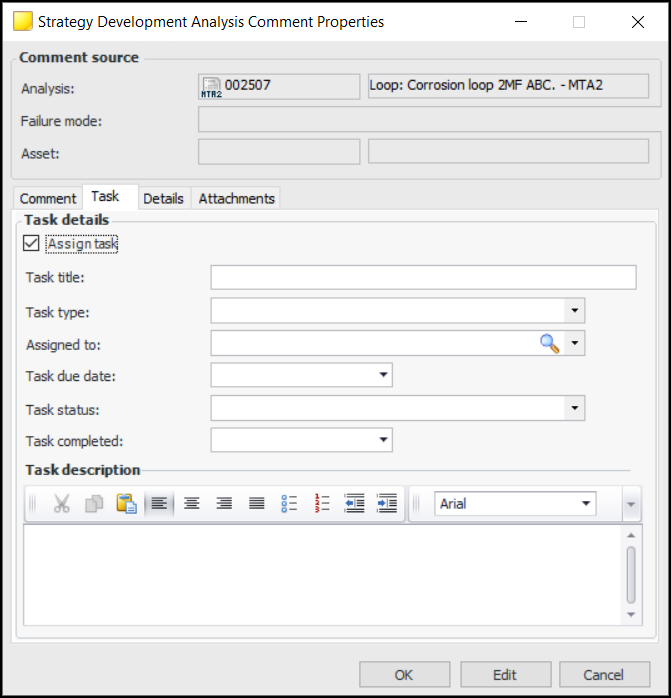
Task Assignments on Comments
For example, open a Strategy Development Analysis window, select the Properties view and the Comments tab. Click New to open the Strategy Development Analysis Comment dialog. Select the Task tab and click Assign task:Task Assignments on Asset Notes
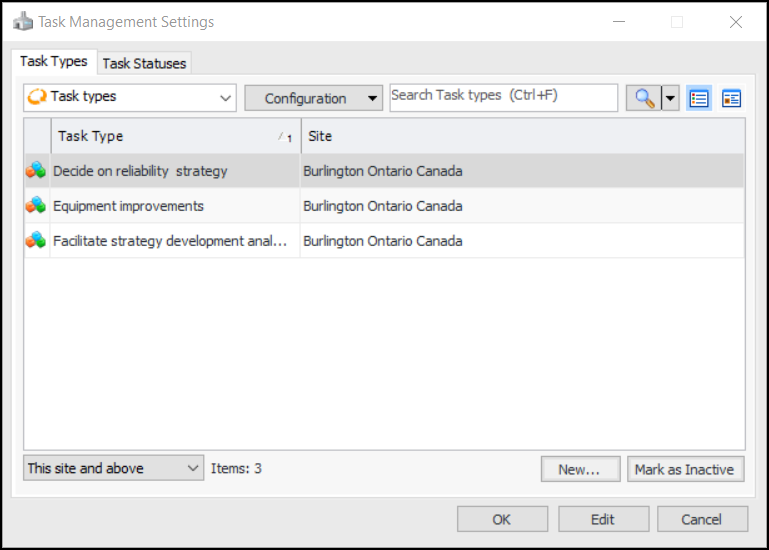
Task Types and Statuses
To define task types and statuses for your organization, click the Administration menu, Asset Management Settings, and Task Settings. You will also find Task Settings in the Administration menu, under other management settings that support comments, for example, Strategy Development Settings.Table Configurations
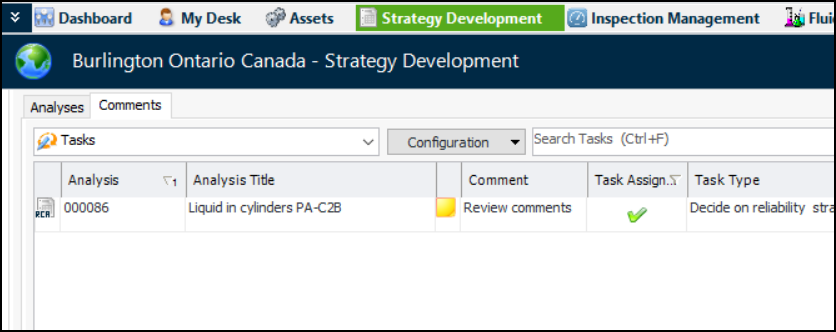
Tables that list comments or asset notes now display information about assigned tasks. In some locations, the Notes or Comments tab includes the “Tasks” configuration, which lists the tasks assigned to items. For example: