|
|
What’s New in APM 7.19
Some of the enhancements made to AssetWise Performance Management (APM) in release 7.19 pertain to APM when AssetWise Enterprise Interoperability (AWEIS) has been implemented to exchange data with an external CMMS. For example, you can now create requests for work from checksheets. In addition, you can take advantage of the Inspection Analytics tab to review information about indicator alarms, readings, inspection reports, marine growth, and platform cathodic protection.Contents
Asset Management
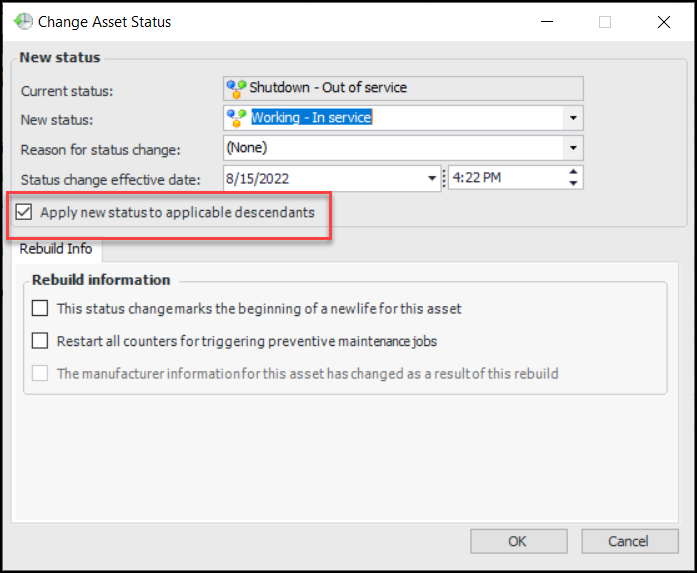
Asset Status – Choose Whether to Apply Status to Child Assets
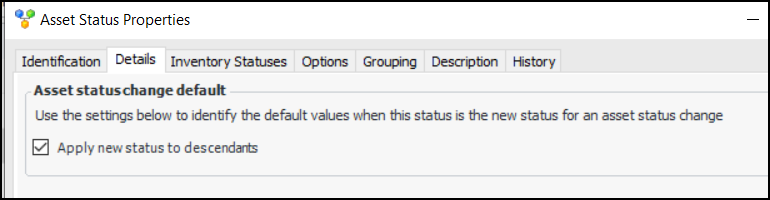
Apply new status to applicable descendants is selected by default. You can clear this option to prevent the change to child assets.To change the default selection in the Change Asset Status dialog, clear the Apply new status to descendants option in asset statuses:Note: The option to not apply the status to descendants is generally available. You must first enable feature 106 to use the functionality in APM. In the Enterprise window, select the Features view and the Enabled Features tab. Click Browse, select “Provide an option to limit an asset status change to the current asset only” and click OK. If APM is running as a smart client, click Refresh Enabled Features on the server. Then restart the client to use the functionality.Asset Category and Class of Asset – New Asset Properties
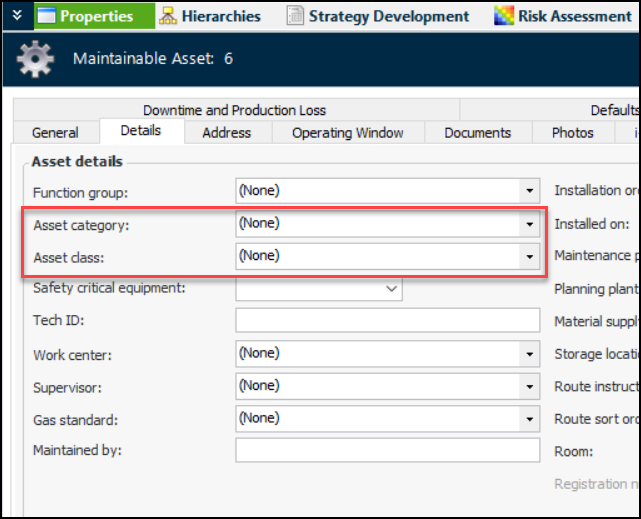
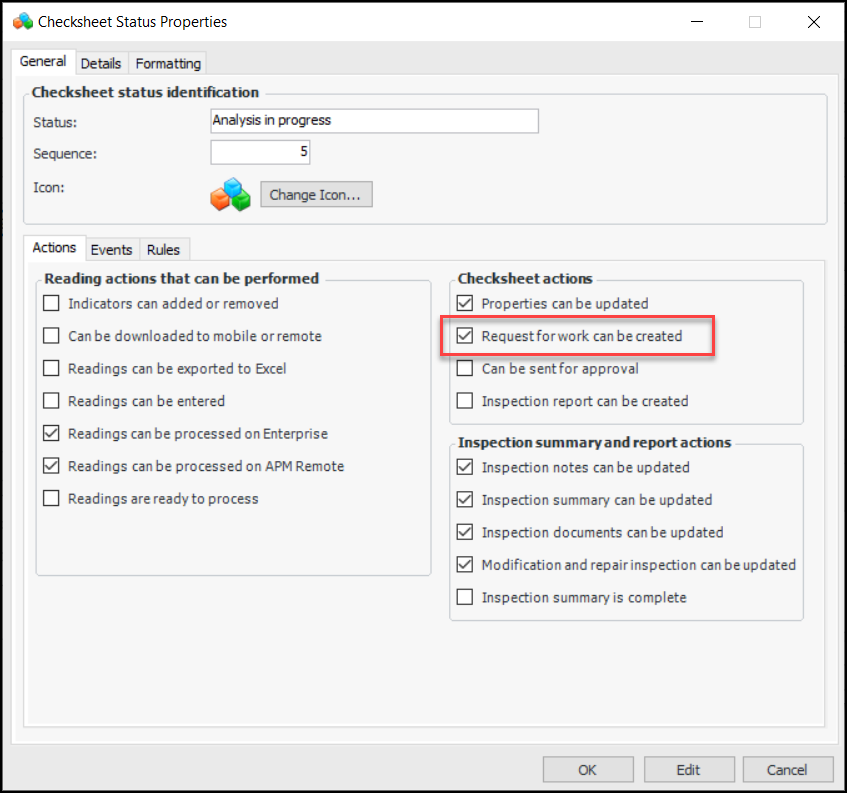
Two new properties are now available in the Asset window, Properties view, Details tab: Asset category and Asset class. For example:AWEIS – Create Requests for Work from Checksheets
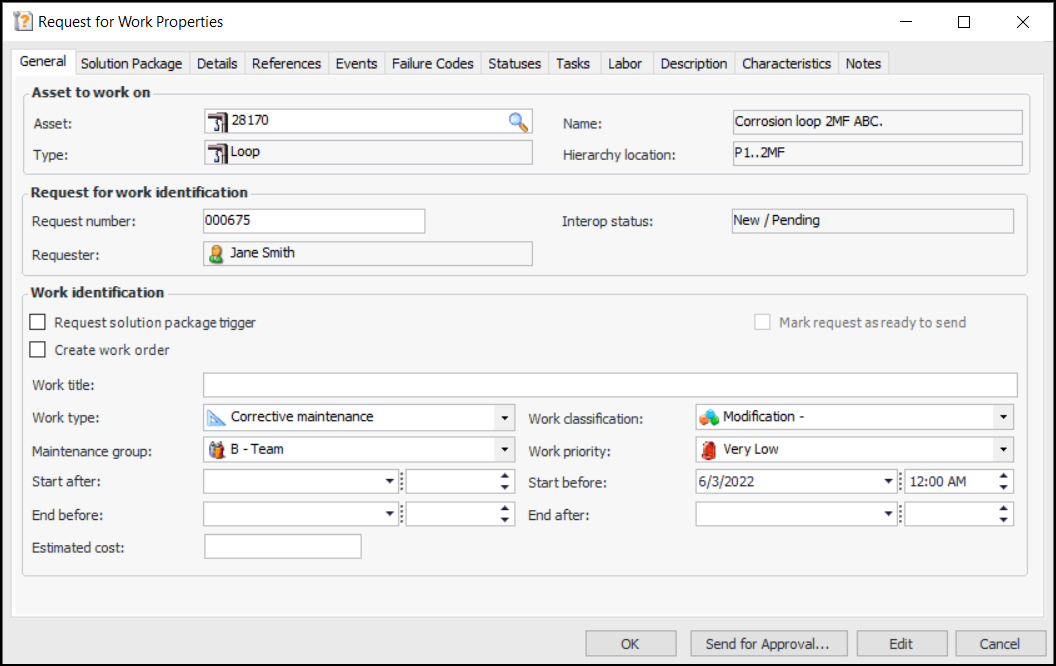
When AWEIS is active, you can create one or more requests for work from an indicator checksheet in APM or APM Remote. In the Checksheet window, select the Readings view and the Requests for Work tab. Click New to open the Request for Work Properties window. For example:Configuring the APM Environment
This section explains changes to software requirements and configuration. For a full list of requirements, see APM Installation Prerequisites.Windows 11
Microsoft® Windows 11 is now supported for smart clients. Windows 11 (x64) is supported for thick and remote clients.Windows Server 2022
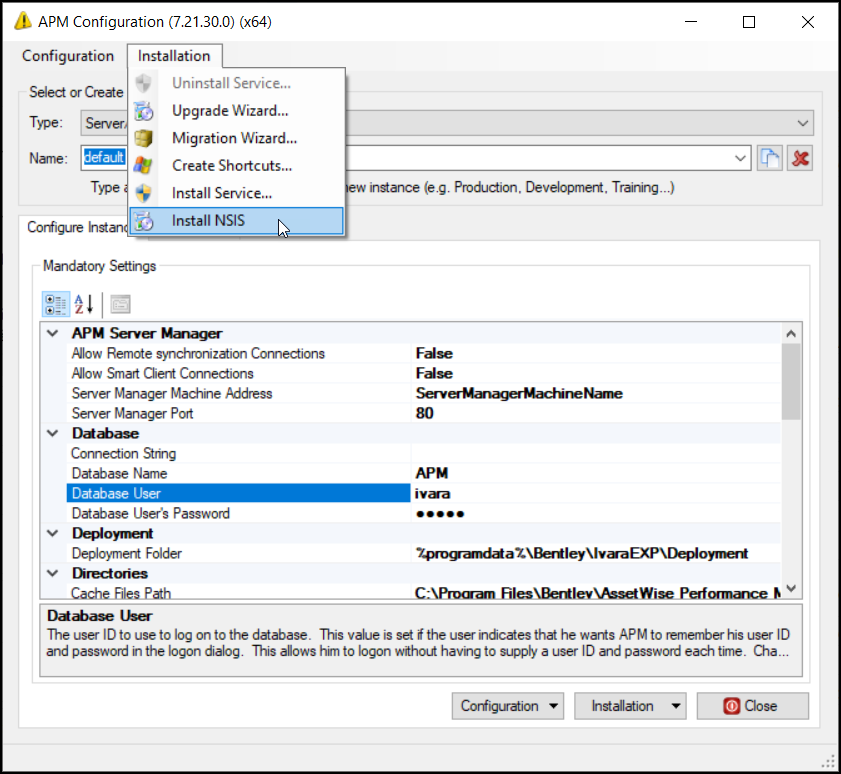
Install NSIS for New APM Implementations
After installing APM 7.19 (or later) on a computer where an earlier version of APM has not been installed, you can install NSIS from APM Configuration. Run APM Configuration as an administrator. In the Installation menu or list, click Install NSIS.Environment Password and ODC Data
See APM ODC Guide.Construction Management
It is now possible to create a gas transaction from a construction form. Open the Construction Form window, select the Activities view and the Gas Transaction tab. Click New to open the Gas Transaction window.In the Gas Transaction window, the transaction’s asset is set to the construction form’s asset, and the construction form’s number is referenced in the Details tab, along with the site, creation date, and creating employee.Data Loading – Asset Characteristics Data Loader
Inspection Management
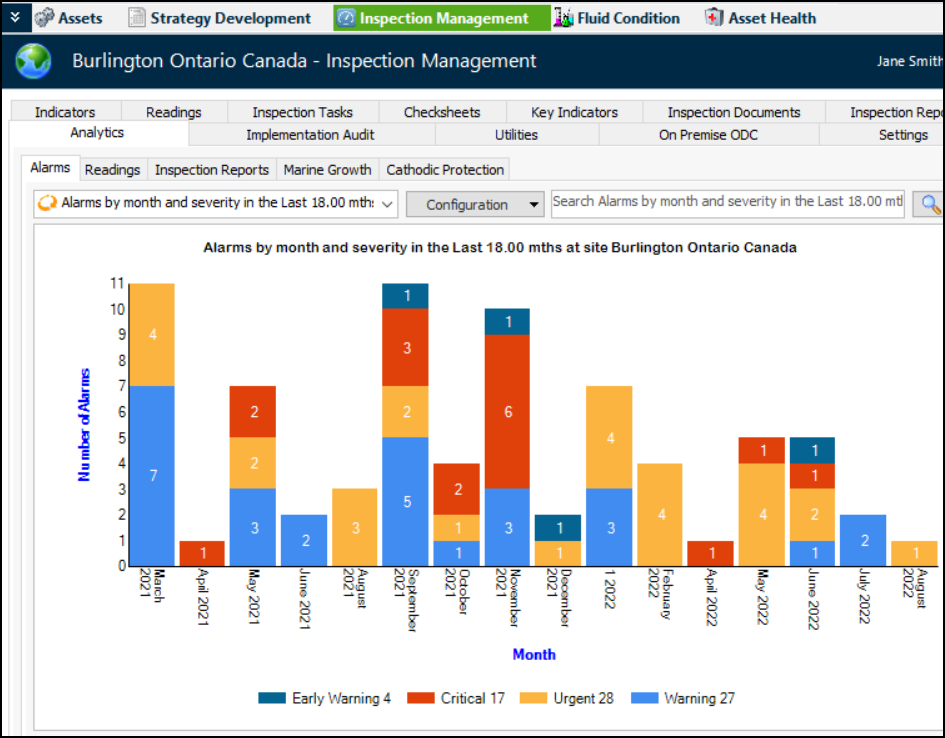
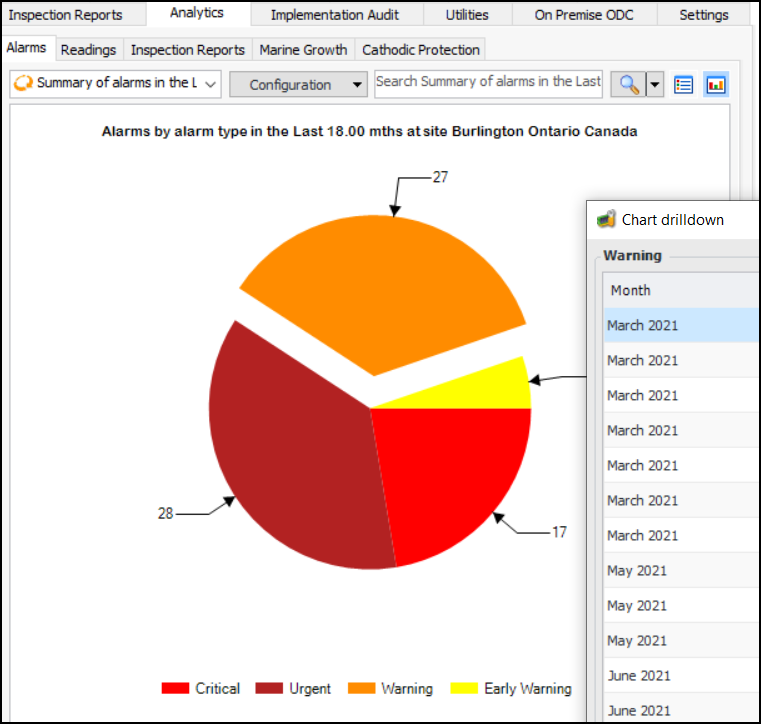
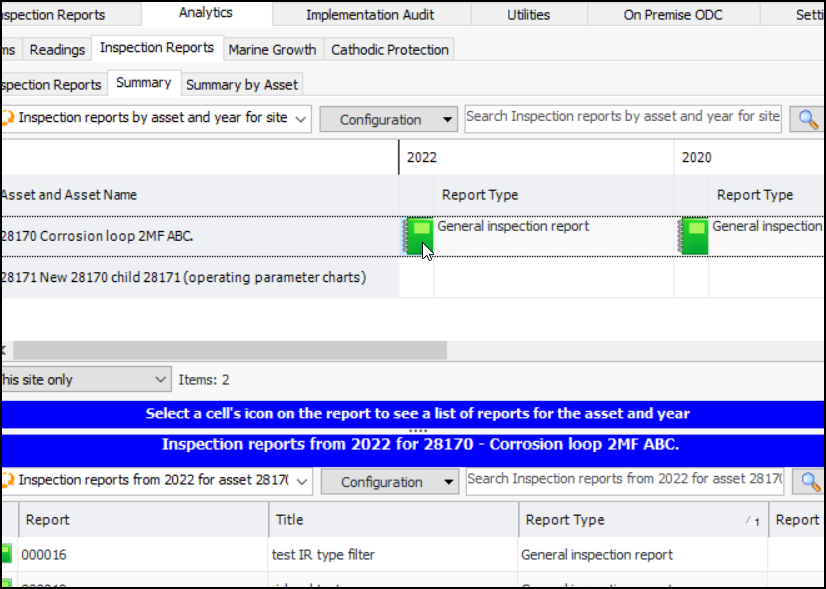
Inspection Analytics Tab in Site Window
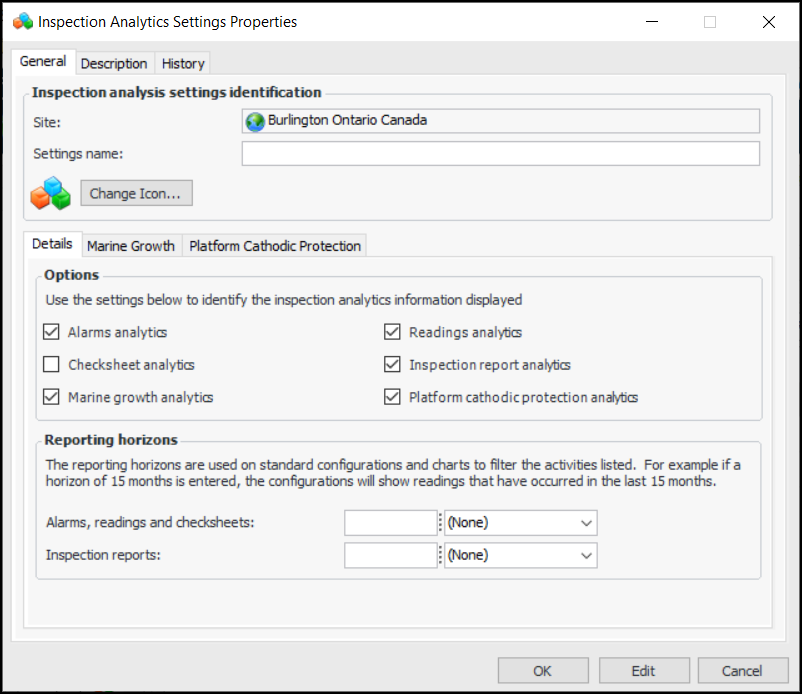
You can set up the new Analytics tab in the Site window, Inspection Management view to display a variety of information, ranging from alarms, readings, and inspection reports to marine growth and platform cathodic protection. You can also specify the time period (in days, weeks, months, or years) for the data.For example, here is the Analytics tab with the full complement of sub-tabs:The Alarms tab offers configurations for:
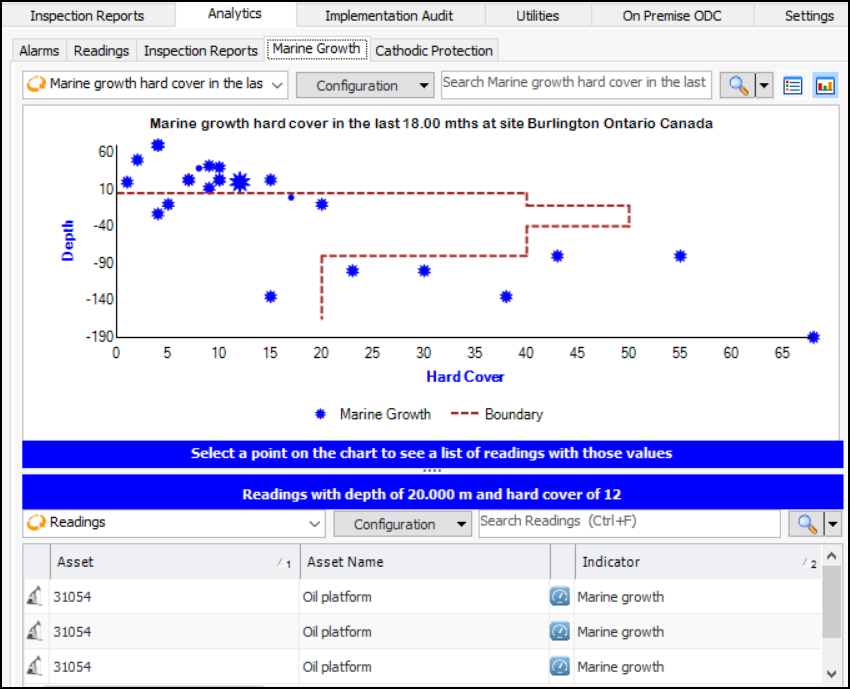
Marine Growth Analytics Chart
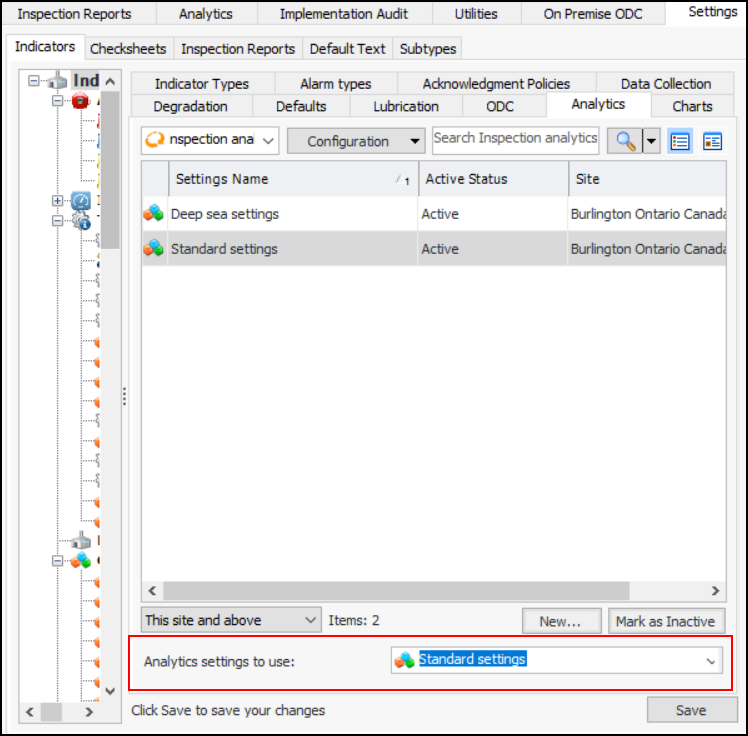
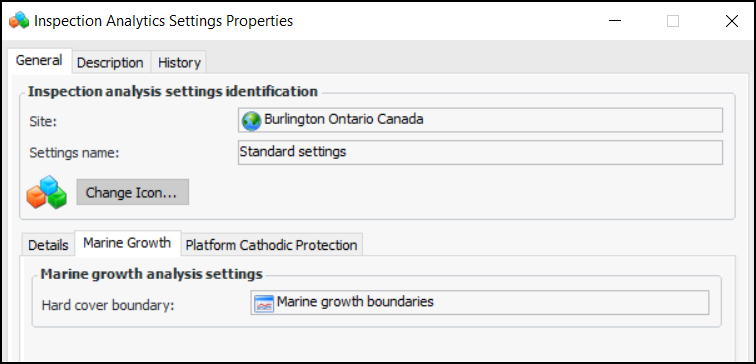
You can use the new “Dashboard - Indicator Analytics Marine Growth” site panel in the Analytics tab and other dashboards to display a point style chart of measurement point readings with the marine growth subtype. Depth and Hard Cover are the chart co-ordinates.You can also set up a boundary line to highlight readings outside of normal points. Define the chart line in the Charts tab and add it in the Inspection Analytics Settings dialog, Marine Growth tab:Cathodic Protection Analytics Chart
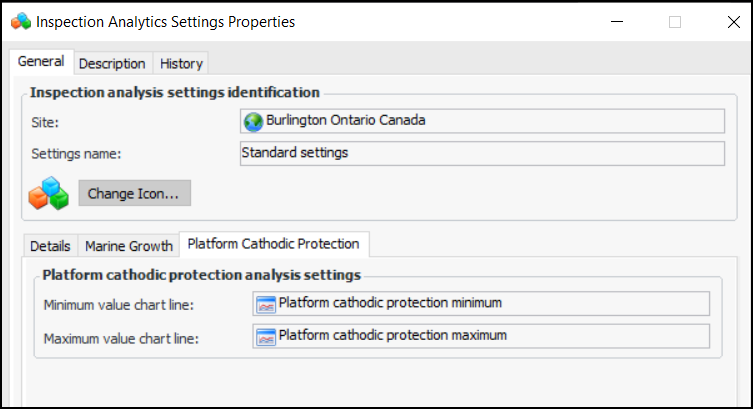
You can use the new “Dashboard - Indicator Analytics Platform Cathodic Protection” site panel in the Analytics tab and other dashboards to display point style charts of measurement point readings with the platform cathodic protection subtype. One chart shows the maximum reading and the other the minimum reading. Depth and Reading are the chart co-ordinates.You can also set up boundary lines to highlight readings outside of normal points. Define the chart lines in the Charts tab and add them in the Inspection Analytics Settings dialog, Platform Cathodic Protection tab:Survey Types – Platform, Fabric, and Subsea Inspections
Checksheet Subtypes – Ultrasonic and Radiography Calibration
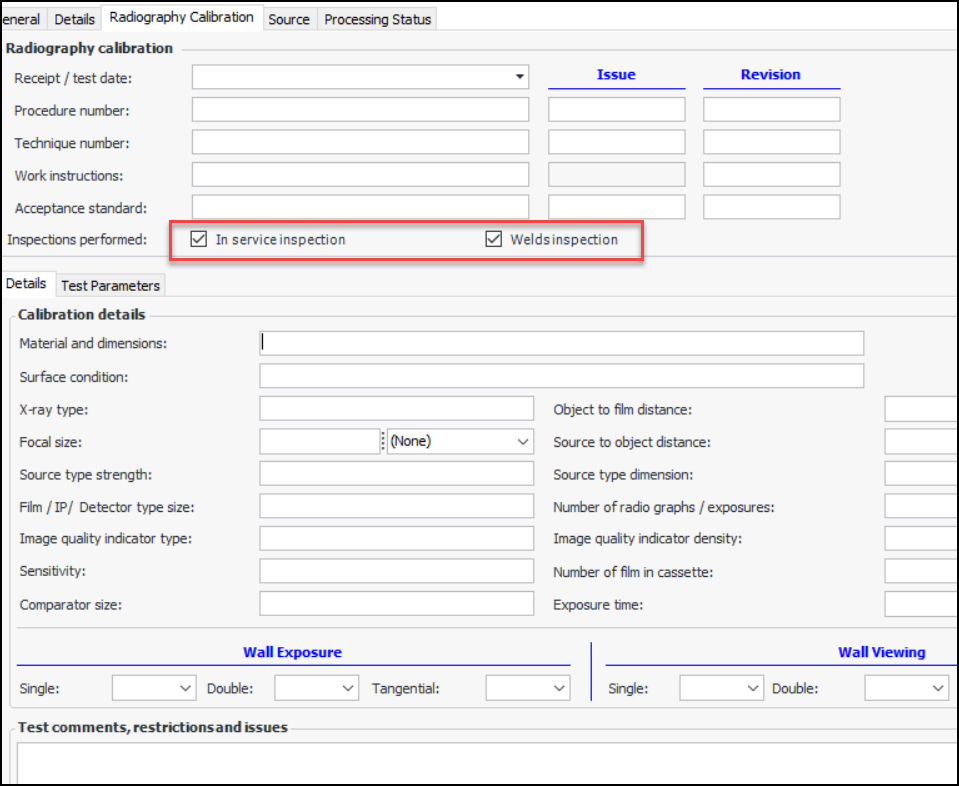
The Ultrasonic Calibration and Radiography Calibration checksheet subtypes introduced in a previous release have been enhanced. When a subtype is assigned to a checksheet type, checksheets of that type have the option of displaying a Calibration tab in the Properties view. Now, in-service inspection and weld inspection versions are available in both subtypes. For example, here is the Radiography Calibration tab when both versions are enabled:Checksheet Subtypes – DPI, ECI, MPI
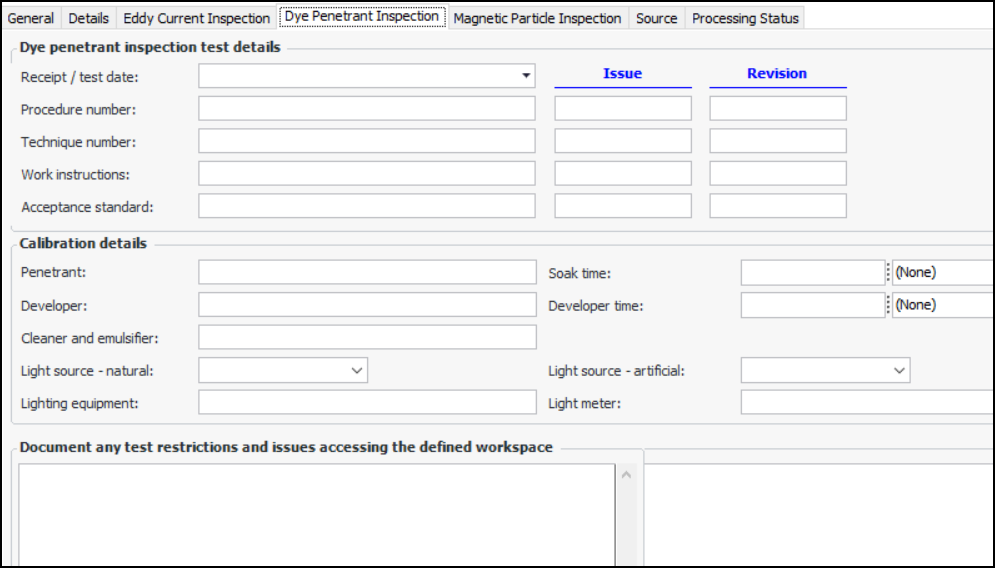
When a subtype is assigned to a checksheet type, checksheets of that type have the option of displaying an Inspection tab in the Properties view. Here is an example of the Dye Penetrant Inspection tab:Measurement Point Reading – Reference to Previous Reading
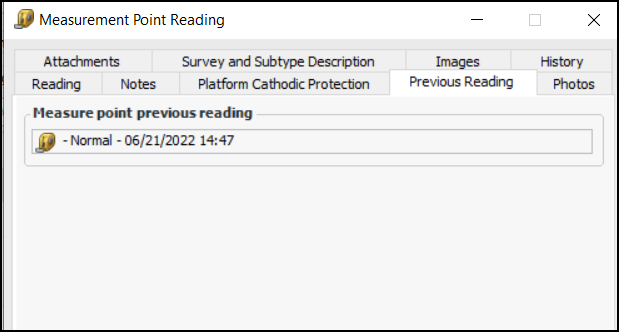
When a measurement point reading is processed, its previous reading is now recorded on the current reading. In the Measurement Point window, select the Previous Reading tab to view the reading:The Previous Reading tab is only displayed when a previous reading exists.APM Remote and Descriptive Measurement Points
Change Meter Supported in APM Remote
Inspection Reports – Financial Periods
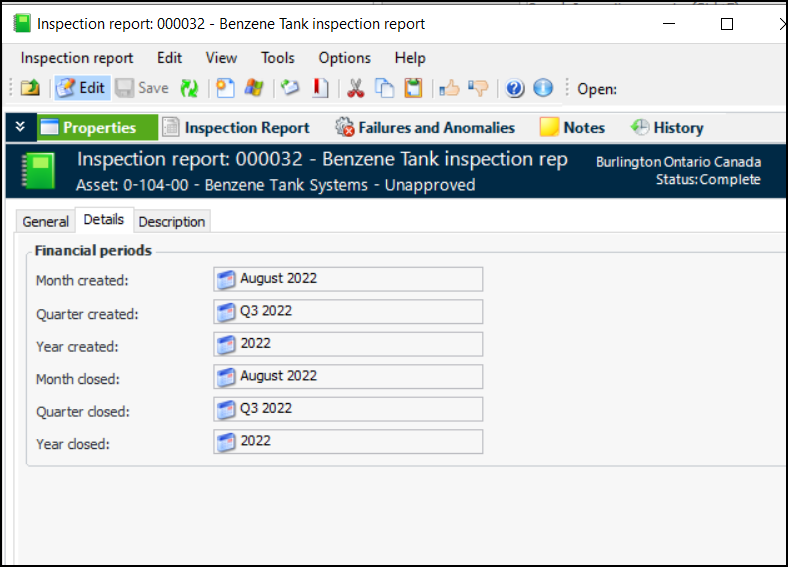
Inspection reports now display the financial periods in which they were created and closed. In the Inspection Report window, select the Properties view and the Details tab. For example:Inventory Management
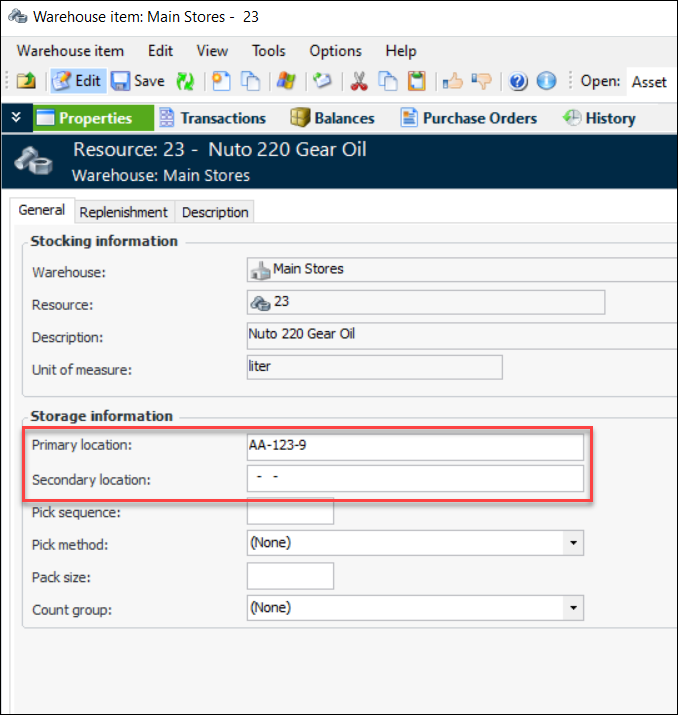
Update Storage Locations on Count Sheet
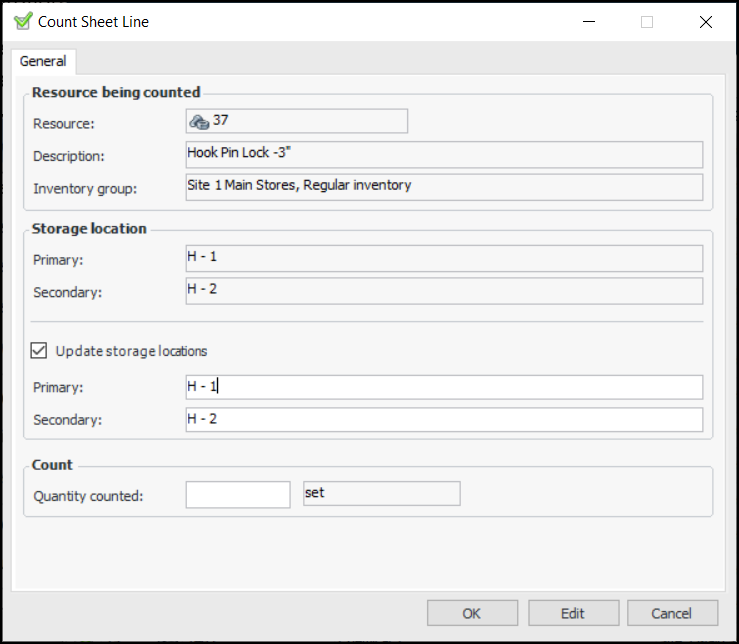
When entering inventory counts in an APM count sheet, you can now also update the primary and secondary storage locations for the resource. In the Count Sheet Line dialog, select Update storage locations and enter a location in the Primary box, Secondary box, or both. For example:Note: The update storage location functionality is generally available. You must first enable feature 105 to use the functionality in APM. In the Enterprise window, select the Features view and the Enabled Features tab. Click Browse, select “Support the ability to update a warehouse item’s storage locations when counting the item” and click OK. If APM is running as a smart client, click Refresh Enabled Features on the server. Then restart the client to use the functionality.Warehouse – Storage Location Formatting
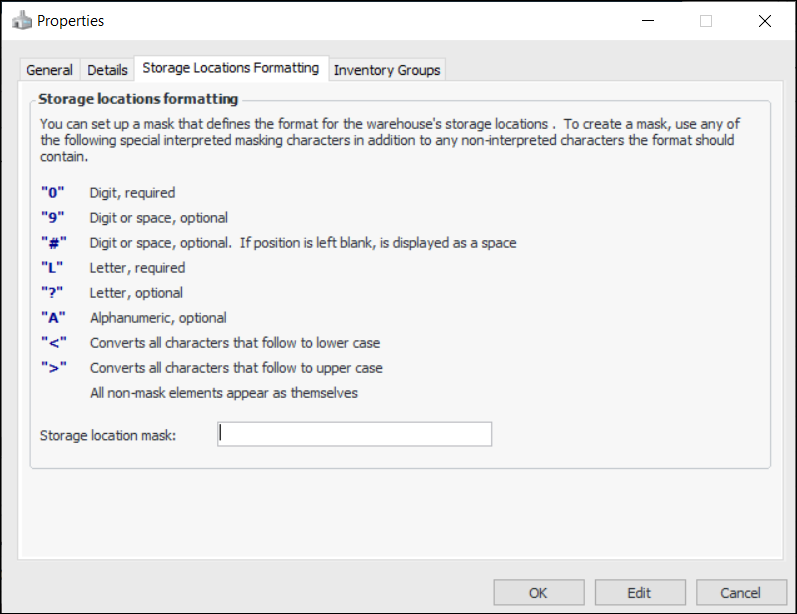
You can now define formatting rules for the names of warehouse storage locations. In the warehouse Properties dialog, select the Storage Locations Formatting tab to set up a mask:For related information, see **Setting up Warehouses, Adding an Item to a Warehouse, Entering and Processing Inventory Count Results, and Adjusting Inventory.Online Data Collection (ODC)
When you are creating an ODC Data Source (both regular and On-Premises data sources), the Identifier string is encrypted and displayed as hashed. For example:This string is displayed in the ODC Data Source dialog and on the ODC tab of the indicator.When you are upgrading to APM 7.19, we strongly recommend that you review and edit all existing data sources (regular and On-Premises) to take advantage of the updated security. Open the ODC Data Source dialog for each data source, click Browse next to the Identifier box, check the connection, and click OK.See APM ODC Guide.Regulated Gas Management
Mark Transaction as Incorrect
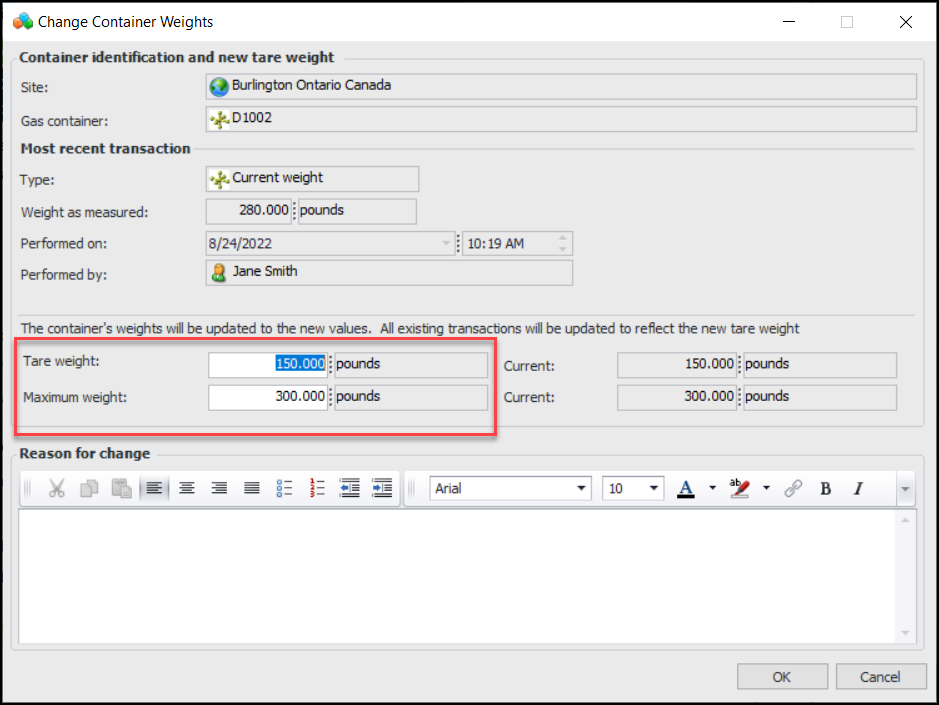
To mark a transaction as incorrect, locate the transaction in a table, for example, transactions By Container. Right-click the transaction and click Mark as Incorrect. (The option is only available for the container’s most recent transaction.) The Mark Gas Transaction as Incorrect dialog appears:Once the transaction is marked incorrect, you cannot change any of its properties. It is displayed as scored through in tables. In the Gas Transaction window, select the Incorrect Transaction Info tab to view the reason, comment, and so on.You can set up reasons for marking transactions as incorrect. In the Site window, select the Regulated Gas Management view and the Settings tab. Select the Incorrect Transaction Reasons tab and click New.Change Gas Container Maximum Weight
Performance and Stability Enhancements
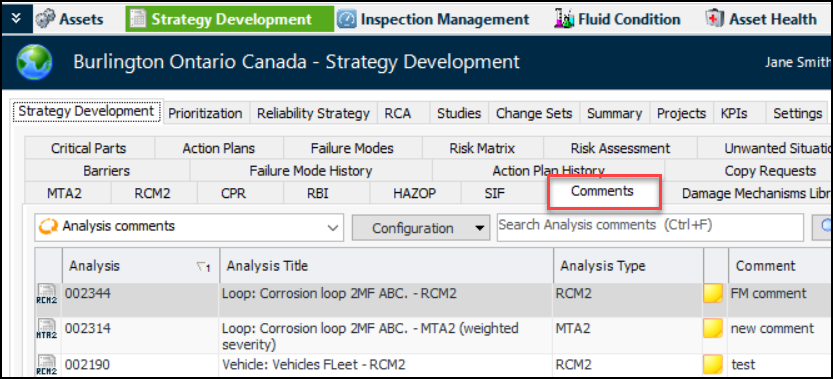
Strategy Development Analysis – Comments
The site’s Strategy Development view now provides Comments tabs that compile the comments for all types of analyses. For example, on the Strategy Development tab, the Comments tab shows comments that were added to CPR, MTA2, RBI, RCM2, HAZOP, and SIF analyses.Select the Prioritization, Reliability Strategy, or RCA tab and then the Comments tab to view comments added to these types of analysis.