|
|
What’s New in APM 7.18
Contents
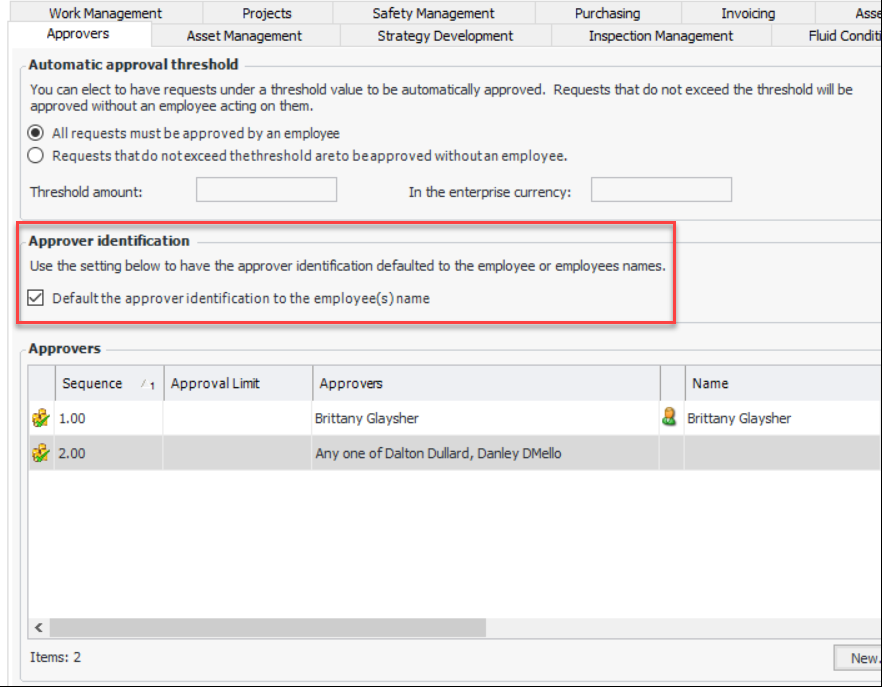
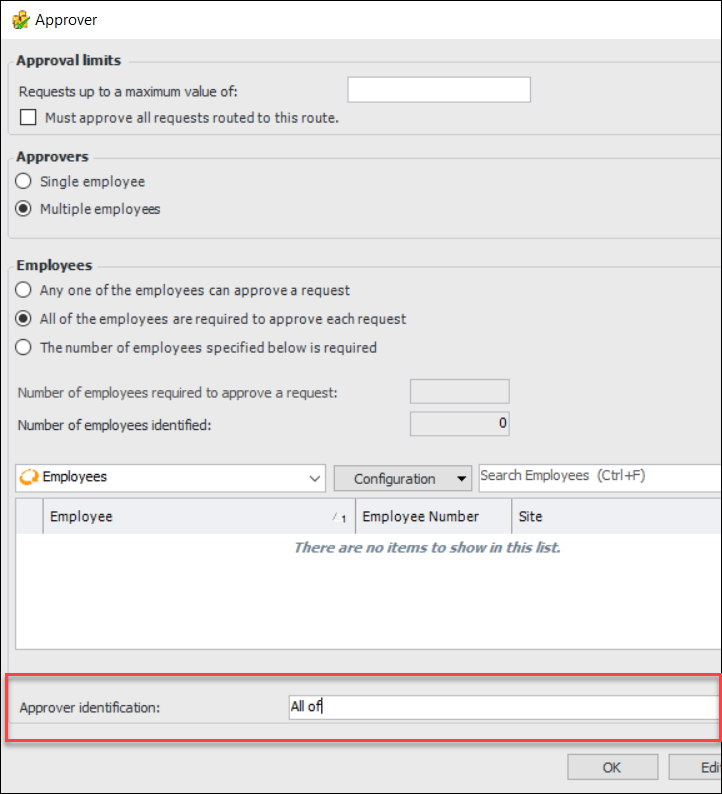
Approvals
If multiple approvers are selected, their names are concatenated, for example, “Any one of name 1, name 2”.The Approver dialog now displays the Approver identification box. This example is for multiple employees, all of whom are required to approve documents on the route:When the Default approver option is selected for the route, employee names are shown in the Approver identification box as they are added. You can then edit the approver identification, as needed. For example, you could change the list of names to “All shift supervisors”.Asset Management
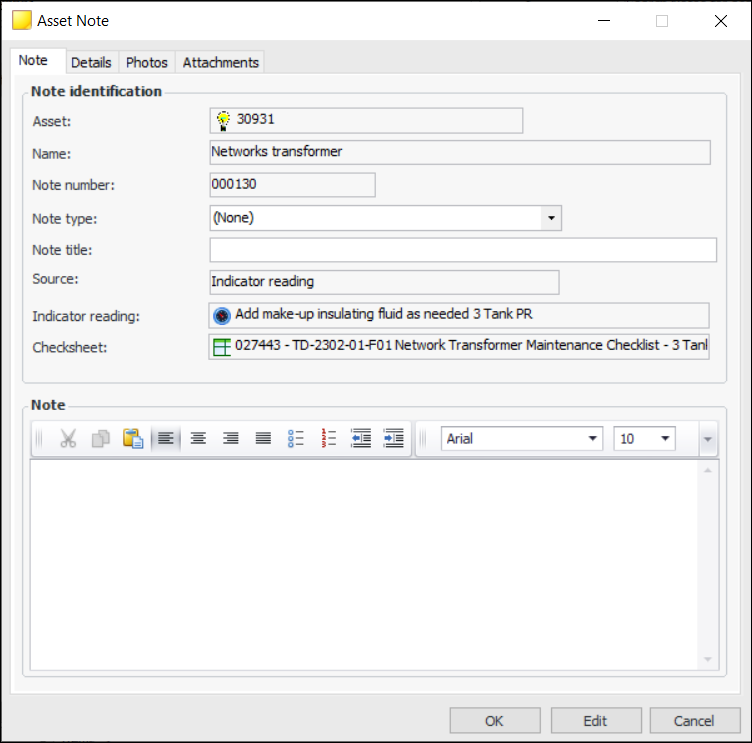
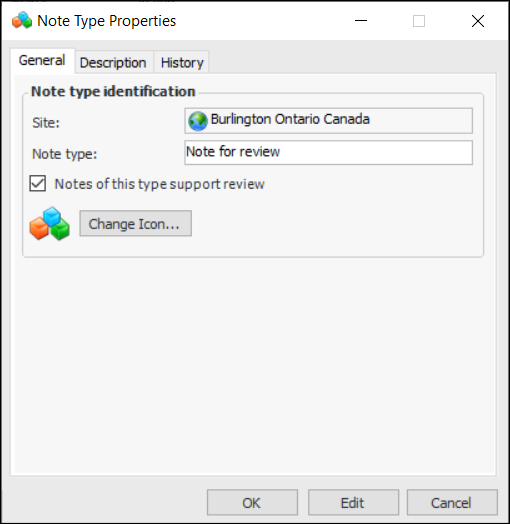
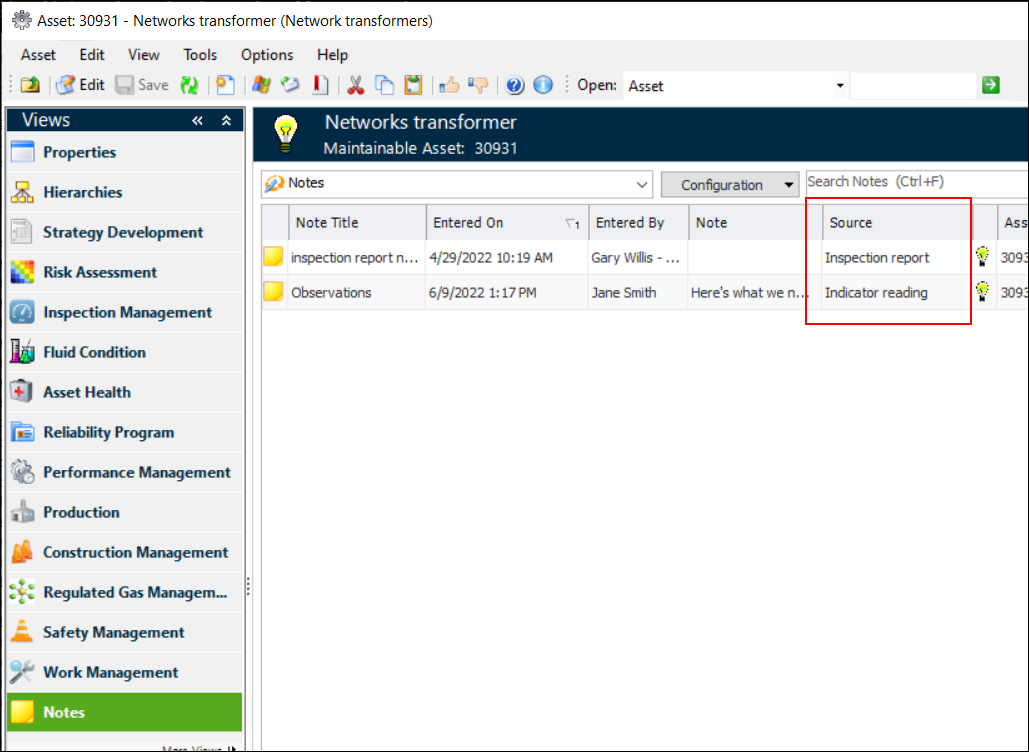
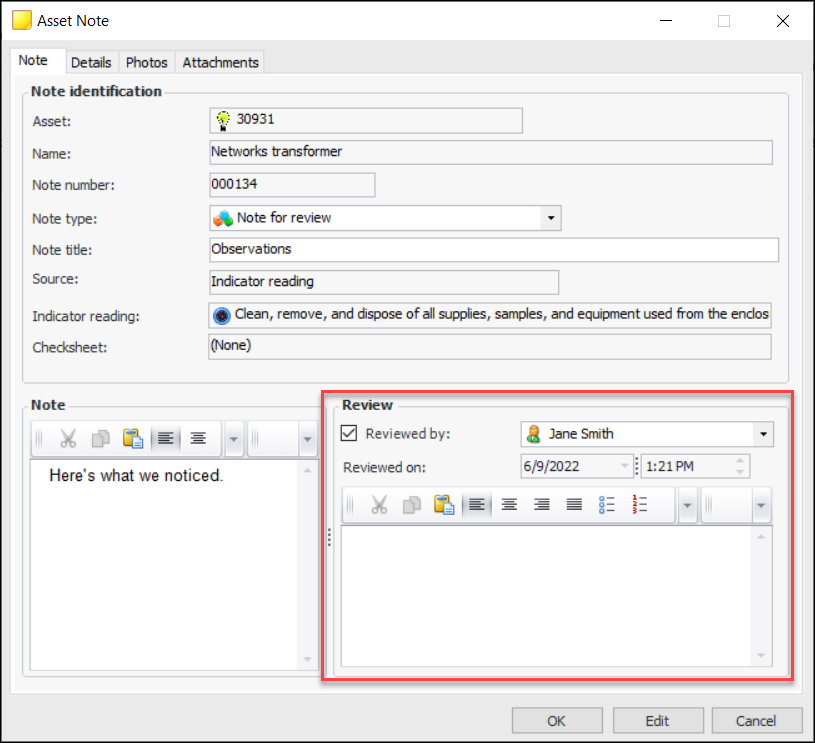
Asset Notes
Note: The Asset Note functionality is generally available. You must first enable feature 58 to use the functionality in APM. In the Enterprise window, select the Features view and the Enabled Features tab. Click Browse, select number 58 “Notes support” and click OK. If APM is running as a smart client, click Refresh Enabled Features on the server. Then restart the client to use the functionality.
Asset Properties – Sort Field
The Sort field box has been added to the Asset window in the Properties view, General tab, Location tab. This property is also available in APM Remote and APM Mobile apps. The value is a company-specific short term for the equipment used for searching, sorting, and filtering.Asset Specifications
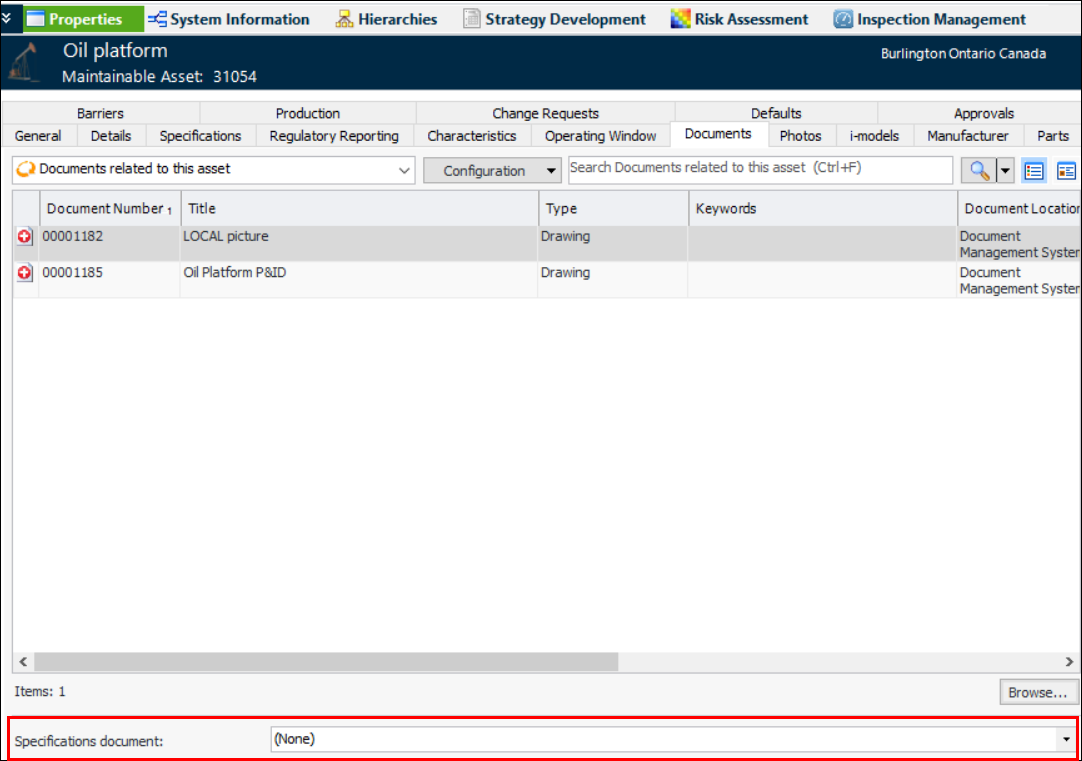
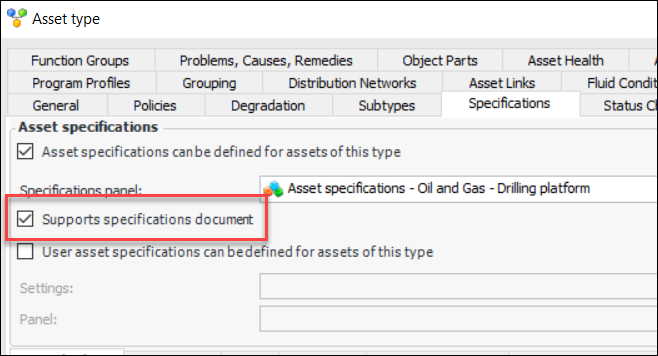
Asset Specifications – Display Documents
As of this release, you can make a document available for display on an asset’s Specifications tab. The document must be linked to the asset and can be any of the file types supported for APM standard documents.When support is enabled in the asset type, the Specifications document list is available in the Asset window, Properties view, Documents tab:When a document is selected, you can view it by selecting the Specifications tab and clicking the sidebar button:Enable the option on the asset type’s Specifications tab:Note: The Supports Specifications Document functionality is available for preview. You must first enable feature 104 to use the functionality in APM. In the Enterprise window, select the Features view and the Enabled Features tab. Click Browse, select number 104 “Support for displaying asset P&ID or other document as part of asset specifications” and click OK. If APM is running as a smart client, click Refresh Enabled Features on the server. Then restart the client to use the functionality.AWEIS – Characteristic Mapping for Work Documents
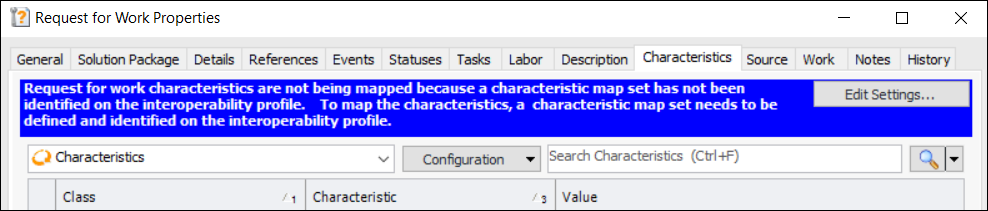
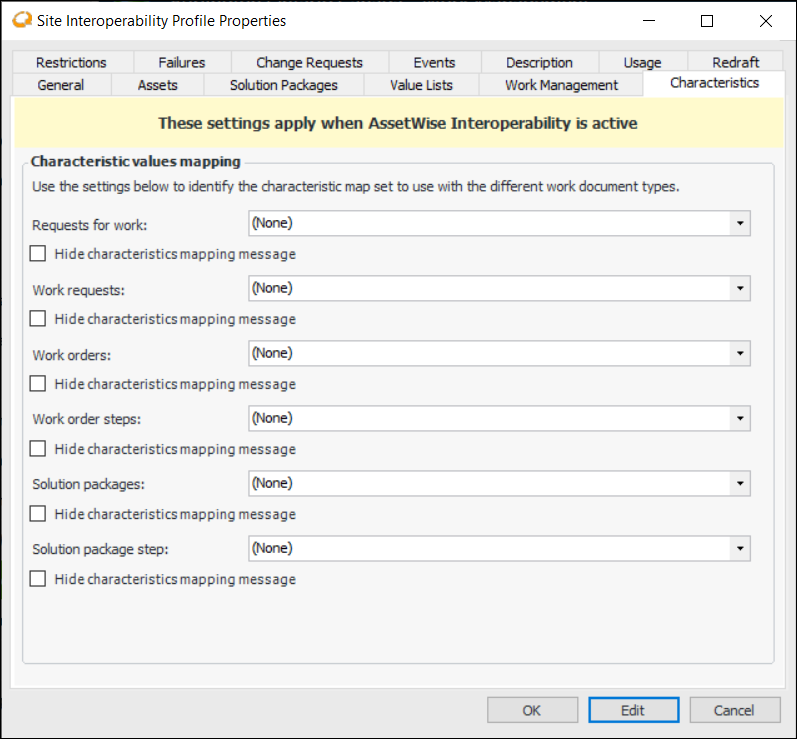
Characteristic values will not be communicated between the CMMS and APM, or vice versa if map sets are not selected in the Site Interoperability Profile. If this step is missed, a message is now displayed in the work documents’ Characteristics tabs in APM.For example, if a map set has not been selected for requests for work, in all Request for Work windows, the Characteristics tab displays a message in the banner, as well as the Edit Settings button. For example:Click Edit Settings to open a dialog where you can select the map set. If needed, you can define characteristic classes, add characteristics, and select default characteristic classes for sites using this dialog.If you do not intend to use characteristic mapping for a type of work document, you can prevent the message from being displayed. In the Site Interoperability Profile dialog, select the Characteristics tab.Click Hide characteristics mapping message to prevent the message from appearing in the document’s Characteristics tab.AWEIS – Various Enhancements
Work Document Change Request Types
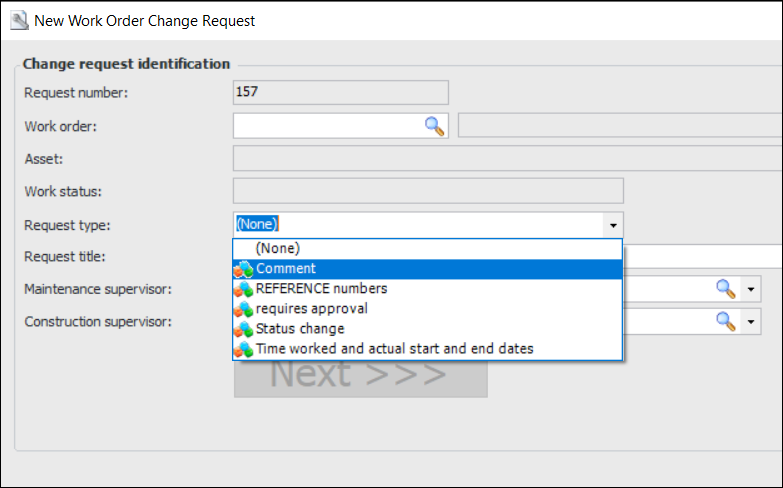
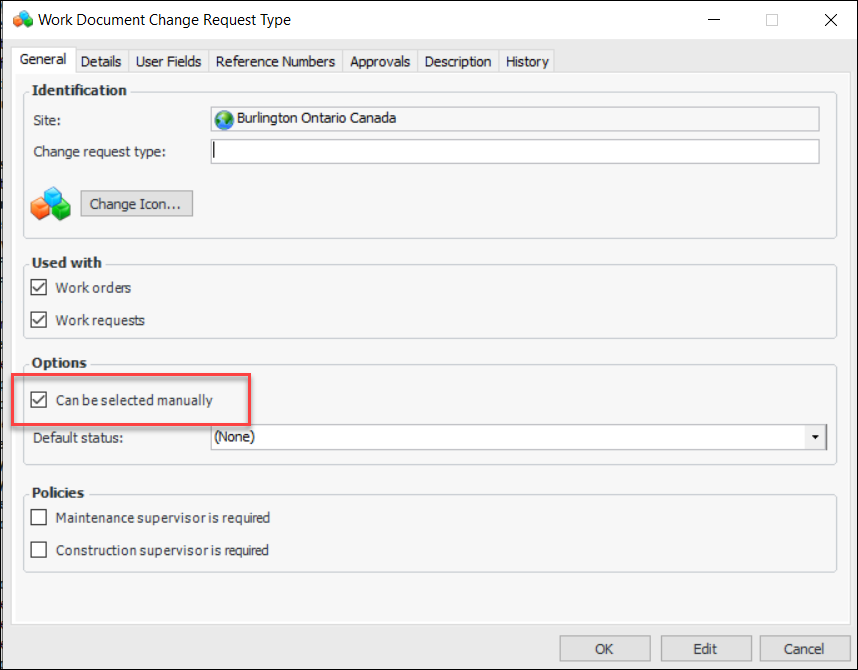
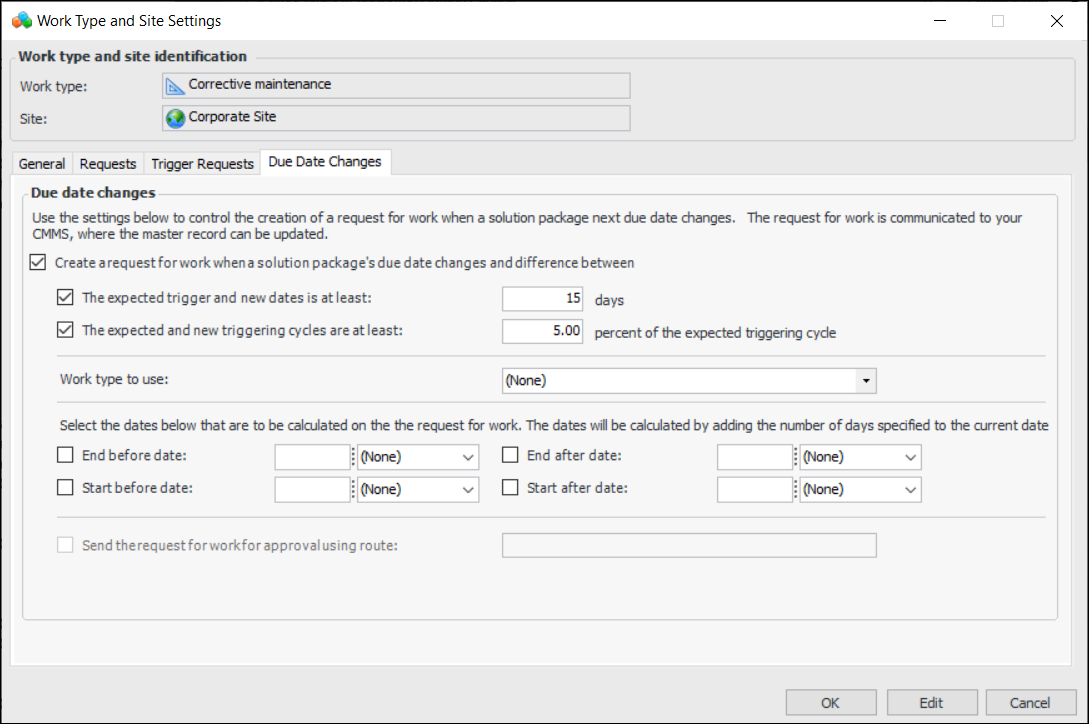
The Can be selected manually option is selected by default in new request types. You can clear the option to prevent the type from appearing in the selection list.Solution Package – Communicating Due Date Changes to CMMS
The solution package’s work type site settings determine if a request for work is required. Open the Work Type Properties window, select the Site Settings tab, and open the site settings that were created for the site. In the Work Type and Site Settings window, select the Due Date Changes tab. For example:The selected work type is assigned to the request for work, along with the solution package’s asset.Solution Package – Expected Trigger Date
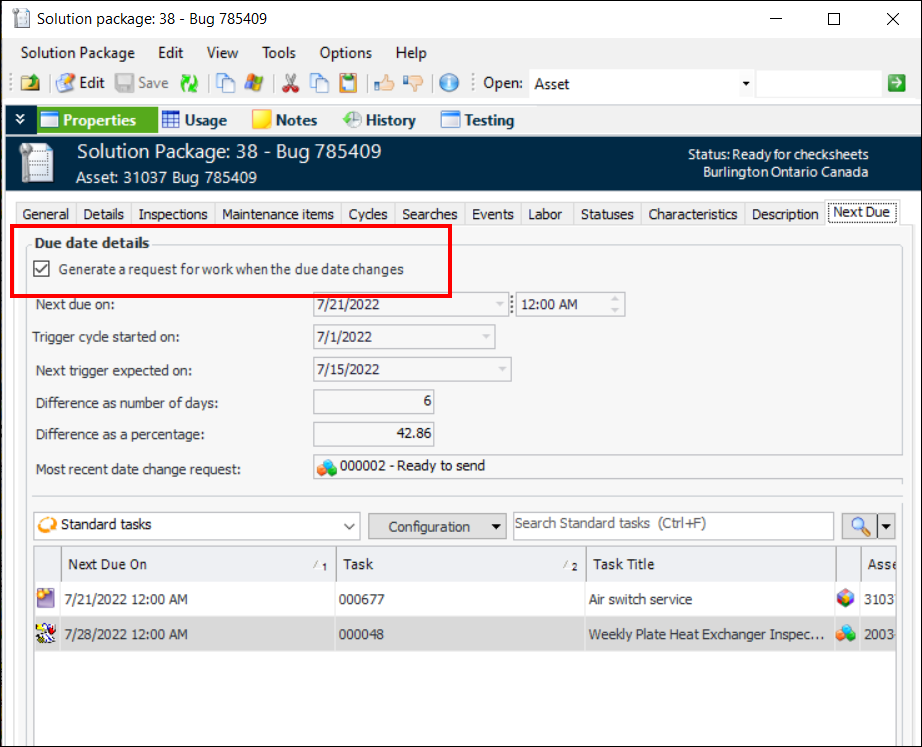
The following information is now displayed in the Solution Package window, Properties view, Next Due tab:
Asset Change Request – Specific Location Information
In the New Properties Change Request window, Change Request tab, the asset location information is now more specific:
Bookmarks are now Favorites
Select the Favorites view in the Site window to see the list of objects. You will also find new “My favorites” configurations available for most objects listed in the Site window, from assets to invoices.Configuring the APM Environment
This section explains changes to software requirements and configuration. For a full list of requirements, see APM Installation Prerequisites..NET Framework
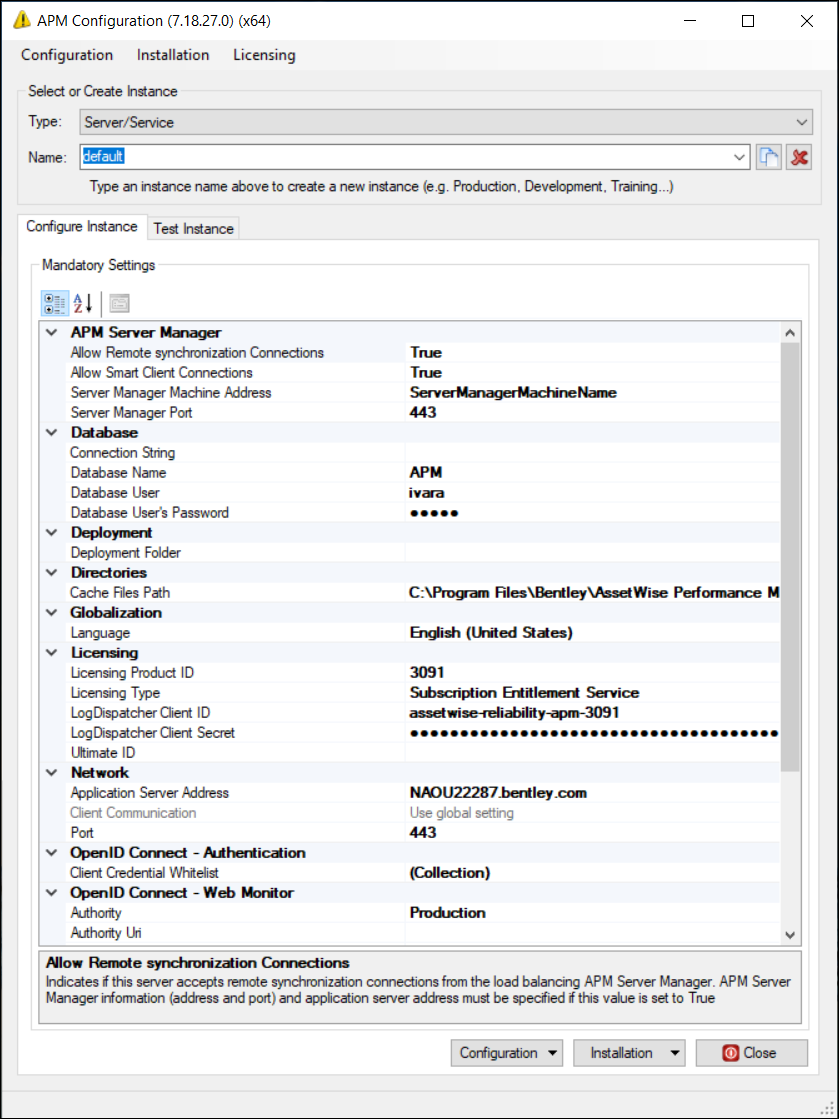
APM Configuration
Seldom-used settings required for special cases and fine-tuning are either shown under appropriate nodes or are available as advanced settings in the Settings Editor. For example, the global communication protocol is shown in the Settings Editor advanced settings under the Mandatory Settings node, under Network. In new blank instances, the protocol defaults to “HTTPS” and the ports to “443”.APM Configuration Window – Changed Defaults
Security Logging
To use security logging, you must open the Ivara.Pers.Security.Logging* rule and change the target (write To) to Seq or the SecurityFile log. For more information, see “Enabling Security Logging” in APM Installation Guide.APM Remote – Intermec Barcode Scanner
Construction Management
Asset Groups for More Asset Types
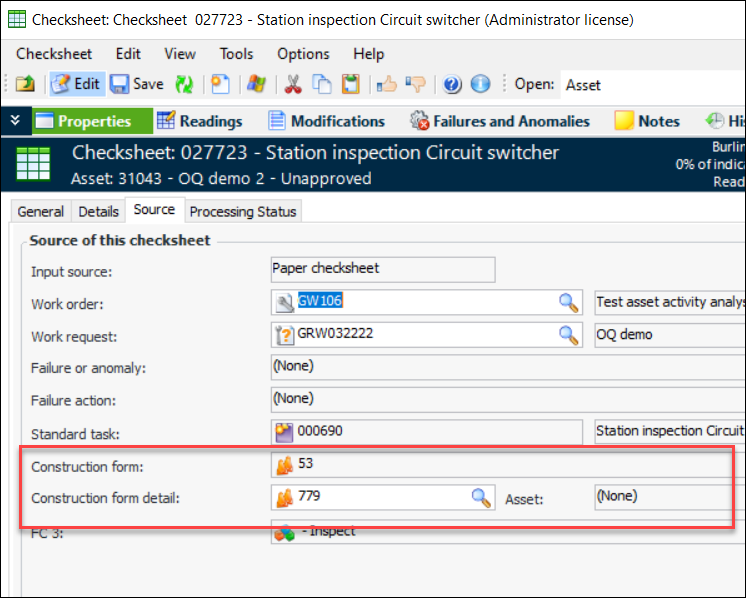
Link Checksheet to Construction Form Detail
In the Checksheet window, select the Properties view and the Source tab. Make sure that editingis enabled. Click the browse icon (
) to select the construction form detail. The related asset and construction form are displayed. For example:
Data Loading
Attachment Support on Data Loaders
Indicator Data Loader
Standard Task Due Date Data Loader
This new data loader is available in the Enterprise window, Data Loaders view, Inspection Management tab. The data loader is used to update the standard tasks’ next due dates. Two functions are supported:
Maintenance Action Plan Corrective Tasks Data Loader
Fluid Condition Tracking
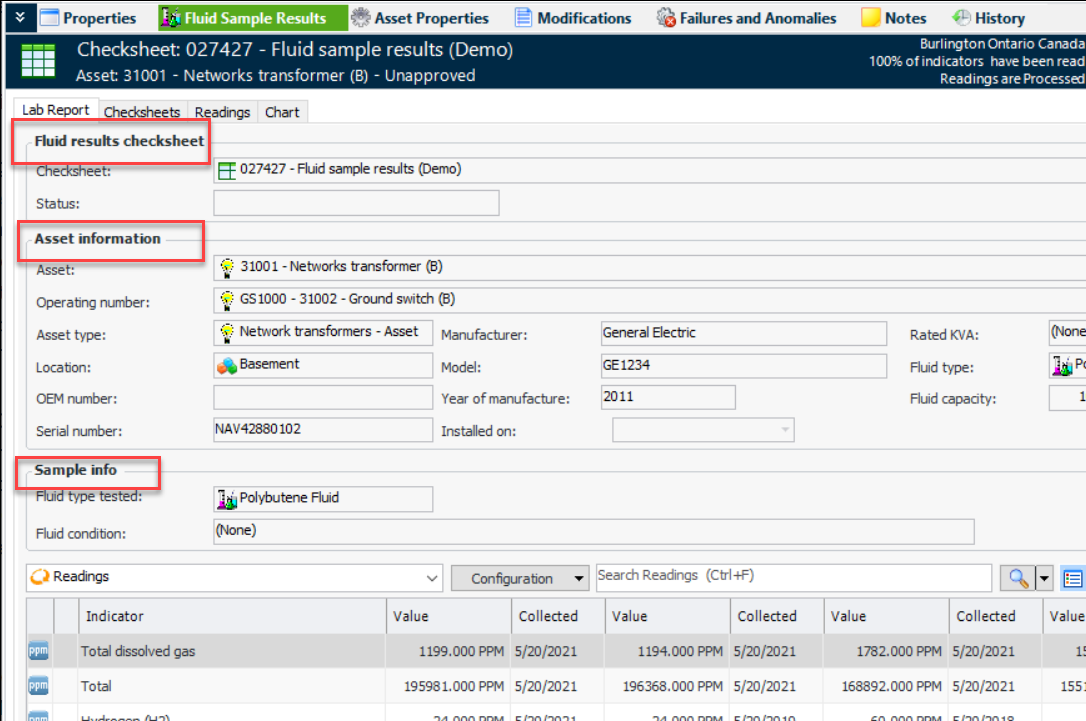
The Lab Report tab has been modified to clearly differentiate between information about the checksheet, the asset and the sample that was tested:The Lab Report tab appears in the Checksheet window, Fluid Sample Results view, as well as in the Lab Fluid Sample window, Results Report view.Inspection Management
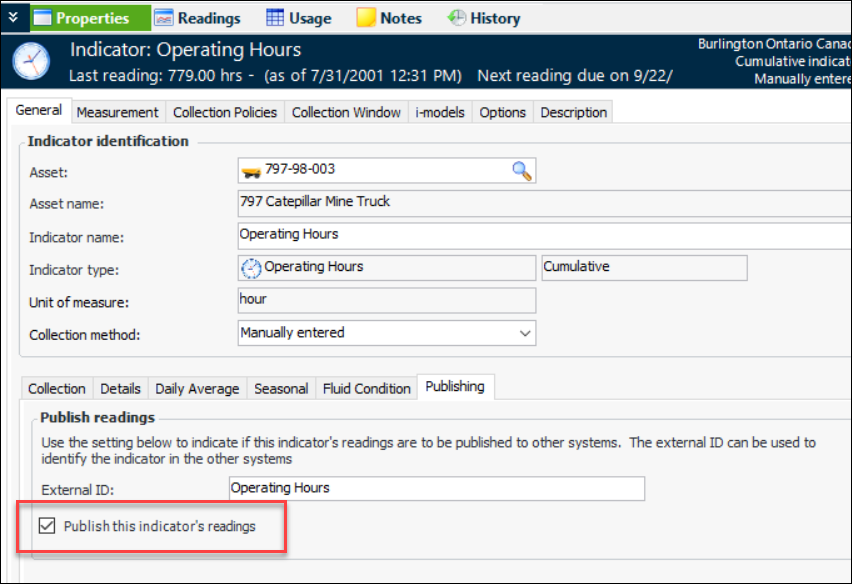
Publish Indicator Readings
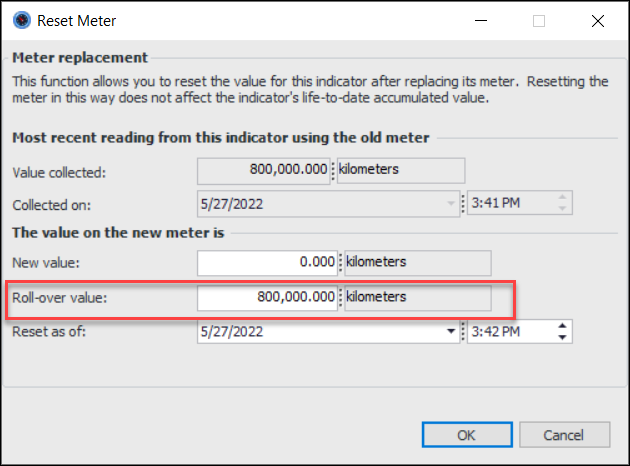
Reset Meter for Cumulative Indicators
Browse Indicators – Select Subset from Standard Task
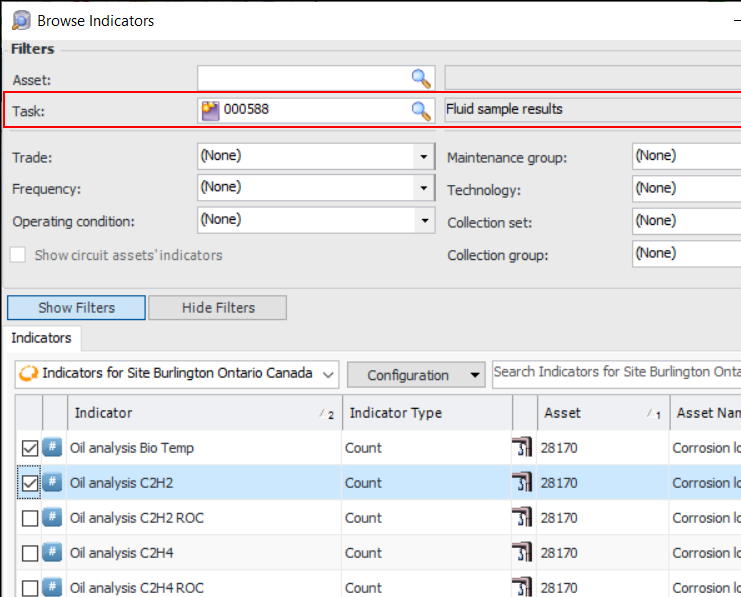
It is now easier to add indicators to an object, such as a checksheet or work order task, by selecting individual indicators from a standard task or template. For example, click Browse Indicators in a Checksheet window to open the Browse Indicators window. Select a standard task to view, filter, and select from the task’s indicators:Mark Multiple Checksheet Indicators as “Unavailable”
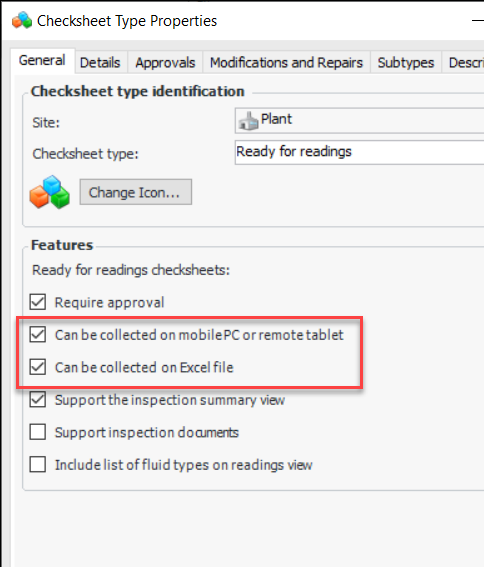
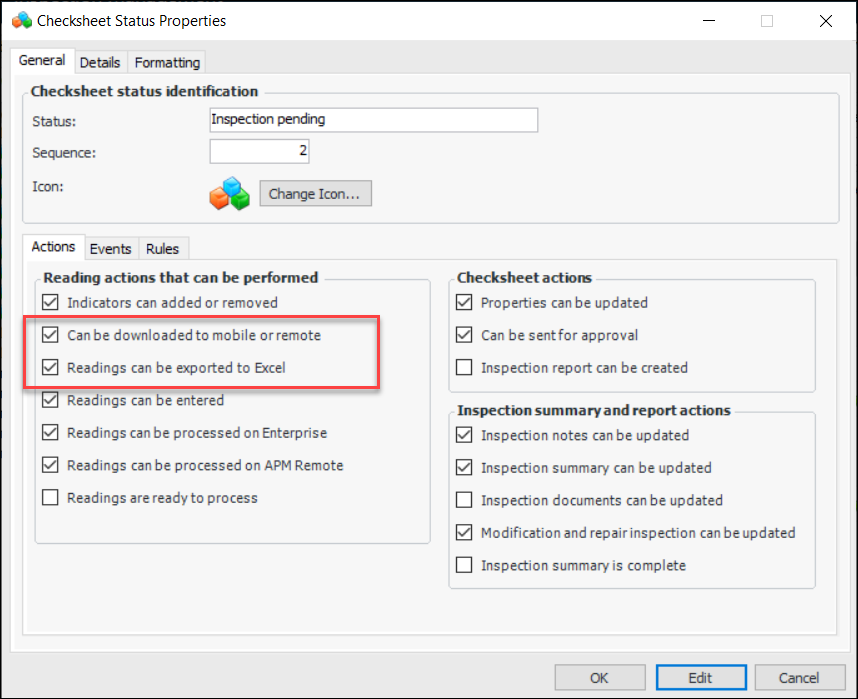
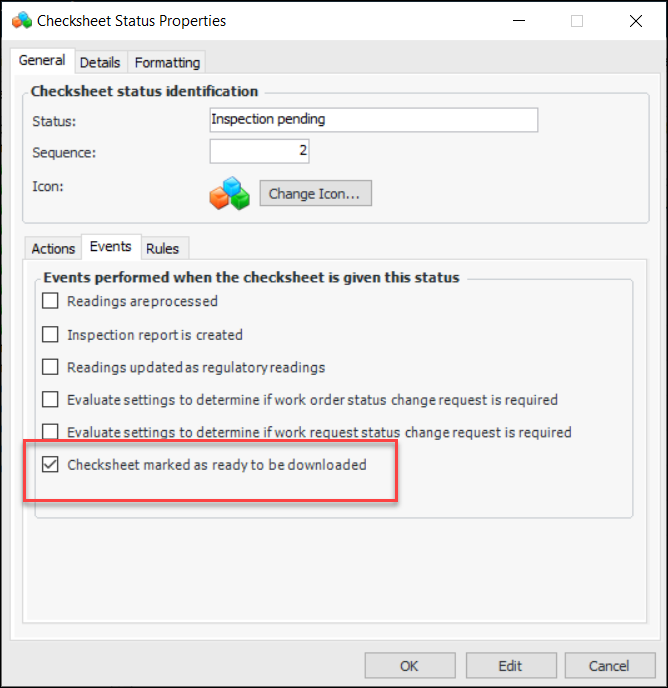
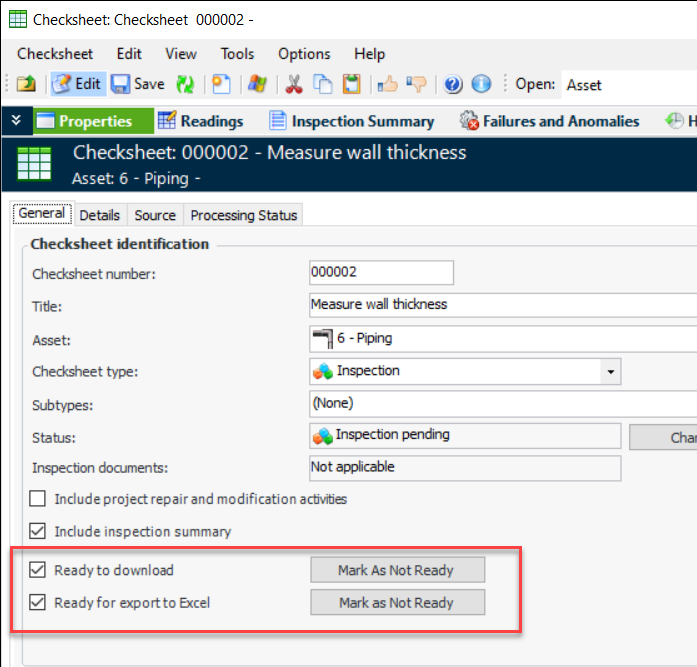
You can now mark two or more readings on a checksheet as unavailable. The Mark as Unavailable dialog appears only once and shows information for the first reading. The information you supply – Operating condition, note, and “applies to” option – is applied to all of the selected readings when you click OK. This functionality is available in APM (desktop) and APM Remote.Checksheet Status – Includes Ready to Download and Export
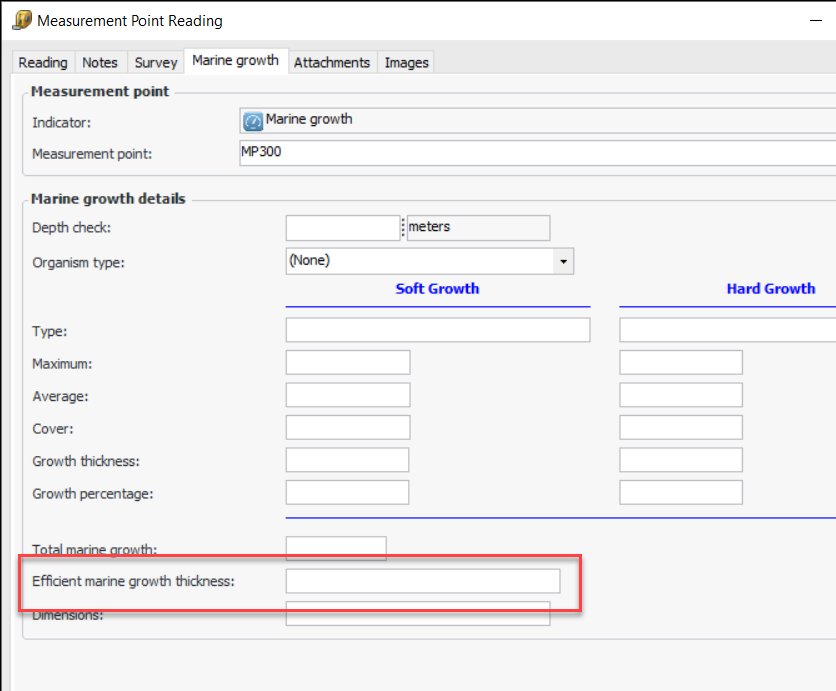
Your organization can now use checksheet type and status to mark a checksheet as ready to be downloaded to APM Remote or APM Mobile Inspections and as ready to be exported to Excel®. Individual checksheets can also be marked manually. For example, checksheets might require that an inspection plan be reviewed and validated before the checksheets can be downloaded to mobile devices for readings to be taken.Marine Growth Subtype for Measurement Point Readings
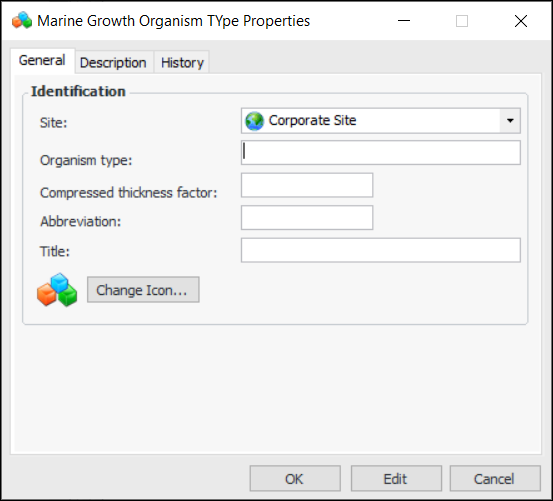
When an indicator supports the Marine Growth subtype, its Measurement Point Reading windows display the Marine growth tab. For example:To add organism types, open the Site window and select the Inspection Management view and Settings tab. On the Subtypes tab, select the Subsea and Organism Types tabs. Click New to open the Marine Growth Organism Type dialog, where you can name the organism and enter its Compressed Thickness Factor (CFT), which is used in the calculation:Viewing Measurement Point Readings in a Grid Format
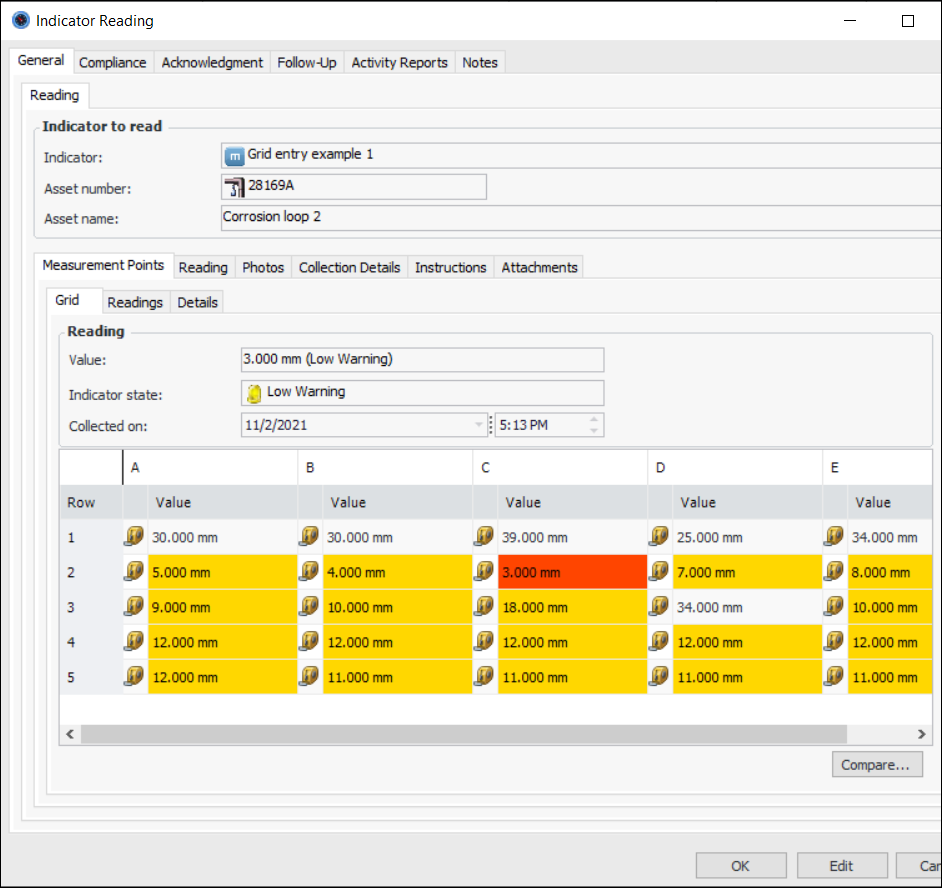
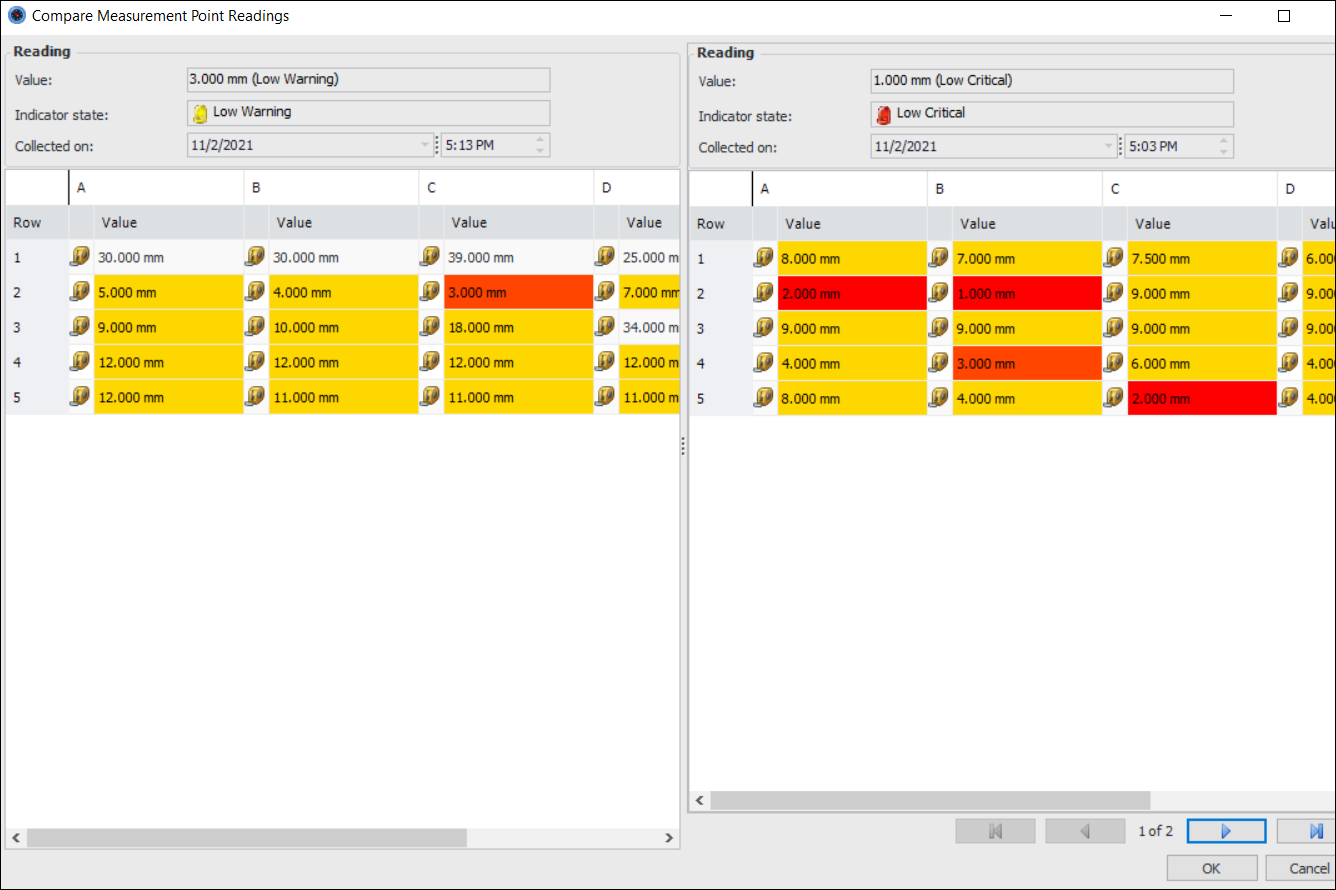
Click Compare to view the current reading side-by-side with previous readings. For example:Note: This functionality is generally available. You must first enable feature 90 to use the functionality in APM. In the Enterprise window, select the Features view and the Enabled Features tab. Click Browse, select “Support display of an indicator reading’s measurement point values in a grid format” and click OK. If APM is running as a smart client, click Refresh Enabled Features on the server. Then restart the client to use the functionality.You can set this up for indicators that support measurement point readings. In the Indicator window, Properties tab, select the Measurement and Measurement Points tabs.Select Support grid style display for measurement point readings. The default number of rows is 5; typically, you would set this to the number of measurement points readings.Grid labels, by default, consist of capital letters for columns and numbers for rows. As you add measurement points to the reading, you can update the label names by clicking Update Grid Labels.If you wish to provide your own labels, select Freeze grid column and row labels.Fabric Inspection Subtype for Measurement Point Readings
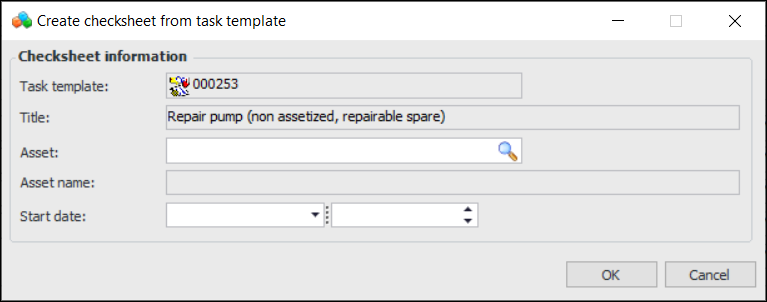
The default unit of measure (UOM) for Total Surface Area values has been added to survey subtype options. You can set the default UOM in the Indicator Type window, Surveys tab, Unit of measure defaults area.Create a Checksheet from a Task Template
As of this release, you can create a checksheet from a standard task template. In the Standard Task window, click the Tools menu, Indicators, and Create Checksheet. The Create Checksheet from Task Template dialog appears, where you can select an asset and set the start date:When you click OK, a standard task is created for the asset, indicators are created from the indicator templates (if they did not already exist), and the checksheet is created.Note: This functionality is generally available. You must first enable feature 83 to use the functionality in APM. In the Enterprise window, select the Features view and the Enabled Features tab. Click Browse, select “Ability to create a checksheet from a Task Template” and click OK. If APM is running as a smart client, click Refresh Enabled Features on the server. Then restart the client to use the functionality.Note: This functionality is available for preview. You must first enable feature 103 to use the functionality in APM. In the Enterprise window, select the Features view and the Enabled Features tab. Click Browse, select “Support for Platform Inspection subtype on Measurement Point Reading” and click OK. If APM is running as a smart client, click Refresh Enabled Features on the server. Then restart the client to use the functionality.Performance and Stability Enhancements
Project Management
Reliability Projects
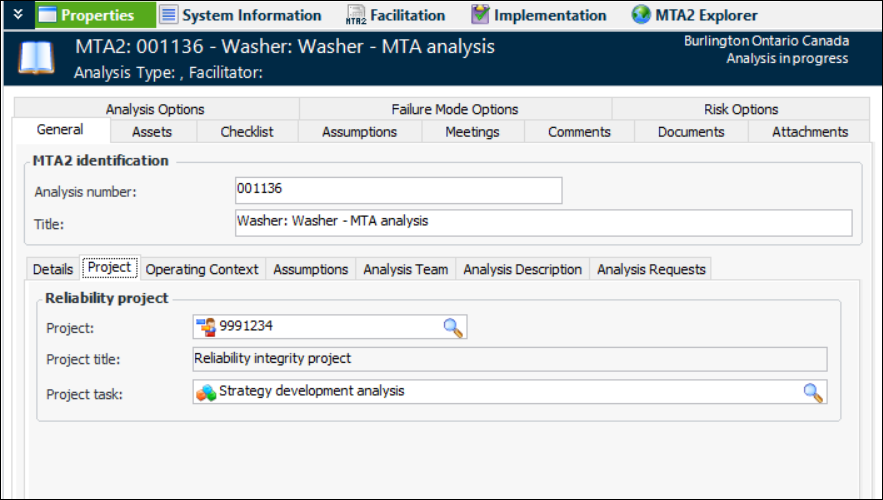
Note: This functionality is generally available. You must first enable feature 99 to use the functionality in APM. In the Enterprise window, select the Features view and the Enabled Features tab. Click Browse, select “Support for reliability projects” and click OK. If APM is running as a smart client, click Refresh Enabled Features on the server. Then restart the client to use the functionality.All of the objects that support links to projects have new Project tabs. For example, here is an MTA2 analysis showing the Properties view, General tab, and Project tab:Projects with this option display the Reliability Project Usage view with tabs listing the objects linked to the project. For example: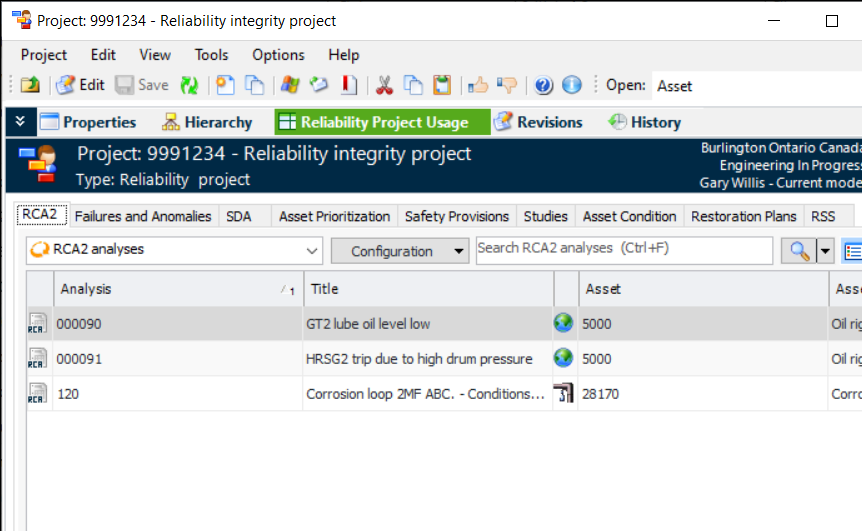
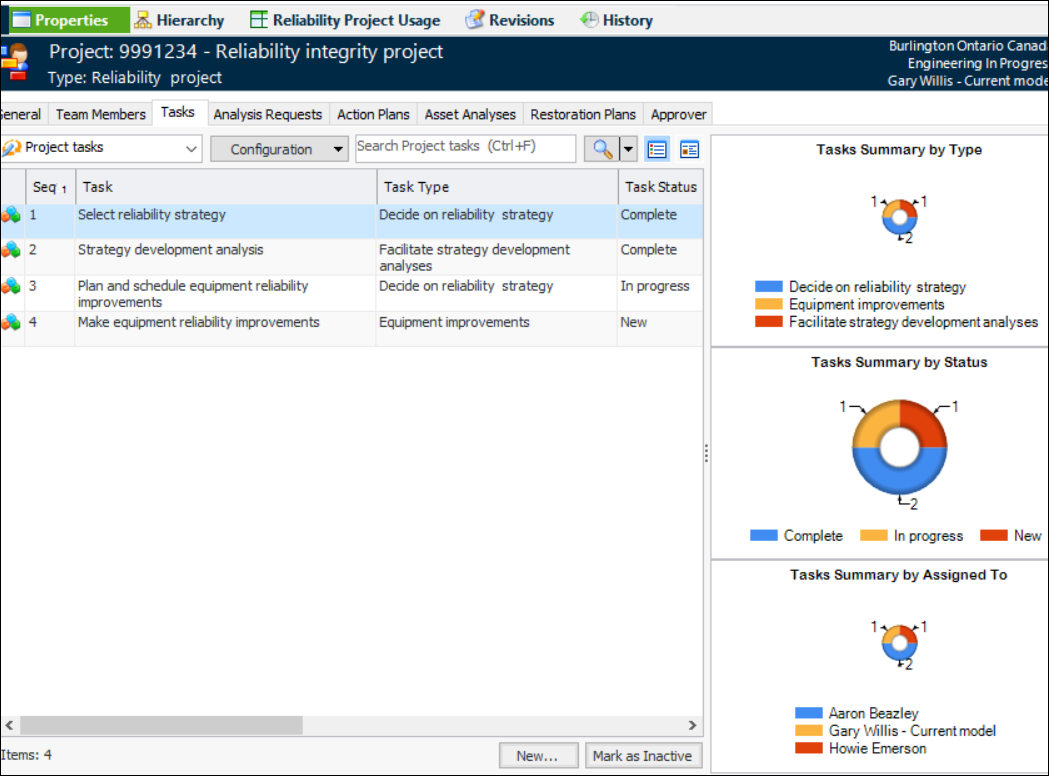
Project Tasks
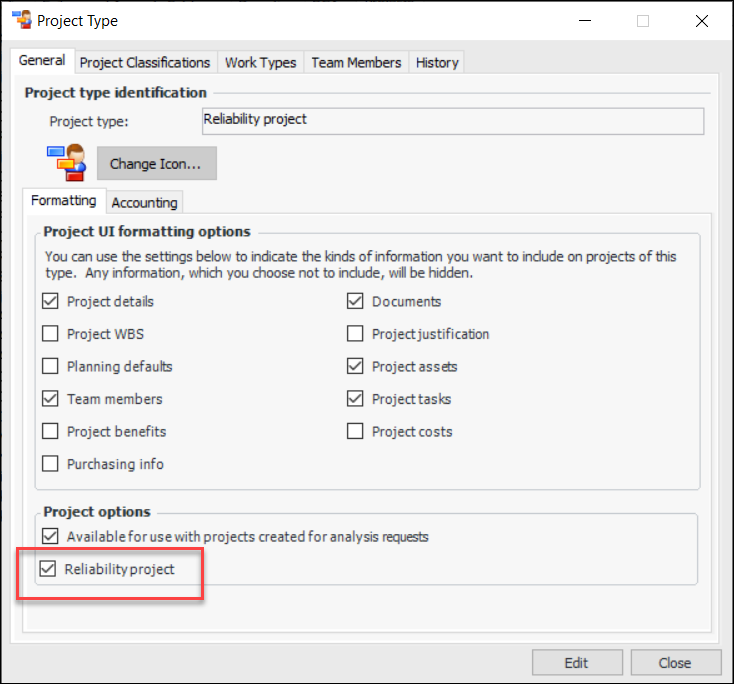
Note: This functionality is generally available. You must first enable feature 98 to use the functionality in APM. In the Enterprise window, select the Features view and the Enabled Features tab. Click Browse, select “Support for project tasks” and click OK. If APM is running as a smart client, click Refresh Enabled Features on the server. Then restart the client to use the functionality.Select a project task when linking an object (for example, an analysis) to a project. You can add tasks to a project in the Tasks tab. This example shows how tasks and task statuses can be used:You can define task types and statuses in project settings. In the Site window, click the Administration menu, Performance Management Settings, and then Project Management.In the Project Management Settings dialog, select the Project Tasks tab. Click New and, in the Task Type dialog, define the type:In the Project Management Settings dialog, select the Project Types tab. Open one or more project types and ensure that Project tasks is selected:Project Team Members
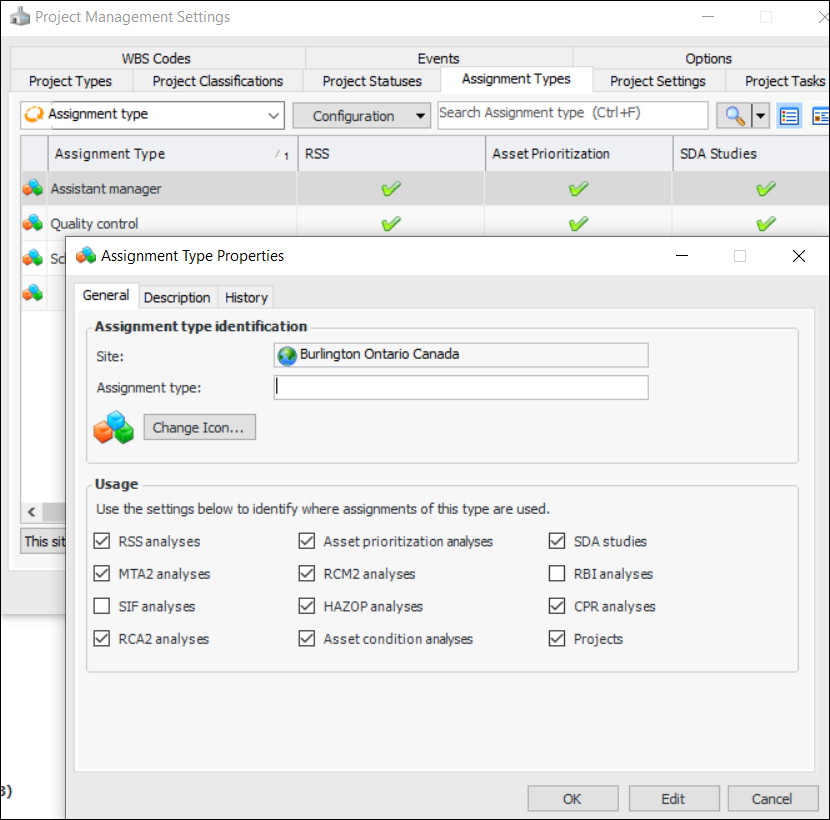
To set up this functionality, define assignment types in project settings. In the Site window, click the Administration menu, Performance Management Settings, and then Project Management.In the Project Management Settings dialog, select the Assignment Types tab. Click New to open the Assignment Type Properties dialog, where you can name the assignment type and select the objects where it is available:Regulated Gas Management
To prevent gas transaction weight from being calculated, select the Regulated Gas Management view, select the Settings tab, and the Transaction Types tab. Open the Gas Transaction Type window and click Edit. Select the Details tab. In the Gas weight rule area, clear the Calculate transaction weight option. For example:Strategy Development Analysis
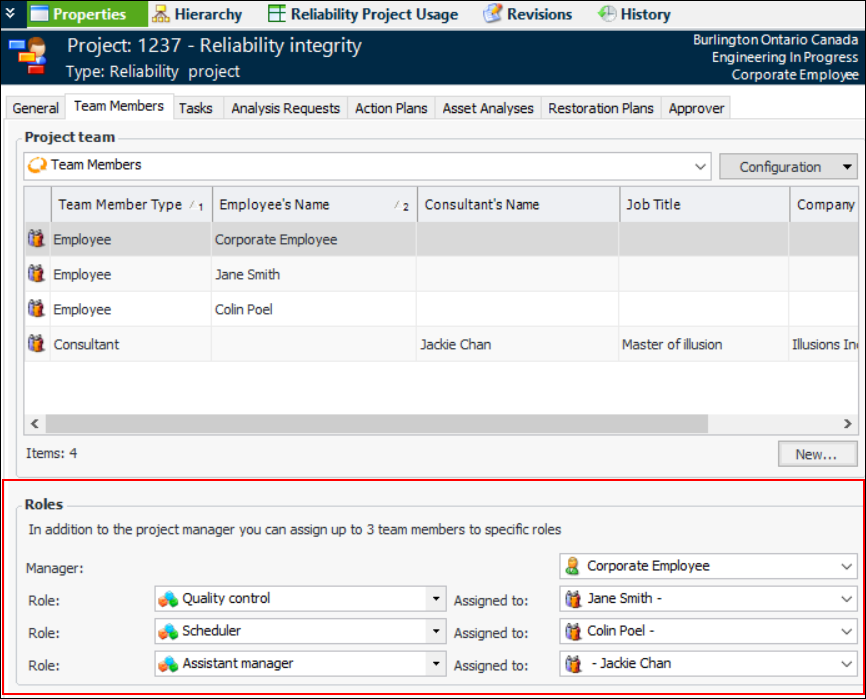
Roles for Team Members
Isograph Availability Workbench®
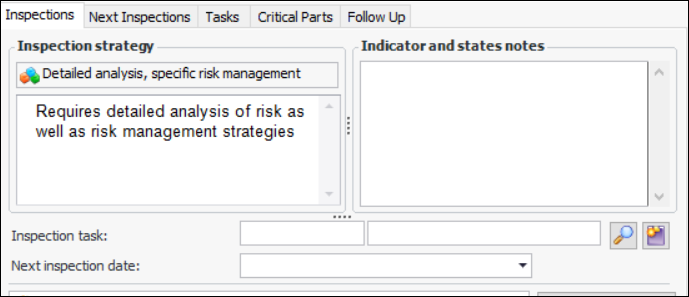
Inspection Strategy in Action Plans
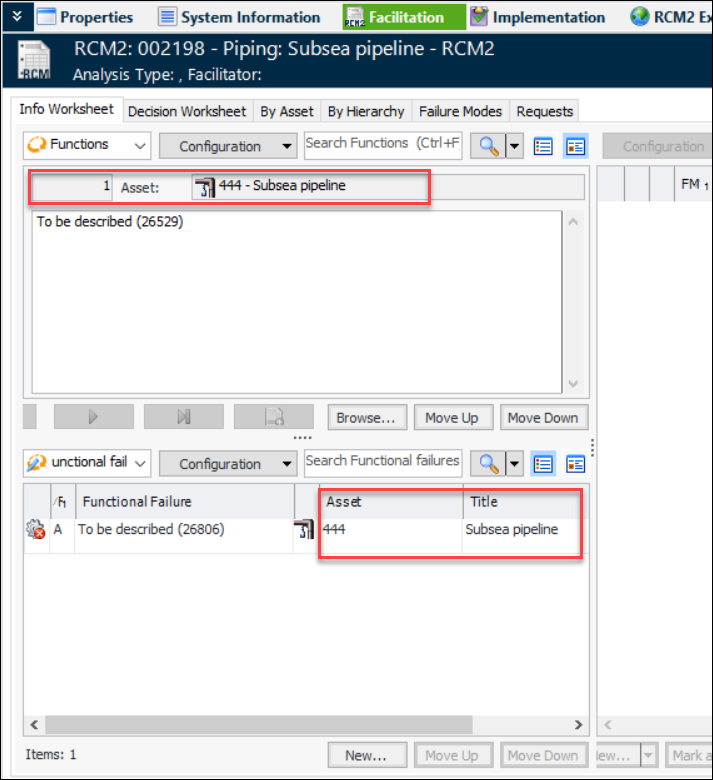
If an inspection strategy has been assigned to the failure mode, the strategy and its description are now displayed on the Inspections tab. For example:RCM2 Analysis – Asset Identified in Facilitation View
The asset number and title are now displayed more prominently for functions and functional failures in the Facilitation view, whether you are viewing the information in a form or table. For example: