|
|
What’s New in APM 7.16
Contents
Asset Management
Characteristic Settings on Asset Type
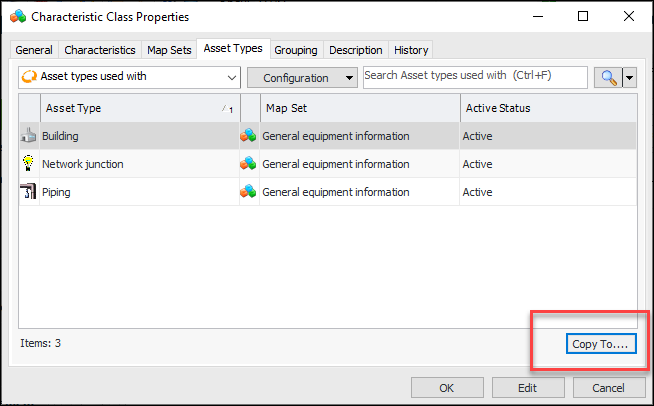
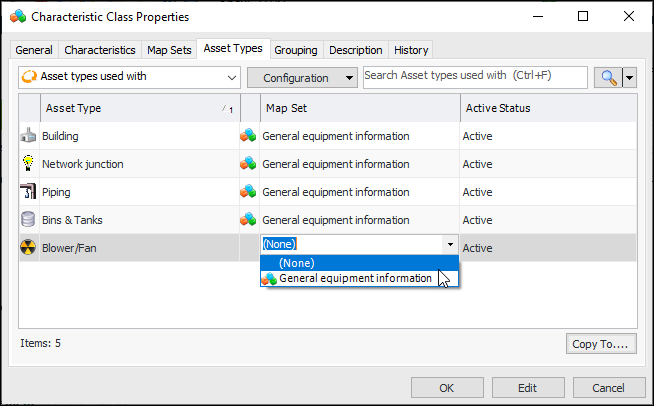
It is now easier to add characteristic classes and map sets to asset types. From the Characteristic Class Properties window, select the Asset Types tab and click Copy To:To quickly add a map set to each of the asset types, select the class in the table and press F2 to open the Map set field for editing. For example:As well, the Asset Type window, Characteristics tab now has a Browse button to make it easier to add characteristic classes to the type.Country of Manufacture
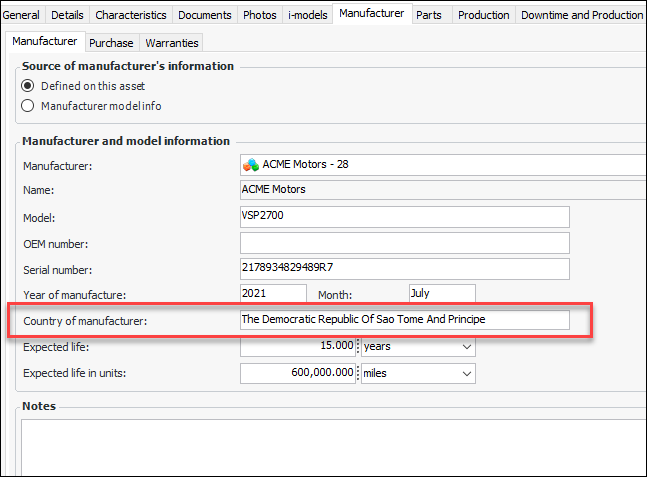
When you are recording manufacturer information on an asset, you can now enter as many as 50 characters in the Country of manufacturer field:Electrical Substations Specifications
Degradation Minimum Value Calculations
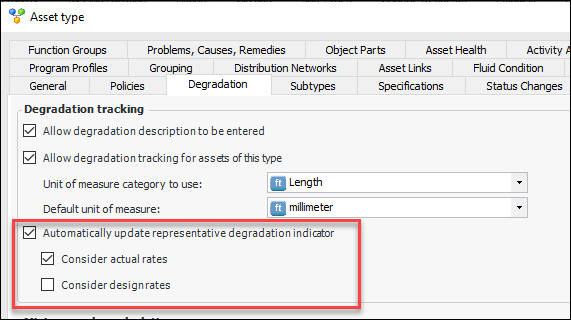
Default Representative Degradation Indicators
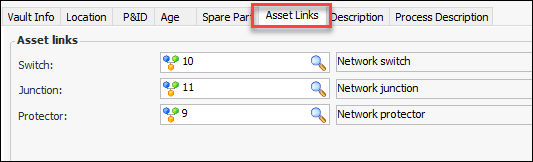
To set this up, open the Asset Type window and select the Degradation tab. Select Automatically update representative degradation indicator. Then select Consider actual rates, Consider design rates, or both. For example:For assets that use the asset type, in the Degradation Info tab, Degradation Indicators tab, you can change the default representative indicator as needed. You can also click Evaluate to have APM review rates and select the appropriate one according to the settings on asset type.Asset Links
Note: Support for asset links is a “generally available” product feature. You must first enable feature 76 to use the functionality in APM. In the Enterprise window, select the Features view and the Enabled Features tab. Click Browse, select “Support for asset links” and click OK. If APM is running as a smart client, click Refresh Enabled Features on the server. Then restart the client to use the functionality.
AWEIS – Work Management
Requests for Work
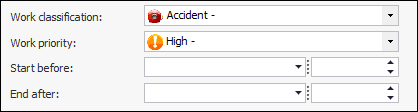
The solution packages available for selection in a request for work can now be filtered according to the request’s asset. In the Site Interoperability Profile window, select the Work Management tab and the Requests tab. In the Solution packages area, you can select an option to filter the solution packages:Work Priority and Work Classification
Task Numbering on Solution Packages
You can specify the amount to increment sequence numbers as they are added to solution packages. In the Site Interoperability Profile window, select the Solution Packages tab. In the Task numbering area, specify the number to increment by. For example:Browse Standard Tasks on Solution Package
The Inspections tab in the Solution Package window now provides a Browse button so that you can browse, filter, and select one or more standard tasks or templates to add to the package. By default, the Browse Tasks window filters by the solution package asset.CONNECTION Client and Log Dispatcher Settings
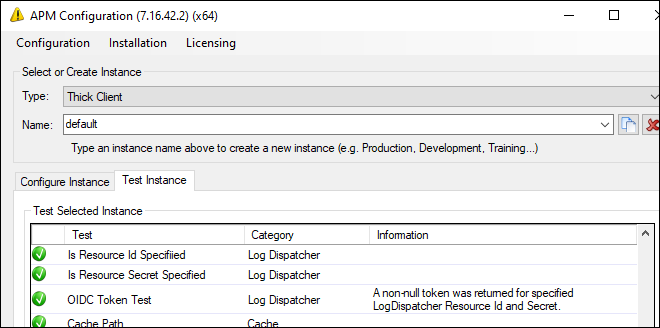
As of this release, CONNECTION Client must be installed and active on computers running APM application servers, whether you are using SELECTServer or SES licensing. For information about CONNECTION Client, including how to install it, see the Bentley Communities page CONNECTION Client.For information about defining Log Dispatcher settings, see “Setting up a Server/Service Instance” in APM Installation Guide.Construction Management
Electrical Substation Specifications
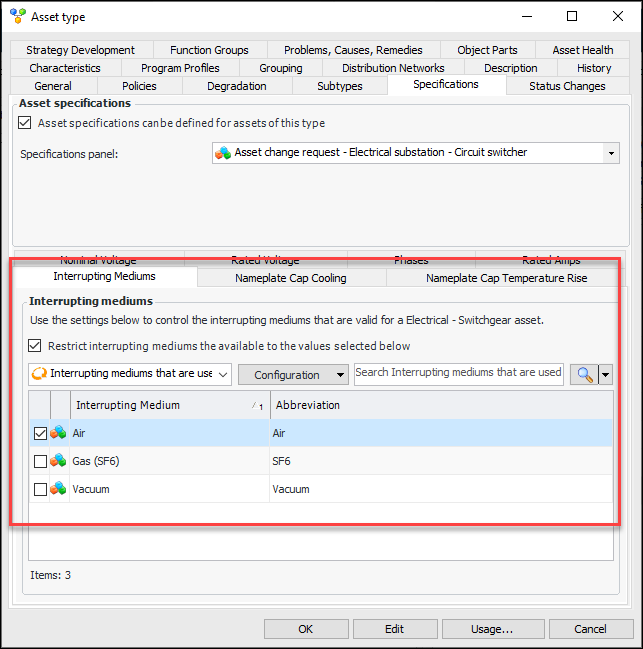
You can use asset type to restrict the values available to users when selecting an interrupting medium, nameplate cap cooling value, or nameplate cap temperature rise value on a construction form or asset change request. For example, in the Asset Type window, select the Specifications and Interrupting Mediums tabs. When you click the Restrict option, the values are listed in the table. Select the values that will be available and click OK.Synchronous Condenser Construction Form
Regulator Single Phase
In the construction form for single phase regulators, the Metal Clad Unique Number attribute has been replaced by Number of digits. The “number of digits” value list is available in the Electrical Substation Specifications tab in asset settings.Fluid Condition Tracking
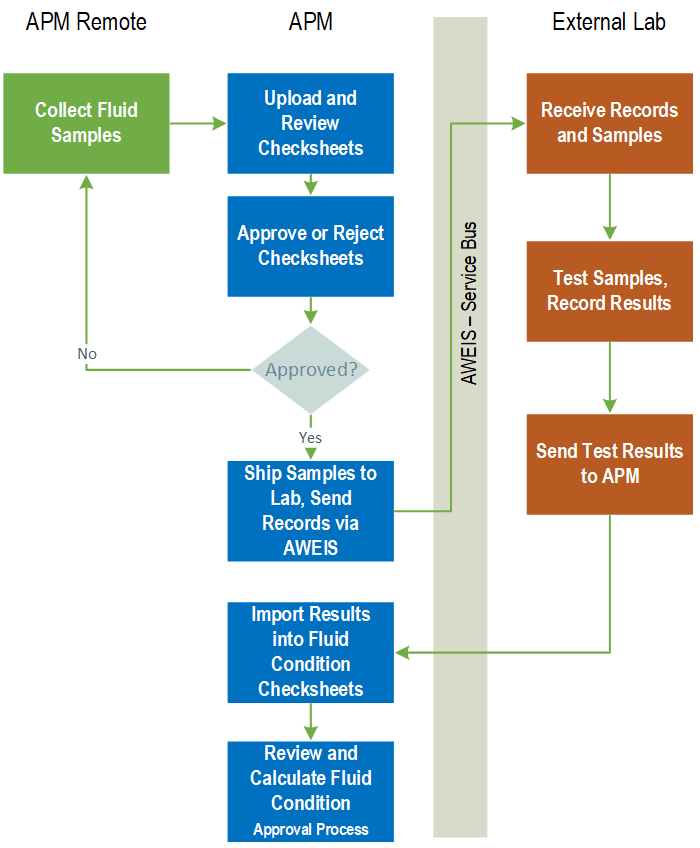
Note: Recording fluid samples on indicator readings and tracking fluid condition test results are “generally available” product features. You must first enable features 53 and 54 to use the functionality in APM. In the Enterprise window, select the Features view and the Enabled Features tab. Click Browse, select “Fluid condition tracking and results” and “Fluid sample support” and click OK. If APM is running as a smart client, click Refresh Enabled Features on the server. Then restart the client to use the functionality.Fluid Sample and Condition Tracking Process
Step 1 - Take Fluid Samples
Step 2 - Create Fluid Sample Receipts
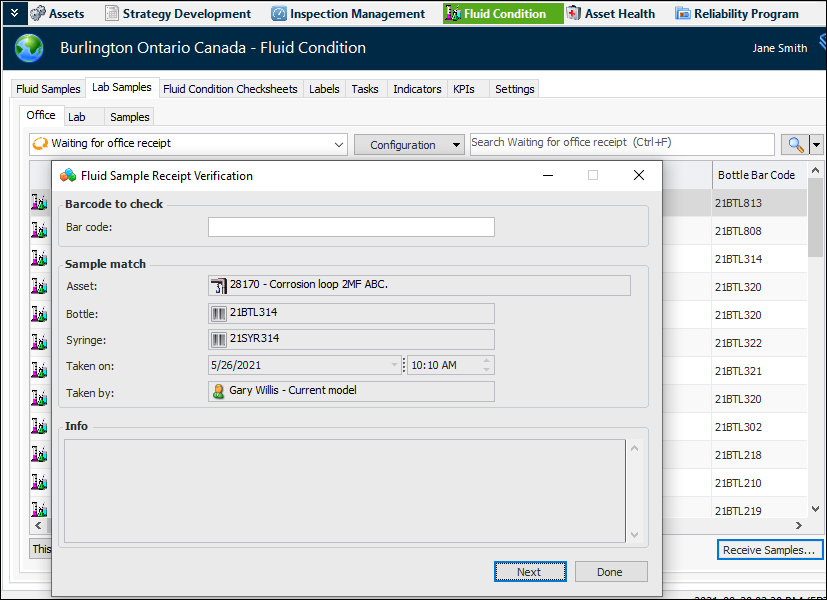
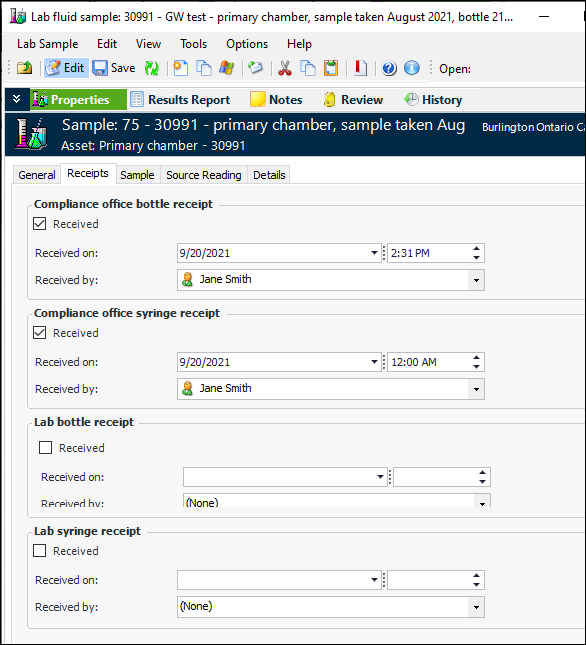
Before the samples are sent to the lab, the internal compliance officer verifies the information on each bottle and syringe, generating a receipt on the lab fluid sample. In the site’s Fluid Condition view, select the Lab Samples and Office tabs. The default table configuration lists samples that are “Waiting for office receipt”.Click Receive Samples to open the Fluid Sample Receipt Verification window. When you scan (or enter) a bar code, APM checks that a matching bar code exists in the system, that the bar code has been assigned to a sample, and that it was not previously received. For example:Continue scanning bar codes until you run out of bottles and syringes. When you click Done, the window closes and the samples you scanned are moved to the “Ready to send to lab” configuration.On the Lab Samples tab, Office tab, select the “Ready to send to lab” configuration and click Send to Lab. The Send Fluid Samples window appears, where you can select the lab, browse for samples to send, and click OK.If testing is performed in a lab within your organization that has access to APM, lab personnel can receive and verify samples. In the site’s Fluid Condition view, select the Lab Samples and Lab tabs. Click Receive Samples to open the Fluid Sample Receipt Verification window. As you scan bar codes one after the other, APM matches the codes and records the receipt.You can view a fluid sample’s receipts in the Lab Fluid Sample window. Select the Properties view, Receipts tab. For example:Step 3 - Lab Tests - Import Results
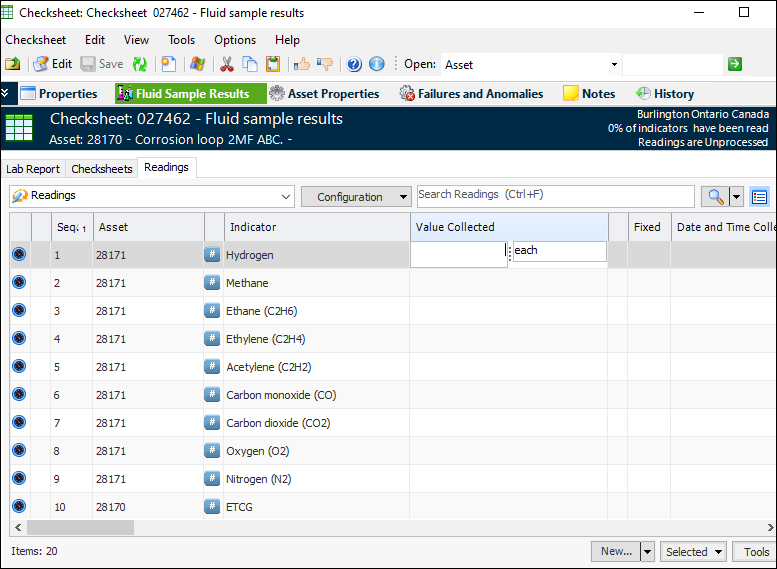
Internal labs can also record test results as indicator readings in the checksheet. In the site’s Fluid Condition view, select the Fluid Condition Checksheets tab and open a checksheet. In the Checksheet window, select the Fluid Sample Results view and the Readings tab. For example:Step 4 - Evaluate Fluid Condition
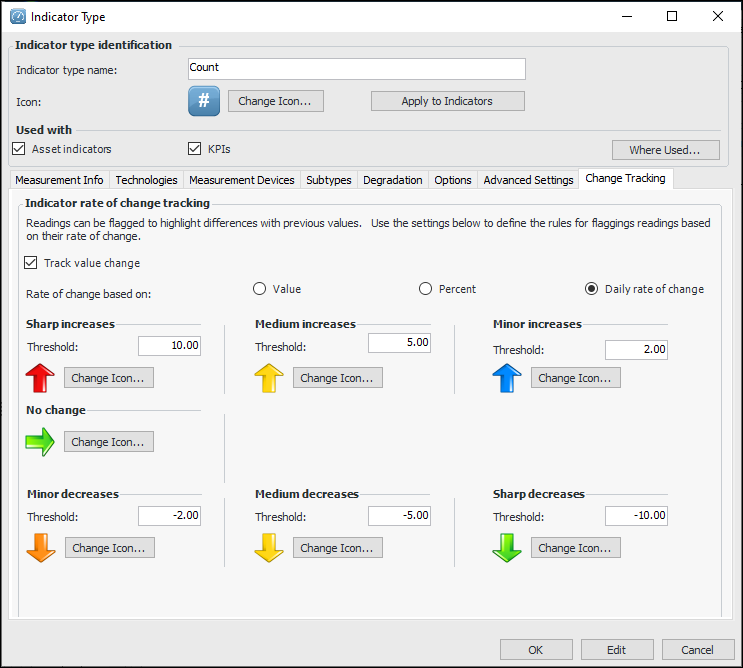
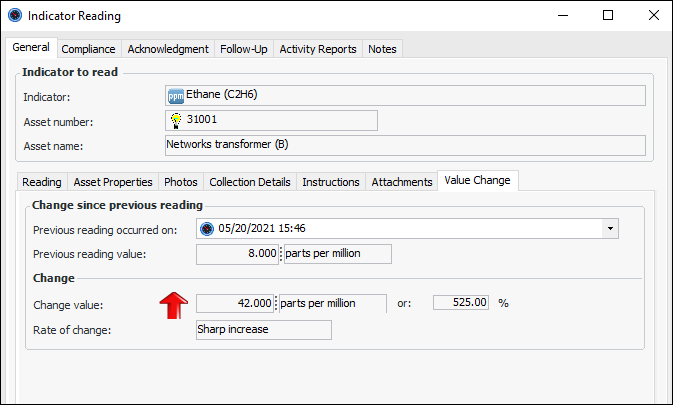
Change Tracking
In an indicator reading, the Value Change tab displays the change since last reading:After implementing the functionality on an indicator type, you can calculate change values for indicators with existing readings. In the Site window, select the Inspection Management view and Readings tabs. Select one or more readings, right-click, and click Calculate Change Value.Review and Approval Processes
Printing Bar Code Labels
Setting up APM for Fluid Sample and Condition Tracking
Fluid Type
Inspection Management
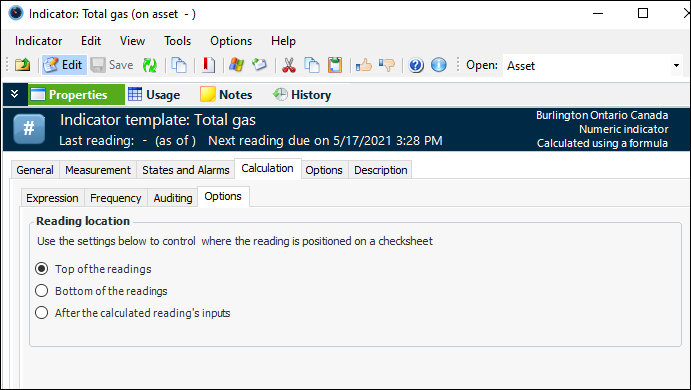
Position of Calculated Indicators on Checksheets
Open the calculated indicator or indicator template. In the Indicator window, select the Properties view, Calculation tab, and Options tab to select the appropriate setting. For example:Site’s Indicator States
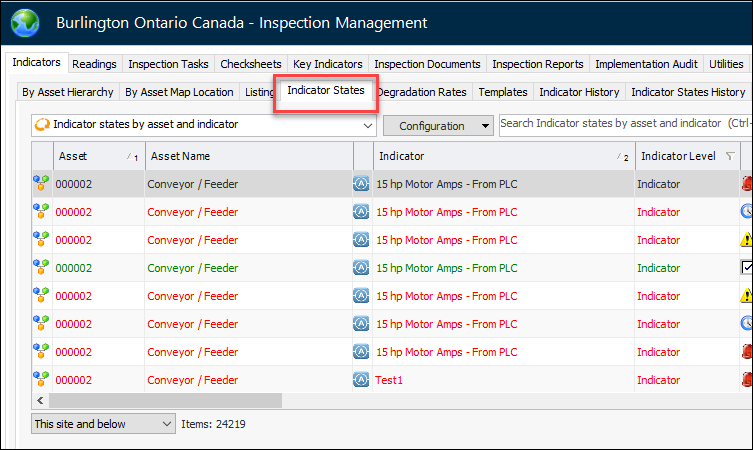
The table of indicator states has moved from the Utilities tab to the Indicators tab in the site’s Inspection Management view. For example:Inspection Photo Displayed on Acknowledgment Work Document
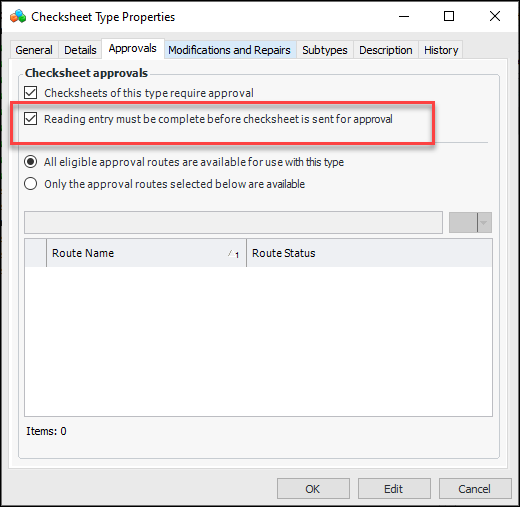
With this release, when you acknowledge an indicator alarm with a work request or work order, the photo attached to the indicator reading is now available in the work document. Select the Photos tab to view the table of acknowledgment reading photos.Checksheet Approvals
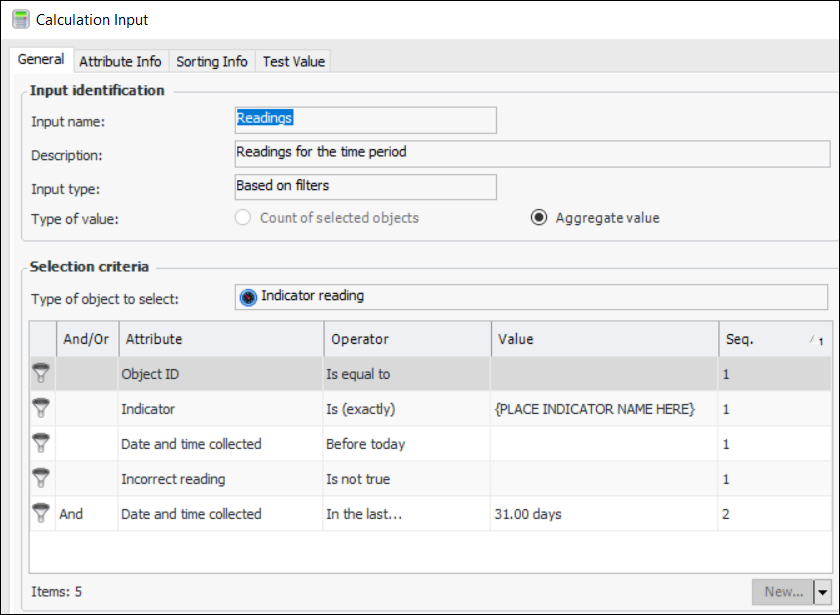
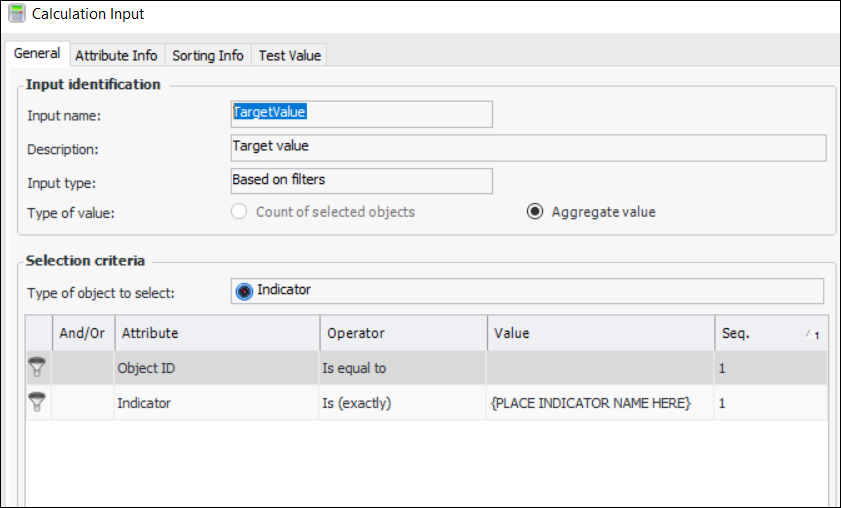
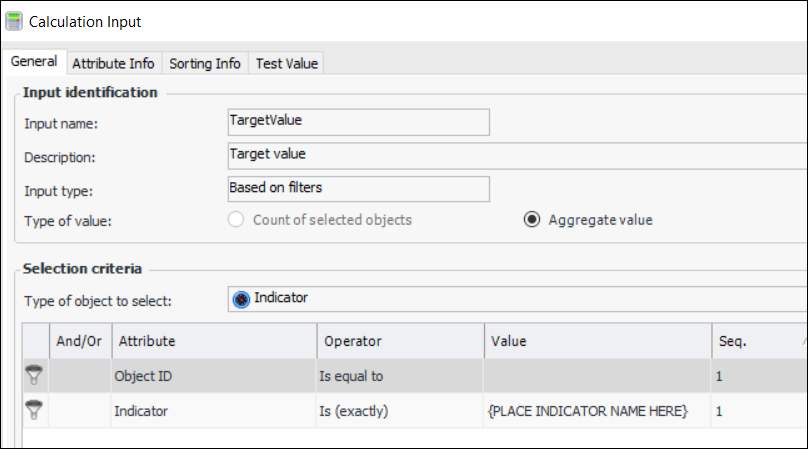
Indicator Templates for Corrosion Inhibitor Analysis
Corrosion Inhibitor Availability for last 30 days – Calculated on a daily basis. Set up inputs based on readings for the time period and target value.Corrosion Inhibitor Availability for last month – Calculated on a monthly basis. Set up inputs for readings for the time period and target value. For example:Online Data Collection (ODC) – On-Premise Agent Deployment
When you upgrade to APM 7.16, additional steps are required to implement this feature. See APM Upgrade Guide.Procurement – Invoicing
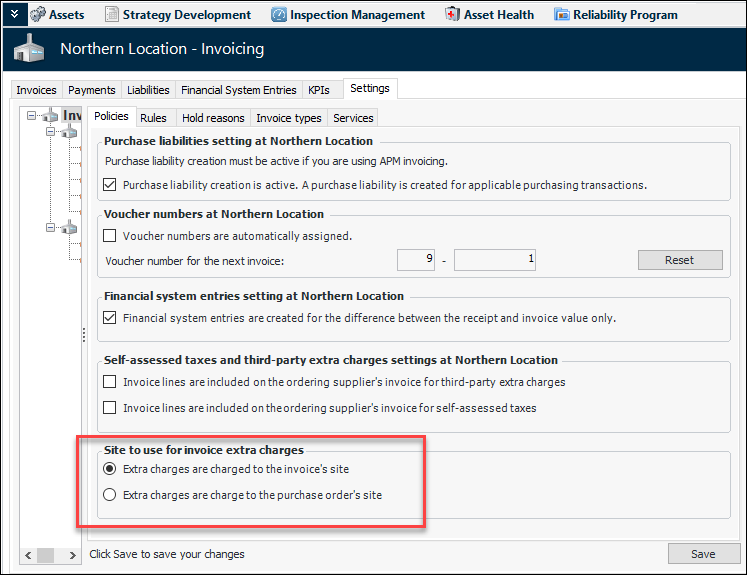
You can now specify in invoicing settings whether extra charges are charged to the invoice’s or purchase order’s site. In the Site window, select the Invoicing view and Settings tab:Remote Computing
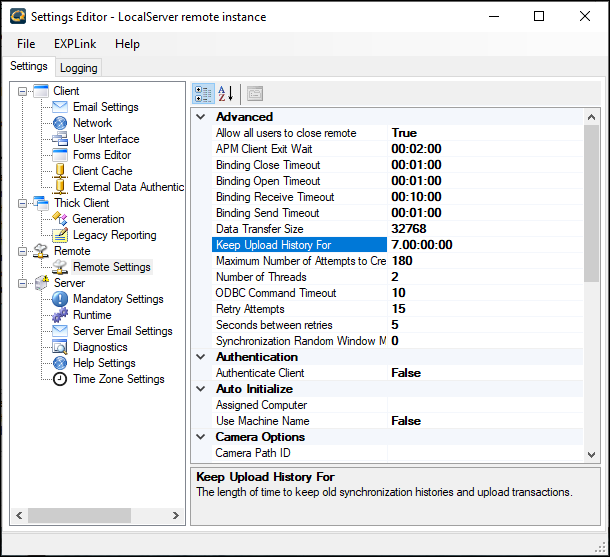
For more information, see APM Remote Setup Guide.Strategy Development Analysis
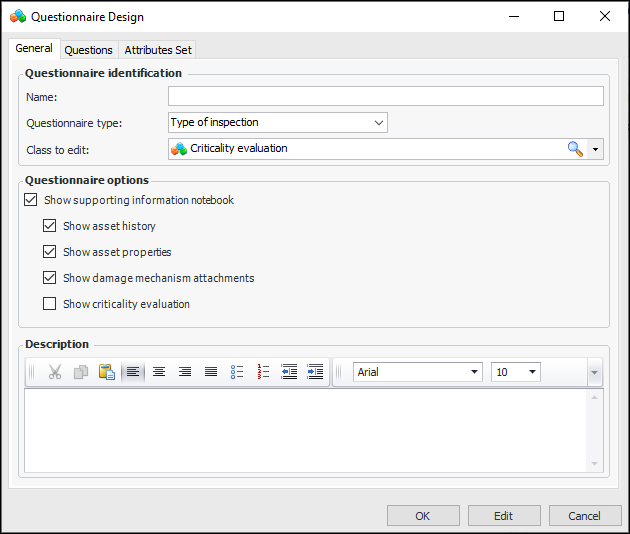
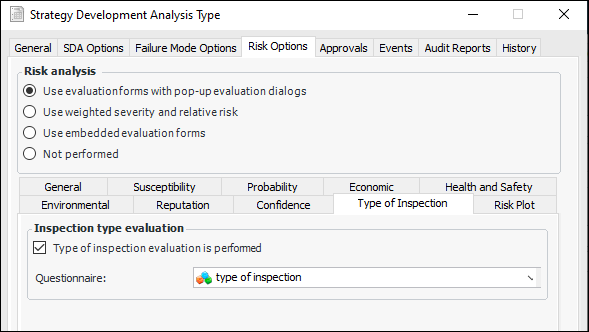
Support for Type of Inspection Questionnaire or Analysis
Note: Support for type of inspection evaluations is a “generally available” product feature. You must first enable feature 74 to use the functionality in APM. In the Enterprise window, select the Features view and the Enabled Features tab. Click Browse, select “Support for type of inspection evaluation as part of the failure mode RBI analysis” and click OK. If APM is running as a smart client, click Refresh Enabled Features on the server. Then restart the client to use the functionality.
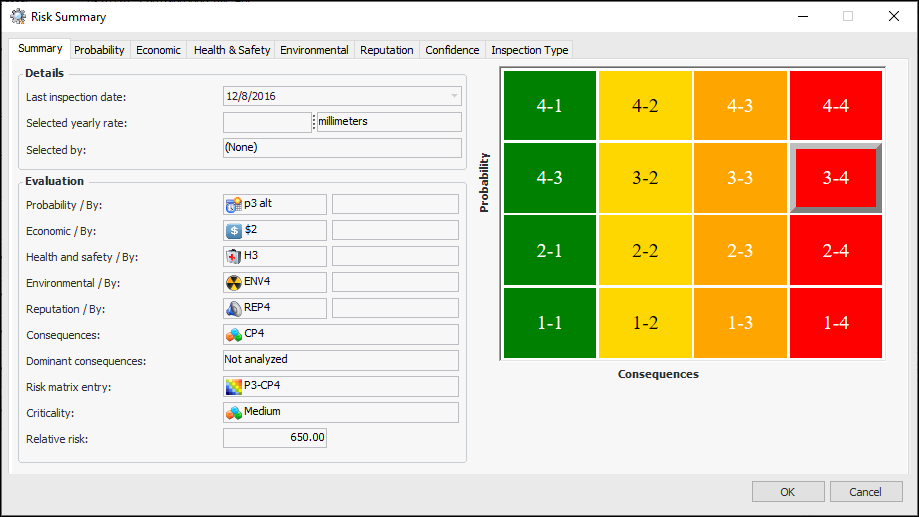
Risk Summary Window Reorganized
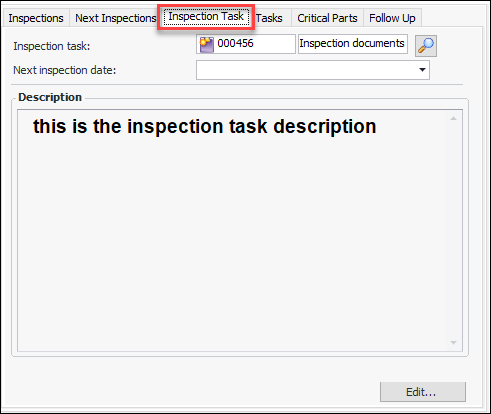
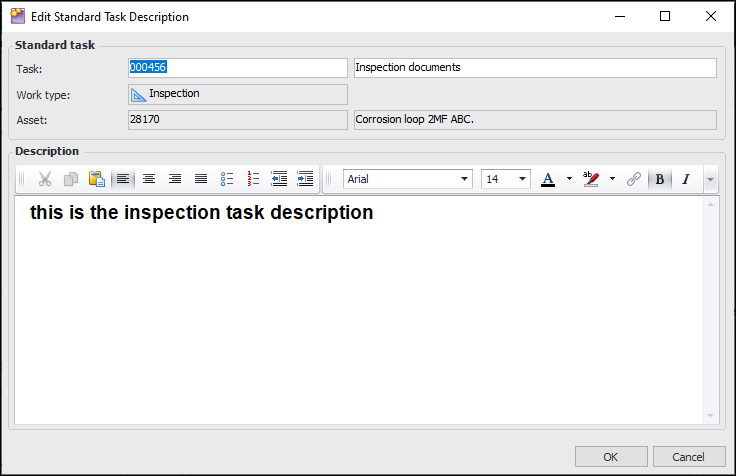
In the Maintenance Action Plan window, Criticality view, you can click Summary to open the Risk Summary window. The window displays the results of the risk analysis and a tab for each of the questionnaires that were used to evaluate probability of failure, consequence severities, confidence, and type of inspection (if supported). For example:Editable Inspection Task Description on an Action Plan
When you add an inspection task on the Inspections tab of a maintenance action plan in a strategy development analysis (MTA2, RCM2, RBI, CPR), the Inspection Task tab is added to the window. This tab shows the inspection task and a Description box.Click Edit to open the Edit Standard Task Description dialog, where you can add and change the information: