|
|
What’s New in APM 7.15
Contents
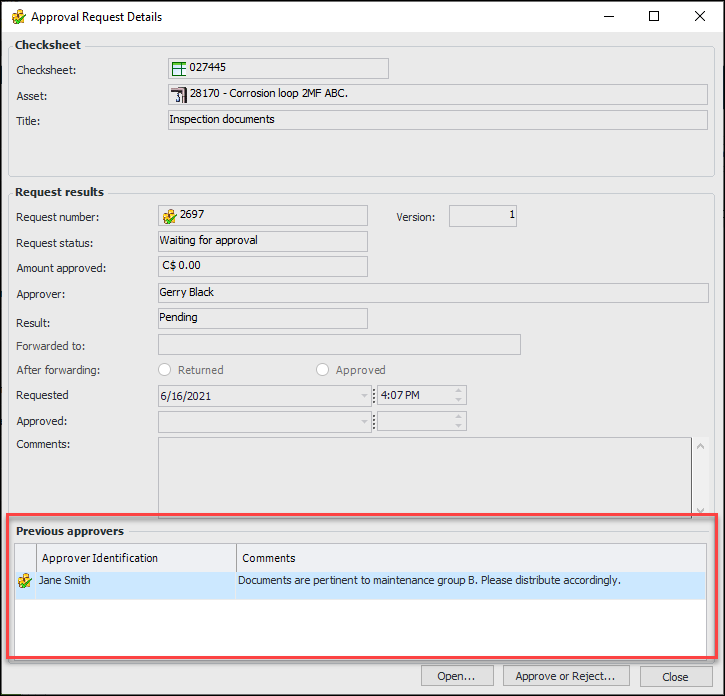
Approvals
Asset Management
Original Equipment Manufacturer (OEM)
Properties for Distribution Network Assets
Ground switch
Primary connection chamber
Junction
User Asset Specifications Class
Note: This functionality is available as a Technology Preview. To use it in APM, you must first enable feature 75. In the Enterprise window, select the Features view and the Enabled Features tab. Click Browse, select “Support for user asset specifications”, and click OK. If APM is running as a smart client, click Refresh Enabled Features on the server. Then restart the client to use the functionality.AWEIS – Asset Change Requests
Equipment Removal Requests
Asset Properties Change Requests
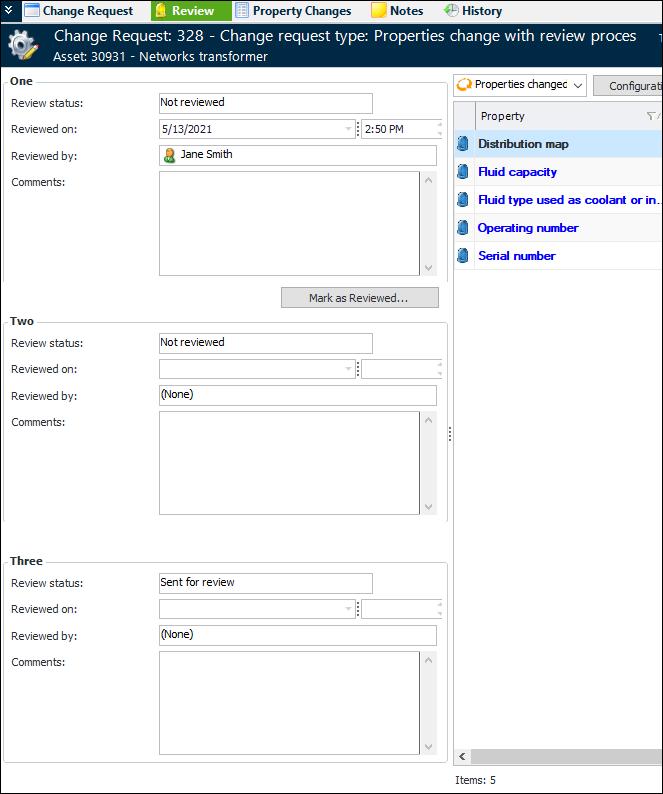
When the review process is active for a properties change request, all levels of review (up to three) are displayed in the Review view at the same time. Here is an example with three levels:Asset Status Available on Properties Change Requests
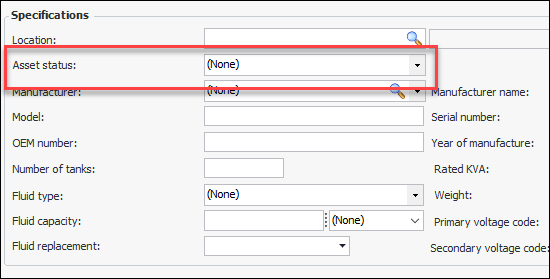
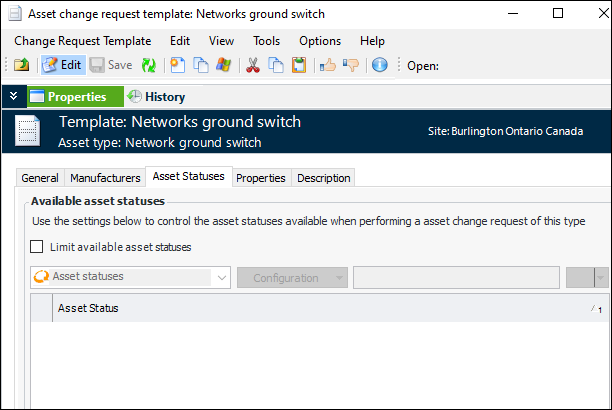
For distribution network assets, the New Properties Change Request window, Change Request tab now includes the Asset status selection list. For example:You can limit the asset statuses available in the list in the asset change request template. Select the new Asset Statuses tab, click Limit available asset statuses, and select the statuses to use.Create Property Change Requests from Construction Form
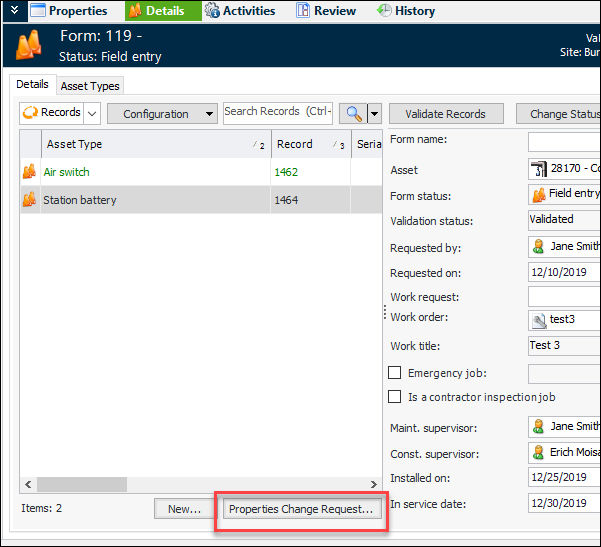
You can now create an asset properties type of change request from the Details view and tab of a validated construction form. Select the record and click Properties Change Request.The New Properties Change Request window opens with many of the construction form properties defaulted in. For more information, see Creating Asset Properties Change Requests.Construction Management
Interop Work Request Support on Construction Forms
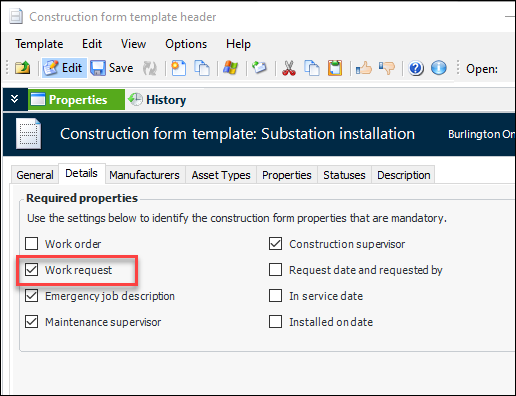
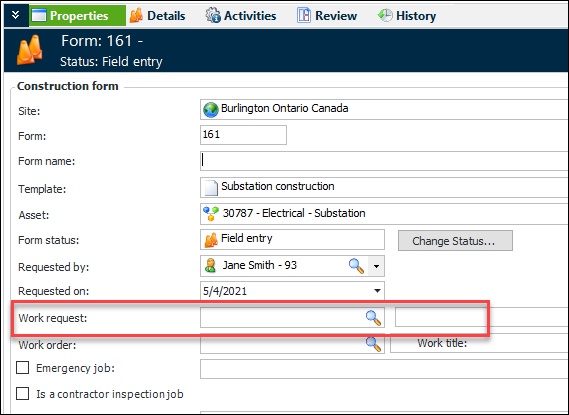
You can now make it mandatory for users to identify the interop work request on construction forms. In the Construction Form Template Header window, select the Details tab and then Work request. For example:In the Construction Form window, you can browse for interop work requests in the Properties and Details views. For example:Specifying Parents for Construction Form Detail Assets
The Parent asset options are located on the Construction Form Template Asset Type Properties window:
Making Photos Mandatory on Construction Forms
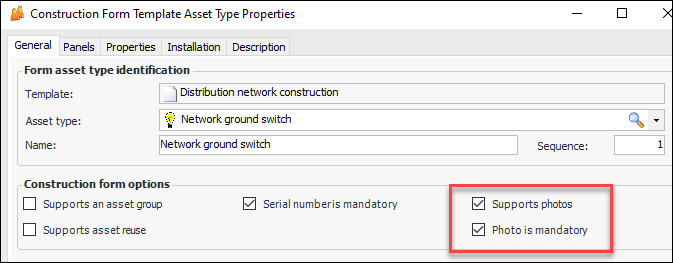
In construction form templates, you can specify that a photograph must be added to construction form details based on asset type. In the Construction Form Template Asset Type Properties window, General tab, select Supports photos and Photo is mandatory. For example:Construction Form Activities: Photos and Attachment Tabs
Open the Construction Form window and select the Activities view to find the Photos and Attachments tab. These tabs display all of the photos or attachments related to the construction form details.Inspection Management
Display Asset Properties on Indicator Readings
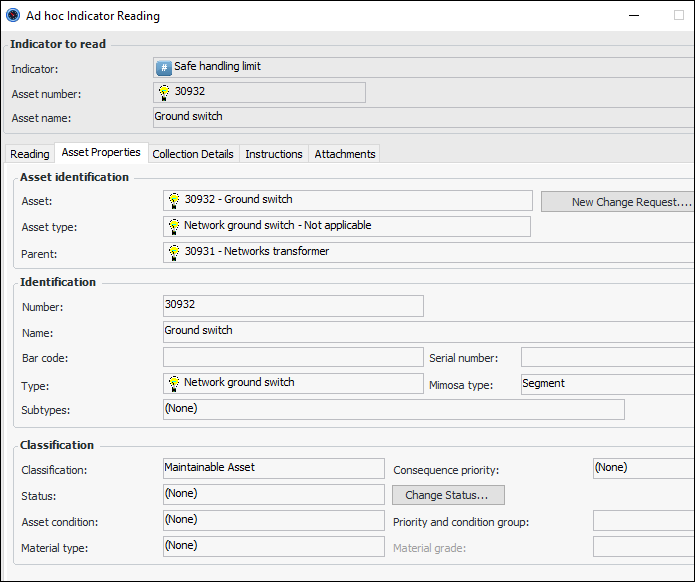
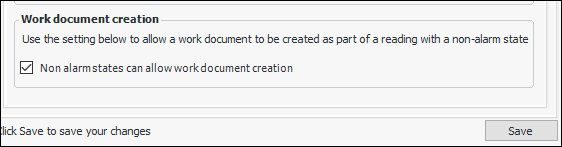
The Asset Type window provides settings to display a set of asset properties in any of checksheets, indicator readings, and requests for work. An Asset Properties view (on Checksheet) or tab (Indicator Reading and Request for Work) is added to the user interface if the asset’s asset type has enabled support for displaying asset properties.In the Asset Type window, you will find the options on the Policies tab, Assets tab at the bottom of the tab. For example:Below is an example of an indicator reading window with the Asset Properties tab. The panel assigned to the asset type is “Properties general information”.Note that, in this example, you can initiate an asset properties change request by clicking New Change Request.This example shows the Checksheet window, Asset Properties view when the panel to display is “General properties tab sub notebook”.Note: This functionality is available as a Technology Preview. To use it in APM, you must first enable feature 65. In the Enterprise window, select the Features view and the Enabled Features tab. Click Browse, select “Display asset properties on selected objects”, and click OK. If APM is running as a smart client, click Refresh Enabled Features on the server. Then restart the client to use the functionality.Work Document Creation for Non-Alarm Readings
Default Values for Requests for Work on Indicator Readings
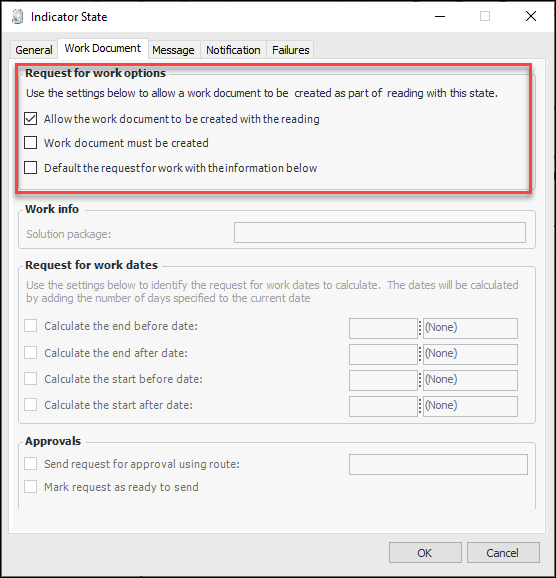
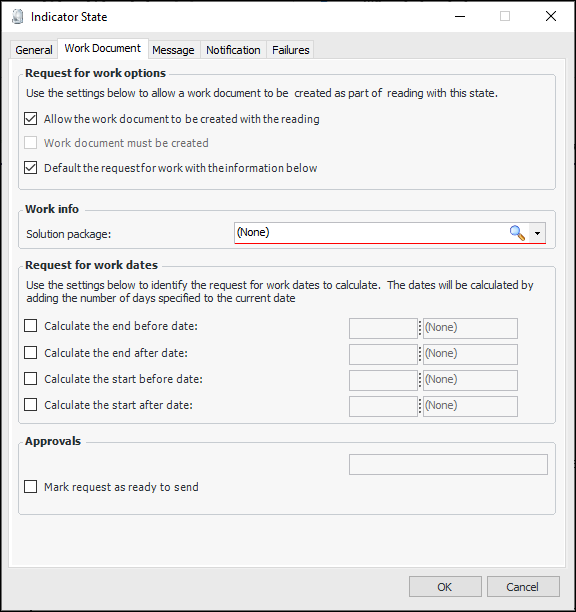
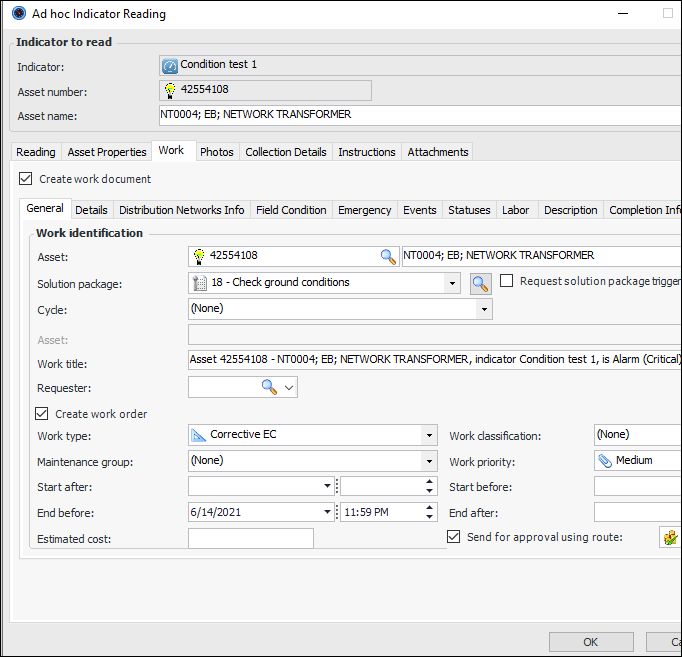
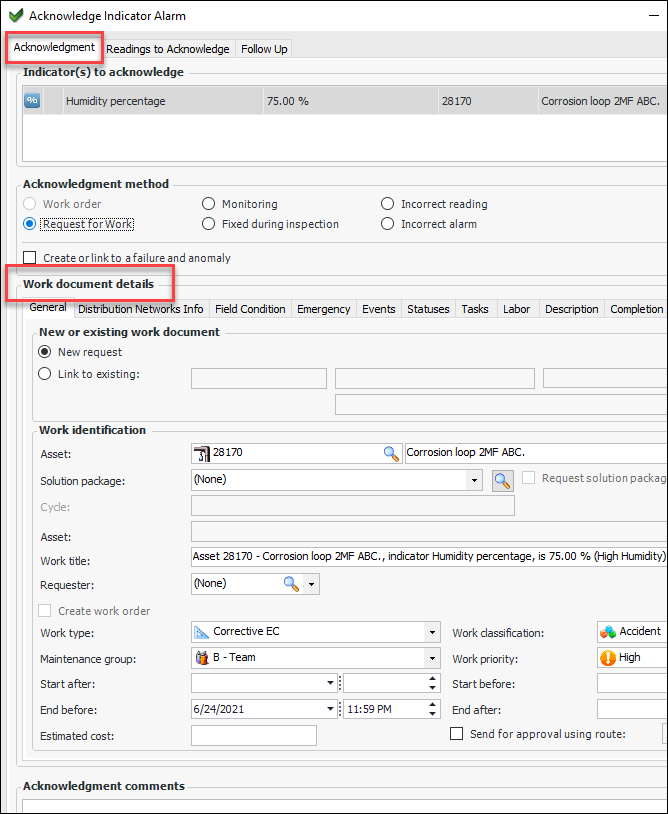
On an indicator state, you can select the Work Document tab to specify default information for the request for work. This functionality is available for alarm states and non-alarm states when the creation of work documents is allowed.In the Indicator State window, select the Work Document tab, and select Default request info for work info. For example:When you enter an indicator reading, the Work tab is available if the indicator state requires it. If work document is mandatory (on a non-alarm state), Create work document is selected and read-only. Default information from the indicator state’s default work document info and the default solution package is displayed. For example:When you are acknowledging an alarm, the Acknowledgment tab displays the Work document details area, which displays the default information for the request for work. For example:Link Checksheets to Interop Work Requests
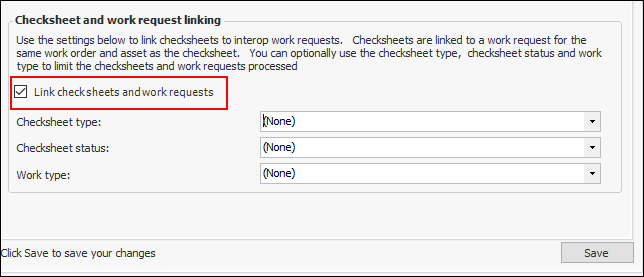
Note: This functionality is available as a Technology Preview. To use it in APM, you must first enable feature 69. In the Enterprise window, select the Features view and the Enabled Features tab. Click Browse, select “Ability to link checksheets and Interoperability work requests”, and click OK. If APM is running as a smart client, click Refresh Enabled Features on the server. Then restart the client to use the functionality.Checksheets that have been matched will have their work request references set to the matching interop work requests. In the Checksheet window, you can see this reference in the Properties view, Source tab.
4D Analytics – Indicator Readings
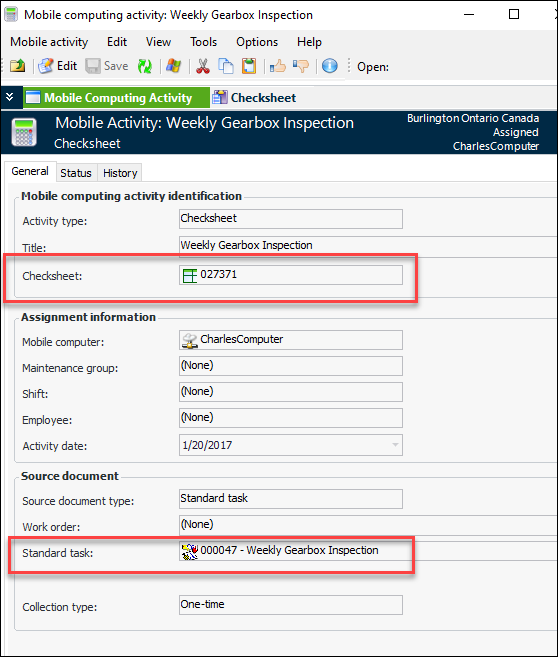
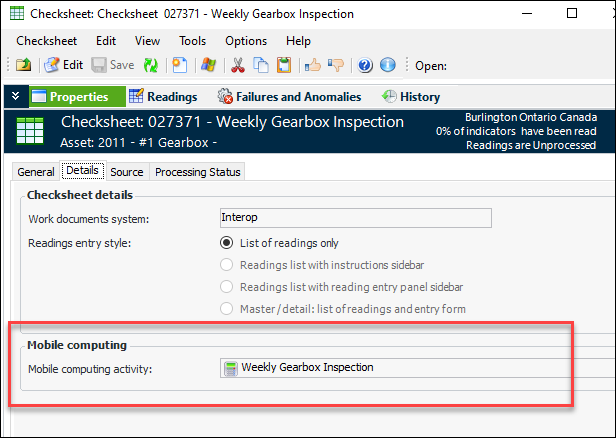
Mobile Computing– Inspections 2.0
The Checksheet window displays the mobile computing activity. In the Properties view, select the Details tab: