|
|
What’s New in APM 7.14
Contents
APM Mobile Inspections
In the Enterprise window, click the Administration menu and then Application Settings. In the Application Settings window, the new Mobile Computing tab displays the Allow switch mobile computer option, which is selected by default. Clear the option to prevent users from selecting mobile computer definitions that are not assigned to their maintenance groups.APM Workflows
Asset Management
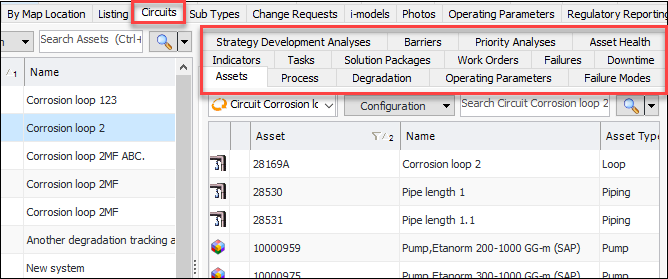
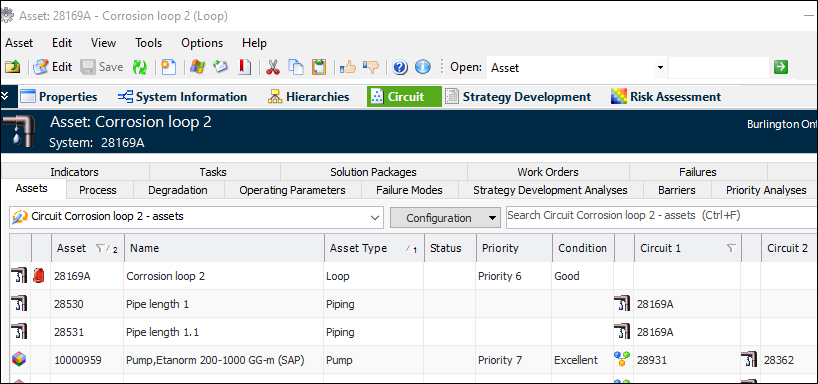
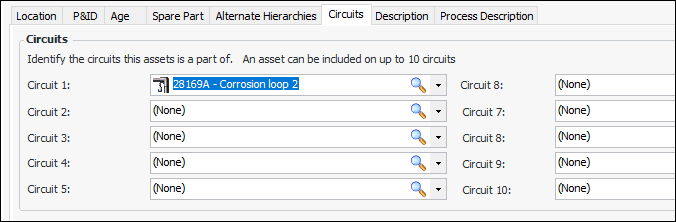
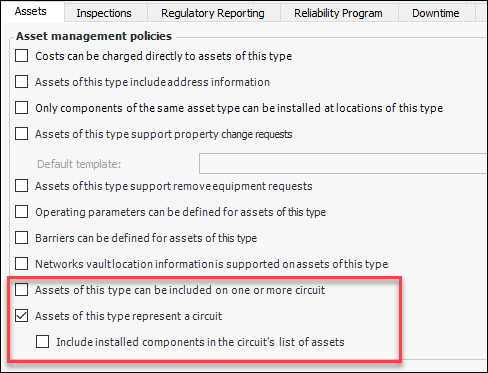
Asset Circuits
Asset Properties for Electricity Transmission and Distribution Networks
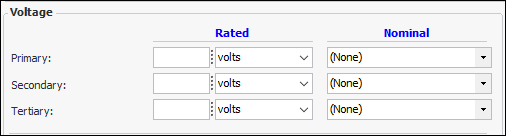
This release introduces asset properties and specifications related to electricity transmission and distribution. Some of the properties appear in the Asset window’s Properties view. For example, Maintenance plant is one of several new properties on the Details tab.Other properties depend on the asset type’s settings, including the subtypes and specifications assigned to the type. For example, assets with the asset type “Distribution network - Transformers” typically display the Vault Info tab on the General tab and the Address tab. The Specifications tab displays transformer data, such as manufacturer, fluid type, and primary voltage.General Properties
Vault Information
Specifications – Value Lists and Panels
In the site’s Assets view, click the Settings tab and then the Distribution Network Specifications tab to work with the new value lists. The following values are available.
Asset Specifications – Electrical Substations
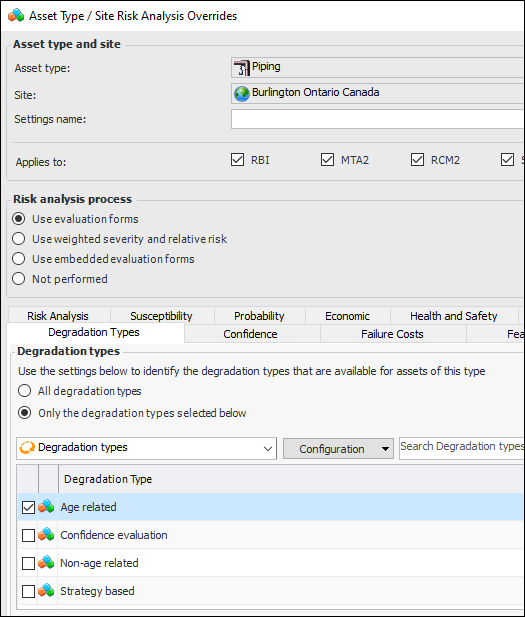
Asset Type Determines Degradation Types
AWEIS — Asset Change Requests
Note: This functionality is available as a Technology Preview. To use it in APM, you must first enable feature 55. In the Enterprise window, select the Features view and the Enabled Features tab. Click Browse, select “Ability to request changes to an asset properties outside of a construction form”, and click OK. If APM is running as a smart client, click Refresh Enabled Features on the server. Then restart the client to use the functionality.Asset Change Request Process
Asset Change Request Template
Approval and Review Processes
Note: Support for approving or reviewing asset change requests is available as a Technology Preview. To use it in APM, you must first enable feature 56. In the Enterprise window, select the Features view and the Enabled Features tab. Click Browse, select “Review or approval support for asset change requests”, and click OK. If APM is running as a smart client, click Refresh Enabled Features on the server. Then restart the client to use the functionality.Setting up New Asset Change Request Functionality
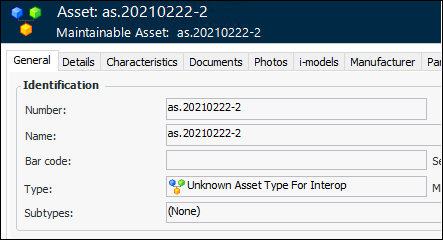
AWEIS — Asset Type
AWEIS — Automatic Site Creation
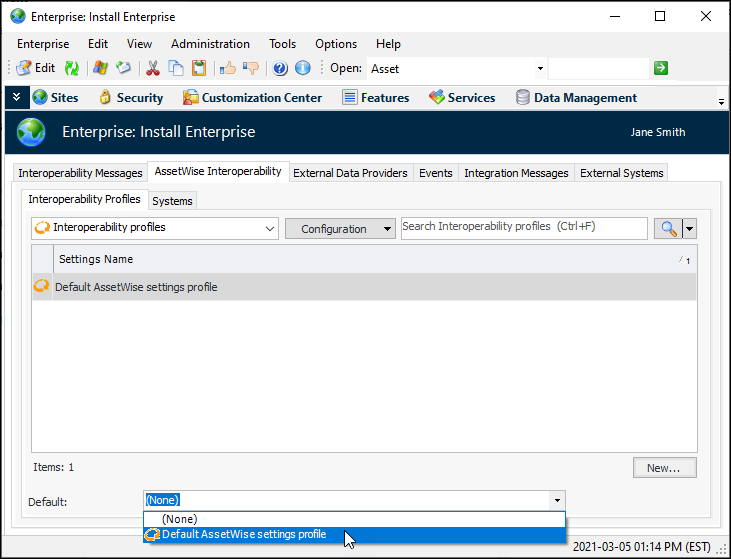
For this functionality to work, at least one AssetWise interoperability system must have been defined in APM. For more information, see Setting up AssetWise Interoperability Systems.In the Enterprise window, select the Integrations view, AssetWise Interoperability tab, and Interoperability Profiles tab. Ensure that editing is enabled. Select the default profile at the bottom of the window. For example:AWEIS — Outbound Events
Proposed, Actual, and Hypothetical Events
Enable Two or More Interop Event Packages
For More Information
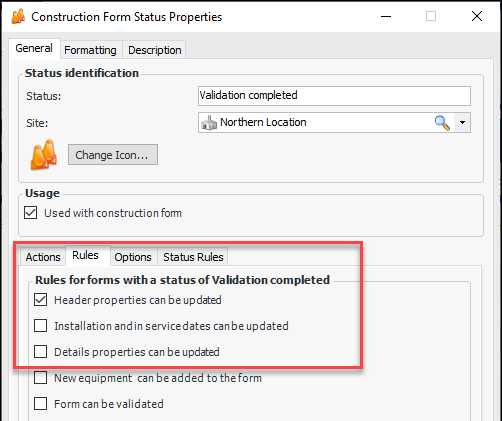
See Setting up APM Outbound Events for information about enabling outbound events at the site level, configuring the server instance, setting up the service provider, and setting event handler options. The topic also explains how to set up custom interface packages and event handlers.For information about creating a topic and connection component so that AWEIS can receive APM events and convert them to SyncEvents, see “Setting up APM Outbound Events” in AssetWise Interoperability Setup Guide.Construction Management – Form Status
The options have been added to the Rules tab:Inspection Management
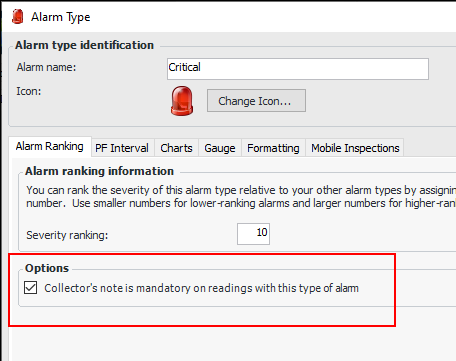
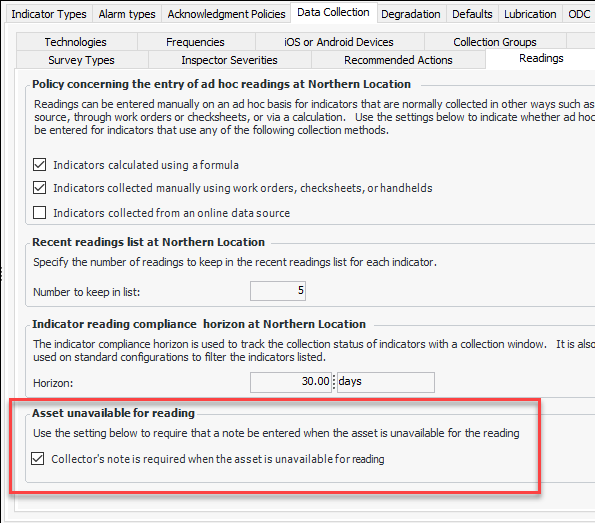
Indicators – Mandatory Collector’s Notes
Note: This functionality is available as a Technology Preview. To use it in APM, you must first enable feature 60. In the Enterprise window, select the Features view and the Enabled Features tab. Click Browse, select “Collectors note mandatory based on type of alarm and marking asset as unavailable for reading”, and click OK. If APM is running as a smart client, click Refresh Enabled Features on the server. Then restart the client to use the functionality.
Indicator Readings – Baseline Tab
The Baseline tab has been added to indicator reading windows and checksheets to allow users entering readings to see the indicator’s baseline reading. The tab is available for numeric indicators where the indicator type supports baseline readings and the indicator has a baseline reading. This functionality is available on APM and APM Remote.Calculated Indicators – Metrics
On the Site window, select the Analytics view and the Calculated Indicators tab. The configuration list provides these ways to view the information:
Regulated Gas Management
Server and Client Management — Service Monitor
For more information, see “Setting up APM Service Monitor” in APM Installation Guide.Strategy Development Analysis
Version 7.13 introduced support for larger risk matrix sizes. At that time, you had to enable an option at the enterprise level in the Application Settings dialog to create large risk matrices. As of version 7.14, this step is no longer required and the Strategy Development tab has been removed from Application Settings.Note: To use this functionality in APM, you must first enable feature 47. In the Enterprise window, select the Features view and the Enabled Features tab. Click Browse, select “Support large risk matrices”, and click OK. If APM is running as a smart client, click Refresh Enabled Features on the server. Then restart the client to use the functionality.Subscription Entitlement Service (SES) Licensing
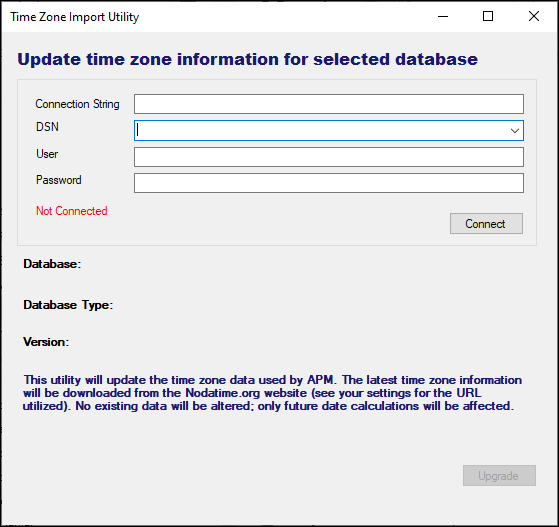
For more information, including how to install CONNECTION Client, see the Bentley Communities page Licensing and Activation Wiki.For information specific to APM, see “Activating APM with SES Licensing” in APM Installation Guide.Time Zone Data — Importing
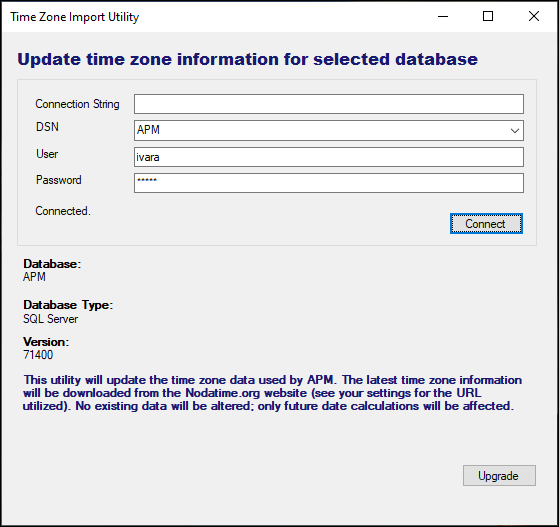
To Run the Time Zone Import Utility
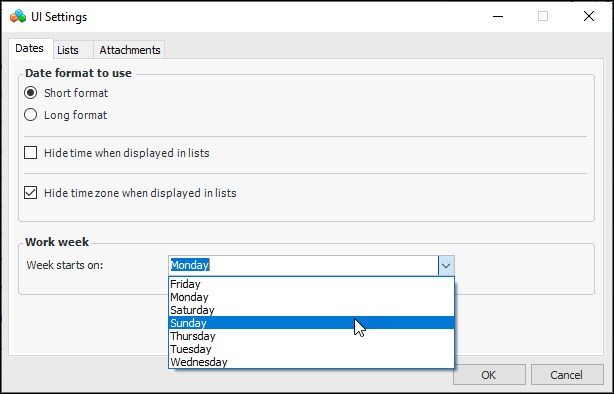
User Interface Settings — First Day of the Week