|
|
What’s New in APM 7.12.3
Contents
AWEIS – Characteristic Classes – Defaults
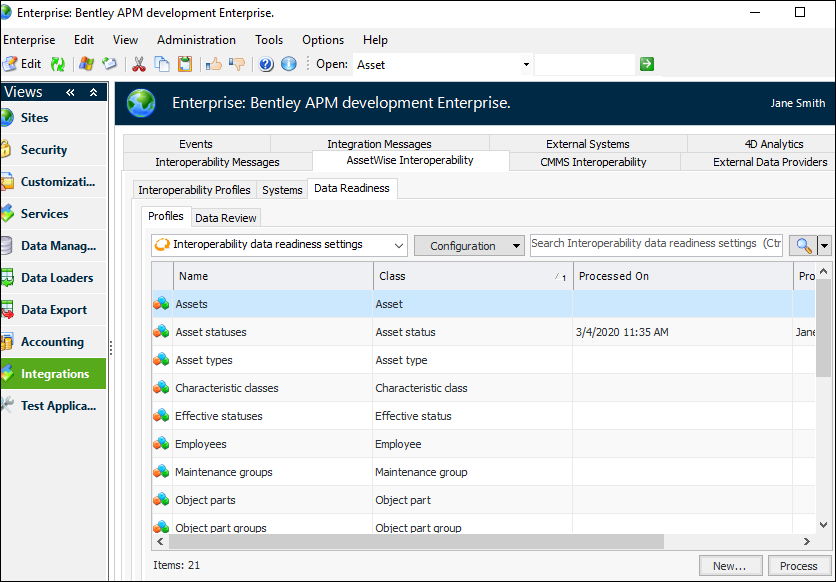
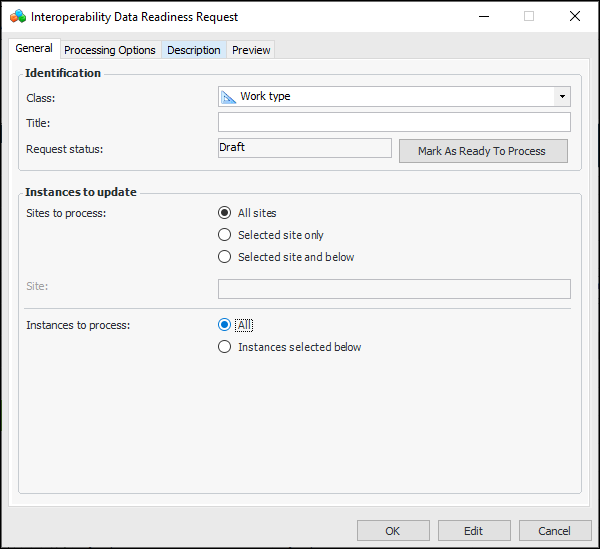
You can set default characteristic classes for each root integrated site in work management and asset settings. For detailed information, see APM Upgrade Guide.AWEIS – Interoperability Data Readiness
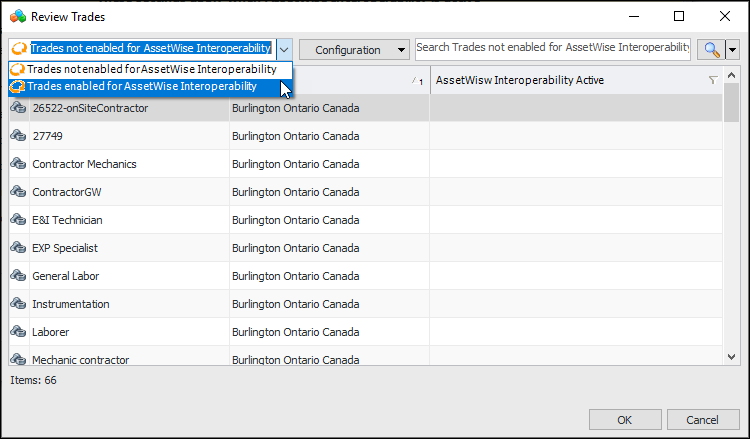
Selection List Restrictions
Click Review for any value type to see items that are – or are not – enabled for interoperability. For example:AWEIS – Site Integration between APM and CMMS Instances
Data Loading
Asset Operating Parameters
Note: This data loader is available as a Technology Preview. To use it, enable feature 37. In the Enterprise window, select the Customization Center view, Enabled Features tab. Click Browse, select “Data loader for asset operating parameters”, and click OK. If APM is running as a smart client, click Refresh Enabled Features on the server. Then restart the client to use the functionality.Asset Warranties
Note: This functionality is available as a Technology Preview. To use it in APM, enable feature 38. In the Enterprise window, select the Customization Center view and the Enabled Features tab. Click Browse, select “Data loader for asset warranties”, and click OK. If APM is running as a smart client, click Refresh Enabled Features on the server. Then restart the client to use the functionality.Assets – Additional Information
Indicators
Standard Tasks
Standard Task Indicators
Work Order Tasks
Integration with AssetWise 4D Analytics
Procurement
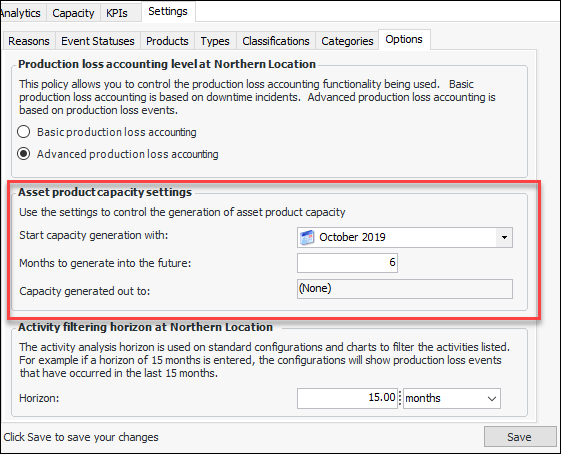
Production Loss Accounting
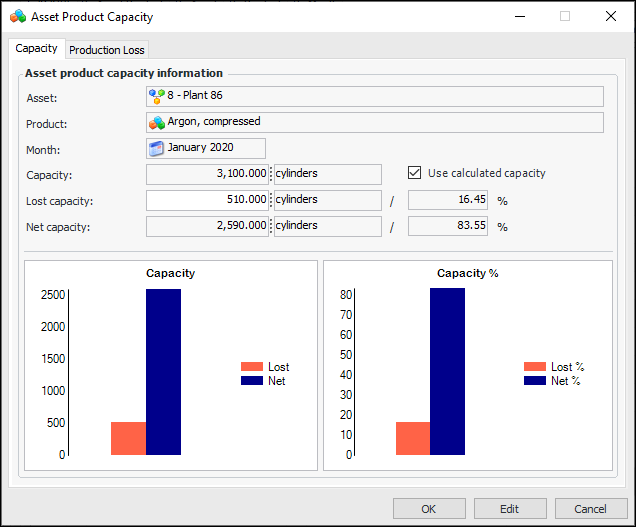
Note: To use this functionality in APM, enable feature 34. In the Enterprise window, select the Customization Center view and the Enabled Features tab. Click Browse, select “Advanced production loss accounting”, and click OK. If APM is running as a smart client, click Refresh Enabled Features on the server. Then restart the client to use the functionality.Asset Product Capacity by Month
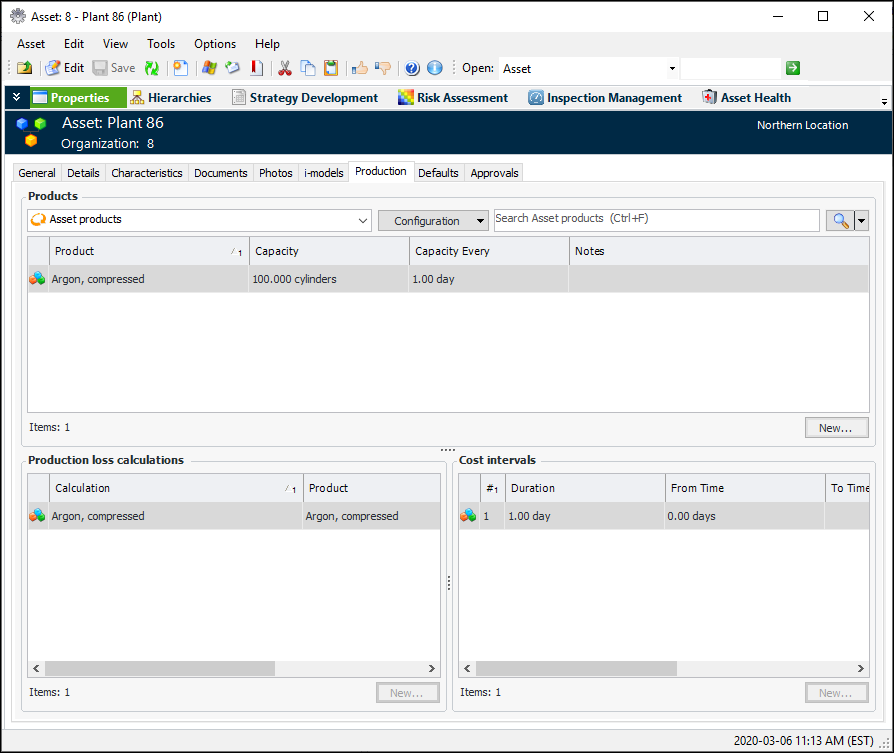
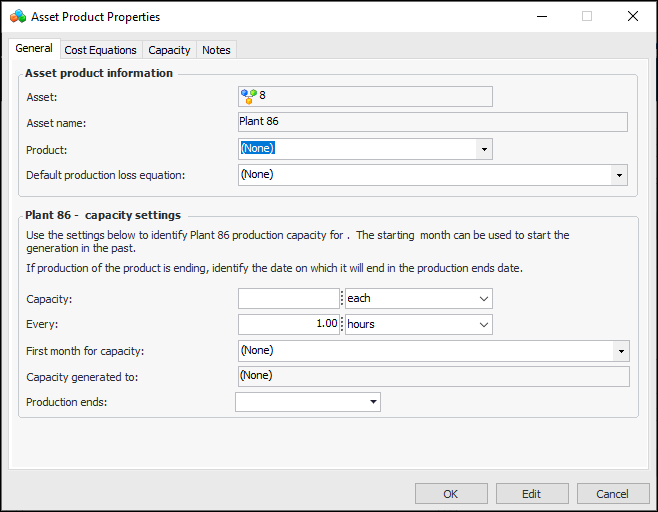
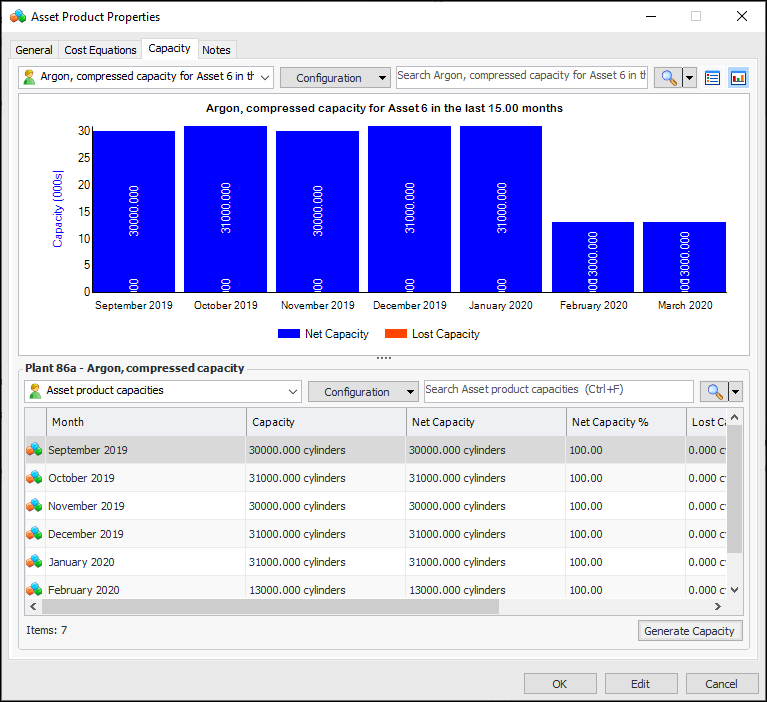
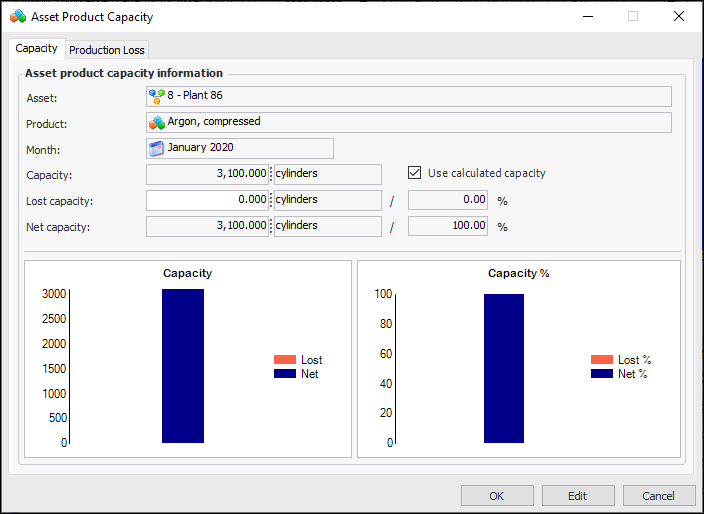
To define capacity settings, open the Asset window and select the Properties view, Production tab. For example:Click New to add a product to the asset.Select the product and default production loss equation. (You can create equations once the asset product has been saved. Select the Cost Equations tab.) In the Capacity settings area, fill in the following:
Production Loss and Asset Product Capacity
Production Loss Costs
Regulated Gas Management
Gas Transaction Site
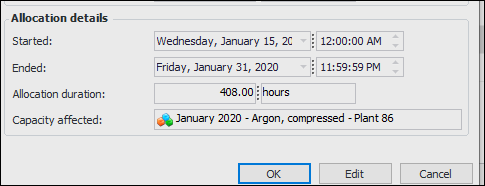
Calculating Transaction Weight when a Transaction is Back-Dated
In the Gas Transaction window, if the performed-on date/time is prior to the container’s most recent transaction, Transaction gas weight is replaced by the message “Calculation pending”. When you click to OK to save the transaction and close the window, the transaction gas weight is calculated and the transaction tables and window are updated. This allows APM to ensure that the most recent performed-on date is taken into consideration.If you wish to confirm gas transaction weights, you can select one or more transactions in any tab under the Transactions tab. Then right-click and click Calculate Transaction Quantity.Add Attachments to Gas Containers
You can now add, view, and delete attachments on gas containers. In the Container window, click the Tools menu, Attachments, and then the action you wish to perform.Set Most Recent Transaction Date
On the Site window, select the Regulated Gas Management view and either the Containers tab or the Transactions tab, By Container tab. Select one or more containers in the table, right-click, and click Set Most Recent Transaction. This command is also available in the Tools menu in the Container window.Supported Software
Database Software
Microsoft® Windows Operating System
For a complete list of supported software, see APM Installation Prerequisites.Work Management
Work Management with AWEIS
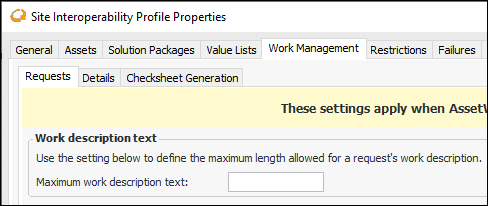
Open the Interop work order dialog, click the Tools menu, and then Reset Solution Package Evaluation Status. The next time that the Create Work Order Checksheets function is executed for the site (Tools menu, Inspection Management, Create Work Order Checksheets), checksheets are created for only the new standard tasks in the solution package.Limiting Work Description Text
Set this option in the Site Interoperability Profile properties window. Select the Work Management tab and the Requests tab. For example: