|
|
What’s New in APM 7.12.2
Contents
Asset Management with AWEIS
Mimosa Asset Type Property
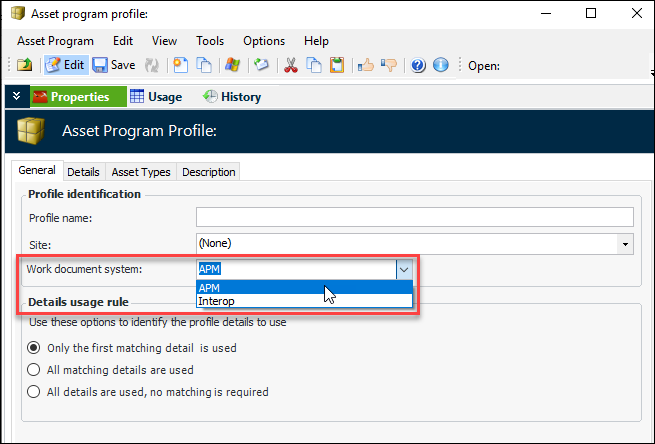
Asset Program Profiles
Asset Prioritization Analysis
Asset Change Requests
Flagging Analyses as Inactive
You can now mark an asset prioritization analysis as inactive, which prevents it and its assets from being edited. The Worksheet view is not displayed in the Asset Analysis window of inactive analyses.AWEIS Setup and Activation
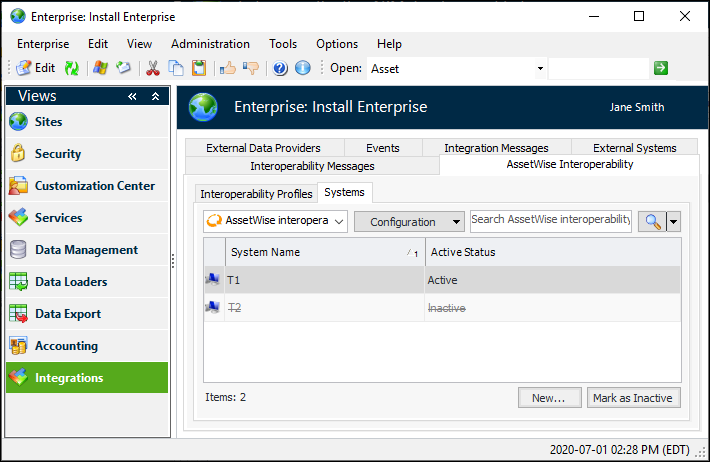
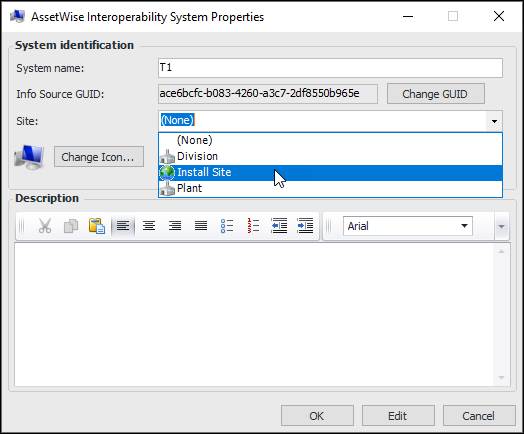
Adding an AssetWise Interoperability System
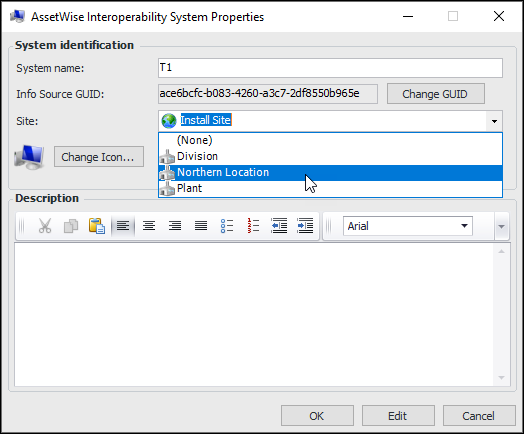
You can add an AssetWise interoperability system from the Enterprise window, Integrations view, AssetWise Interoperability Systems tab. This tab displays the active and inactive systems for your implementation. For example:When you click New, the AssetWise Interoperability System Properties dialog appears. Give the system a name and select the appropriate site. For example:If you wish to support interoperability with more than one CMMS in the future, create one or more value list controls and assign them to sites. For more information, see Site Value Lists.Construction Management
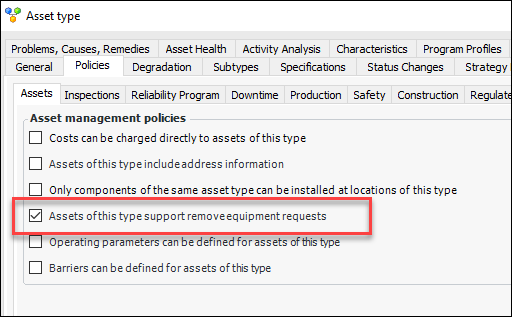
Asset Change Requests
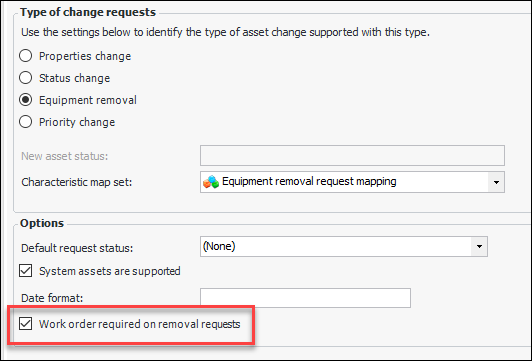
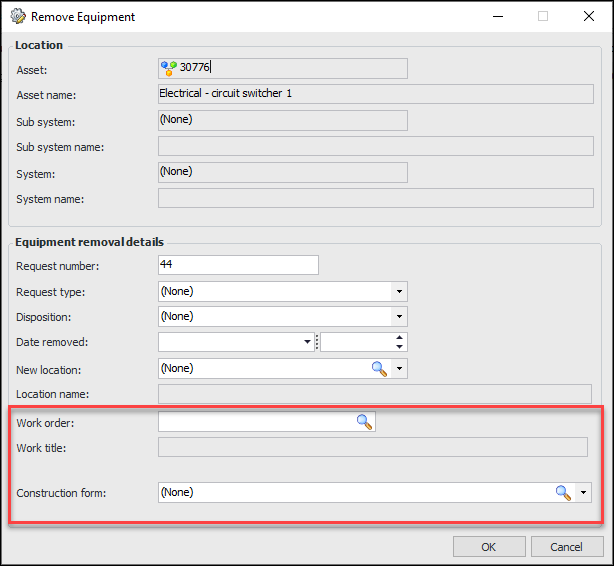
Equipment Removal Requests
You can now add a work order and construction form in the Remove Equipment dialog. For example, in the Asset window, click the Tools menu and then Request Equipment Removal.Failure Tracking with AWEIS
Failure Records Created from Interop Work Documents
Note: To enable these new features, open the Enterprise window, select the Customization Center view and the Enabled Features tab. Click Browse, select “Failure creation from Interop work requests and orders,” and click OK. If APM is running as a smart or remote client, click Refresh Enabled Features on the server. Then restart the client to use the functionality in the product.Failure Statistics for Failure Codes
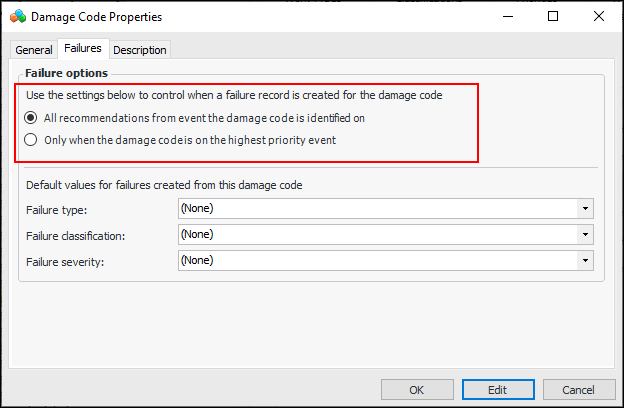
CMMS Information on Failure Records
In work management settings, select the Work Management tab, Object Parts tab, and then the Damage tab. Open the Damage Code Properties dialog and select the Failures tab to set options that specify when failures are created:Failure Modes Provide Failure Codes
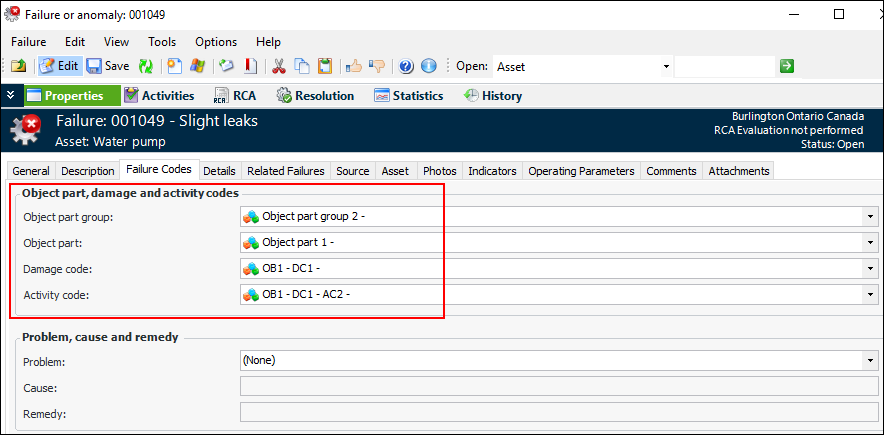
When a failure record references a failure mode, information from the failure mode is copied to the failure: object part group, object part, damage code, and activity code. In the Failure or Anomaly window, select the Properties view, Failure Codes tab to view the information.File Attachments
APM now allows only files with specified formats to be added to APM objects as attachments. All of the standard formats are accepted, from .avi to .xlsm. You can see the list when adding a file attachment. In the Open dialog, click the Supported Files list. Trying to attach a file with an unsupported format results in an error message.Inspection Management
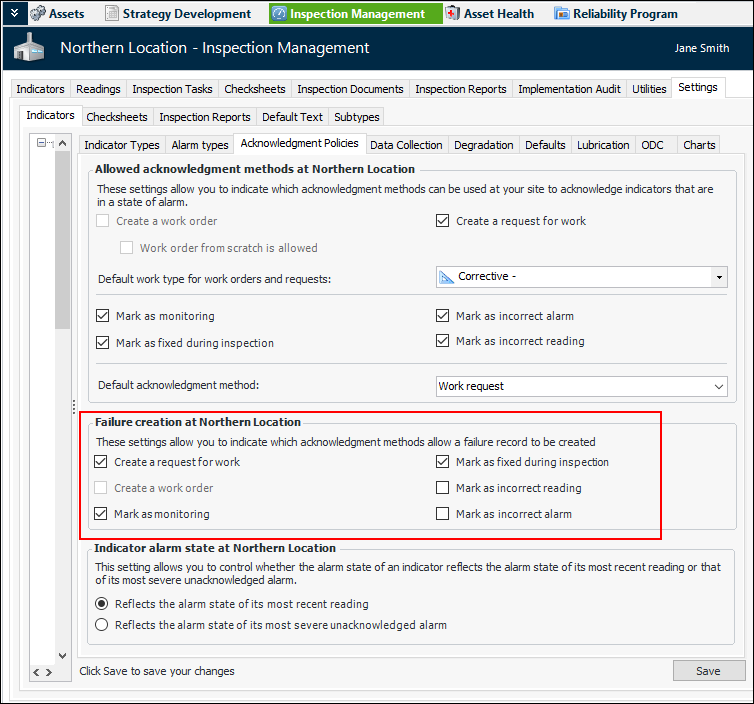
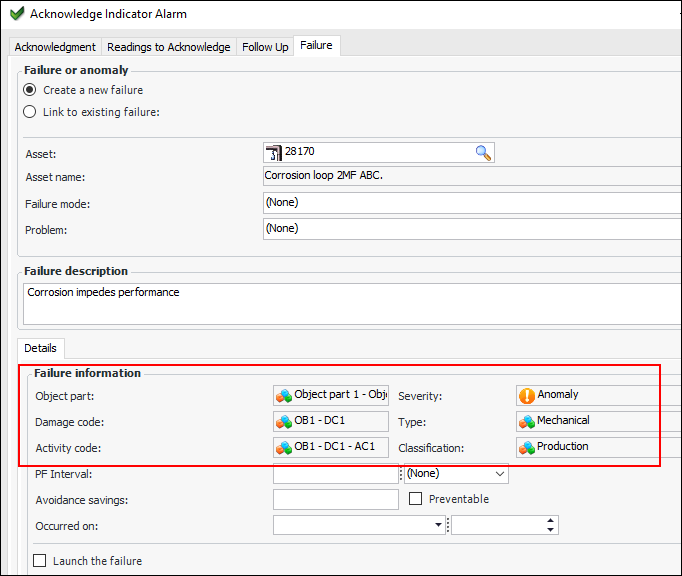
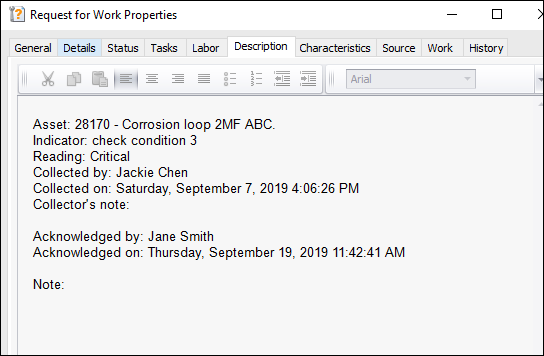
Acknowledgments and Failure Creation
Note: When AWEIS is active for the site, select Create a work request to allow failures to be created when an alarm is acknowledged with a request for work.The failure settings on the indicator’s alarm state determine whether Create or link to a failure and anomaly is selected by default in the Acknowledge Indicator Alarm window.In the Acknowledge Indicator Alarm window, select the Failure tab to view information that is copied from work document details for the highest priority event. The object part, damage code, and activity code are copied from the event. The failure severity, type, and classification are copied from the damage code. For example:Acknowledging Alarms with Requests for Work – Work Title
Corrective Candidates on Indicators
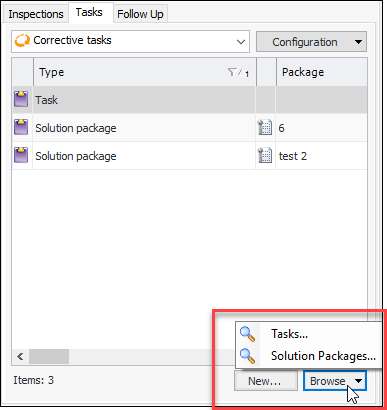
In the Indicator window, Properties view, the Jobs and Tasks tab has been renamed Candidates. This tab lists corrective jobs (when AWEIS is not active) or solution packages and standard tasks associated with the indicator.Requesting a Solution Package for an Indicator
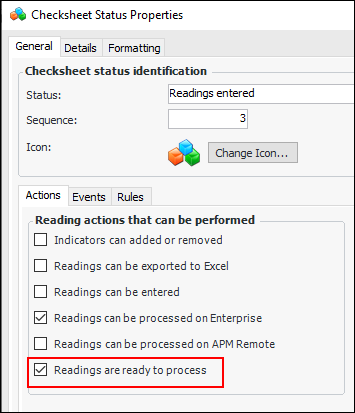
Processing Checksheets for a Site
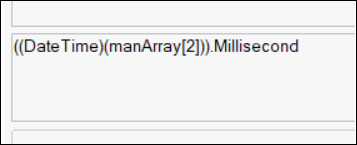
To support the function, the Readings are ready to process setting has been added to checksheet status properties:You can start the process from the Site window by clicking the Tools menu, Inspection Management, and then Process Checksheets. The progress dialog identifies the number of checksheets, which checksheet is currently being processed, and the number of checksheets that could not be processed due to errors. The dialog includes a Cancel button.An error occurs if the minimum number of readings has not been entered or mandatory readings have not been taken for the checksheet. The process creates an error object for that checksheet and then continues on to the next checksheet. You can view checksheet errors in the Checksheet window, History view, Processing Errors tab.You can define the Process Ready Checksheets scheduled action to automatically trigger the method at regular intervals. For more information, see Scheduling Actions.Calculated Indicators – Millisecond Support on DateTime
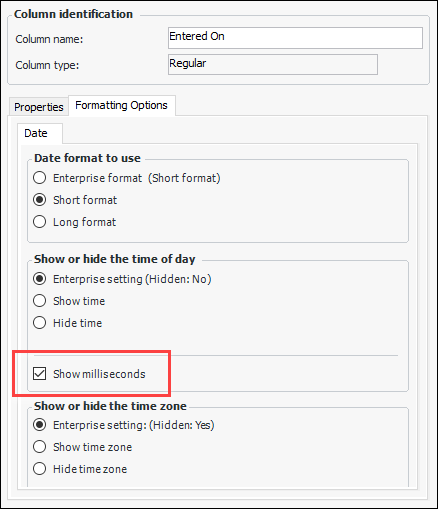
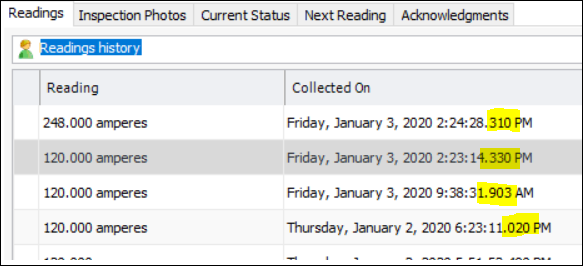
You can display milliseconds in table columns that show dates and times. In the Configuration Column window, select the Formatting Options tab and select Show milliseconds. For example:Production Loss Accounting, Advanced Version
Enable Advanced Production Loss Accounting
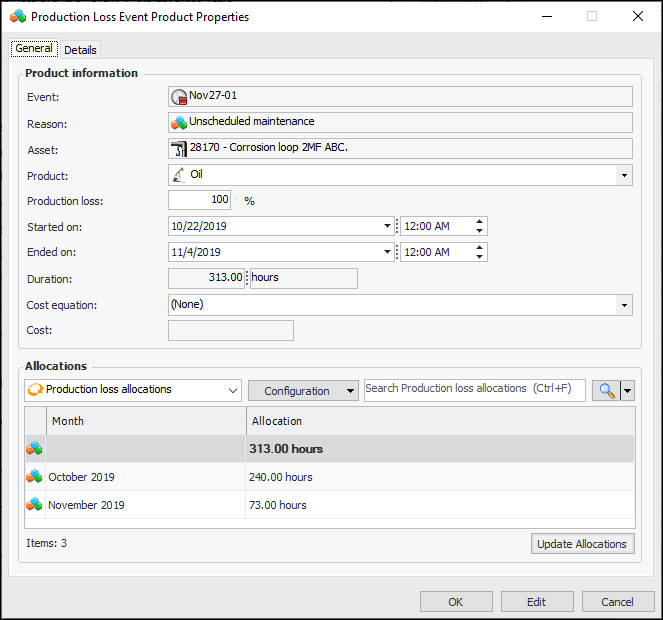
The production loss accounting level is identified on the site’s Production view settings:Define Settings in APM
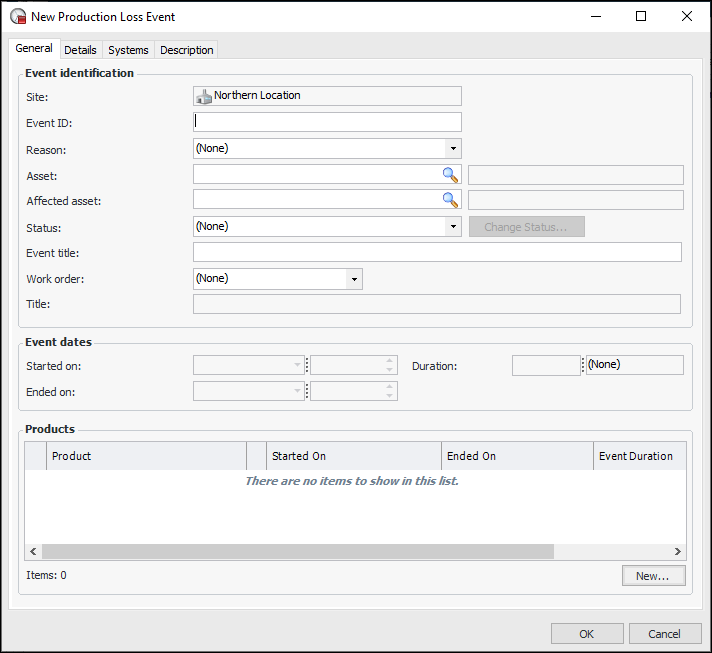
Create Production Loss Events
You can create a production loss event from the Site or Asset window, Production view, Events tab. Click New to open the New Production Loss Event dialog. For example:
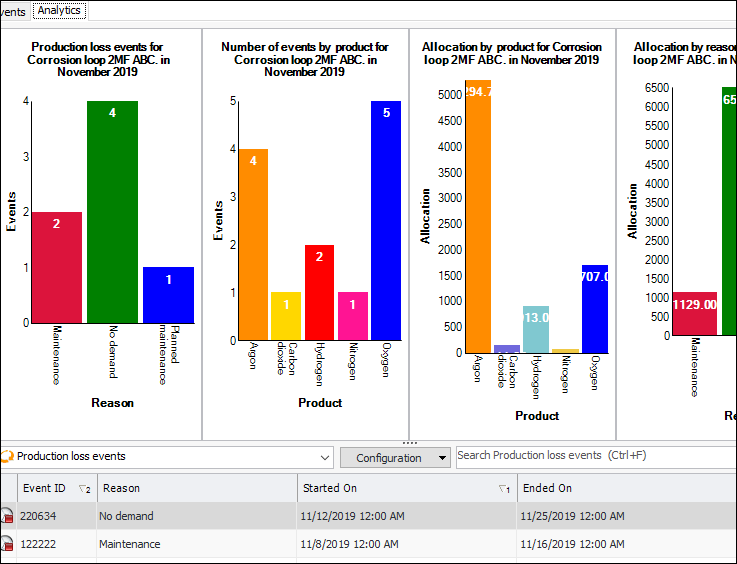
View Production Statistics
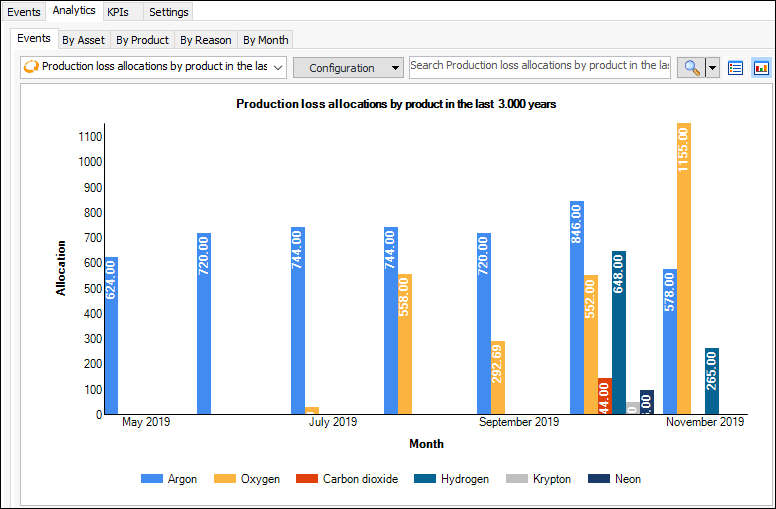
APM provides several ways to review production loss statistics. For example, the Asset window, Production view, Analytics tab displays summary charts for the current month showing production loss events by reason and product, as well as allocation hours by product and reason. For example:At the site level, select the Production view, Analytics tab for access to events, statistics by asset, product, reason, and month. Several configurations are provided on each tab to display (and export) information. For example, here is a chart view of allocations by product in the past three years:Production Loss Accounting, Basic Version
Existing data is not affected by upgrading. However, select the new Production view in the Site window to view summary charts, production loss statistics, bad actors, and KPIs. This information moved from the Performance Management view.You can continue to access downtime incidents and analytics on the Performance Management view.Regulated Gas Management – Containers
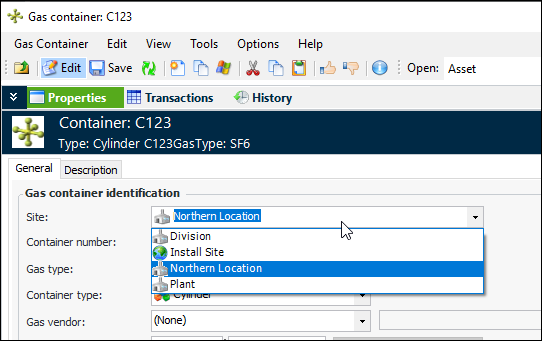
When creating or modifying gas containers, you can now set the container’s site. For example, open an existing container and enable editing. The Site list is available:To control where containers can be created, you can set up value list controls and assign them to sites. For more information, see Site Value Lists.Reliability Program – Solution Packages
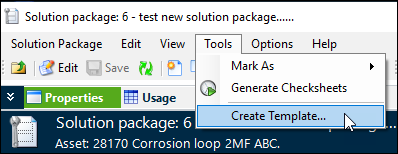
You can now create templates from solution packages. The Copy Failure Modes wizard does this automatically in some cases (see Failure Mode Copy Includes Solution Packages.)To create a template from a solution package, open the Solution Package window, click the Tools menu and then Create Template:A confirmation message appears. Click Yes to create the template. The new Solution Package window opens for the template. The source solution package is linked to the new template.Site Time Zones
Note: To enable this new feature, open the Enterprise window, select the Customization Center view and the Enabled Features tab. Click Browse, select “Time Zones by Site,” and click OK. If APM is running as a smart or remote client, click Refresh Enabled Features on the server. Then restart the client to use the functionality in the product.Changing a Site’s Time Zone
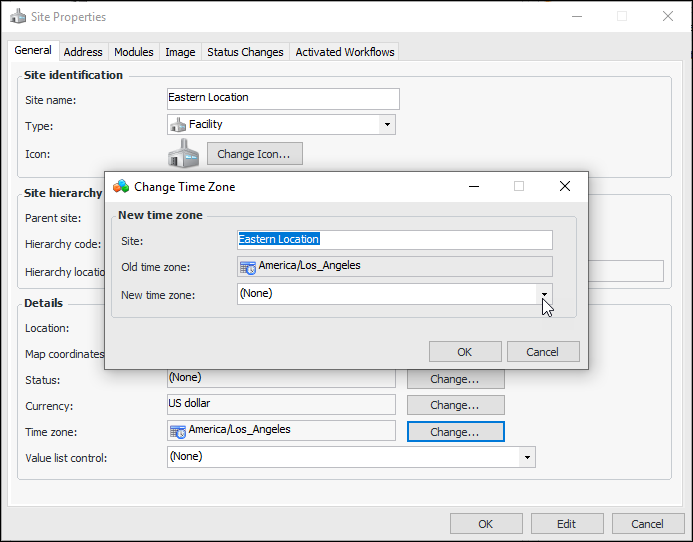
The time zone for a site can be set using its Properties dialog. Click Edit to open the properties for editing. Click Change next to the time zone. The Change Time Zone dialog appears:Select the new time zone (typically a geographical area) and click OK. When you close the properties dialog, the change is made for the site and becomes the default for child sites that have not been assigned time zones.Viewing Time Zones
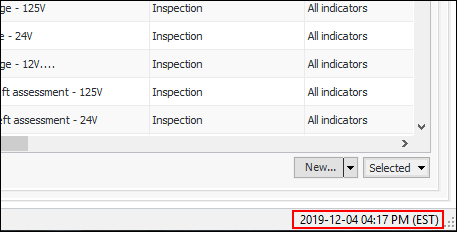
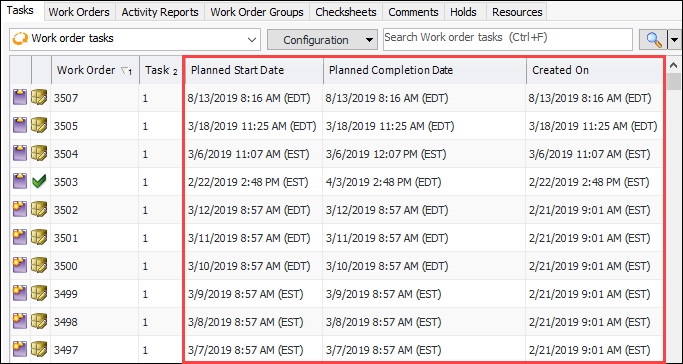
Time zones are specific to each row in the table. For example, if the Tasks tab shown above is set to “From this site and below”, work order tasks created on other sites could have different time zones.Tables that include date and time data members use the current site’s time zone for any filtering requirements. For example, in the Work Management view, Work Requests tab, the default configuration shows columns for requested completion date and the date and time closed. If you apply the “Last month” filter to one of the columns, it will be accurate to the current site’s time zone.Display Settings
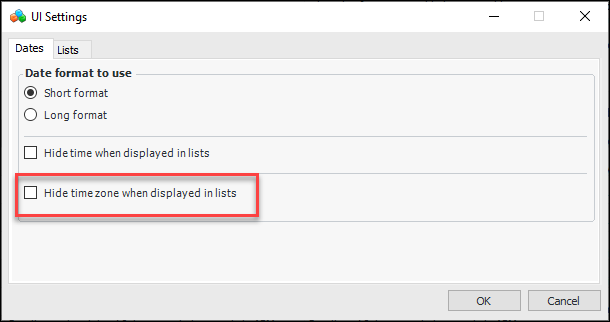
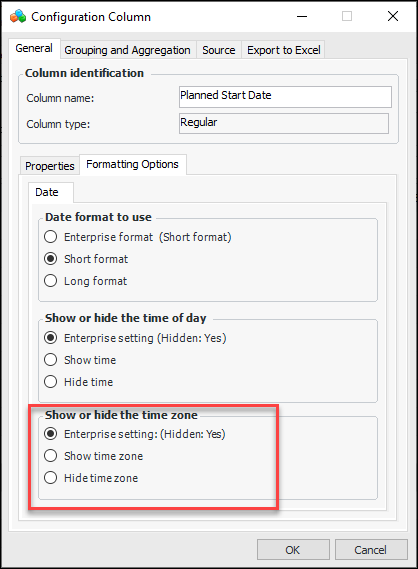
You can hide time zone abbreviations in lists. In the Enterprise window, click the Administration menu and then UI Settings. The UI Settings dialog appears:You can also set the formatting for individual columns in a table. In the Configuration Column dialog, select the Formatting Options tab:The Enterprise setting options show the default formatting that was set in the enterprise UI settings. In the example shown above, time and time zone are hidden by default (Hidden: Yes).Financial Periods
Upgrading to 7.12.2 – Site Time Zone Considerations
After you have upgraded your database, the top site retains the enterprise time zone. Child sites automatically use the parent’s time zone. You will notice in child sites’ Properties dialogs that the Time zone boxes are blank. You can change the time zones for sites that require it.For detailed information about time zone considerations when upgrading to 7.12.2, see “Site Time Zones (APM 7.12.2)” in APM Upgrade Guide.Site Value Lists
Note: If you are using AWEIS, after upgrading to 7.12.2, you must modify the existing AssetWise interoperability system by identifying the top site. You must do this whether or not you intend to implement site value lists. Otherwise, errors will occur when interoperability is enabled. See Setting up Site Value Lists.Supported Value Lists
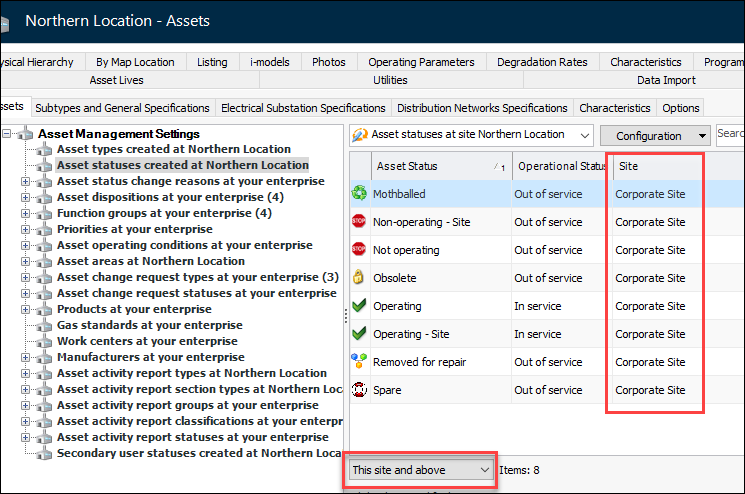
Note: Default characteristic classes have been moved from application settings to the site level. For example, to view or change the default class for asset characteristics, open the Site window and then select the Assets view, Settings tab, Characteristics tab, and then Options tab.Viewing Site Value Lists
Setting up Site Value Lists
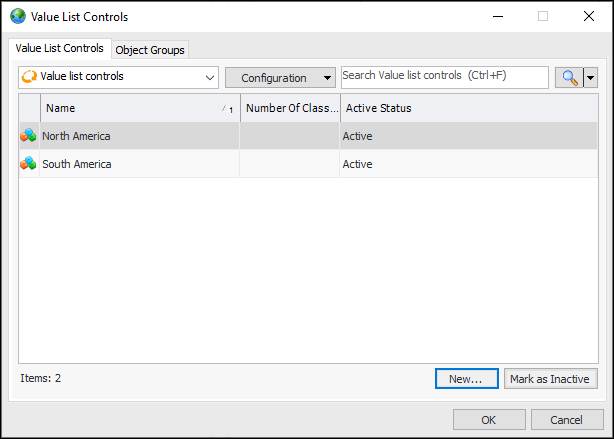
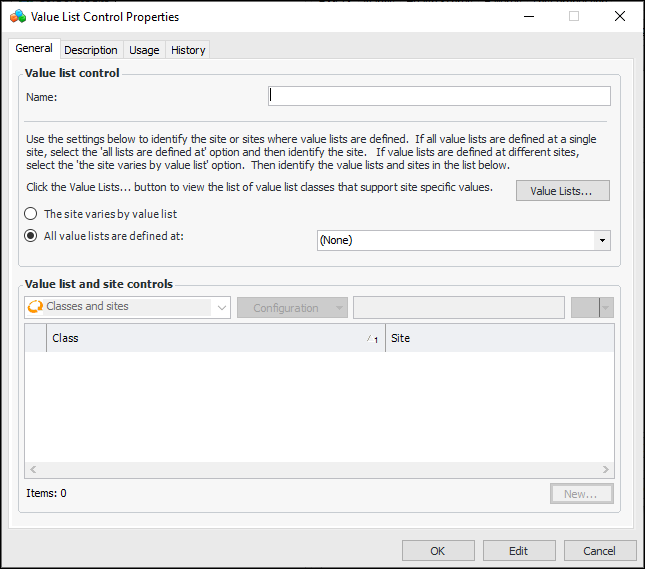
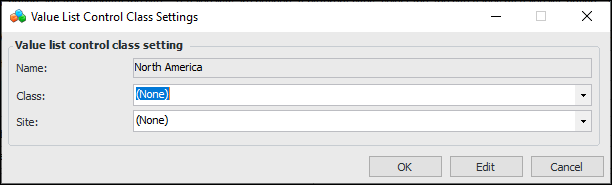
To update the AssetWise interoperability system, open the Enterprise window, select the Integrations view and then the AssetWise Interoperability Systems tab. Locate and double-click the system to open the AssetWise Interoperability System Properties dialog.In the Enterprise window, click the Administration menu and then Value List Controls. The Value List Controls dialog appears:Click New to open the Value List Control Properties dialog:
Strategy Development Analysis with AWEIS
Maintenance Action Plans – Solution Packages
Failure Mode Copy Includes Solution Packages
Unsupported Software
Note: For a complete list of supported software, see APM Installation Prerequisites.Work Management with AWEIS
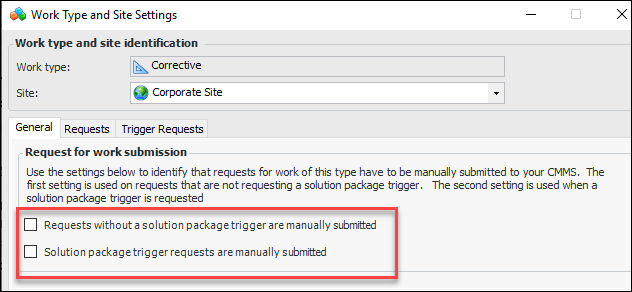
To have requests automatically marked as ready to send, create or edit a work type. In the Work Type dialog, select the Site Settings tab. Click New to create the setting.On the General tab, clear the options for manual submission. For example:Click OK. You can then assign the work type to requests for work.