|
|
What’s New in APM 26.0.0
Contents
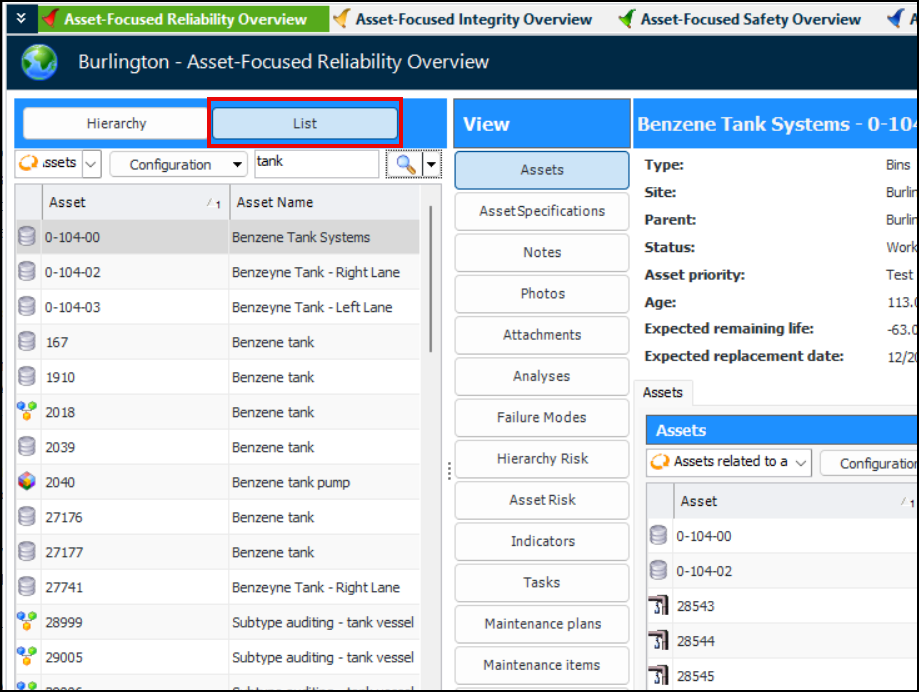
Assets – Asset-Focused Views Now Support Lists of Assets
The Reliability, Integrity, Safety, and Asset Health asset-focused overviews have been updated with Hierarchy and List buttons to provide alternate methods for selecting the asset to view. The List table allows you to search for asset names, create configurations with different filtering, include assets from different sites, and so on.Attachments
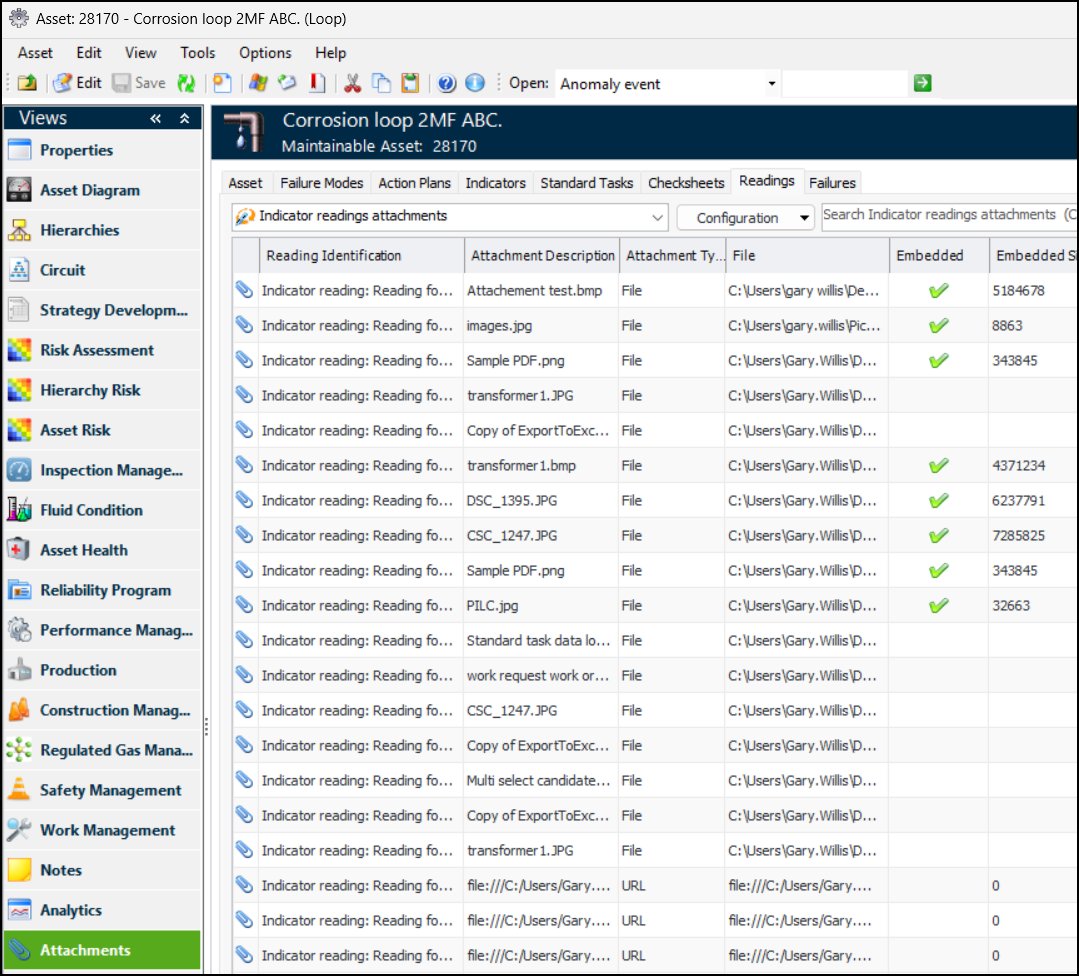
Improved Visibility of Attachments
Attachments Can Be Purged
Attachments View in the Asset Window
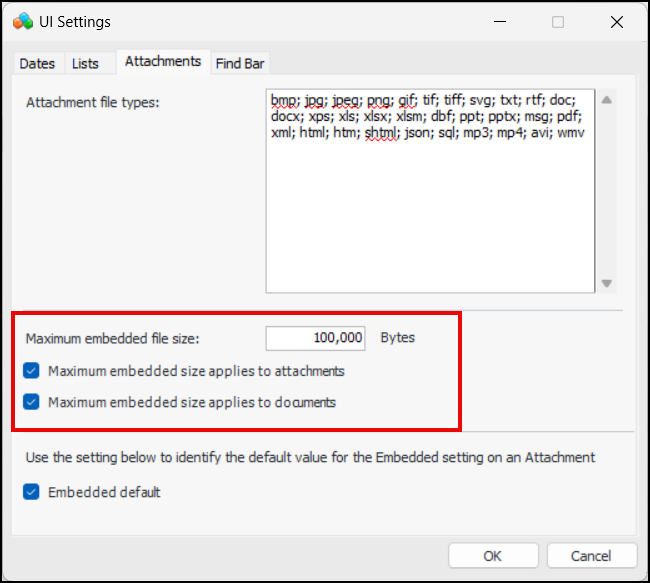
Maximum Size for Embedded Attachments
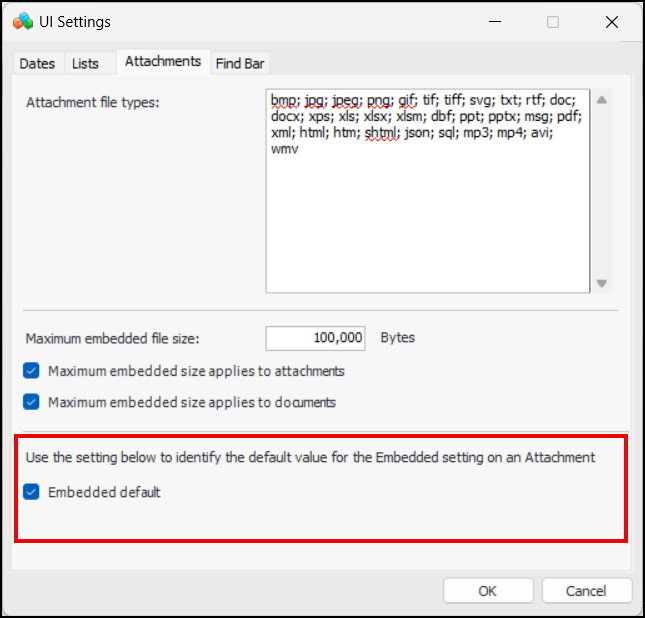
You can now set the maximum size limit for attachments that are embedded in the APM database. If the user attempts to attach a file larger than the maximum, the Embedded option is not available.Make Embedded Attachment the Default
Wherever you add an attachment to an APM object, the Embedded option will be selected by default.One Attachment Method for Photos and Documents
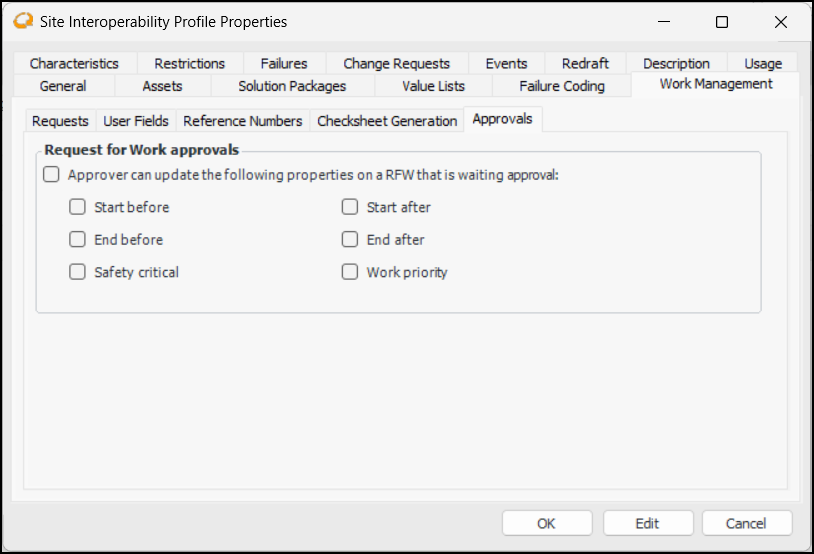
AWEIS – RFW Approvals
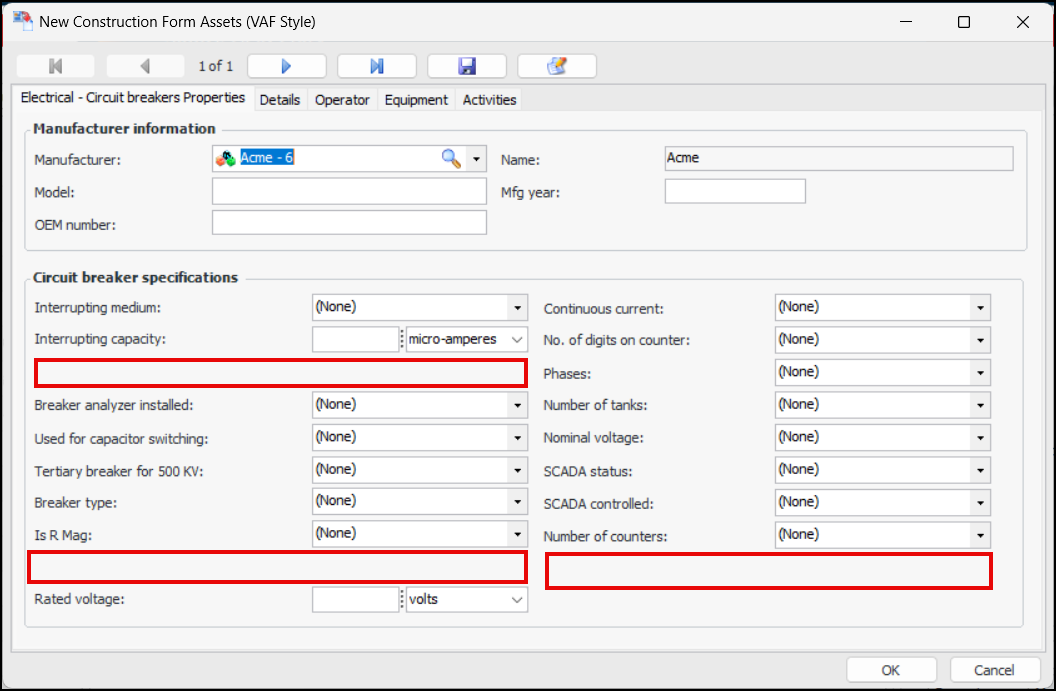
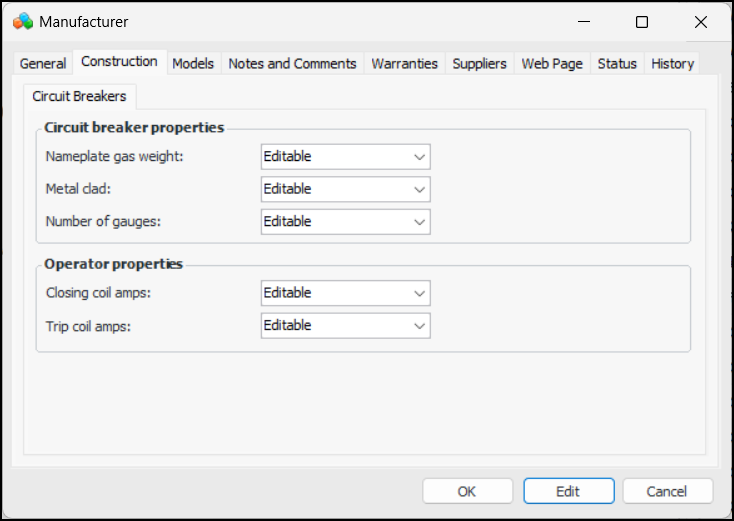
The settings are available in the site interoperability profile. In the Enterprise window, select the Integrations view, AssetWise Interoperability tab, Interoperability Profiles tab. Open the Site Interoperability Profile Properties window and click Edit.Select Approver can update the following properties on a RFW that is awaiting approval and select the properties that can be changed. Click OK to save and close the profile.Construction Form Properties Based on Manufacturer Rules
To implement this functionality, in the Site window, select the Construction Management view, Settings tab, Manufacturers tab. Open each of the manufacturers that you wish to update.
Data Loading
Standard Task Document Data Loader
Note: This data loader is available for technology preview. You must first enable feature 146 to use the functionality in APM. In the Enterprise window, select the Features view and the Enabled Features tab. Click Browse, select “Standard task document data loader” and click OK. If APM is running as a smart client, click Refresh Enabled Features on the server. Then restart the client to use the functionality.Checksheet Document Data Loader
Note: This data loader is available for technology preview. You must first enable feature 145 to use the functionality in APM. In the Enterprise window, select the Features view and the Enabled Features tab. Click Browse, select “Checksheet document data loader” and click OK. If APM is running as a smart client, click Refresh Enabled Features on the server. Then restart the client to use the functionality.Strategy Development Analyses – Inspection Task
Personnel – Employees
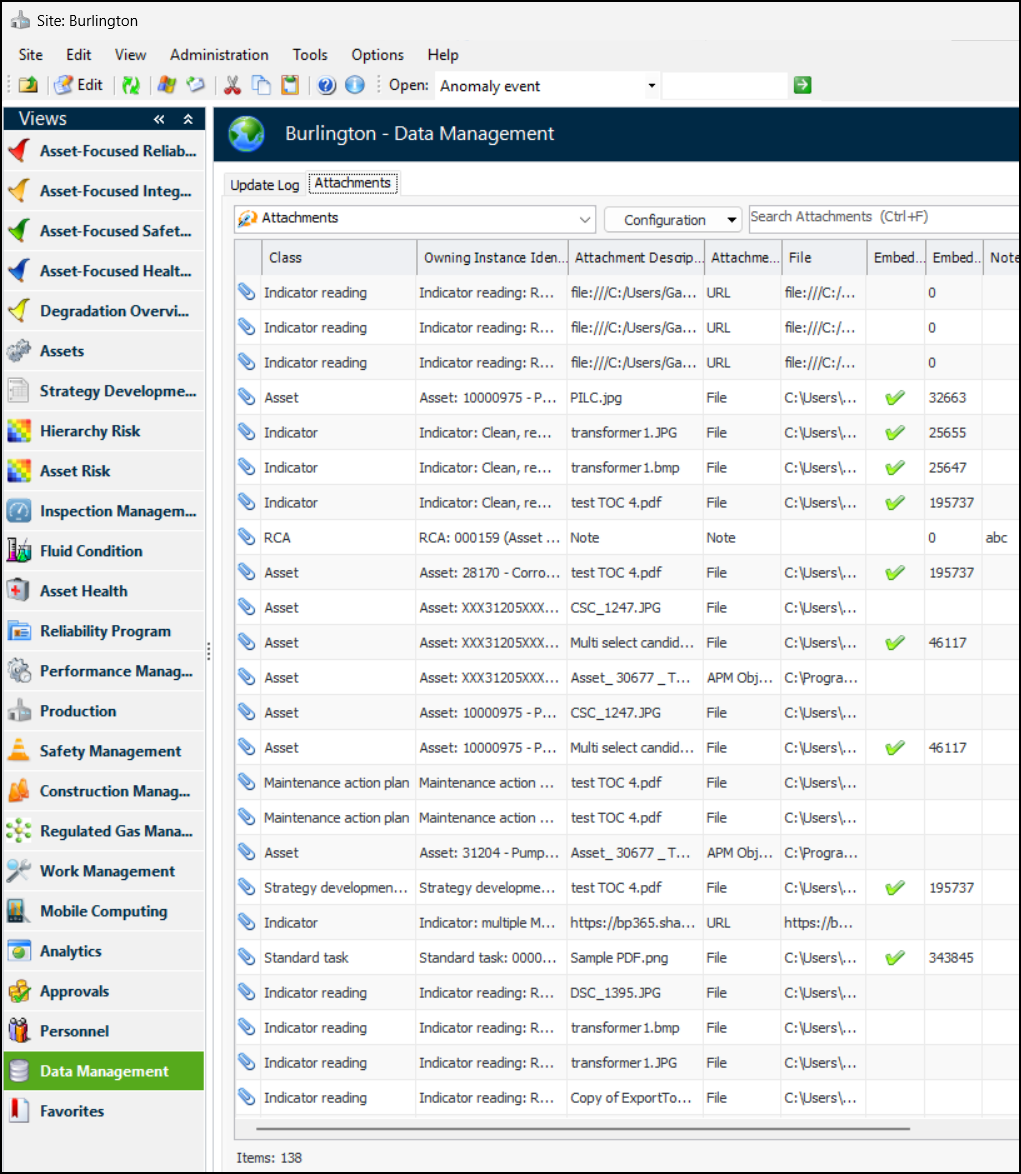
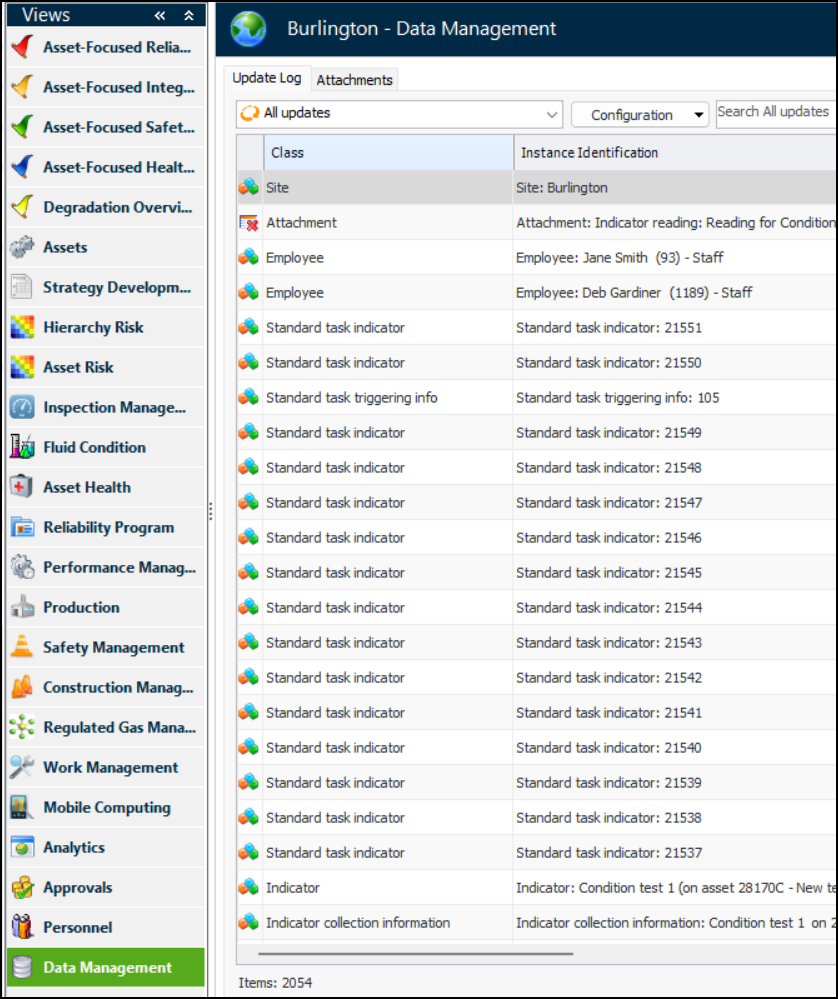
Data Management – Update Log
The new Data Management view in the Site window displays the Update Log tab, as well as the Attachments tab. The Update Log provides configurations that list:Drag and Drop
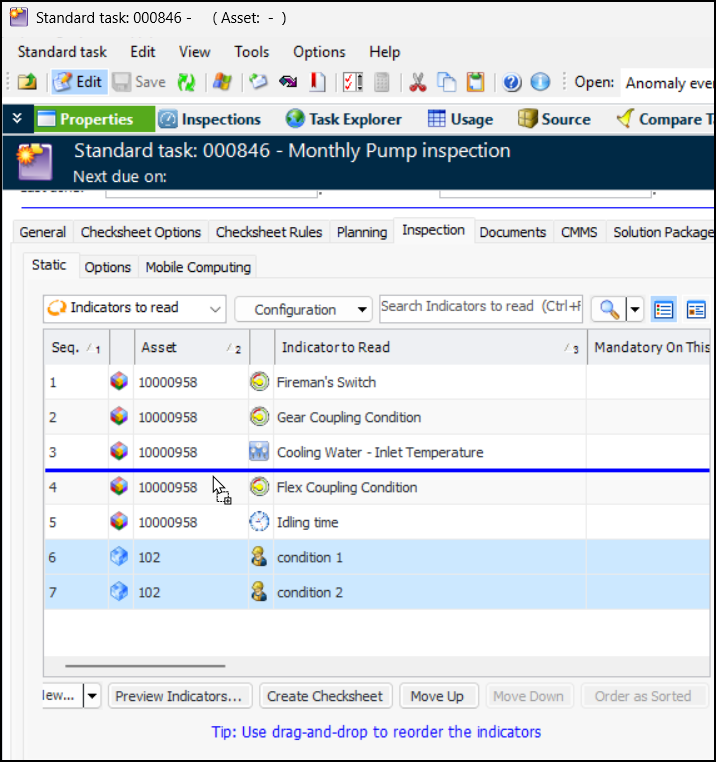
Use Drag and Drop to Reorder Indicators on a Standard Task
Drag and Drop Columns in a Configuration
Drag and Drop to Add an Indicator to an Asset
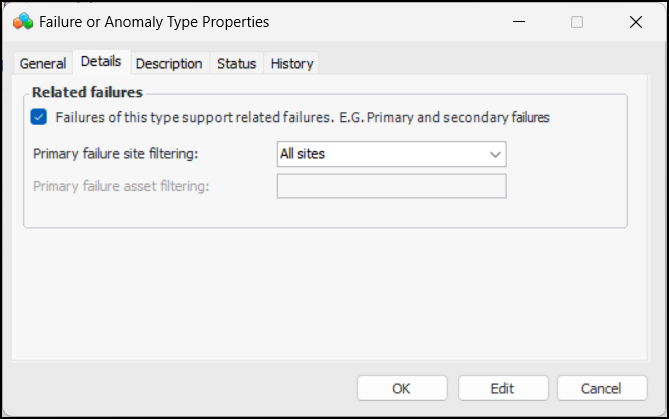
Failure Tracking – Primary and Secondary Failures
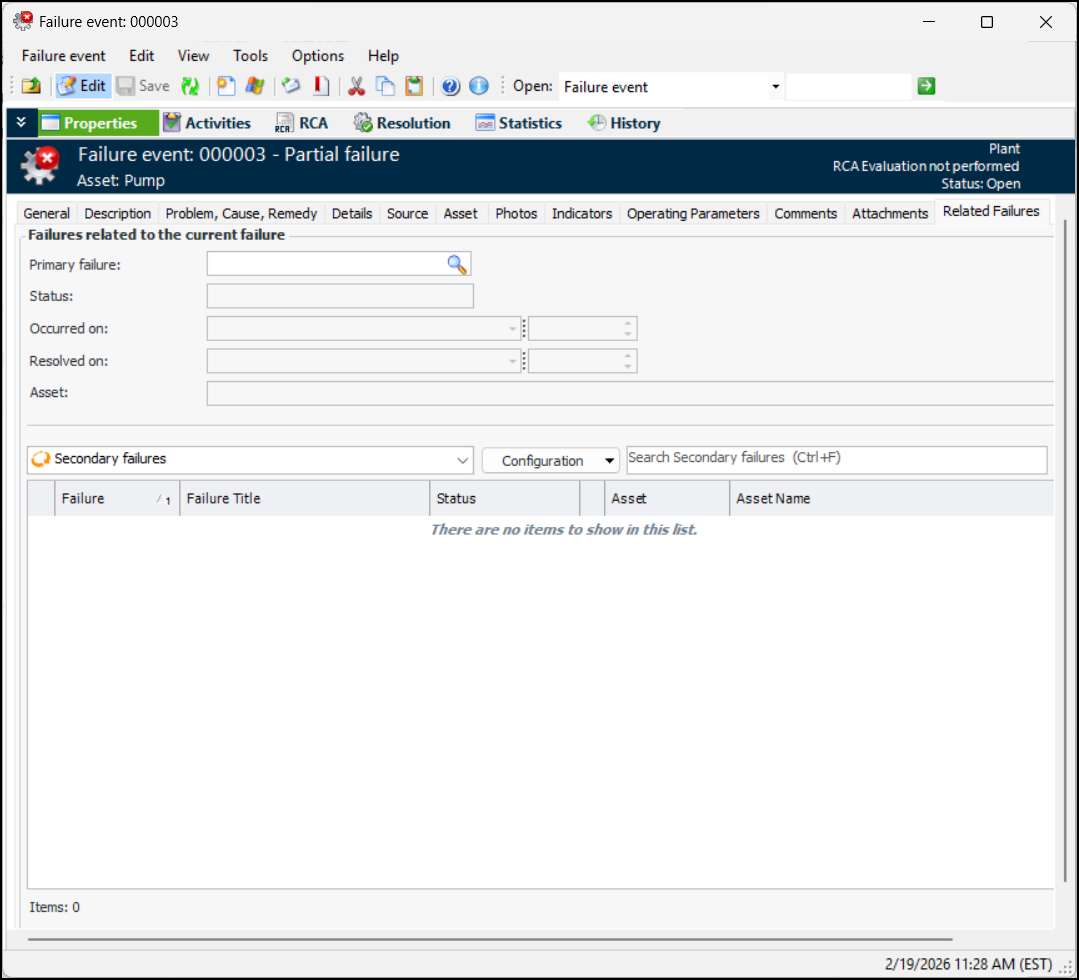
It is now possible to identify and link primary and secondary failures with the help of failure types. In the Site window, select the Performance Management view, Settings tab, Failure Events tab, Types tab. Open the Failure or Anomaly Type Properties window, Details tab. Click Edit. Specify that failures of this type support related failures:A failure event that supports related failures displays the Related Failures tab in the Failure Event window, Properties view:Inspection Management
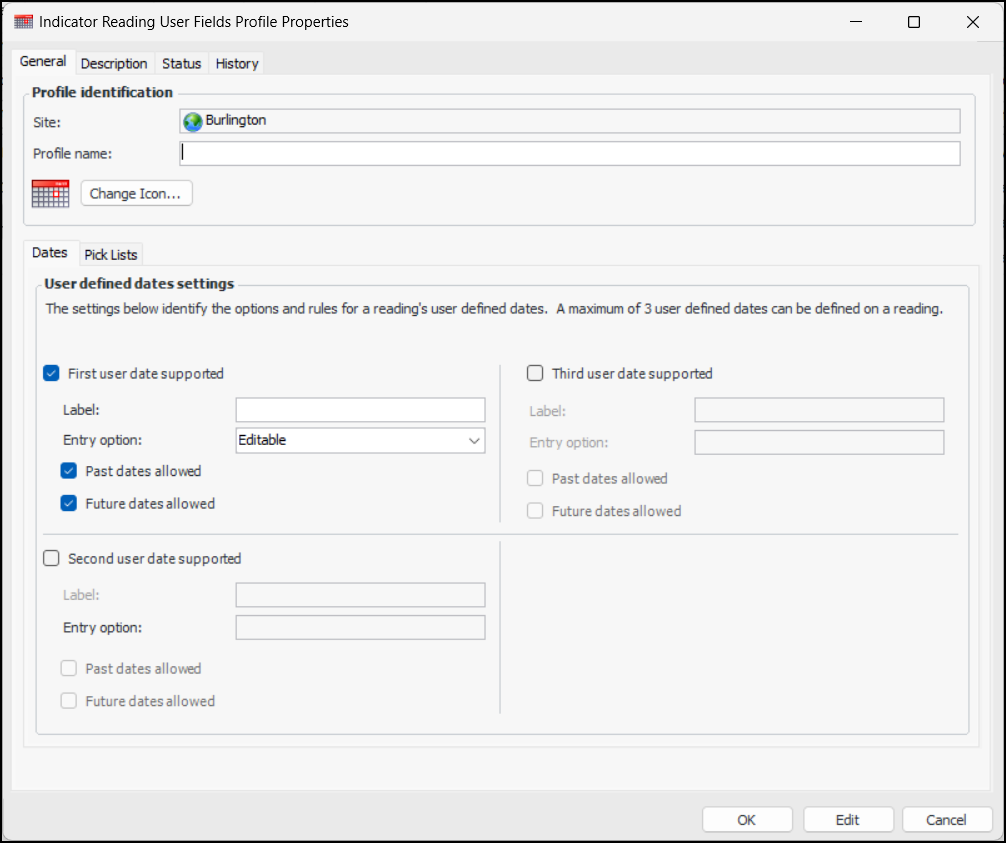
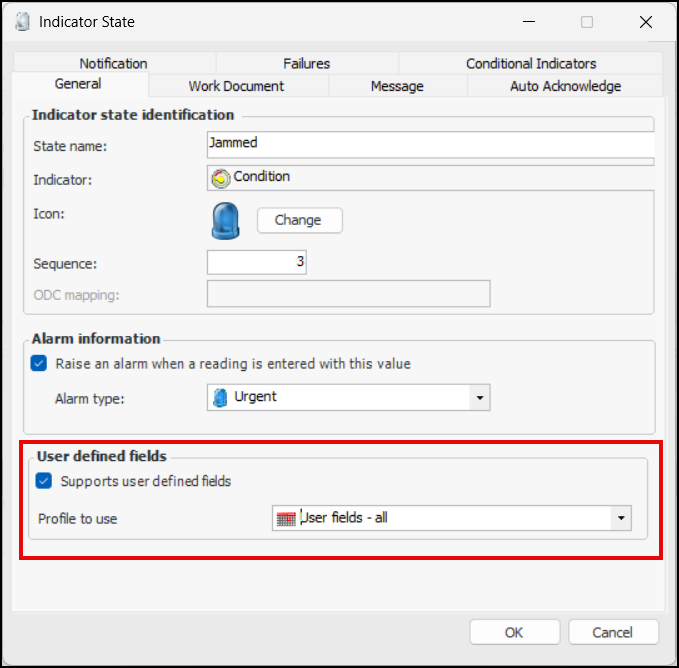
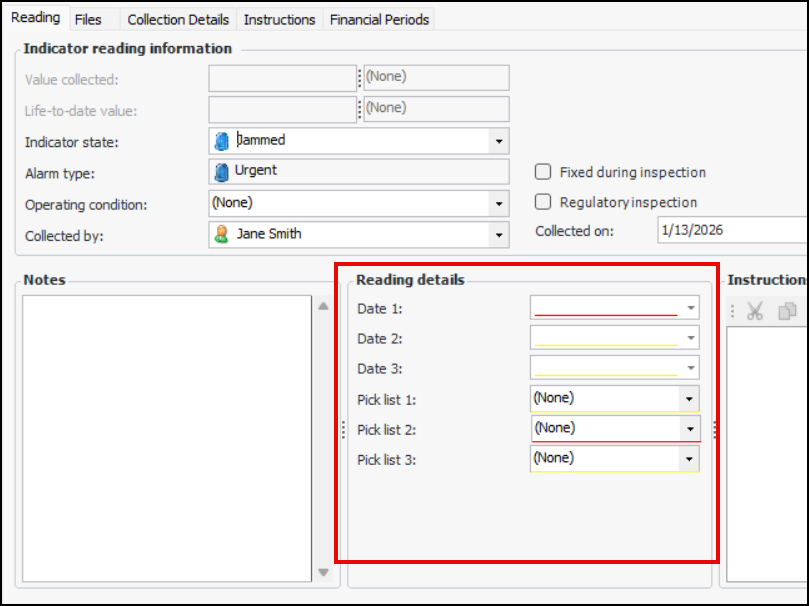
User-Defined Field Profiles
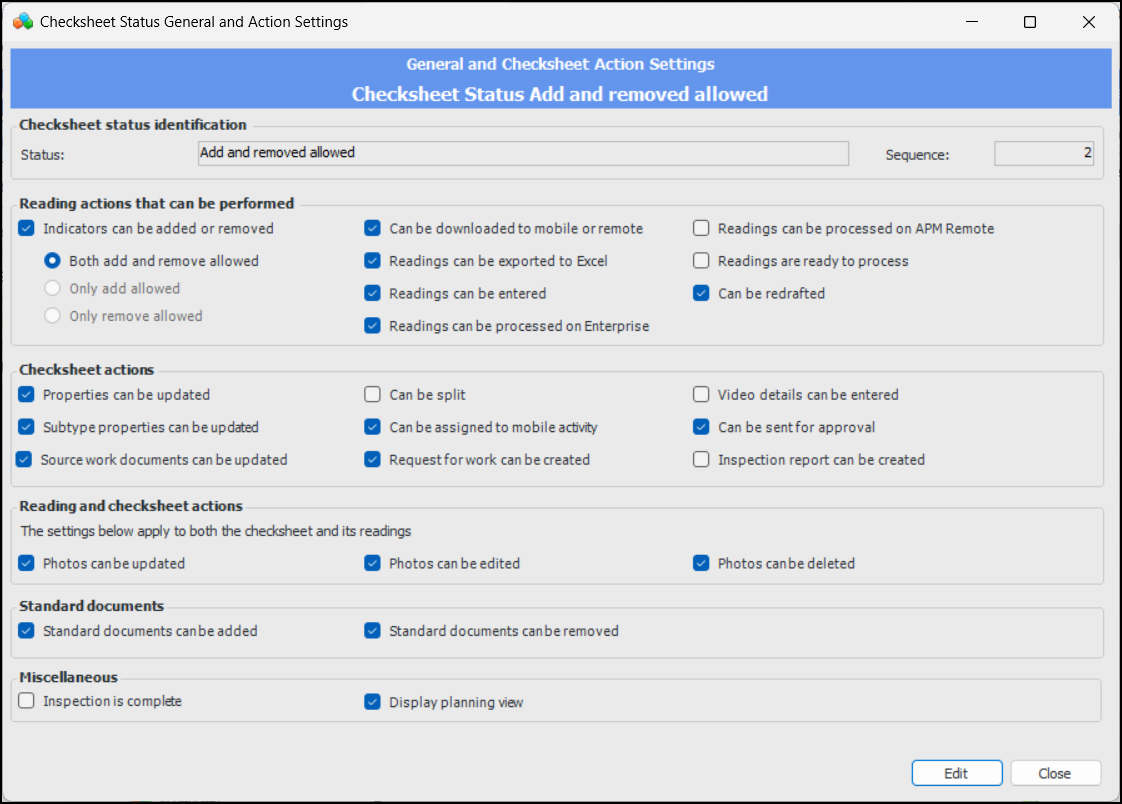
Checksheet Status – Photos and Standard Documents
These settings also apply on APM Remote, to photos and standard documents, as well as to the Take Photo button.Checksheet Tab on Reading Window
When you open an Indicator Reading window from a checksheet, you will now have the option of selecting the Checksheet tab. For example:The Checksheet tab provides a convenient location for sending the checksheet for approval, processing the checksheet, changing the checksheet status, and viewing information about the checksheet.The Display Checksheet Info on Readings setting on checksheet type controls whether the tab appears on the Indicator Reading window.Checksheet Statuses – Settings Review
The new Settings Review tab provides an easy way to view, compare, and update settings for all checksheet statuses.In the Site window, select the Inspection Management view, Settings tab, Checksheets tab, Checksheet Statuses tab, and Settings Review tab:Mandatory Photograph or Attachment on Indicator Readings in Alarm
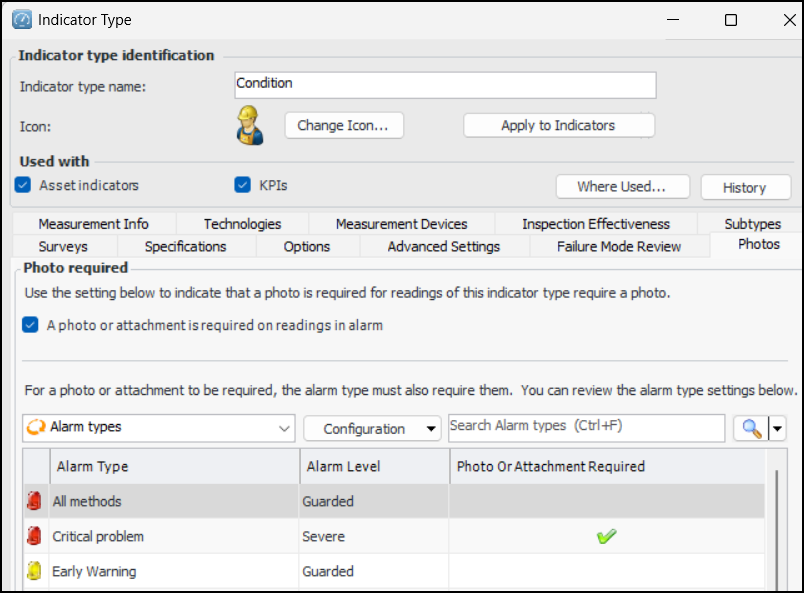
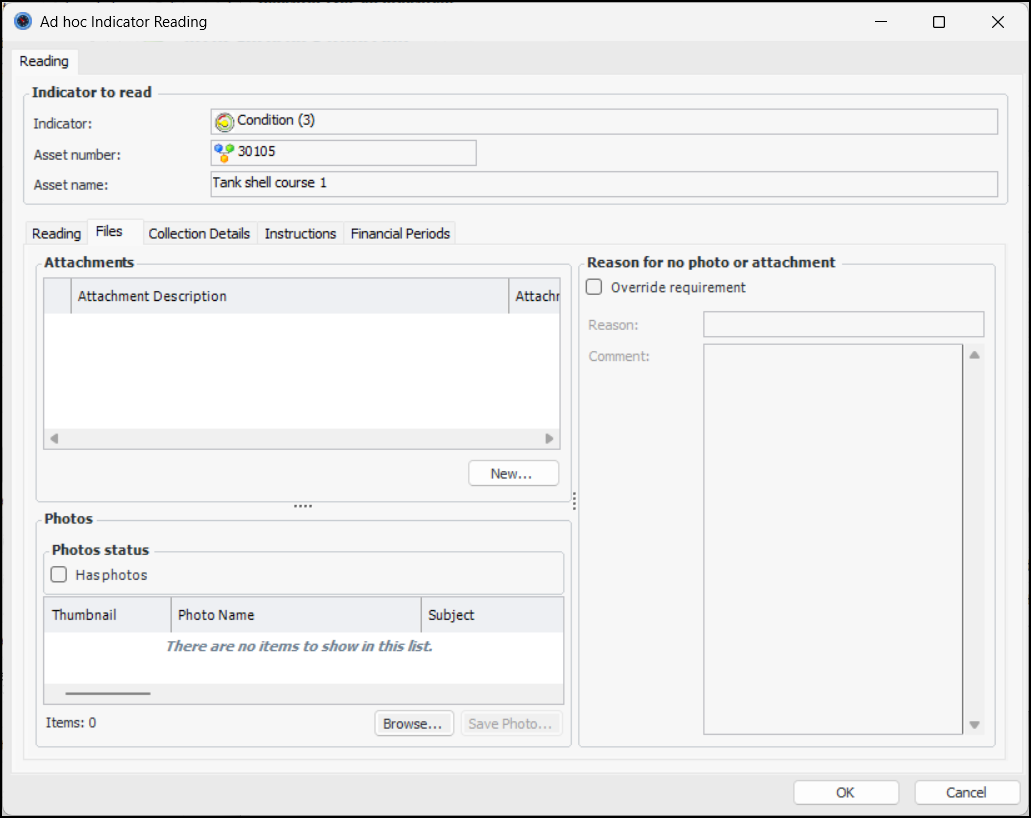
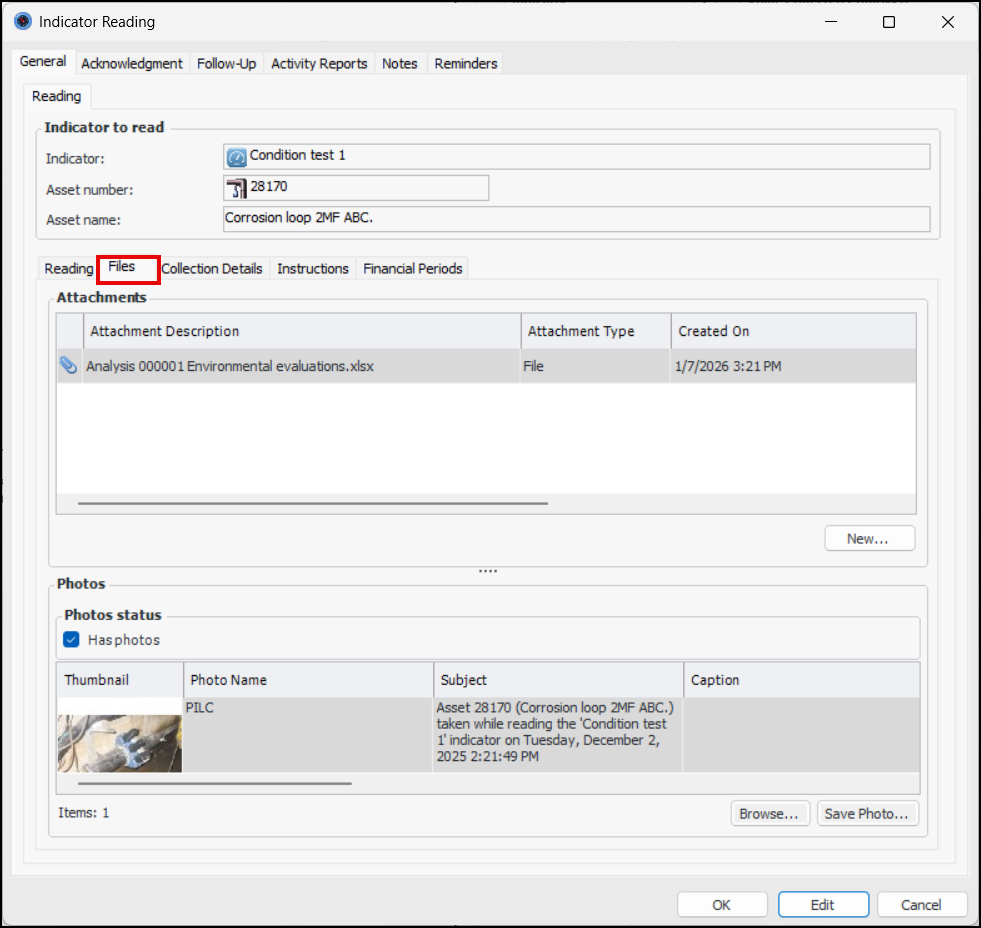
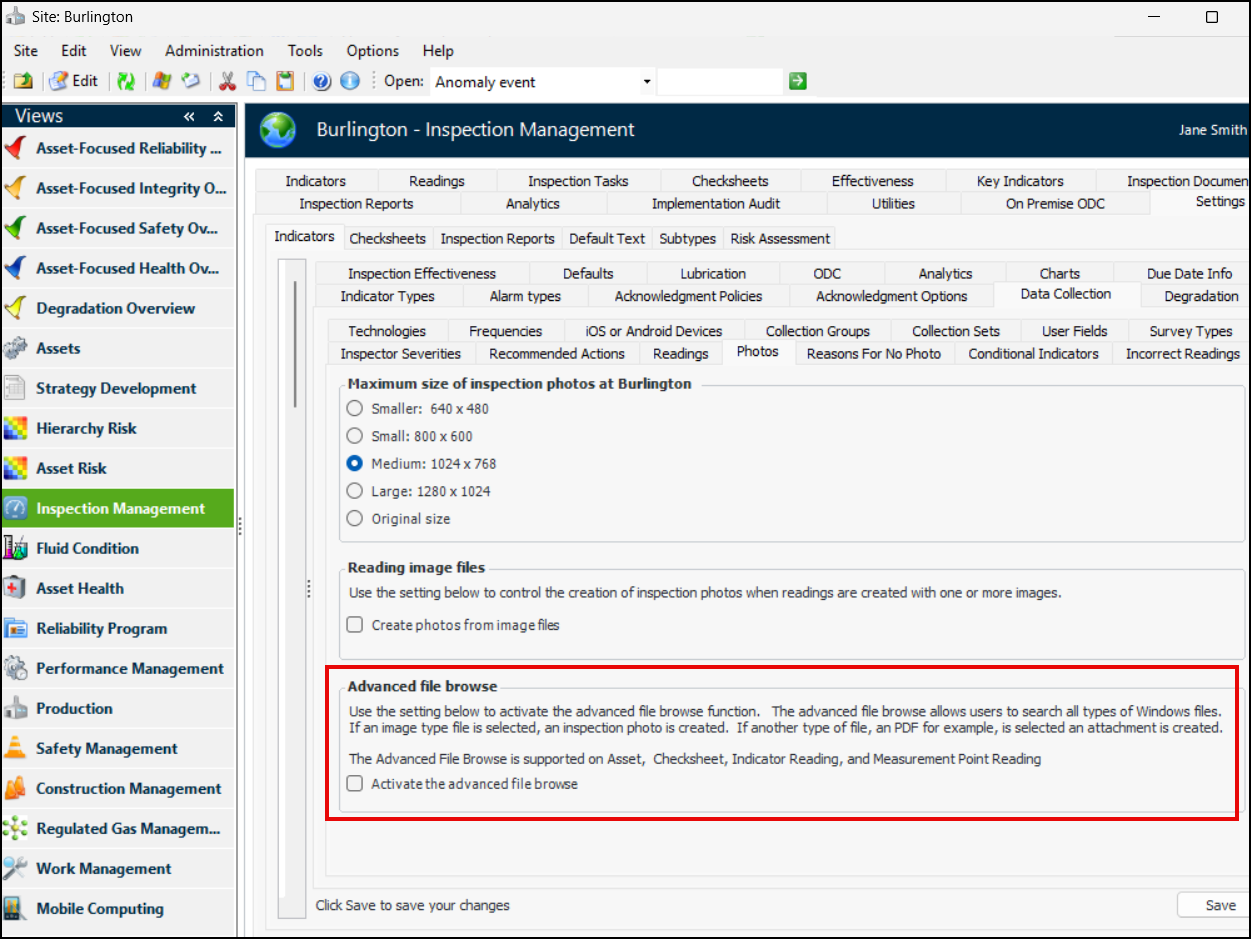
This functionality relies on the indicator type and alarm type. In the Indicator Type window, select the Photos tab. For example:Select A photo or attachment is required on readings in alarm. Check that the appropriate alarm types in the table below also require a photo or attachment. You can double-click an alarm type to open its window and edit it.If you enter an alarm state on a reading for an indicator that uses the indicator type and attempt to save the reading, an error message appears stating that a photo or attachment is required. Select the Files tab if you wish to add an attachment or photo:To add an attachment, click New below the Attachments table.To add a photo, click Browse below the Photos area. The thumbnail is added to the Photos table, along with information about the photo. Has photos is selected.It is also possible to override the requirement for a photograph or attachment. In the Reason for no photo or attachment area, select Override requirement. Select a reason from the list, for example, “Camera is broken”, and enter a comment, if appropriate.You can set up reasons in indicator management settings. Select the Data Collection tab and the Reasons For No Photo tab. Click New to add a reason.Checksheet Planned Start Date for Frequent Inspections
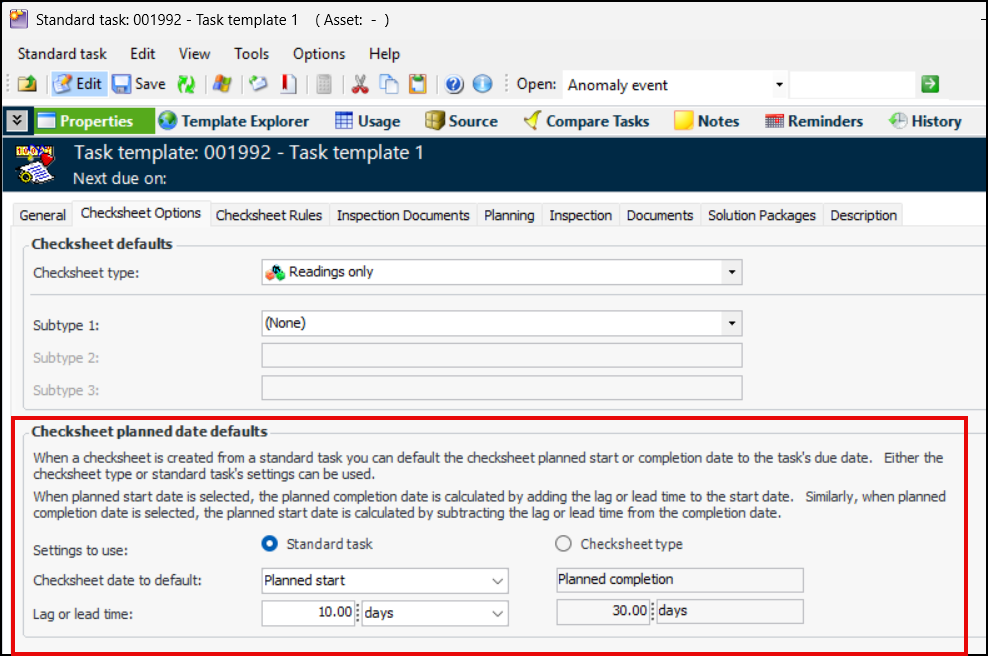
To set these options, open the Standard Task window, select the Properties view, Checksheet Options tab. Ensure that editing is enabled. Here’s an example of a standard task template:Degradation Indicators – Readings Prior to Reset Marked as Historical
Degradation Indicators – Indicator Design Degradation Rate
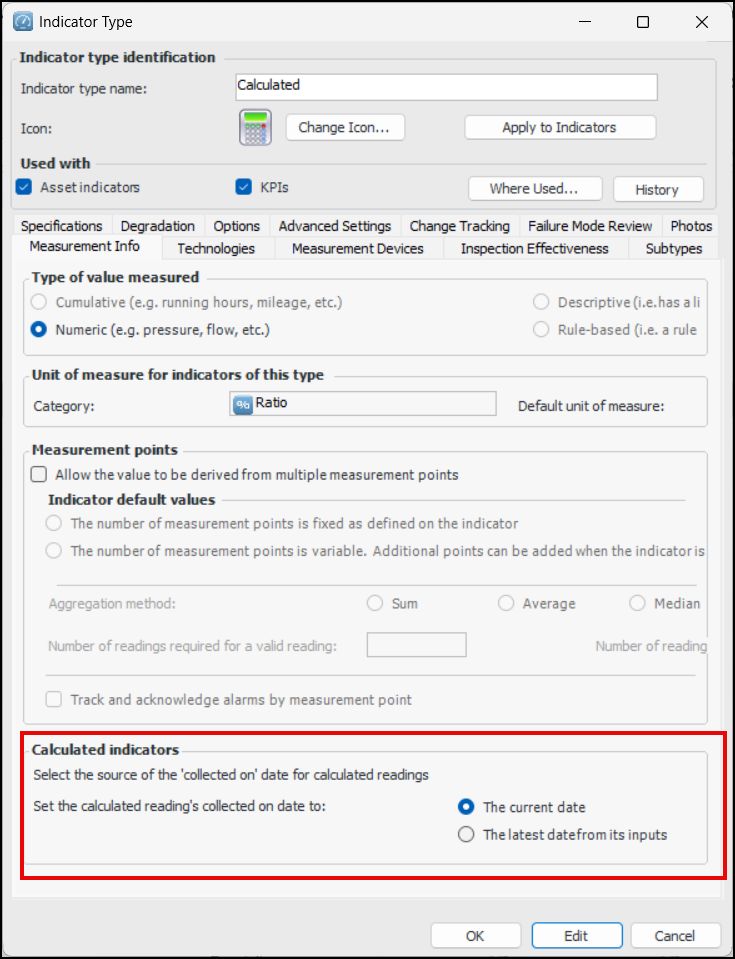
Calculated Indicator Readings – Collected On Date
Package Manager
Performance and Stability Enhancements
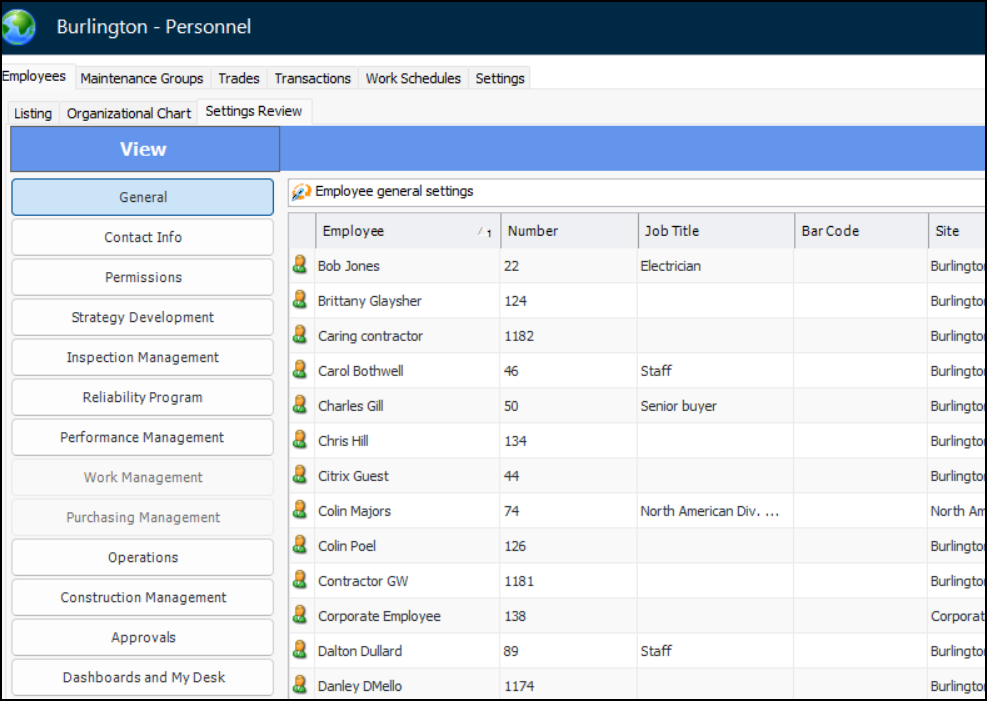
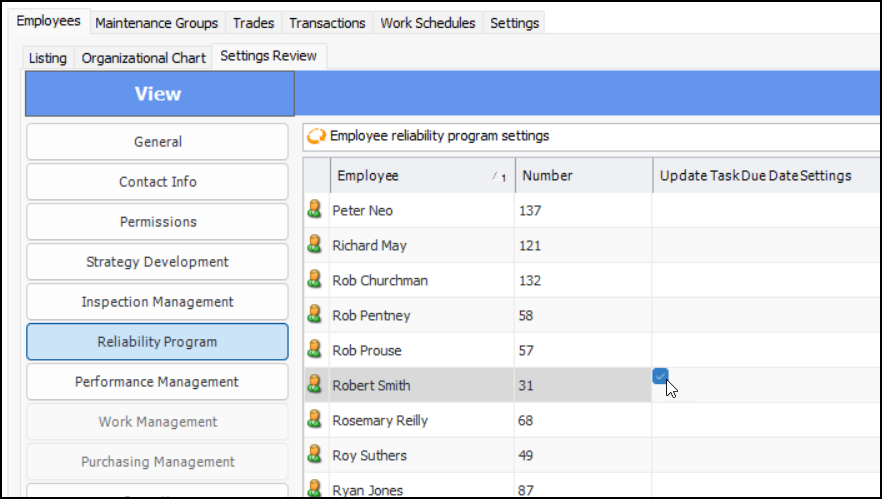
Personnel – Employees Settings Review
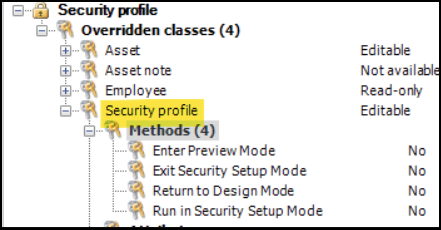
The new Settings Review tab provides an easy way to view, compare, and update settings for all employees.Security Profiles – Security Setup Mode in Smart Clients
APM enables you to quickly and easily build security profiles by directly setting security levels on items within the user interface (UI), such as menu actions, views, and fields. You can do this by entering the Security Setup mode for a security profile. Click Setup Mode on the General tab of a security profile.Standard Documents – Embedded Files
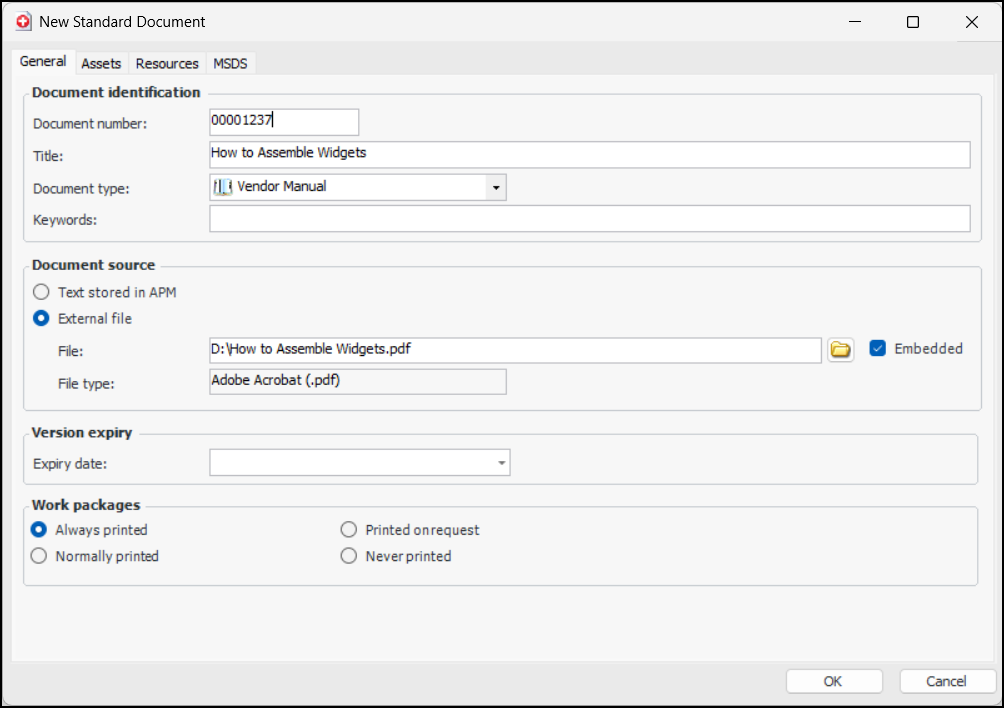
External files can now be added to standard documents and embedded in the APM database. For example:The size of the external embedded file is limited by the file size maximum set in UI Settings. See Maximum Size for Embedded Attachments.Standard Tasks
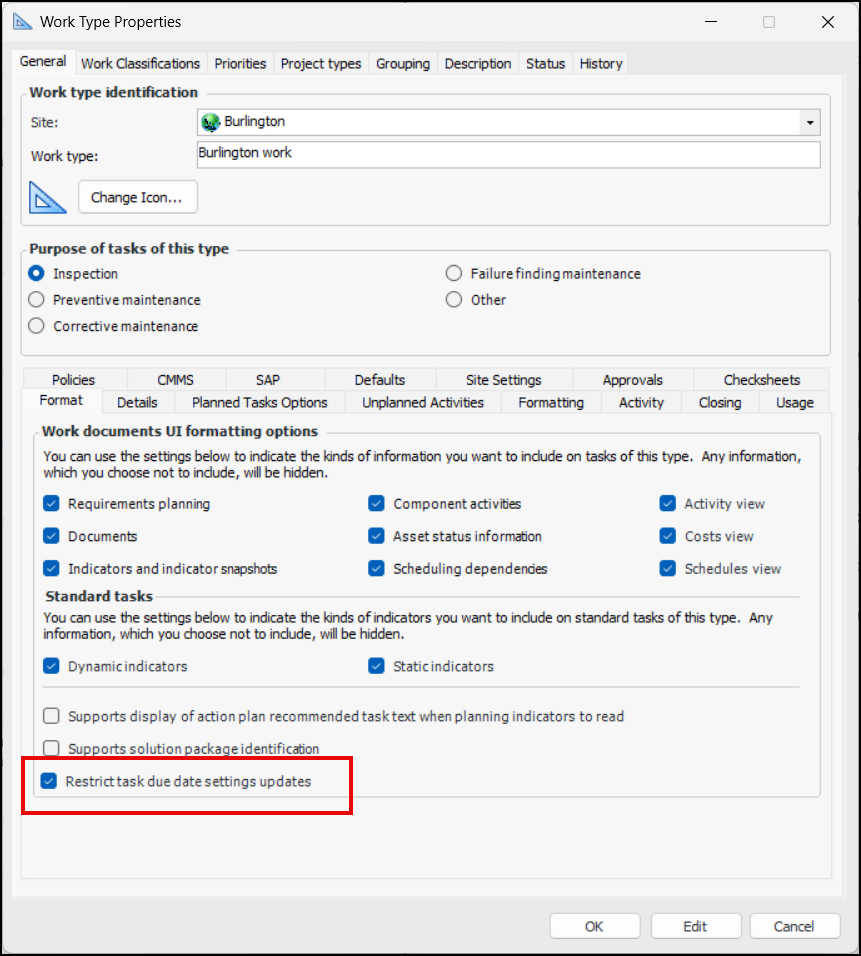
Manage Which Users Can Update Standard Task Frequency and Due Dates
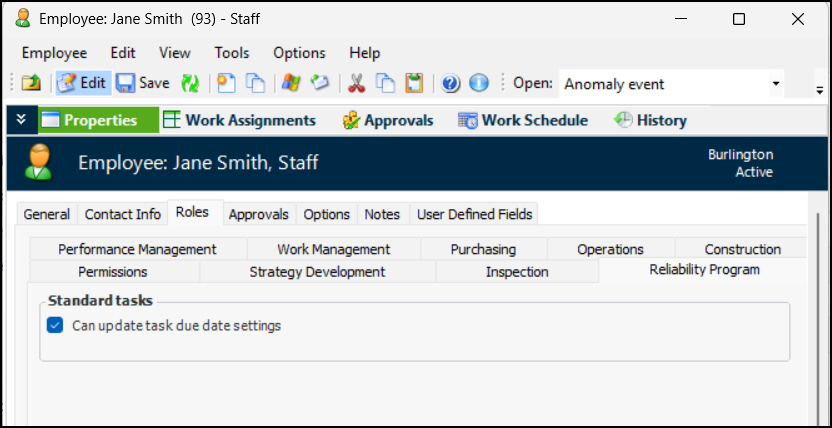
In the Site window, select the Work Management view, and Settings tab. Open the appropriate work type window and click Edit. On the General tab, Format tab, select Restrict task due date settings updates. For example:Click OK to save the work type and close the window.Next, set the “Can update task due date settings” option for the appropriate employees. The fastest way to do this is to select the Personnel view in the Site window, then the Employees tab and Settings Review tab. Select the Reliability Program view.Default Due Date
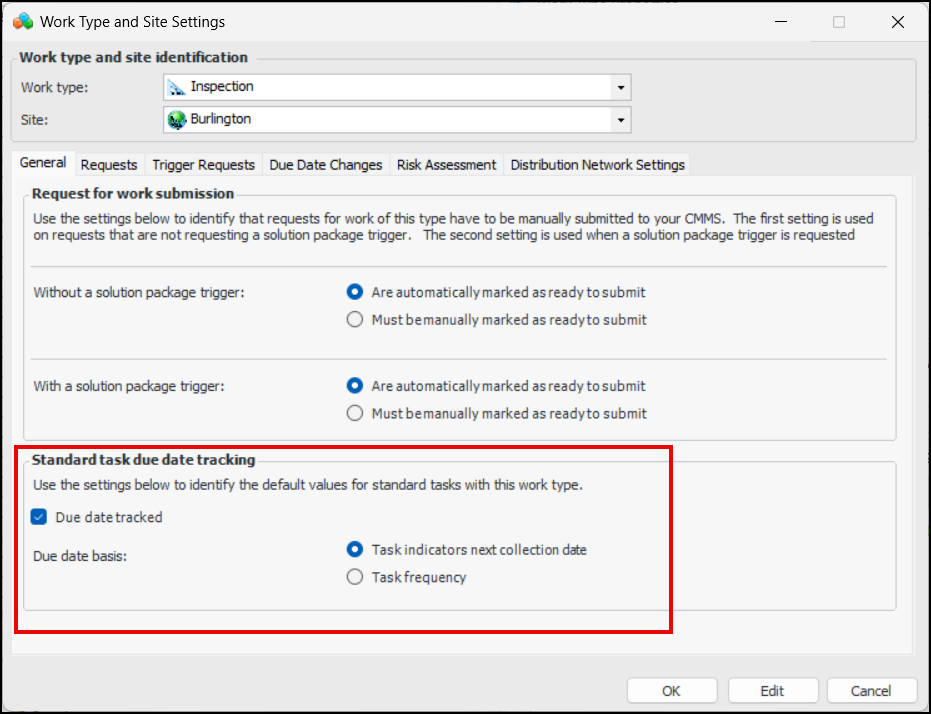
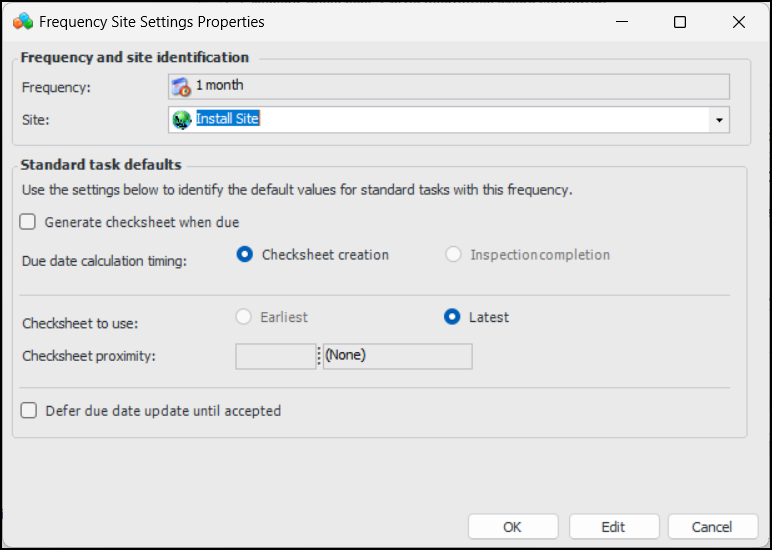
In the Site window, select the Personnel view, Employees tab, locate and open your Employee window. Ensure that editing is enabled. In the Properties view, select the Roles tab and the Reliability Program tab. Select Can update task due date settings.In the Site window, select the Reliability Program view, Settings tab, Reliability Program tab, Work Types tab. Open a Work Type window, select the Site Settings tab, and open the appropriate Work Type and Site Settings window. Ensure that editing is enabled. On the General tab, select Due date tracked. For example:To set up a frequency’s site-specific settings, open the Frequency dialog and ensure that editing is enabled. On the General tab, click New at the bottom of the Frequency site settings table. The Frequency Site Settings Properties dialog appears:Select Generate checksheet when due and choose due date calculation timing, the checksheet to use, and checksheet proximity.Finally, in the standard task or template, select the Properties view, General tab. Ensure editing is enabled. On the Details tab, select a work type and a frequency.Strategy Development – RCM2 Analysis
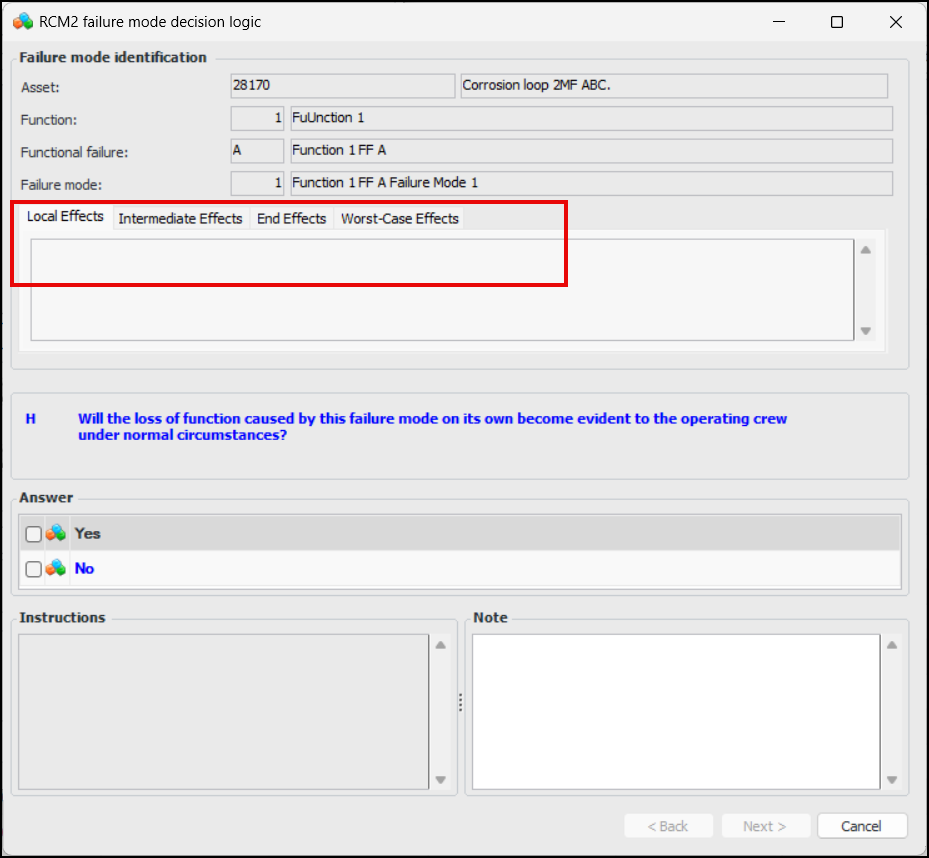
When extended failure effects are supported on failure modes, Local, Intermediate, End, and Worst-Case Effects tabs are displayed in the RCM2 Failure Mode Decision Logic wizard. For example:
 on the tool bar. The Enterprise window appears.
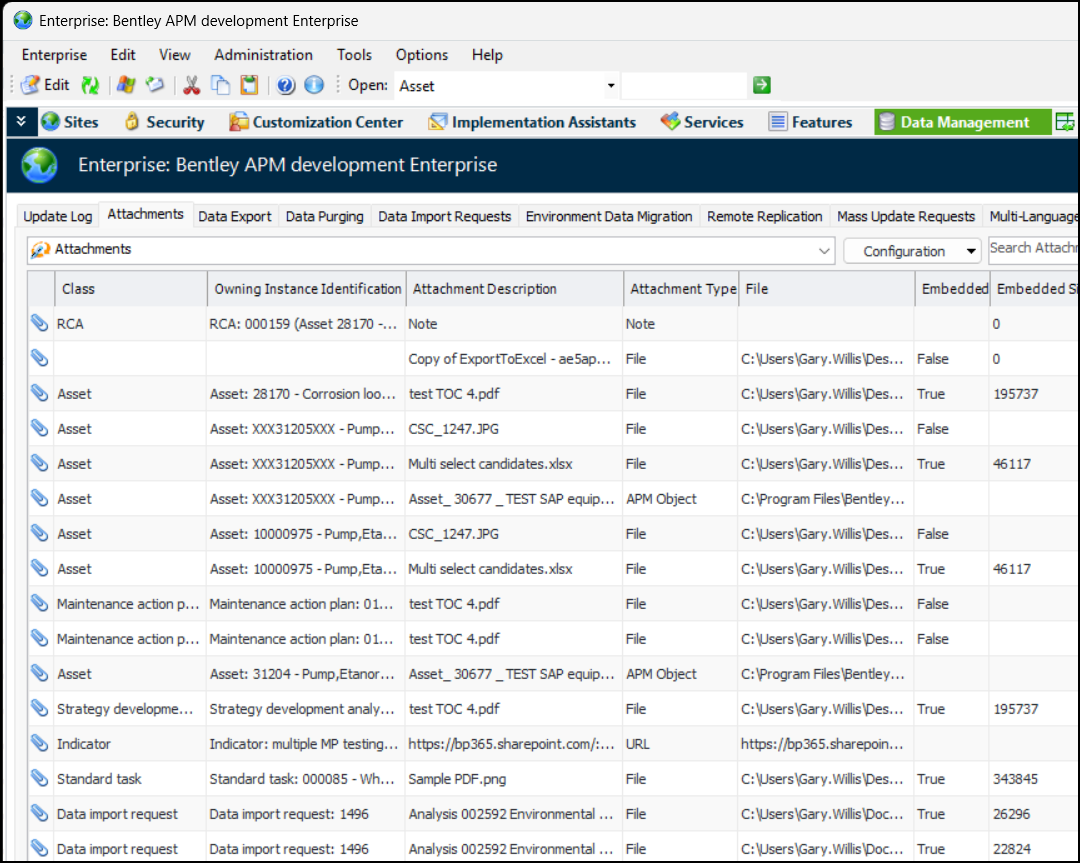
 is enabled.
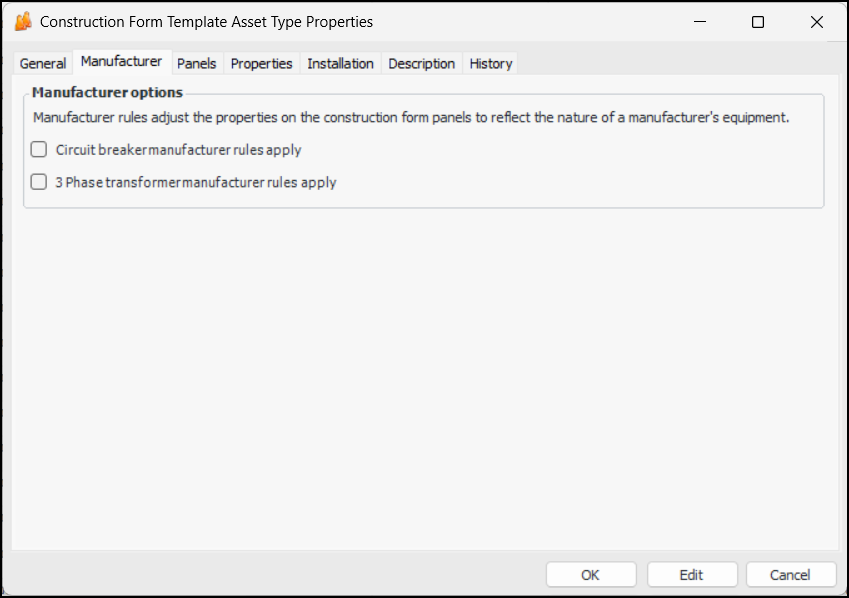


 to view as Form
  to view, update, and save an individual checksheet type and move on to the next using the navigation buttons.