|
|
What’s New in APM 24.0.3
Contents
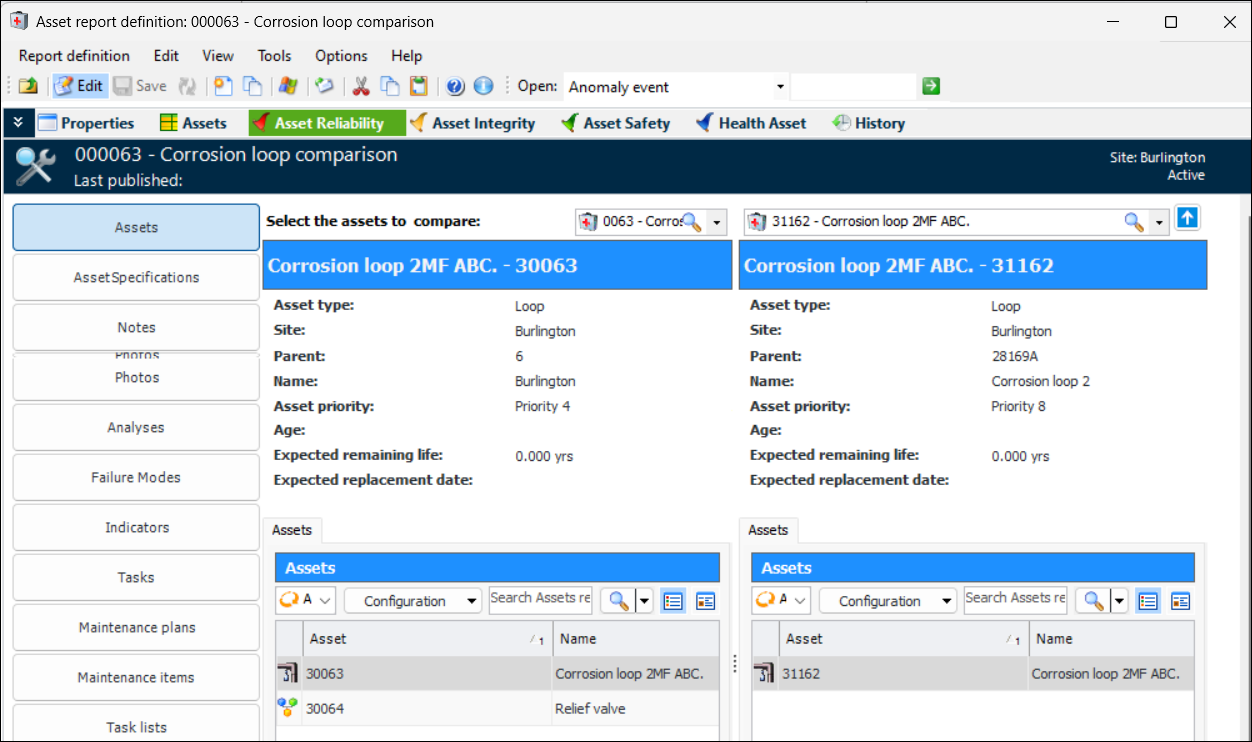
Asset Comparisons
Note: Asset comparisons are a “generally available” product feature. You must first enable feature 136 to use the functionality in APM. In the Enterprise window, select the Features view and the Enabled Features tab. Click Browse, select “Asset comparison” and click OK. If APM is running as a smart client, click Refresh Enabled Features on the server. Then restart the client to use the functionality.
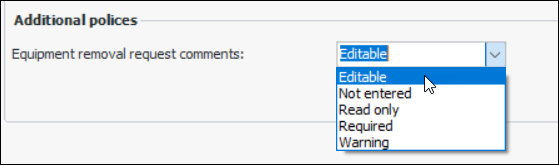
AWEIS – Comments on Equipment Removal Requests
Construction Management
Construction Form Panels for Reactors
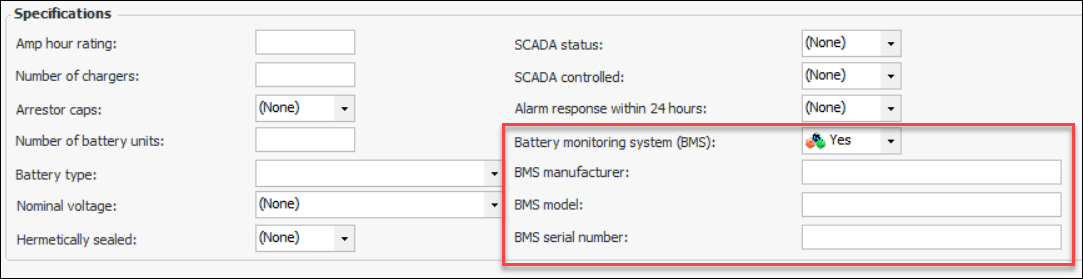
Construction Form Panels for Station Battery
Construction forms, asset specification panels, and asset change requests have been updated. Here is an example of the Specifications section of the Electrical - Station batteries construction form:Bushing Asset Type Supported on Construction Forms
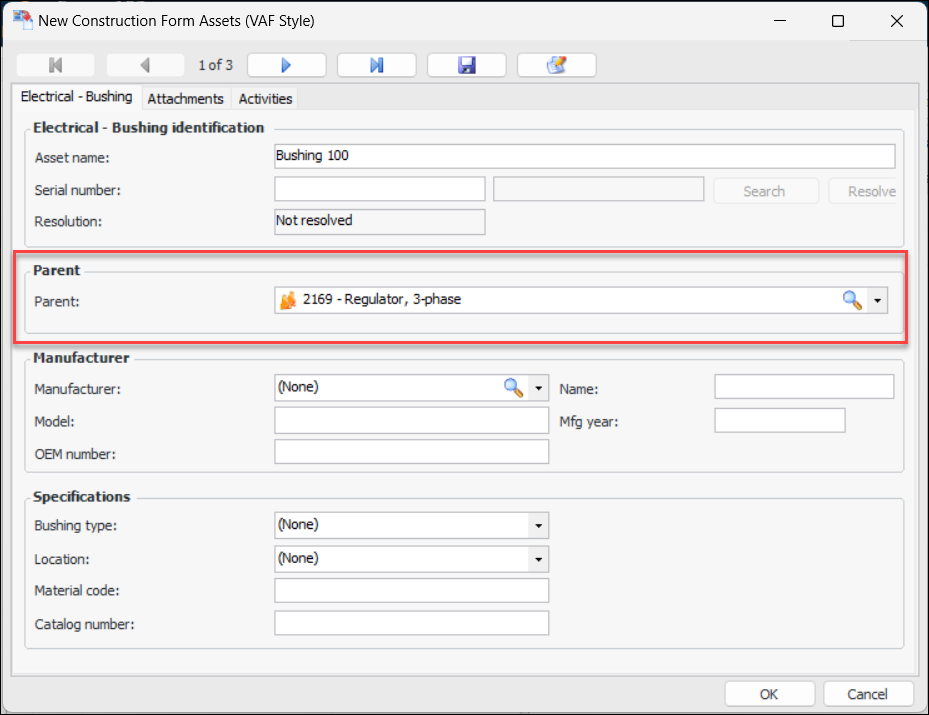
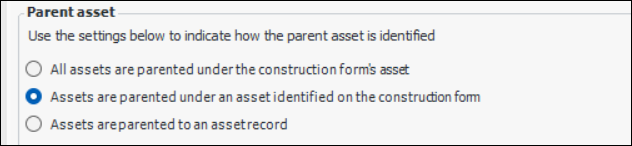
In the Specifications area, select the bushing type and location. (You can populate these value lists in the Assets view, Settings tab, Electrical Substation Specifications tab. See Adding Values for Asset Subtypes and Specifications.)When adding the Bushing construction form template asset to a template, be sure to select Assets are parented under an asset identified in the construction form:Inspection Management
Create a Template from an Indicator
You can now create an indicator template from an indicator that is not based on a template. In the Indicator window, click the Indicator menu, Create, and then Template From. In the confirmation window that appears, click Yes.The Indicator template window opens, where you can finish creating the template. The original indicator’s General tab, Details tab shows that the indicator is based on the new template.Link Indicators to Indicator Templates
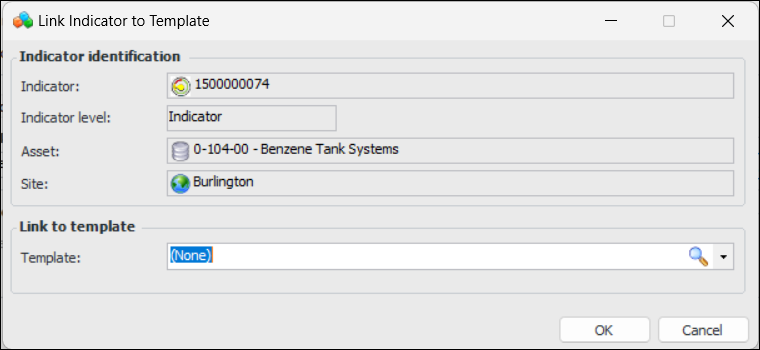
You can now link an indicator (that is not based on a template) to an indicator template. Note that when you link an indicator to a template, the template’s settings and information are not copied to the indicator. However, the indicator is added to the Usage view of the template. You can then update indicators either by using the Mass Indicator Update Wizard or by applying a mass update in the table configuration.Click Link to Template. The Link Indicator to Template dialog appears, where you can select the template and click OK.The template is added to the Template based on field:Tip: Double-click the template to open its window. Select the Usage view to see a list of indicators based on or linked to the template.Create Checksheets from Standard Tasks without Indicators
You can now create a checksheet from a standard task that does not have indicators. The results of the inspection can be recorded in the checksheet’s Inspection Summary view.Show Last and Next Reading Information
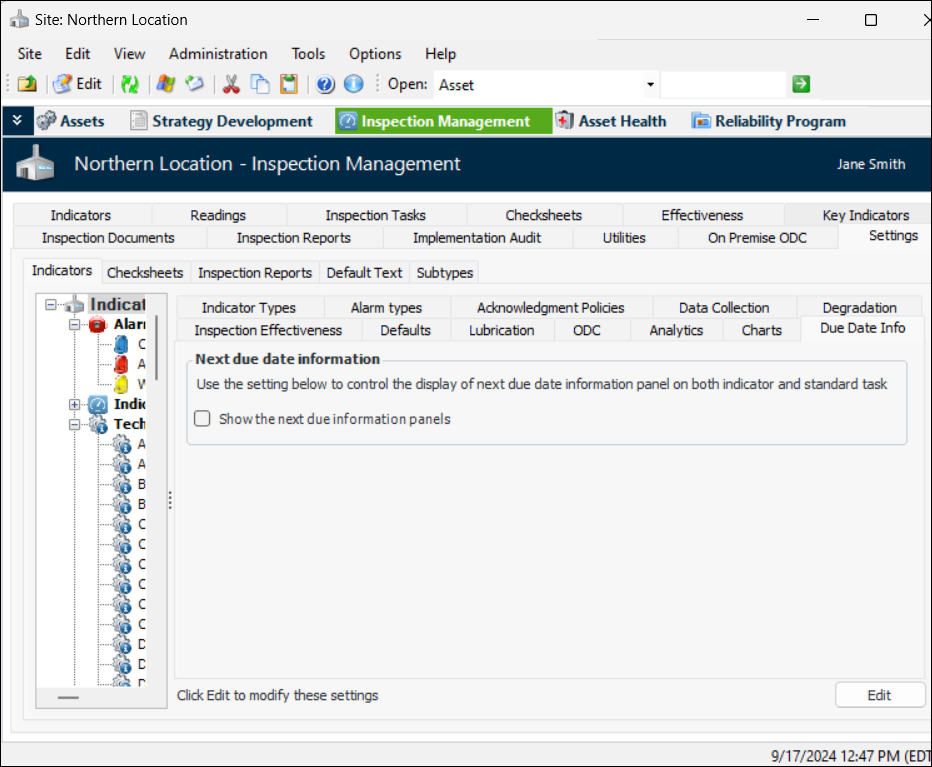
To display these bars, you must first select an option on the site. In the Inspection Management view, select the Settings tab, Indicators tab, and Due Date Info tab. Click Edit at the bottom of the window to change the site setting.The Edit button changes to Save. Select Show the next due information panels and click Save to commit the change.Inspection Photos
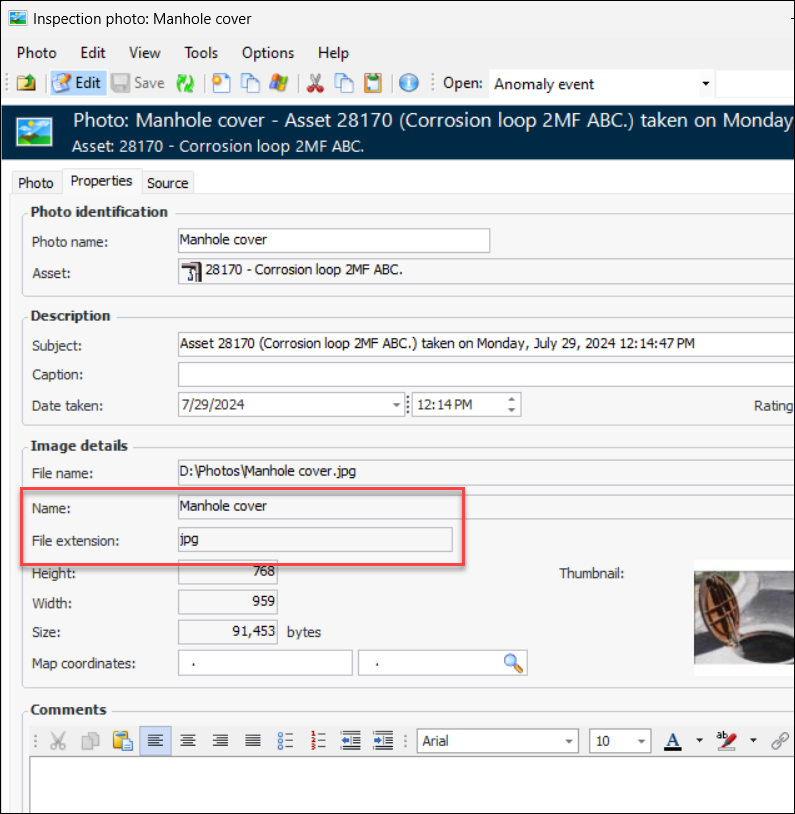
Photo Properties Added to Objects
Photo Table Configurations Include View-as-Form
Anywhere in APM where you see a Photos tab, the table configurations now include the View-as-Form icon. For example:Performance and Stability Enhancements
Standard Documents – Creating From Within Objects