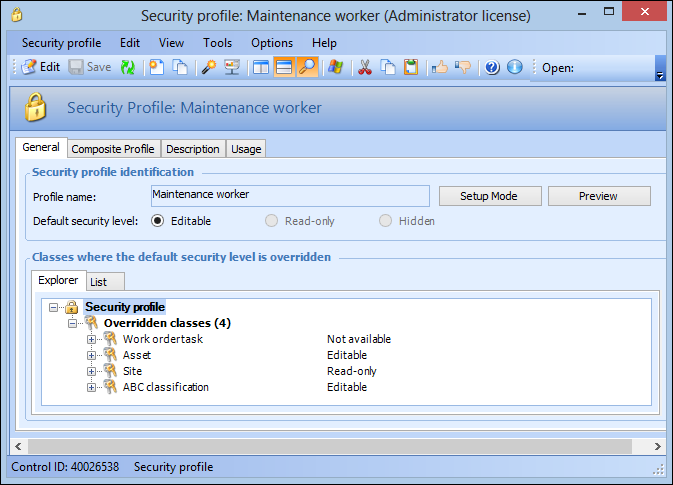
Using Security Setup Mode

This section explains how to enter and work with Security Setup mode for an existing security profile.
APM enables you to quickly and easily build security profiles by directly setting security levels on items within the user interface (UI), such as menu actions, views, and fields. You can do this by entering the Security Setup mode for a security profile. Click Setup Mode on the General tab of a security profile.
When you enter Security Setup mode, you can add class, action, attribute, relationship, view, and tab overrides by navigating through the UI. You can change the security setting for any class (object), view, tab, table, action (menu item), and attribute or relationship (field) by right-clicking the item and selecting the appropriate Mark as option.
Note: To use Security Setup mode, you must launch the application as an APM administrator.

Tips for Working In Security Setup Mode

When creating a profile using Security Setup mode, you should visit every view and dialog that the user of that profile will need, in order to ensure that everything is accessible at the required level.
When setting security on views, tabs, and tables, the system might create security overrides for many classes, attributes, and relationships at once. There is no ‘undo’ option for this feature. For this reason it is a good idea to save copies of your profiles as you work. For example, if you edit one area to react the way that you want in a profile, save a copy so that you can return to that stage if necessary.

To Use Security Setup Mode

1.
2.
Select the Security view and then the Security Profiles tab.
3.
4.
Click Setup Mode. A confirmation message appears. Click Yes.
The cursor displays an open lock icon to indicate that Security Setup mode is on:
5.
6.

To Exit Security Setup Mode

When you are finished editing the security profile, exit from the Security Setup mode.
1.
2.
Click Exit Setup. A confirmation message appears. Click Yes.
The open lock icon is removed from the cursor.