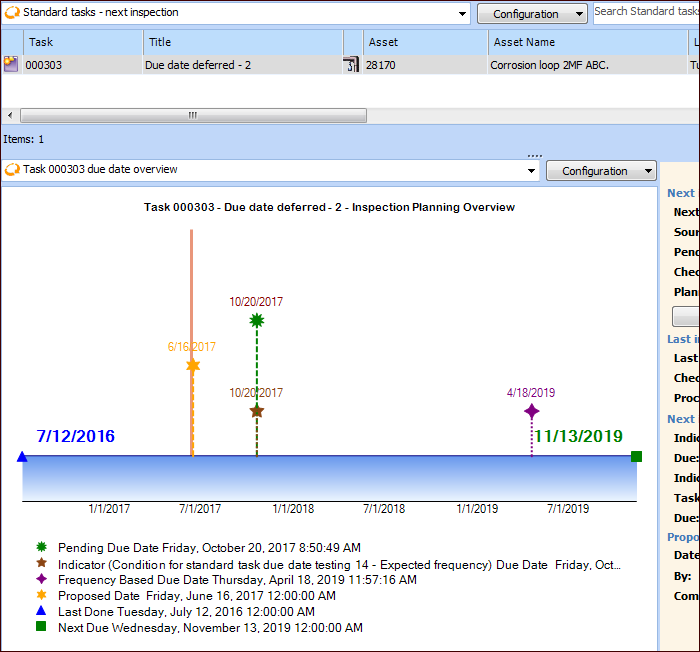
Updating Next Inspection Dates

One of the last steps in the inspection process is to start planning the next inspection, typically 2-3 years in the future. This involves reviewing the next-inspection information for the assets’ indicators and standard tasks. First, review the next inspection dates for the assets’ indicators and adjust the next inspection dates for those that require it. Then repeat the process for the assets’ standard tasks.
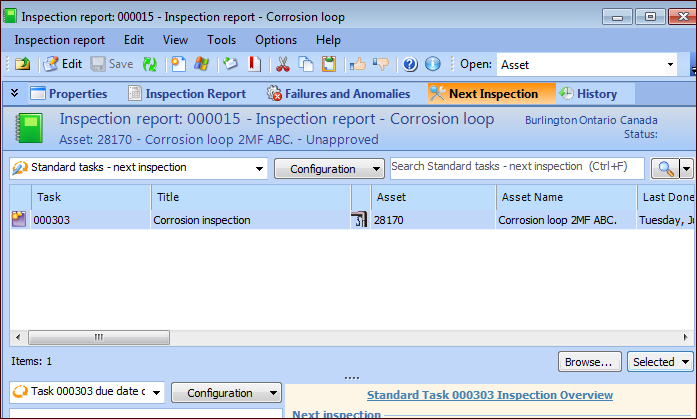
For information about changing an indicator’s collection date, see Indicator Collection Dates: Calculations, Windows, and Compliance Tracking.
The inspection report automatically lists standard tasks associated with the checksheets included in the report. You can expand the list of standard tasks to include tasks for the asset and its related assets and for any asset at the same site. For any of these tasks, you can manually override the next due date. Alternatively, you can propose a due date for another user to accept or reject.
This topic explains how:
For more information about standard task due dates, see Working with Standard Task Due Dates.

To Add Standard Tasks to an Inspection Report

1.
In the Inspection Report window, select the Next Inspection view. For example:
This view displays all of the standard tasks associated with the report’s checksheets.
2.
Click Browse. The Browse Standard Tasks dialog appears, showing all of the standard tasks for the asset. You can broaden the list to include standard tasks for assets above or below the current asset.
3.
4.
Select a task and click OK to add it to the report.

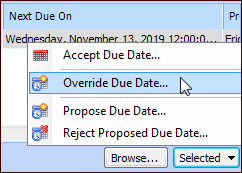
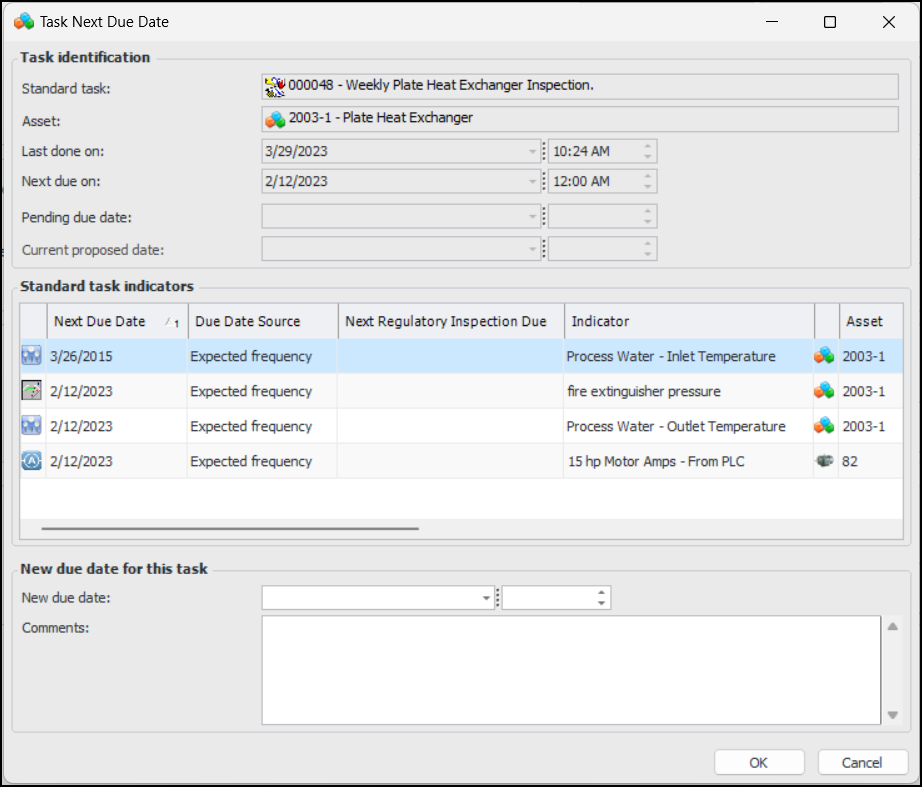
To Override the Next Due Date on a Standard Task

1.
The chart shows the time line between the date of the most recently processed checksheet and the due date for the next inspection. Next inspection inputs are represented, including the indicator’s next collection date, task frequency, pending, and proposed due dates.
The information panel on the right displays this information and allows you to view due-date audit history, override the due date, propose a due date, and accept or reject a proposed due date.
You can select the inspection history configuration to view line charts of the task’s processed checksheets and open and planned checksheets.
2.
Click the Selected list and then Override Due Date:
Tip: You can also click Override Due Date in the right-hand panel.
The Task Next Due Date dialog presents information about the standard task, including its indicators and their collection information. For example:
3.
4.
Click OK. The due date overview chart and information panel are updated accordingly.

To Propose a Due Date

1.
In the Next Inspection view, select the standard task in the top table, click the Selected list, and click Propose Due Date. The Propose Task Next Due Date dialog displays information about the standard task, including its indicators and their collection information.
2.
3.
Click OK. The due date overview chart and information panel are updated accordingly.
Tip: Users can click Accept to implement the new date or Reject to clear the proposed date information.