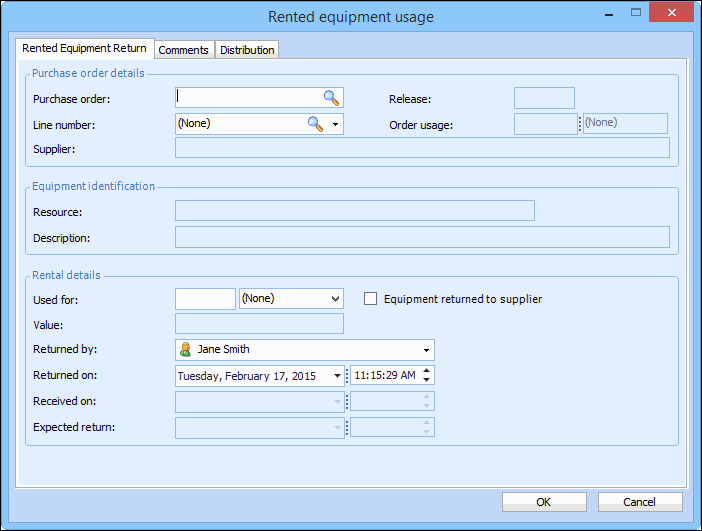
Returning Rental Equipment to Suppliers

This topic explains how to create a rental return from the Purchasing view. You can also create this transaction when you are reporting activity for a work order task.
When rental equipment is returned to the supplier, you must create a rental return transaction. The system matches the rental return to the purchase order line’s rental receipt. You must record the amount of time that the tool was used on the return. The system uses this duration to calculate the cost of the rental.
You can enter only one return transaction for a rental purchase order line. Charging a rental to multiple work orders is handled through the purchase order line’s distribution in the same way as regular purchases. The system updates the work order and asset’s costs with the cost of the rental.
To account for any difference between the value of the return and the actual rental cost invoiced by the supplier, you can enter the changes on the invoice.

To Return Rental Equipment to a Supplier

1.
On the site’s Purchasing view, select the Transactions tab, and then the Rentals tab. From the configuration list, select Rented equipment usage by date.
2.
Click Report Usage. The Rented Equipment Usage dialog appears. For example:
3.
On the Rented Equipment Return tab, enter the following information:
4.
On the Comments tab, you can enter any notes for the transaction, and select whether to display the comment at invoicing time.
5.
Select the Distribution tab. If necessary, you can edit the charging information for the transaction:
If charging to a Work order, click the browse icon. Select the work order in the selector dialog and click OK. You can select a task on the work order using the Task list.
If charging to an Asset, click the browse icon. Select the asset in the selector dialog and click OK.
If charging to an Account, click the browse icon. Select the account in the selector dialog and click OK. You might be able to override the selected GL account. To change the GL account, select Override the account. Click Browse, select the appropriate account, and then click OK.
6.
Click OK to save your changes and close the Rented Equipment Usage dialog.