|
|


Working with Standard Task Due Dates
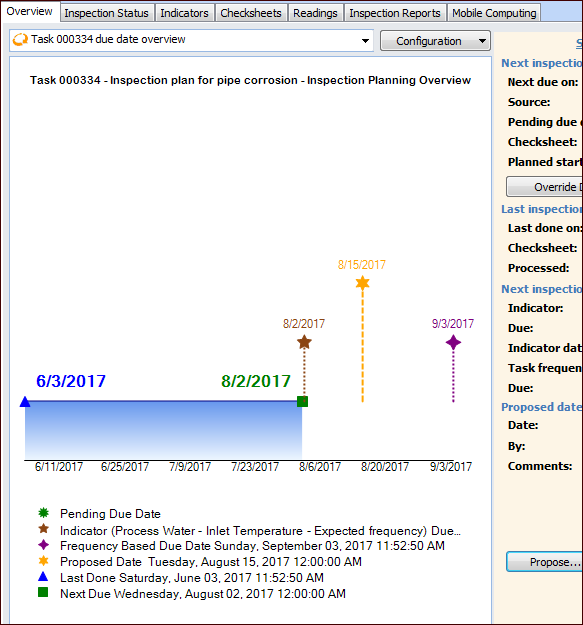
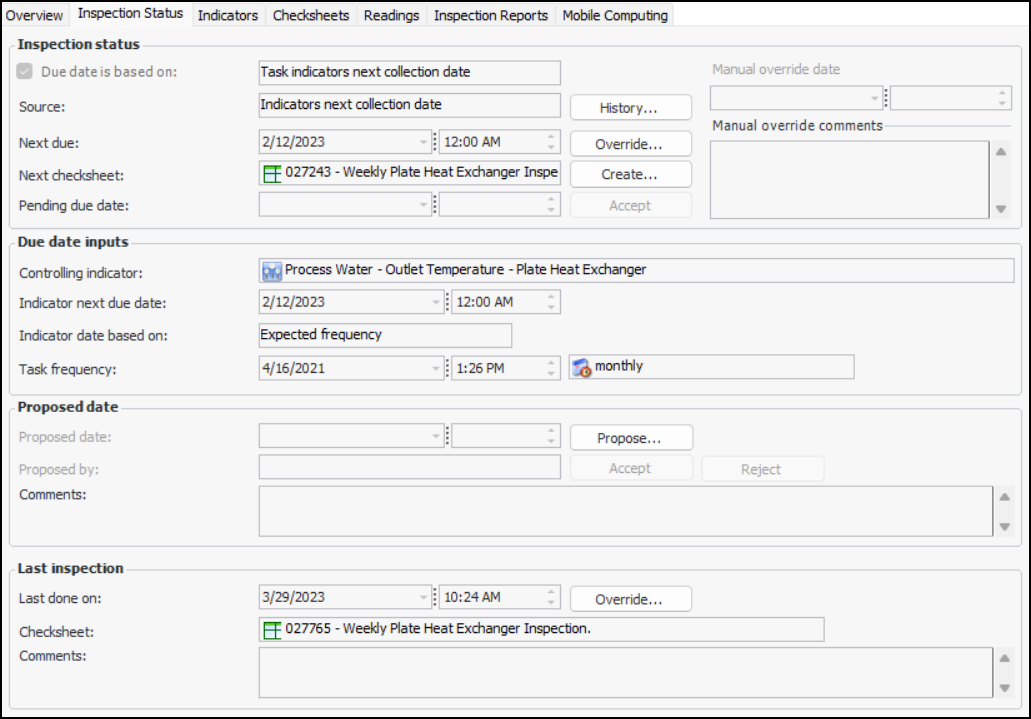
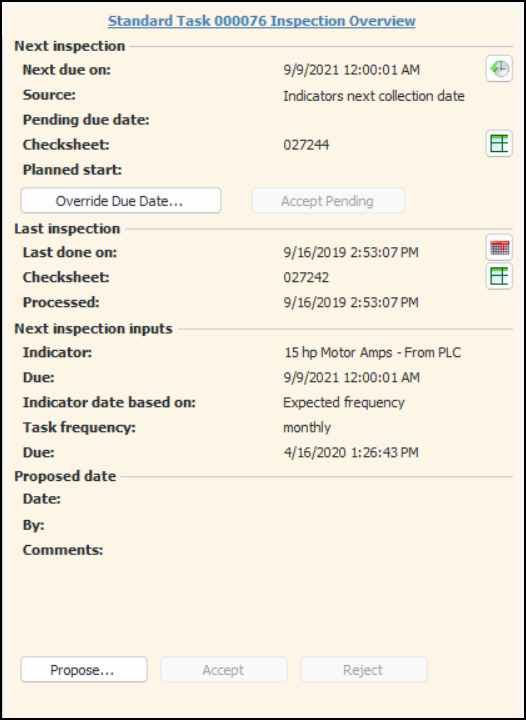
The Standard Task window’s Inspections view provides additional actions. As well as accepting a pending due date, you can manually override the due date. You can propose due dates, which can then be accepted or rejected by another user. You can also manually override the task’s last done on date, which might update the next due on date.APM presents information on the Overview and Inspection Status tabs. The Overview tab provides a chart showing the time line between the date of the most recently processed checksheet and the due date for the next inspection. Next inspection inputs are represented, including the indicator’s next collection date, task frequency, pending, and proposed due dates. The tab also offers the inspection history configuration, which displays a graph charting processed and open planned checksheets.You can monitor a standard task’s last and next inspections, see due date inputs, and view due date audit history. The Indicators tab also provides detailed information.This topic explains the features available in the Inspections view. It explains how:For information about setting due-date calculation options, see Setting Inspection Options for a Standard Task.To View the Task’s Past and Future Inspections
To Track Last and Next Checksheets for a Task
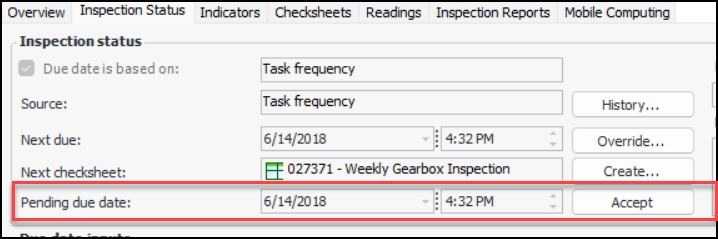
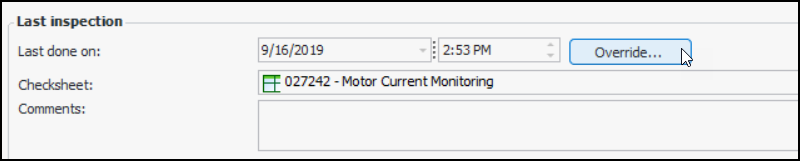
In the Standard Task window, select the Inspections view and the Inspection Status tab. For example:The Next checksheet box displays the checksheet number. You can also start a new checksheet by clicking Create.The Last inspection area shows the most recent date and time when a checksheet was processed, as well as the checksheet number.On the Overview tab, the information panel also displays this information. For example:To Accept a Deferred Due Date
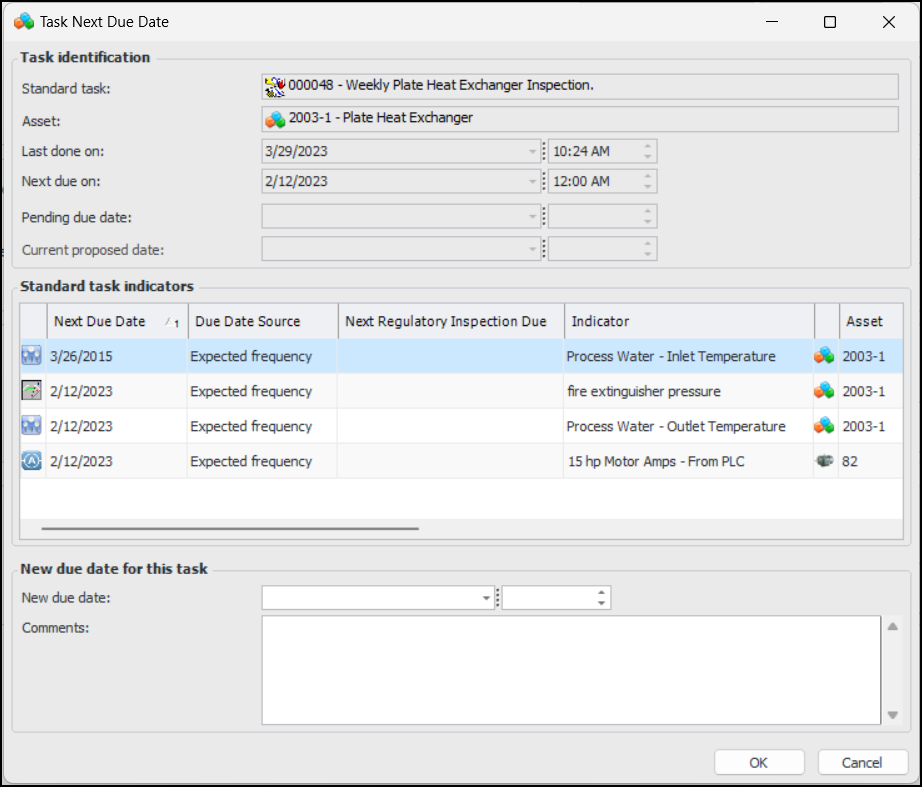
To Manually Override a Due Date
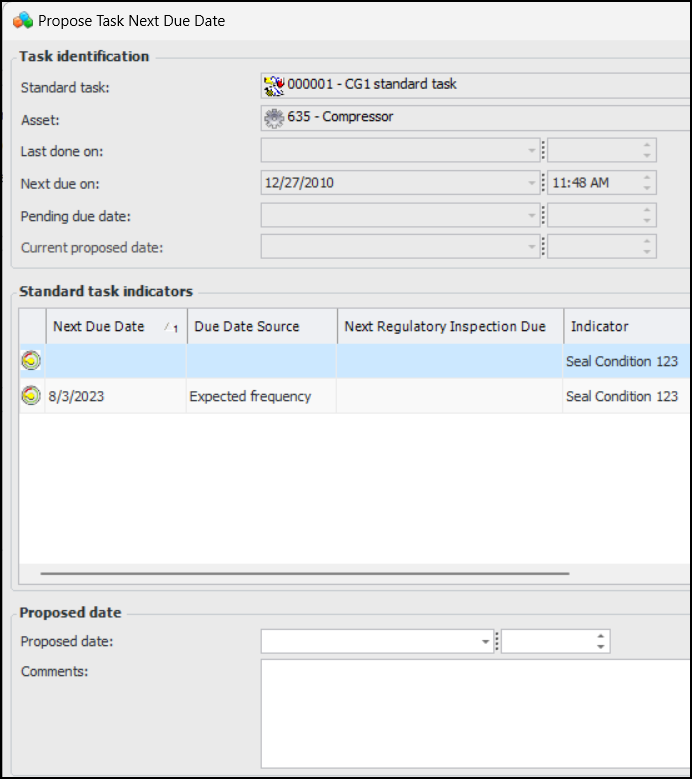
To Propose a Due Date
To Accept a Proposed Date
To Reject a Proposed Date
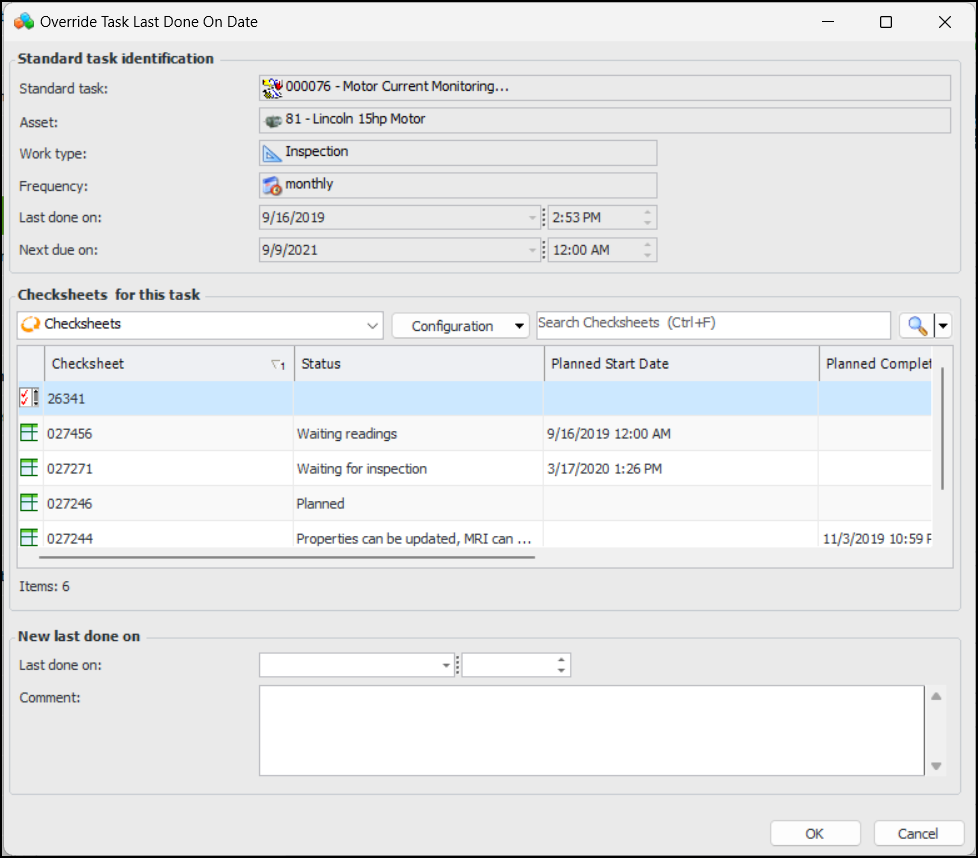
To Override the Last Done On Date
on the Overview tab.
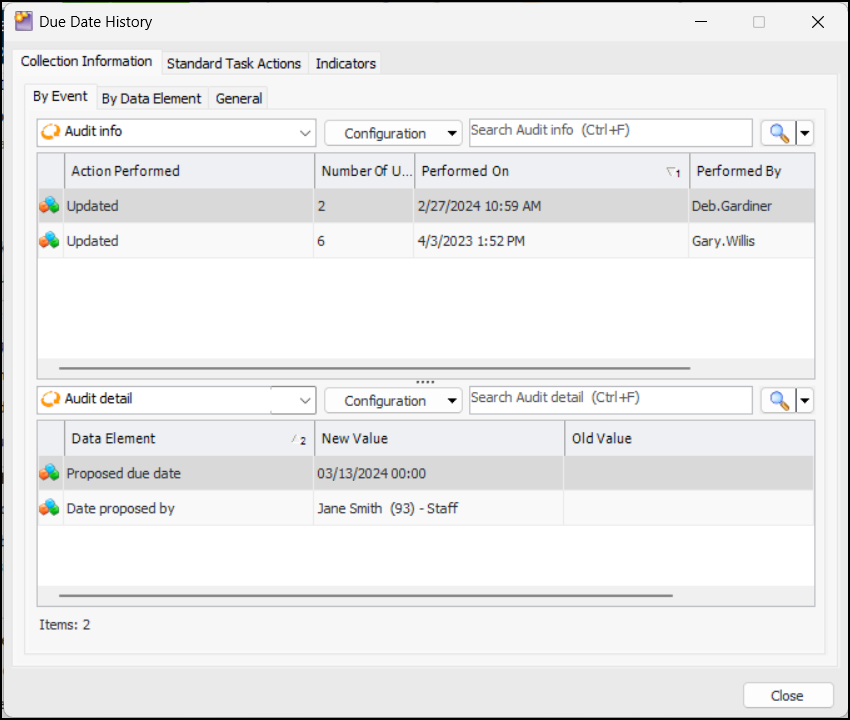
To View Due Date Audit History
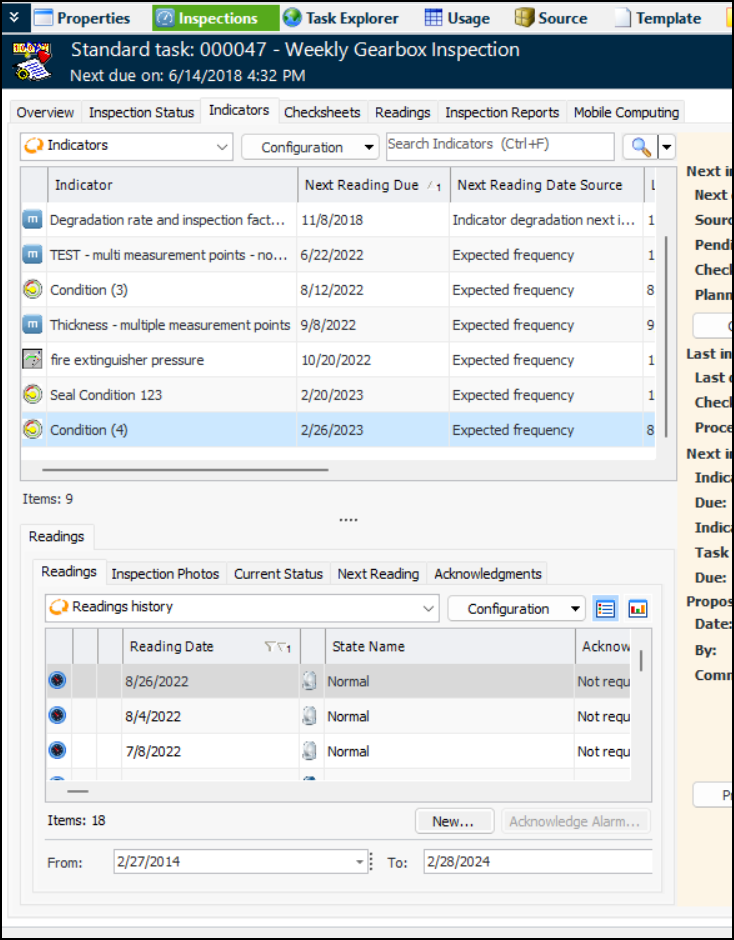
To View Detailed Information about Indicators
In the Standard Task window, select the Inspections view and the Indicators tab. This tab provides detailed information about individual indicators, including readings and status. Select an indicator in the top table to view its details below. For example:
 to open the Checksheet window (either the next open checksheet or last completed)