|
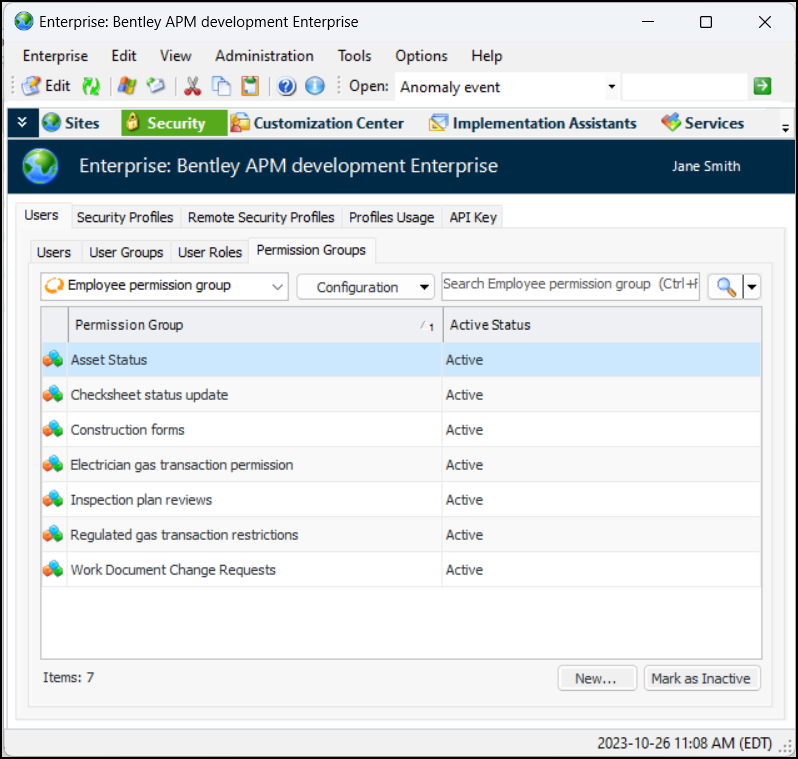
Setting up Employee Permission Groups
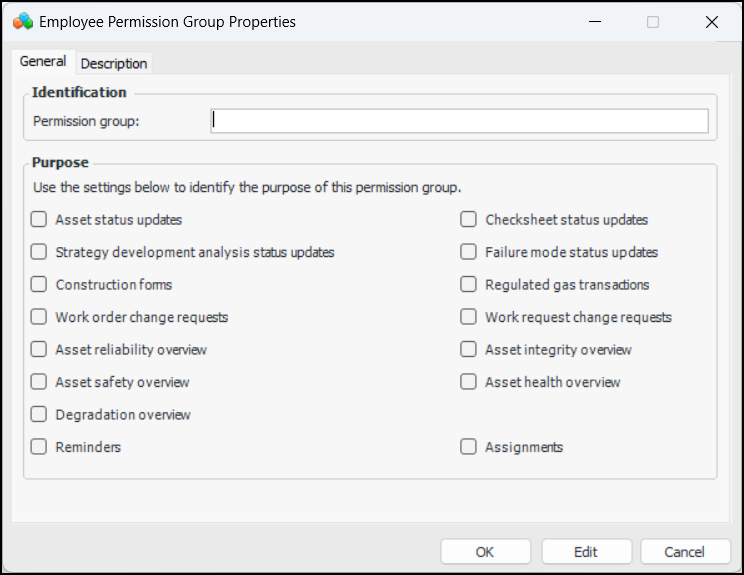
In the case of regulated gas transactions, group members can select only the specified gas and transaction types when entering gas transactions. For example, the “Electrician” permission group might be restricted from entering gas recovery transactions for SF6 gas. When a group member creates a transaction, “Gas recovery” is not available in the Transaction type list and “SF6” is not available in the Gas type list.Note: We recommend using security profiles to identify employees who have the authority to perform actions. Employee permission groups allow you to fine-tune security by restricting access at a more granular level. For more information, see Security.To Create an Employee Permission Group
1. In the Enterprise window, select the Security view, the Users tab, and the Permission Groups tab. This tab lists the existing permission groups, which you can mark as inactive or active.
2. Click New. The Employee Permission Group Properties dialog appears:
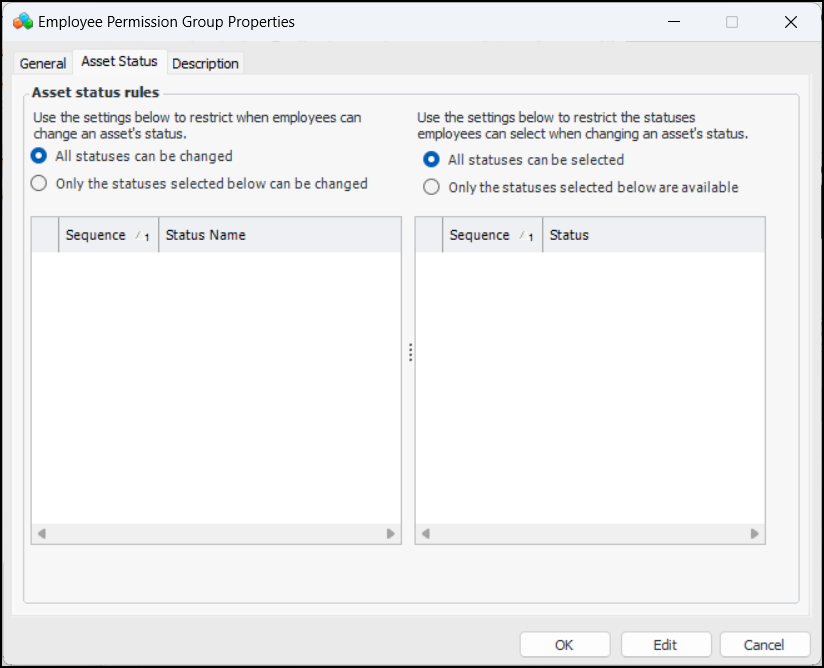
To Define Asset Status Rules
1. Select the Asset Status Updates tab.
2. Select Only the statuses selected below can be changed. Select the appropriate statuses in the table.
3. Select Only the statuses selected below are available. Select the statuses that will be available to employees in the group when they change an asset’s status.
4. Select the Description tab to add information about the group.
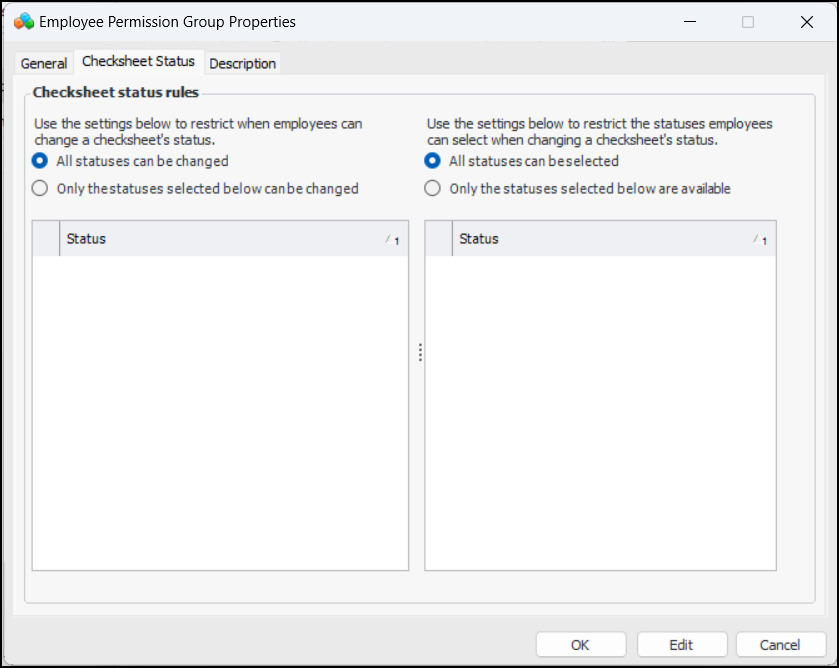
To Define Checksheet Status Update Rules
1. Select the Checksheet Status tab.
2. Select Only the statuses selected below can be changed. Select the appropriate statuses in the table.
3. Select Only the statuses selected below are available. Select the statuses that will be available to employees in the group when they change an checksheet’s status.
4. Select the Description tab to add information about the group.
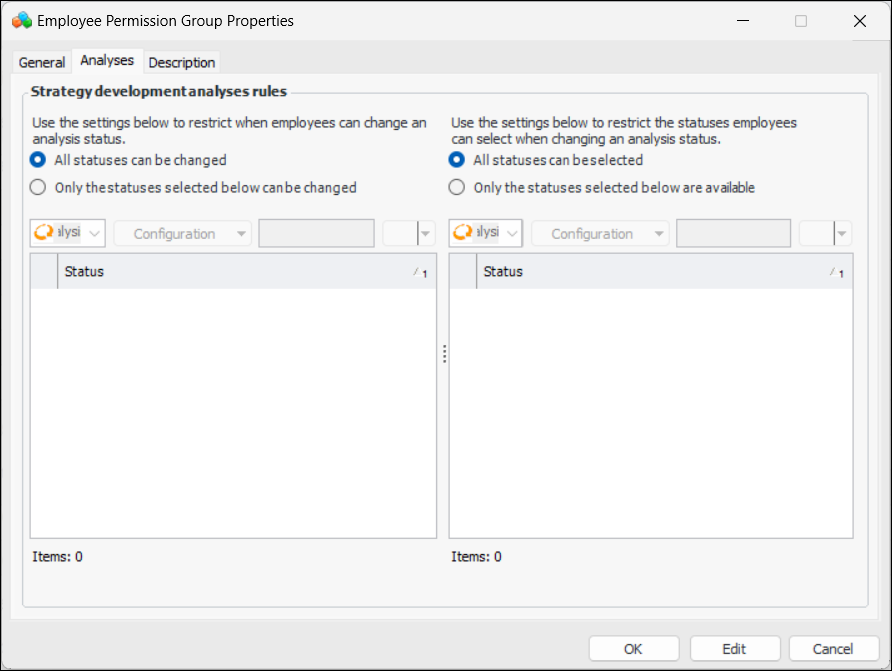
To Define Strategy Development Analysis Status Update Rules
1. Select the Analyses tab.
2. Select Only the statuses selected below can be changed. Select the appropriate statuses in the table.
3. Select Only the statuses selected below are available. Select the statuses that will be available to employees in the group when they change an analysis’ status.
4. Select the Description tab to add information about the group.
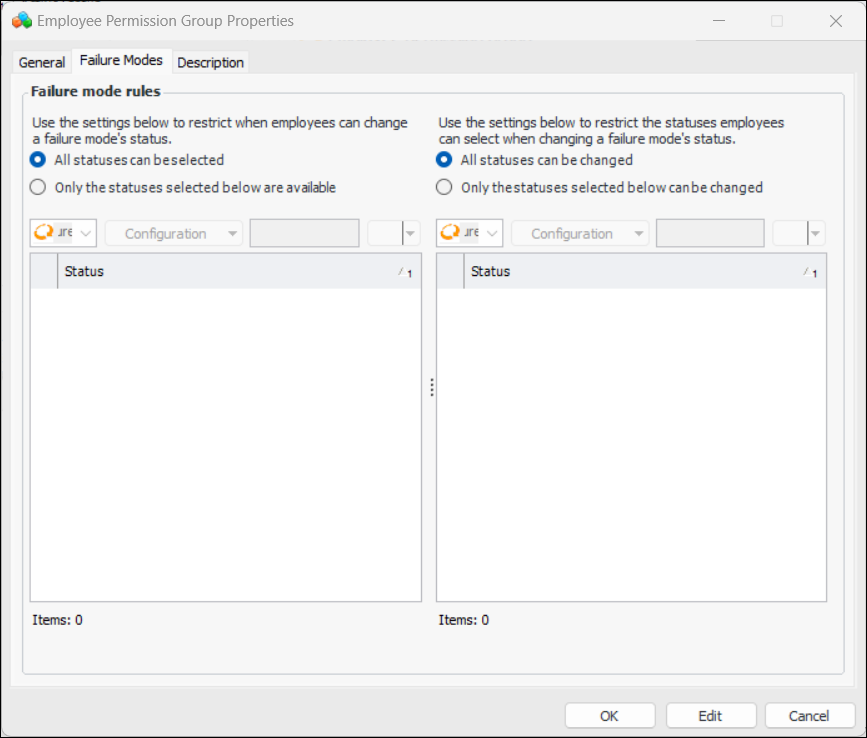
To Define Failure Mode Status Update Rules
1. Select the Failure Modes tab.
2. Select Only the statuses selected below can be changed. Select the appropriate statuses in the table.
3. Select Only the statuses selected below are available. Select the statuses that will be available to employees in the group when they change a failure mode’s status.
4. Select the Description tab to add information about the group.
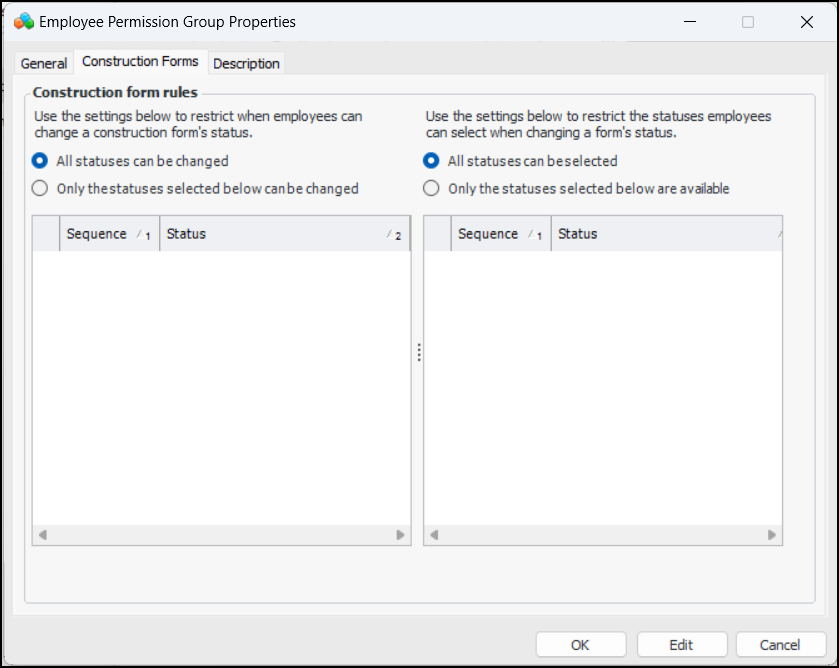
To Define Construction Form Rules
1. Select the Construction Forms tab.
2. Select Only the statuses selected below can be changed. Select the appropriate statuses in the table.
3. Select Only the statuses selected below are available. Select the statuses that will be available to employees in the group when they change an construction form’s status.
4. Select the Description tab to add information about the group.To Define Gas Transaction Rules
1. Select the Gas Transactions tab.
2. Select Transactions only for the gas types selected below can be entered. Select the appropriate gas types in the table.
3. Select Only the types selected below can be entered. Select the gas types that will be available to employees in the group when they enter a transaction.
4. Select the Description tab to add information about the group.
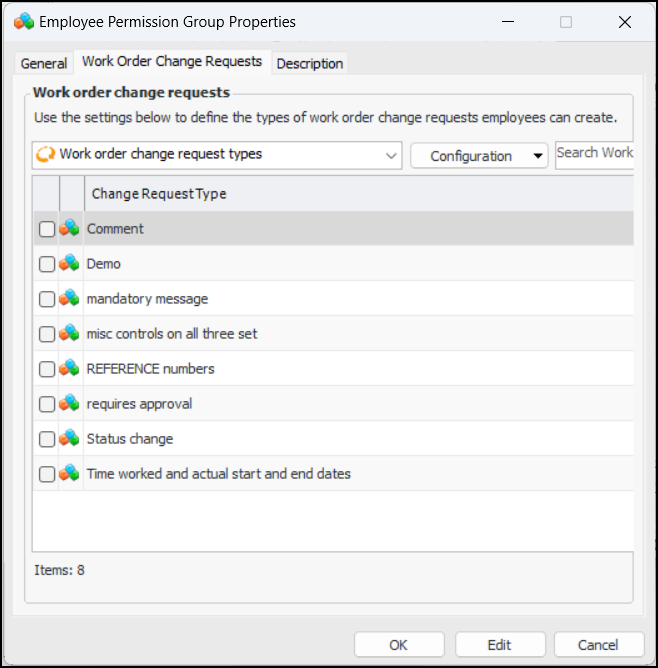
To Define Work Order Change Request Rules
1. Select the Work Order Change Requests tab.
3. Select the Description tab to add information about the group.
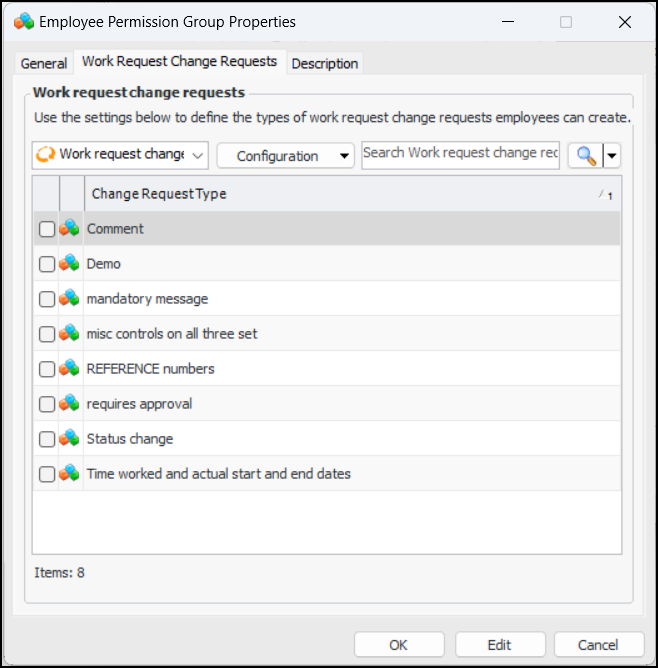
To Define Work Request Change Request Rules
1. Select the Work Request Change Requests tab.
2.
3. Select the Description tab to add information about the group.
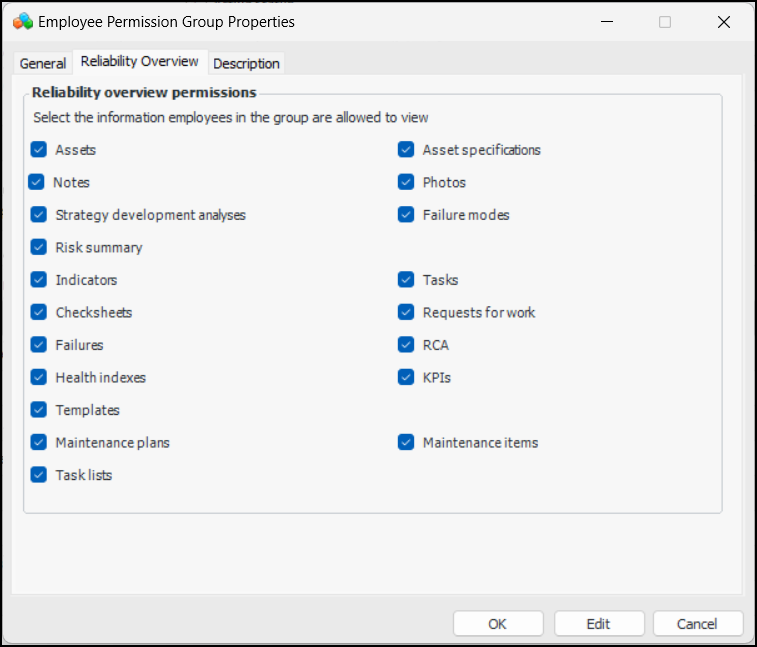
To Define Asset Reliability Overview Rules
1. Select the Reliability Overview tab.
3. Select the Description tab to add information about the group.
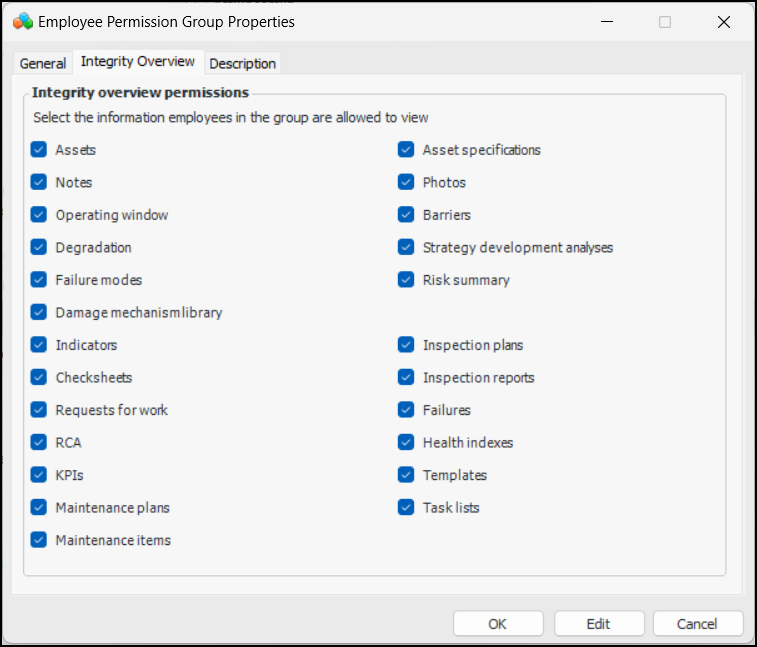
To Define Asset Integrity Overview Rules
1. Select the Integrity Overview tab.
3. Select the Description tab to add information about the group.
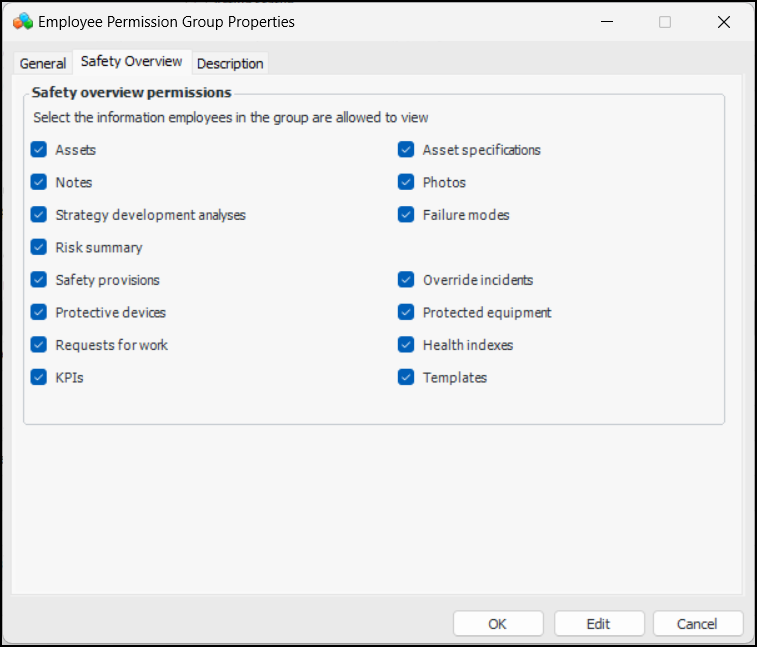
To Define Asset Safety Overview Rules
1. Select the Safety Overview tab.
3. Select the Description tab to add information about the group.To Define Asset Health Overview Rules
1. Select the Health Overview tab.
3. Select the Description tab to add information about the group.
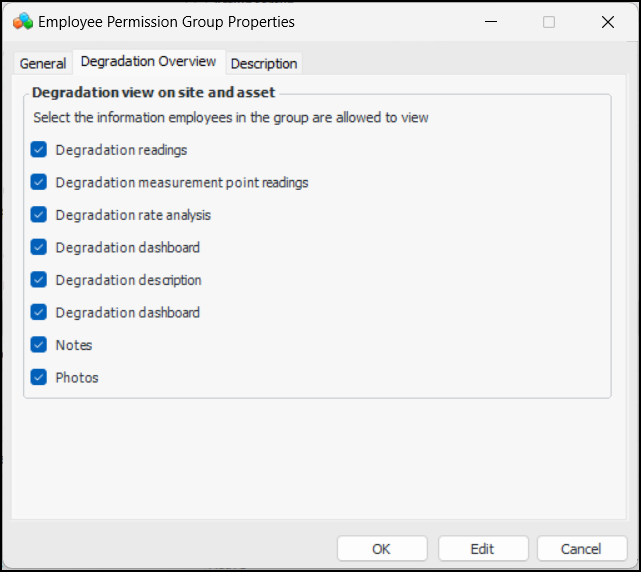
To Define Degradation Overview Rules
1. Select the Degradation Overview tab.
3. Select the Description tab to add information about the group.
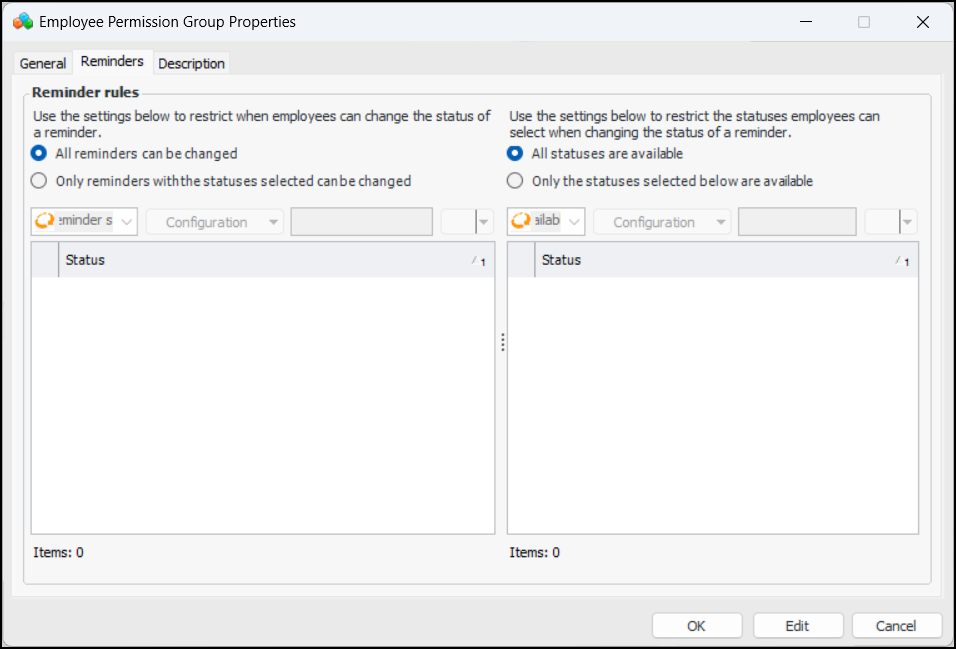
To Define Reminders Rules
Note: Reminders are a generally available product feature. You must first enable feature 139 to use the functionality in APM. In the Enterprise window, select the Features view and the Enabled Features tab. Click Browse, select “Reminders and assignments” and click OK. If APM is running as a smart client, click Refresh Enabled Features on the server. Then restart the client to use the functionality.
4. Select the Reminders tab.
5. Select Only reminders with the statuses selected can be changed. Select the appropriate reminder statuses in the table.
6. Select Only the statuses selected below are available. Select the reminder statuses that will be available to employees in the group.
7. Select the Description tab to add information about the group.To Assign a Permission Group to an Employee
1.
4.