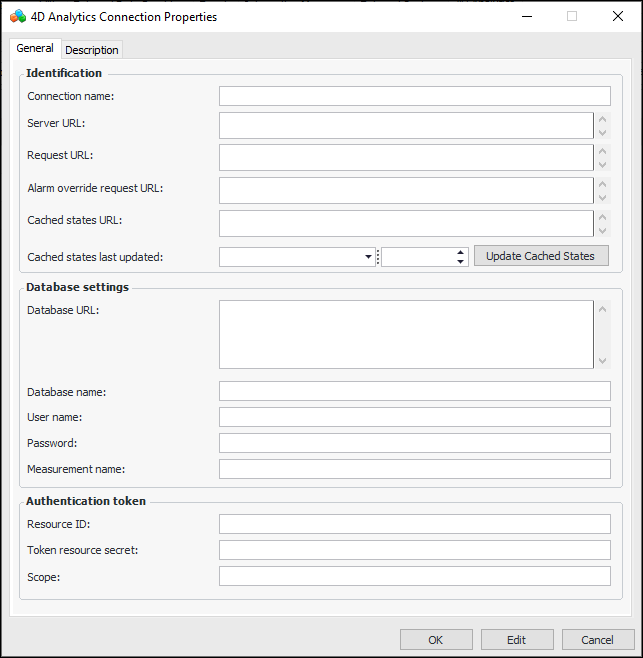
Creating 4D Analytics Connections

A connection specifies the information needed to access the server and Influx database, as well as authentication information. You will typically create a connection for each site that uses 4D indicators.

To Create a 4D Analytics Connection

1.
Open the Enterprise window, select the Integrations view, the 4D Analytics tab, and the Connections tab.
2.
Click New. The 4D Analytics Connection Properties dialog appears:
3.
https://ServerName/engineeringChart.jsp
https://ServerName/WriteHighVolData.jsp
https://ServerName/WriteHighVolAlarmOverride.jsp
https://ServerName/WriteHighVolAlarmLevels.jsp
4.
Cached states last updated shows the date and time when indicator states were last sent from the APM database to the cache. The states cache supplies the 4D Analytics alarm engine with current information for evaluating newly ingested readings.
When you have finished setting up 4D Analytics, clear any values in the “last updated” boxes and click Update Cached States to initially populate the cache. Whenever indicator states change in the future, the cache is updated automatically and the “last updated” date is refreshed.
5.
6.
7.
Select the Description tab to provide more information.
8.
Click OK to save the connection and close the dialog.
Tip: Once a connection has been in use, you can open its properties dialog to view usage and historical information.
Note: You can mark a connection as inactive to prevent it from being used, for example, during development. Select the connection in the table and click Mark as Inactive.When the connection is ready, select it in the table and click Mark as Active.