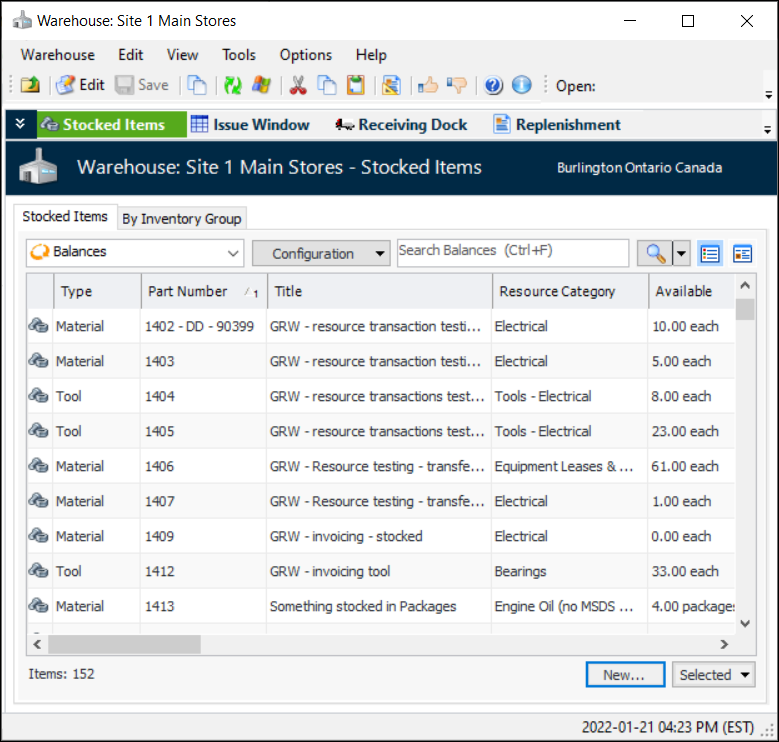
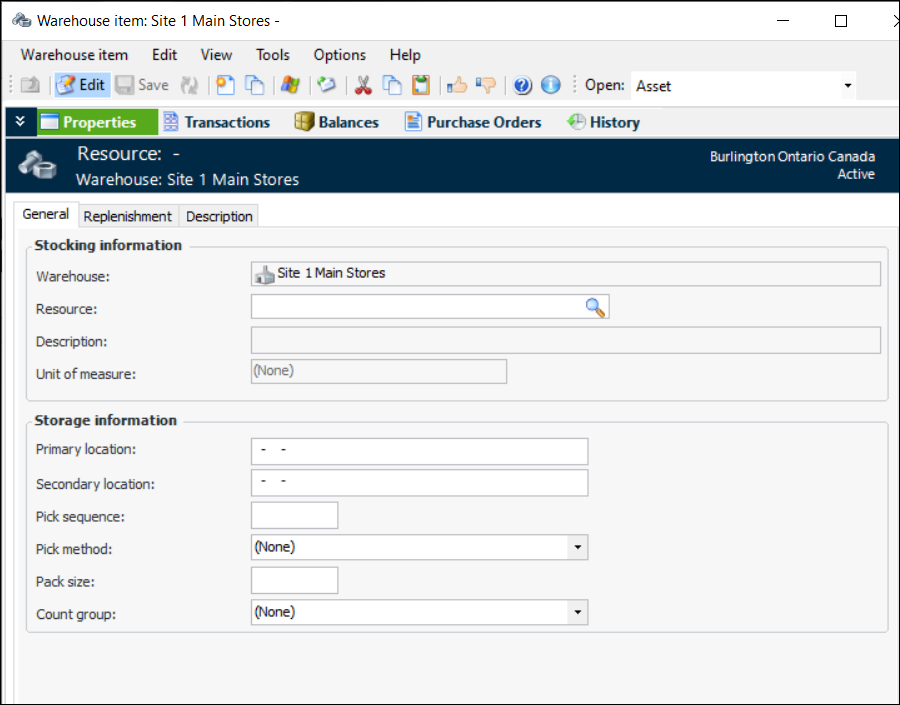
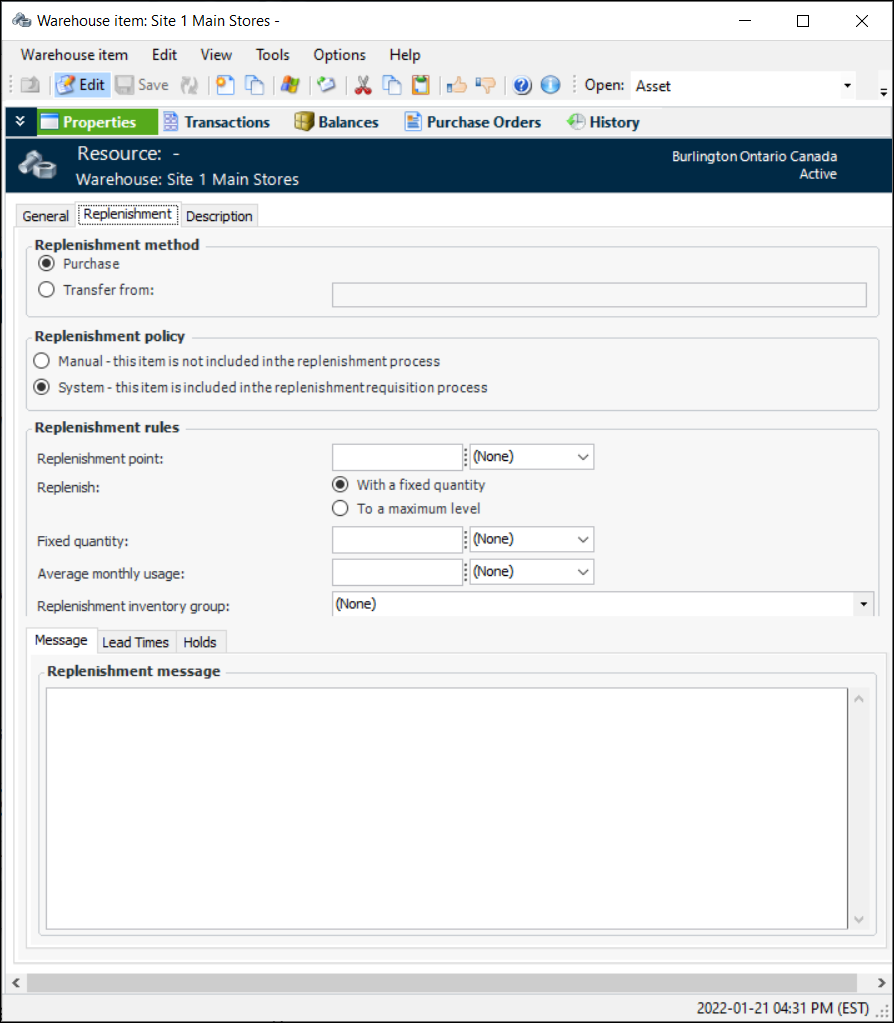
Adding an Item to a Warehouse

To make use of the inventory function, you must link items in the resource catalog to a specific warehouse. You can do this by creating warehouse items for each warehouse. When you create a warehouse item, you can enter the locations where the warehouse staff can find the item and a picking method for the item (for example, manual or forklift). This information is included when the item is placed on a pick list. You can also select a count group for each item. You can use count groups to filter warehouse items when creating count sheets.
You can set up replenishment rules for warehouse items. APM uses these rules to determine when you need to get more stock. If the resource is a consignment item, you must select the appropriate consignment inventory group as the inventory group for receiving the replenishment orders.
Warehouse items can also be set to have a manual replenishment review. For example, a manual review would be appropriate when you stock seasonal or high value materials. When an item needs to be replenished, you can set APM to create either a purchase order or a request to transfer stock from another warehouse.
Audit history for a warehouse item such as when the item was created, can be viewed on its History view, By Event tab.
This topic explains how to add a warehouse item to an existing warehouse.

To Add an Item to a Warehouse

1.
In the Site window, select the Resource Management view and then the Inventory tab.
2.
On the Warehouses tab, double-click the warehouse that you want to add items to. The Warehouse window opens displaying the Stocked Items view.
3.
Click New. The Warehouse Item window appears.
4.
On the General tab, complete each of the following sections with the appropriate information.
The part number for the resource being stocked. If you know the number, you can enter it here. To see the resource catalog, click Browse. The Resource Selector dialog appears. Select the resource you want to add to the warehouse and click OK.
APM fills in the Description and Unit of measure boxes automatically.
5.
On the Replenishment tab, fill out each of the following sections with the appropriate information.
Purchase: This method creates a resource demand of the type Purchase. The buyer will review the replenishment demand and use the information to create a PO line.
Transfer from: This item will be replenished using a request to transfer stock from another warehouse. This method creates a resource demand of the type Transfer. Transfer demands become warehouse transfer transactions.
Manual: Select this option if a manual review will be conducted to determine the need to replenish the item. The item will not be included when the Create a replenishment requisition action is run.
System: Select this option if APM will determine the need to replenish the item when the Create a replenishment requisition action is run for the warehouse.
Fixed Quantity: The replenishment demand will always request the same number of items or multiples of the number if required to push the available balance above the replenishment point.
Maximum Level: The replenishment demand will calculate how many items to order to reach the maximum stock level.
6.
Select the Lead Times tab.
7.
Select the Message tab.
8.
On the Description tab you can enter a longer description for the warehouse item.
9.
When you are finished entering information about the warehouse item, click OK. APM adds the item to the warehouse. The warehouse item appears in the list.
10.
To enter information about the current quantity and value of the item, right-click on the item and select Adjust Item. The Adjust Item dialog appears. For detailed information on filling out the adjustment, please see Adjusting Inventory.