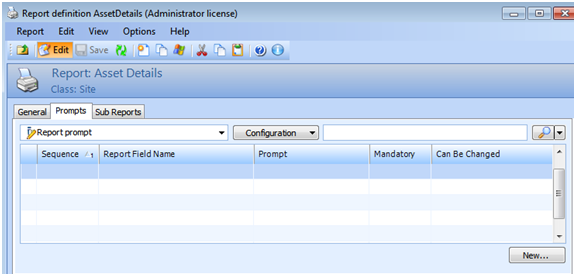
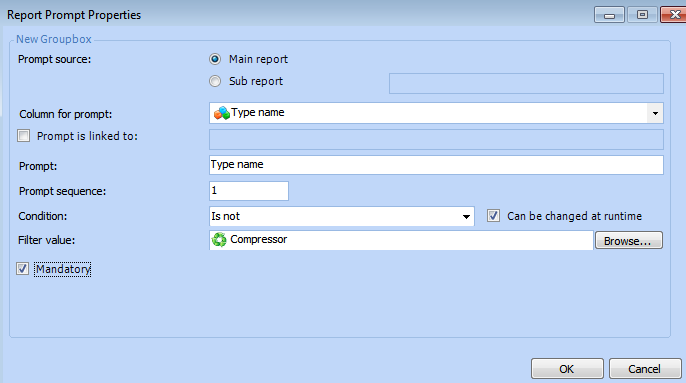
Adding Prompts to Reports

Prompts can be added to reports so that users can specify a date range or a value on which the report is filtered. For example, you might want a report of Inspection reports that were generated between January 15 and February 14 or a report that contains specific asset types only, such as a motor.
Prompts for relationships are available for string-type attributes only. If the attribute is included on the report though a relationship (that is, if the configure column has a join path and the selector type is set to either dropdown or popup) then the user will see the prompted filter on the Print Report dialog.
Up to ten prompts can be shown on the Print Report dialog. If there are more than ten prompts on a report, all will be used on the report but only the first ten will be shown in the Print Report dialog.
It is helpful to know what prompts were used when a report was generated. This allows the user to understand the report content. If the expected information was not included on the report, the prompts can be modified accordingly.
Prompts are added to the report definition and can also be printed on the report, usually as part of the report footer. When this is done, the prompt values selected by the user appear on the report.
This topic explains how:

To Add a Prompt to a Report

1.
2.
Select the Prompts tab.
3.
Click New. The Report Prompt Properties dialog appears.
4.
Select either Main report or Sub report for a prompt source.
5.
From the list, select the Column for prompt that has been formatted in the report configuration. In this example, the Type name is selected.
When the column to prompt is selected, additional fields appear in the dialog:
Prompt name: Provided by APM
Prompt sequence: Automatically assigned by APM
Condition: Select a condition to be used for the prompt when the report is generated or printed. The following conditions can be selected:
Is after (alphabetically)
Is (exactly)
Is before (alphabetically)
Contains
Is blank
Is not blank
Does not contain
Starts with
Ends with
Is not
If you select Is after (alphabetically), Is before (alphabetically), Is (exactly) or Is not, you can browse for a Filter value field.
Filter value: Enter the prompt value. You can enter the value directly into the field or, if the condition selected is one of Is after (alphabetically), Is before (alphabetically), Is (exactly) or Is not, click Browse. The Selector dialog appears. Choose a value and click OK to return to the Report Prompt Properties dialog.
6.
Clear Can be changed at runtime to not allow the prompt to be altered when the report is run.
7.
Select Mandatory if the prompt must be used for the report. For example:
8.
Click OK. The Report Prompt Properties dialog closes. The prompt is listed on the Prompts tab.
9.
10.

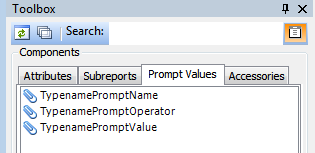
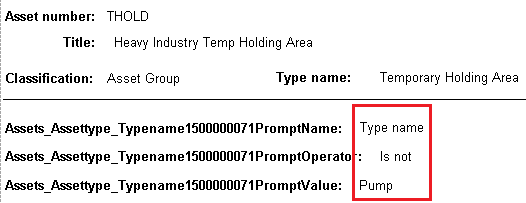
To Include Prompts on the Report

1.
2.
Select the Toolbox panel and then the Prompt Values tab. It will look similar to this:
3.
PromptName: The name given to the prompt by the report designer.
PromptOperator: The condition for the prompt, for example, “Is not”
PromptValue: The value that is used with the operator/condition for the prompt.
4.
Tip: The prompt values can be added to any section of the report: header, detail, or footer.
5.
6.
When the report is generated and either printed or previewed, the prompt values will be listed. For example: