Creating Gas Containers

Gas containers, such as bottles and cylinders, are used to track the volumes and transactions associated with regulated gas. The container record specifies the container type, gas type, tare weight (weight when empty), and capacity (maximum weight).
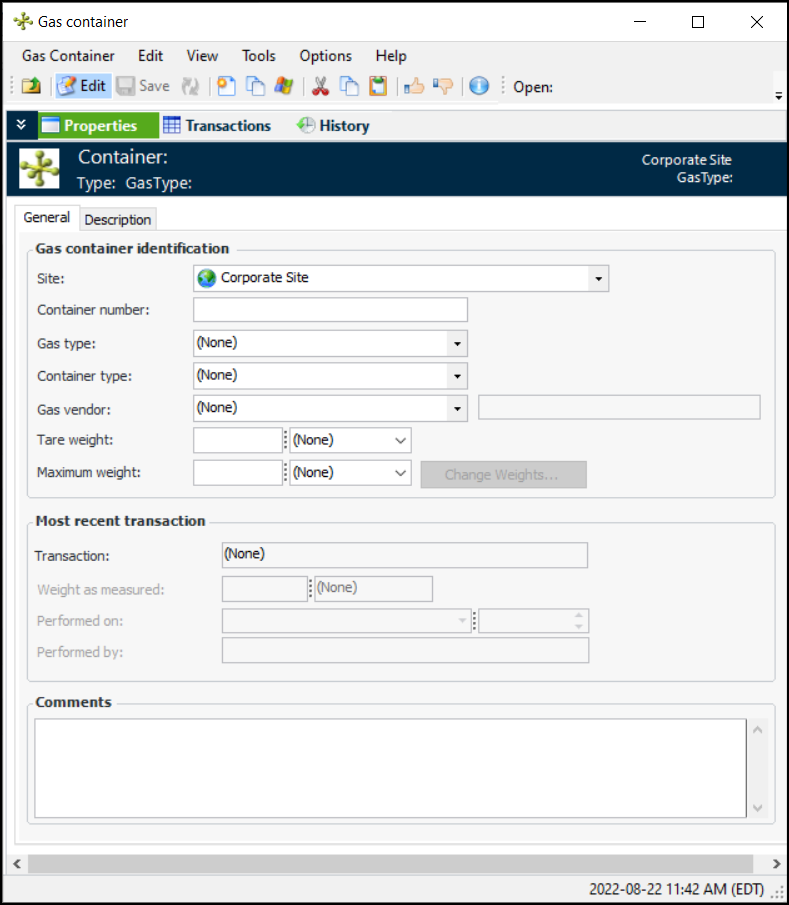
You can use the Gas Container window to view information about the container, create gas transactions, and change the tare and/or maximum weight. The Properties view shows the most recent transaction. Select the History view to review general information about the container record, as well as changes according to event and data element.
The gas container’s type can specify the site where it is defined. The site also controls the location assets (for example, headquarters or substations) and equipment (for example, circuit breakers) that can be referenced in the container’s transactions.
Tip: Once a transaction that involves the container has been entered, you cannot modify its tare or maximum weight values directly. For information about using the Change Tare Weight function, see Changing a Gas Container’s Weights.
This topic explains how to add a new container in APM.

To Create a Gas Container

1.
In the Site window, select the Regulated Gas Management view and the Containers tab.
This tab can list containers for the current site only, this site and above, or this site and below. For example:
Tip: You can mark a container as inactive, for example, when it has been damaged. This prevents the container from being used in transactions, while preserving a history of the container and its transactions. You can also reactivate a container to make it available again.
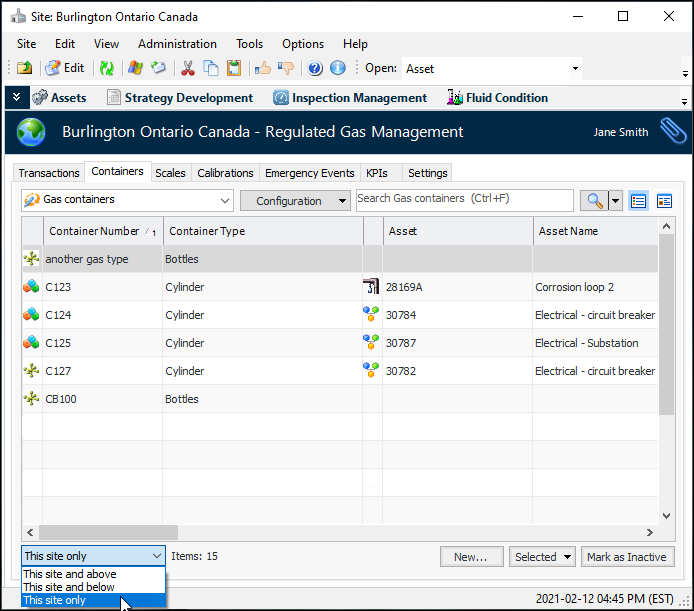
Select the container and click Mark as Inactive. The Mark as Inactive/Active window appears, where you can enter the reason for the change. Click OK and then click OK again to confirm the action. Now when the container is selected in the tab, the Mark as Active button is available.
2.
Click New. The Gas Container window appears.
3.
In the Properties view, General tab, provide the following information:
4.
Select the Description tab to add more information about the container.
5.
Click OK to save the container and close the window. The container is added to the Containers tab.