|
|


Adding Assets to an RBI Analysis
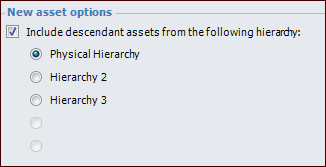
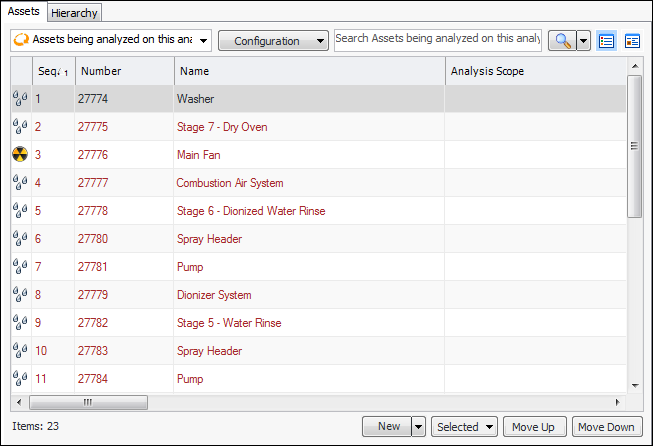
In a new analysis, the Properties view, Assets tab displays the primary asset or system and its asset type. The second Assets tab and the Hierarchy tab display the primary asset and its descendants, if included in the analysis. As the analysis progresses, you might find it necessary to add assets to the analysis.When you create an analysis that includes the primary asset’s descendants, a snapshot is taken of the asset’s physical hierarchy. This analysis hierarchy remains static. That is, any changes made to the site’s physical hierarchies are not automatically made to the analysis hierarchy. However, when you add assets to an analysis, the analysis hierarchy is refreshed with any changes that have occurred to the physical hierarchy. Also, at any time you can update the analysis hierarchy to reflect changes. For more information, see Updating the Asset Hierarchy Snapshot for an RBI Analysis.Assets are given sequence numbers as they are added to the analysis. The asset’s sequence number contributes to the failure mode’s reference number. You can change the sequence numbers of assets and failure modes using the Move Up and Move Down buttons on the Assets tab.You can also update the sequence numbers for all assets, failure modes, or both using the Renumber Objects option on the Tools menu. For more information, see Renumbering Assets and RBI Failure Modes.Tip: In the System Information view, you can review information about the analysis asset. You can also edit the following properties from the Asset tab:In the Process tab, you can also add and edit operating parameters on the Operating Window tab. Changes that you make in the System Information view are saved to the asset record.Tip: After the analysis is completed, you can return and see a snapshot of an asset’s properties as they were at the time the asset was analyzed. In the Strategy Development Analysis window, select the Properties view and then the Assets tabs (or the System Information view, Hierarchy or Assets tab). Right-click the asset in the table and click Asset Snapshot. The Asset Snapshot dialog displays the information that was current either on the date that the asset was added or on the date that the analysis status changed to “Analysis completed”.To Browse for Assets
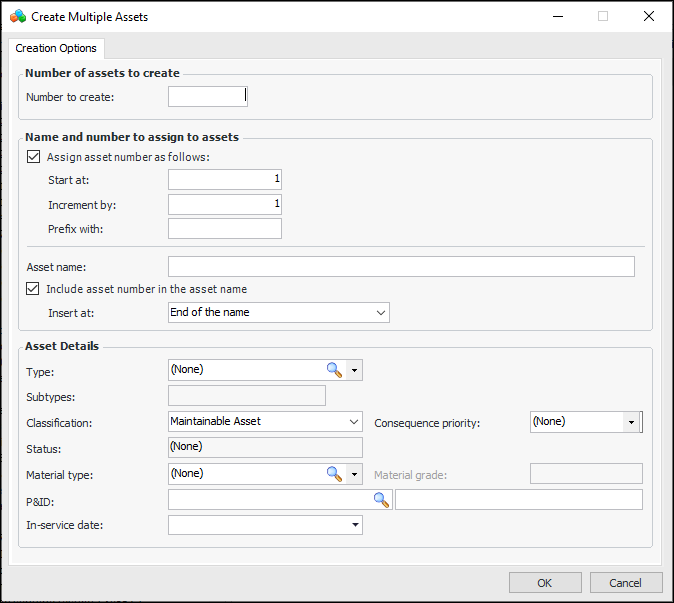
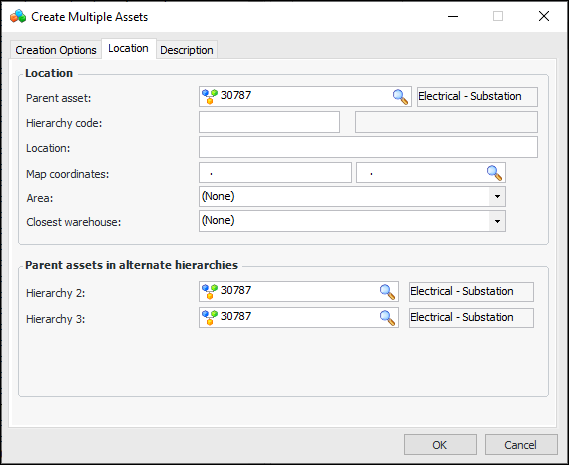
To Create Assets
 is enabled.