|
|


**Setting up Work Types
Work Types and Interoperability (AWEIS)
When AssetWise Enterprise Interoperability (AWEIS) has been implemented to exchange data between APM and an external CMMS, the CMMS is the work management system. This means that APM work orders, work requests, and standard jobs are not used. Instead, you can create requests for work to submit to the CMMS, which in turn sends interop work requests, interop work orders, and solution packages (pre-planned work) to APM. This makes the job of setting up work types simpler. It also allows you to configure work type settings that are tailored to the sites where the work types are used. For more information, see Setting up Site-Specific Work Types.Work Types and Solution Packages (AWEIS)
A standard task’s work type determines if solution packages can be identified on its Properties view, Solution Packages tab. Requests for work generated from the checksheets associated with the standard task are then used to trigger the correct solution packages in the CMMS.Note: Support for solution packages on standard tasks is “generally available” functionality. To use it, you must first enable feature 119 in APM. In the Enterprise window, select the Features view and the Enabled Features tab. Click Browse, select “Solution package identification on standard task” and click OK. If APM is running as a smart client, click Refresh Enabled Features on the server. Then restart the client to use the functionality.Work Types and KPIs
Task Purpose
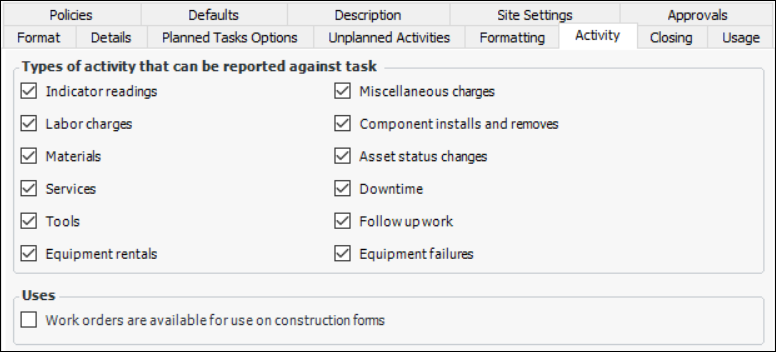
Activity Reporting
Automatic Completion and Closure of Work Order Tasks
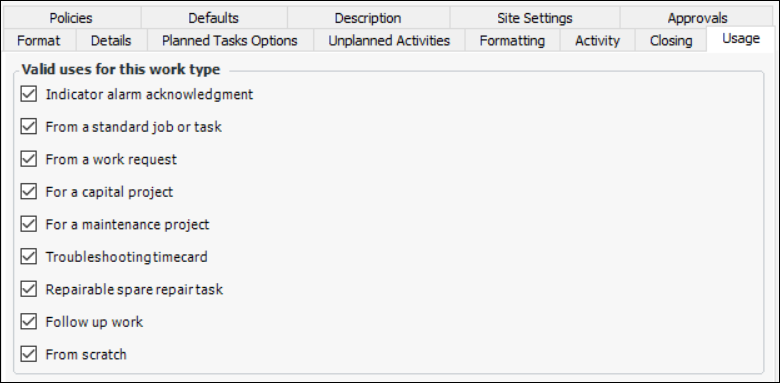
Note: You must then set up a scheduled action (Close Completed Tasks) to look for completed tasks for which the length of time has elapsed and then close the tasks. For more information, see Creating a Scheduled Action.Valid Uses
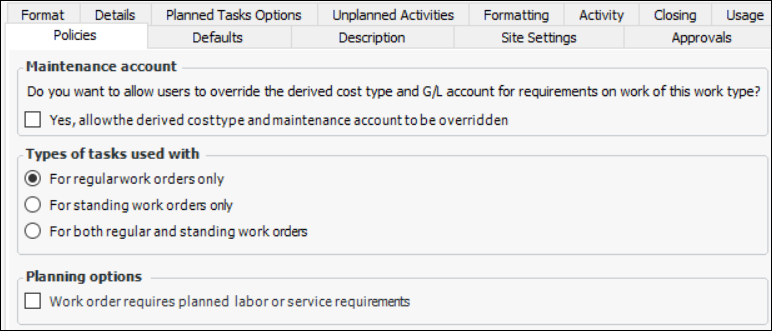
Override GL Account
Regular vs. Standing Work Orders
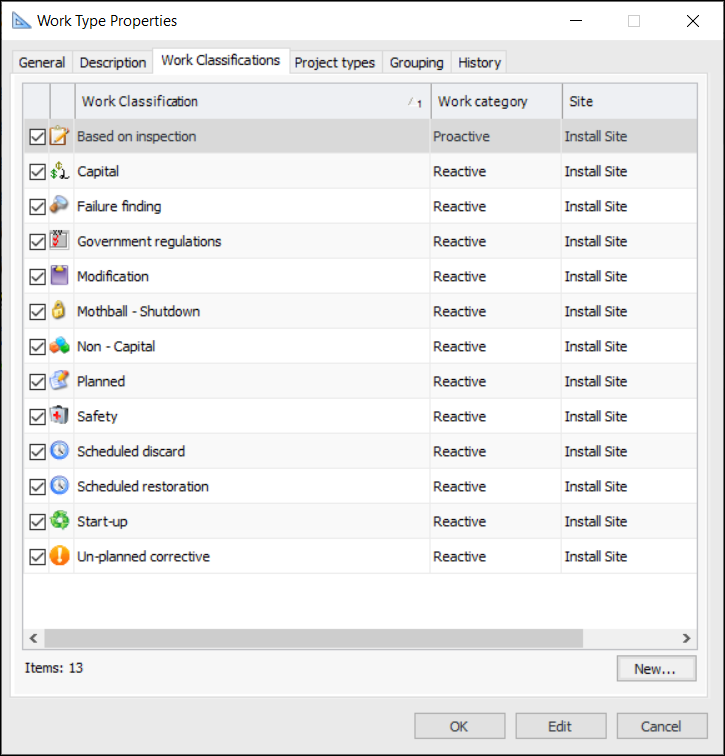
Work Classifications
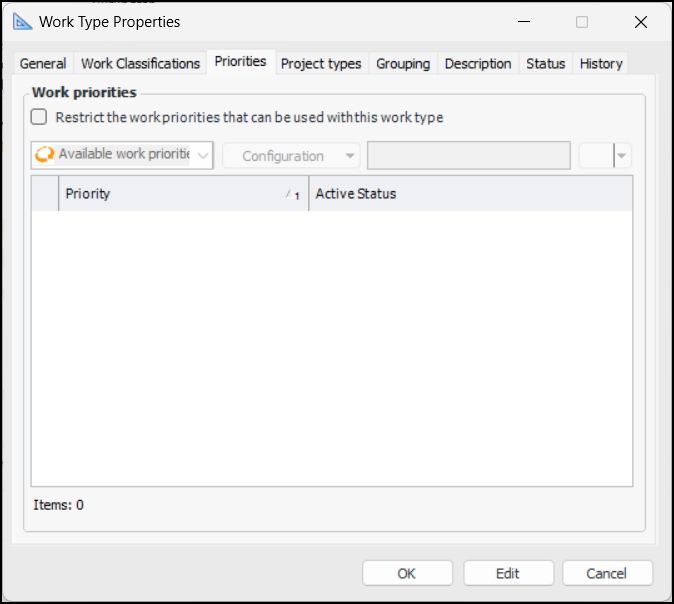
Work Priorities (AWEIS)
You can restrict the work priorities available for use with a work type. In the Work Type window, the Priorities tab is available when AWEIS is active and feature 131 is enabled. The work priorities that are available for selection are filtered on assets, standard tasks, checksheets, and requests for work.Note: The restricted work priorities feature is generally available in APM. You must first enable feature 131 to use the functionality. In the Enterprise window, select the Features view and the Enabled Features tab. Click Browse, select “Provide the ability to limit the priorities that can be used by a work type” and click OK. If APM is running as a smart client, click Refresh Enabled Features on the server. Then restart the client to use the functionality.Project Types
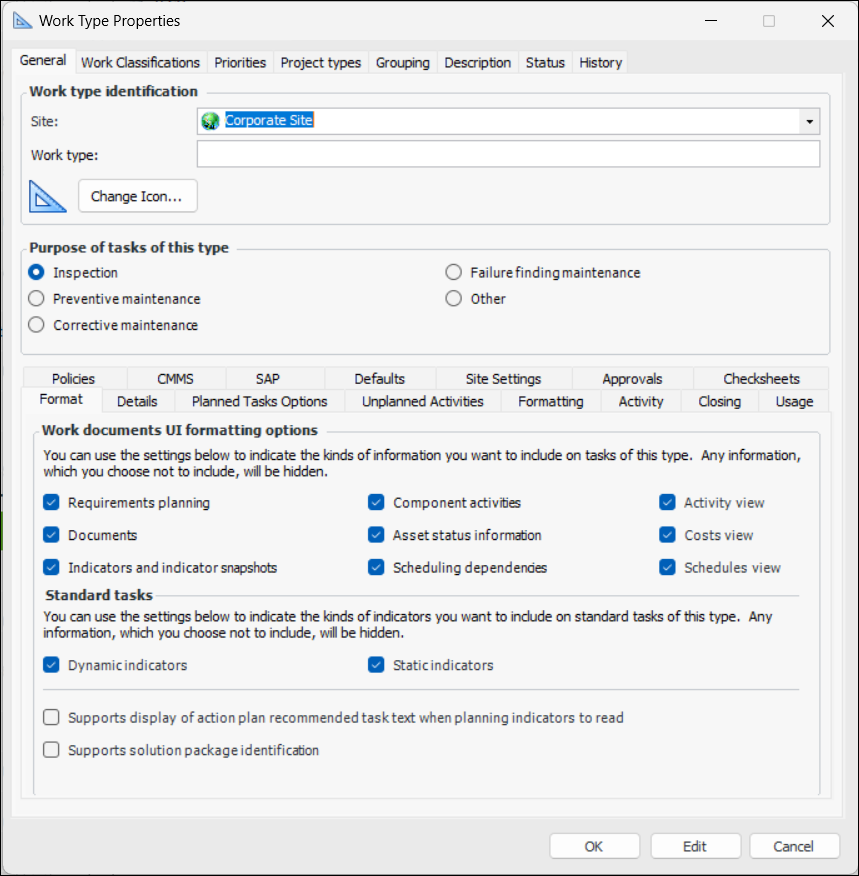
UI Formatting Options
You can use these options to simplify work orders and standard tasks that have certain work types. When you remove any of the options from the work type, the resulting work order task and standard task do not display that information. You can remove any of the following: planning information, standard documents, indicators and indicator snapshots, component activities, asset status information, scheduling dependencies, Activity view, Costs view, Schedules view, and Survey information.Work Type Defaults
You can pick a default work type for the site. APM uses this default work type when a user acknowledges an indicator alarm by creating a new work order from scratch. This setting is on the Indicator Settings dialog (Administration menu, Inspection Management Settings option, then Indicator Management option, Acknowledgment Policies tab).You can also pick default work types for each asset. You can do this on the Asset window, Properties view, Defaults tab. When a user creates a work order for an asset from scratch, APM uses this work type. Work order tasks created from standard tasks use the work type selected on the standard tasks.Approval Options
If you wish, you can require approval of work orders based on the work type selected. For example, you could require Corrective type work orders to be approved, but allow Inspections to proceed without approval. You can select the approval setting for work types in the site’s Approval Settings dialog (select the Administration menu and then Approval Settings option).To Set up a Work Type