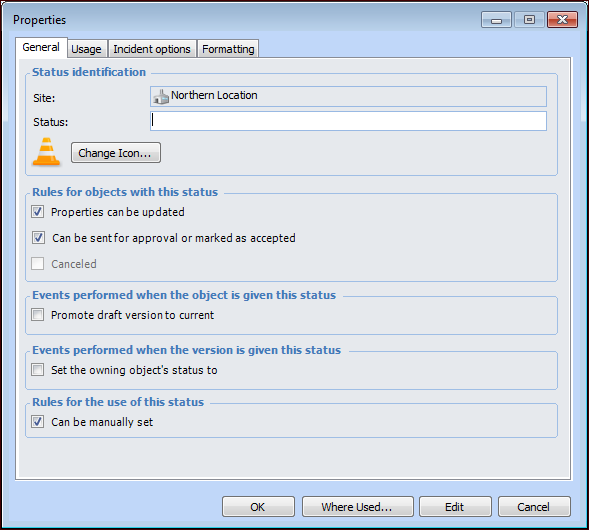
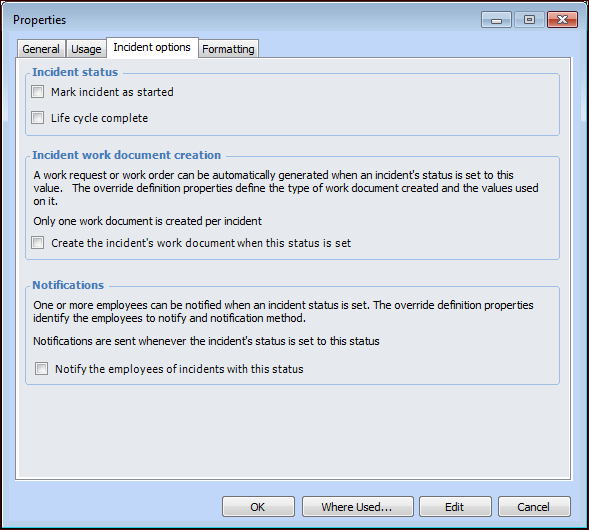
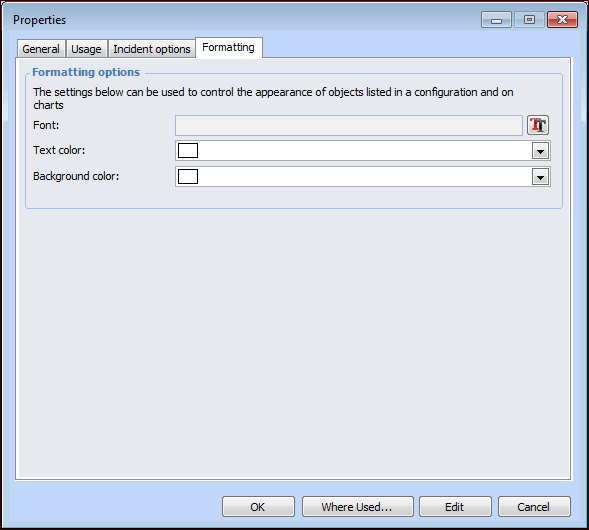
Setting up Safety Statuses

Safety statuses are user-defined settings that are applied to safety objects to control the events and rules available to them. The status’ usage settings specify which objects it can be applied to: safety provisions, override incidents, or both. Status settings also define rules such as whether the properties of an object with this status can be changed. Status properties include formatting choices such as font, text color, and background color.
Safety statuses and safety types work together. An object’s safety type controls the status assigned to it when an event occurs. For example, when a provision is created, its status might automatically be set to “New” in response to the creation event.
A status can also be applied manually if its settings allow. For example, when an override incident is completed, the user could set its status to “Historical” to complete its life cycle. The status might also specify that employees be notified that the incident has been closed.
Safety types determine if an object must be sent for approval. This involves employees designated as approvers reviewing the object in turn. Each approver can approve, reject, or forward the request. As an alternative to the formal approval process, safety provision drafts can be reviewed and marked as “Accepted.”
Tip: If you wish to change properties for an existing status, you can right-click the status and click Where Used to view the provisions, incidents, and safety types that use the status. The Properties dialog also contains the Where Used button.
This topic explains how to set up safety statuses. See Safety Statuses and Types for examples. For information about setting up types, see Setting up Safety Types.

To Set up a Safety Status

1.
On the site’s Safety Management view, select the Settings tab, and the Safety Management Settings node in the tree.
Tip: You can also select the site’s Administration menu and then Safety Management. The Safety Management Settings dialog appears.
2.
Select the Statuses tab. This tab shows the safety statuses defined for the enterprise and site.
3.
Click New. The Properties window appears.
4.
5.
To select a different icon for the status, click Change Icon. Select the new icon and then click OK.
6.
7.
Select Set the owning object’s status to if you want the status for the provision version and its provision to be the same.
8.
By default, a status can be manually selected by users. To prevent this, clear Can be manually set. The status can only be set by system events.
9.
Select the Usage tab. By default, both Safety provisions and Override incidents are selected. Change the selections as appropriate for the status.
10.
Select the options that apply:
11.
Select the Formatting tab if you wish to distinguish the status from others when it appears in tables and charts.
12.
13.
When you are finished defining the status, click OK. The status is added to the Safety Statuses table.