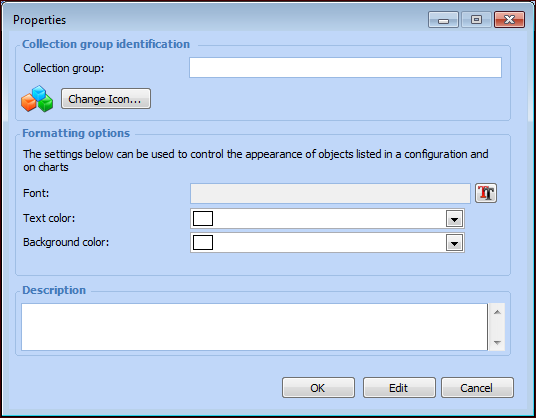
Setting up Collection Groups for Dynamic Routes

A dynamic inspection route is defined on a standard task and comprises a list of assets (ordered in walk-around sequence) and a set of criteria for including the assets’ indicators. When a list of indicators to read is generated using the standard task, indicators with properties that match the criteria are included.
The indicator’s collection group is one such criterion. Collection groups typically identify a location on large assets, for example, the first floor or second floor. Because a large asset can be included more than once on the same route, the collection group is used to pinpoint the stop. For example, a large piece of equipment might be visited once to read indicators on the front and again later to read indicators on the back.
When setting up a collection group, you can select a font and color for showing the data in charts in KPIs, for example.

To Set up Collection Groups

1.
From the Site window, select the Inspection Management view, the Settings tab, and then the Indicators tab. Select the Indicator Settings node in the tree.
Tip: You can also click the Administration menu, Inspection Management Settings, and then Indicator Management. The Indicator Settings window appears.
2.
Select the Data Collection tab and then the Collection Groups tab.
3.
4.
5.
To change the graphic used to identify the group, click Change Icon, select a graphic, and click OK.
6.
7.
8.
Click OK to close the dialog. The collection group is added to the table.