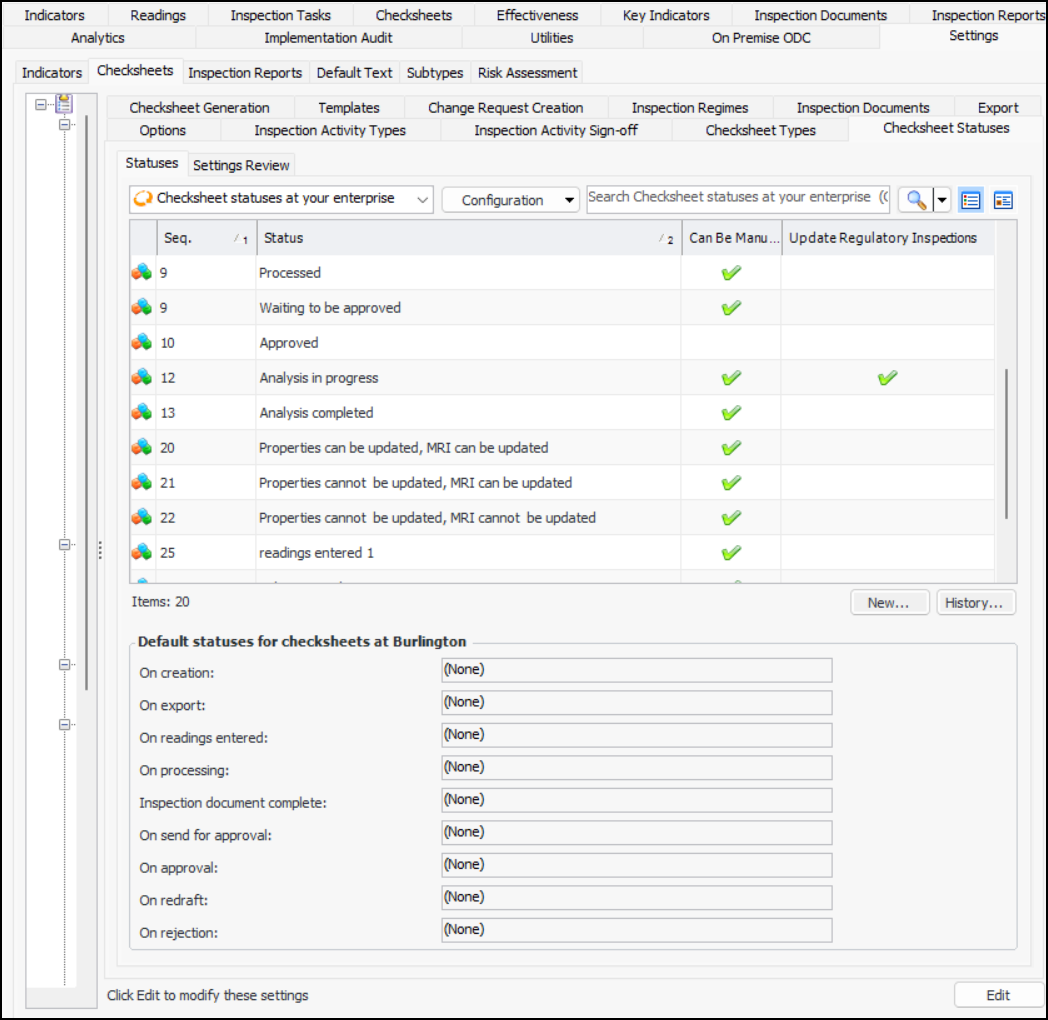
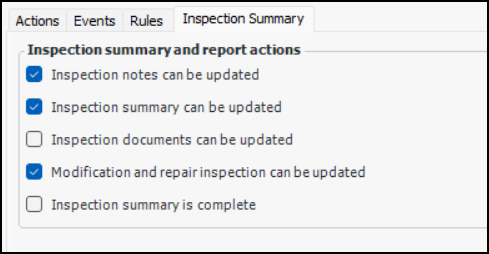
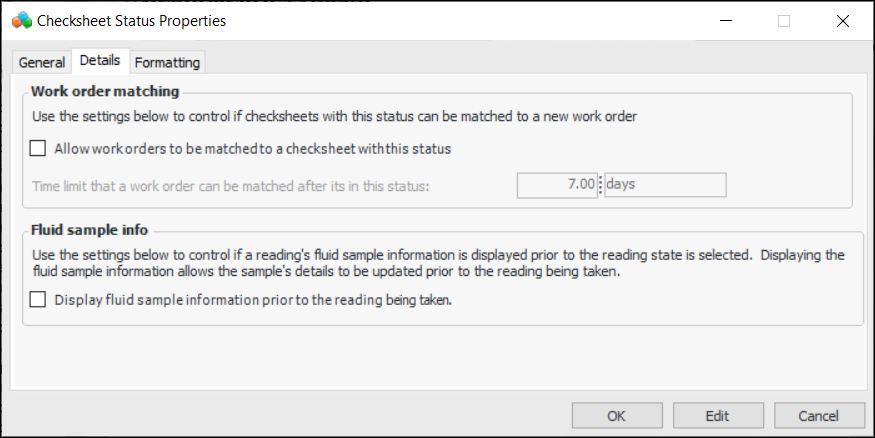
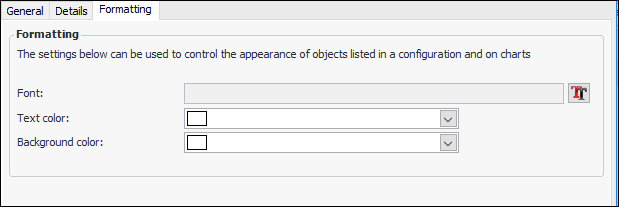
Setting up Checksheet Statuses

Your organization can use statuses to track the life cycle of checksheets in APM. The status can also control the actions that you are able to perform on the checksheets to which it is applied. For example, in a typical implementation, when a checksheet has the status “New”, indicators can be added and removed.
Note: We do not recommend using checksheet statuses on sites that use workflows because statuses can conflict with workflow tasks.
APM comes with standard statuses, which you can modify for your organization. You can also create statuses and set the default statuses for the site.
This topic explains these concepts:
This topic also explains how:

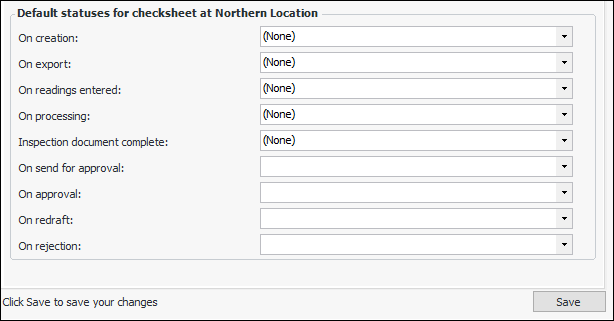
Default Checksheet Status Assignments

For the site, you can select the statuses to be assigned to checksheets when events occur. For example, when a checksheet is created, it could automatically be assigned the status “New”.

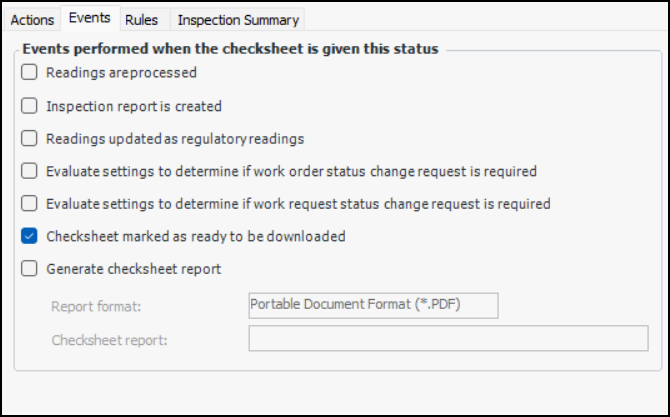
Checksheet Status Events

You can have APM perform one or more actions when the status is applied to the checksheet. For instance, when the “Approved” status is assigned to a checksheet, you could have its inspection report created.
For example, you could create a status called “New” that allows indicators to be added and the checksheet to be sent for approval. You could then create the “Approved” status and have APM apply it automatically when the checksheet has been OK’d by the formal approval process. The “Approved” status could allow readings to be entered, and so on. Status properties include formatting choices such as font, text color, and background color.

Control Download and Export

You can use checksheet type and checksheet statuses to control collection methods and to automatically mark checksheets as ready to be downloaded to APM Remote or APM Mobile Inspections and/or as ready to be exported to Excel®. For example, an organization might require that an inspection plan be reviewed and validated before the checksheets can be downloaded to mobile devices for readings to be taken. In this case, you would enable the Can be collected on mobile PC or remote tablet option on the checksheet type. Then control when the download is permitted to occur using checksheet statuses.
For related information, see Controlling Checksheet Download and Export Using Checksheet Settings.
Checksheets with a type and status that enable these options are automatically marked as ready to download or export. If necessary, you can mark an individual checksheet as not ready by clicking the appropriate Mark as Not Ready button.

Checksheet Status and AWEIS

When AssetWise Enterprise Interoperability (AWEIS) is in use, the checksheet status can help determine if a change request for the associated work request or interop work order needs to be sent to the CMMS. For example, when a checksheet status of “Inspection completed” is assigned to a checksheet, you could have APM automatically check the checksheet work status settings and the other checksheets associated with the interop work order to determine if all the criteria have been met to send a change request. If all the criteria are met, the change request is generated and sent to AWEIS.

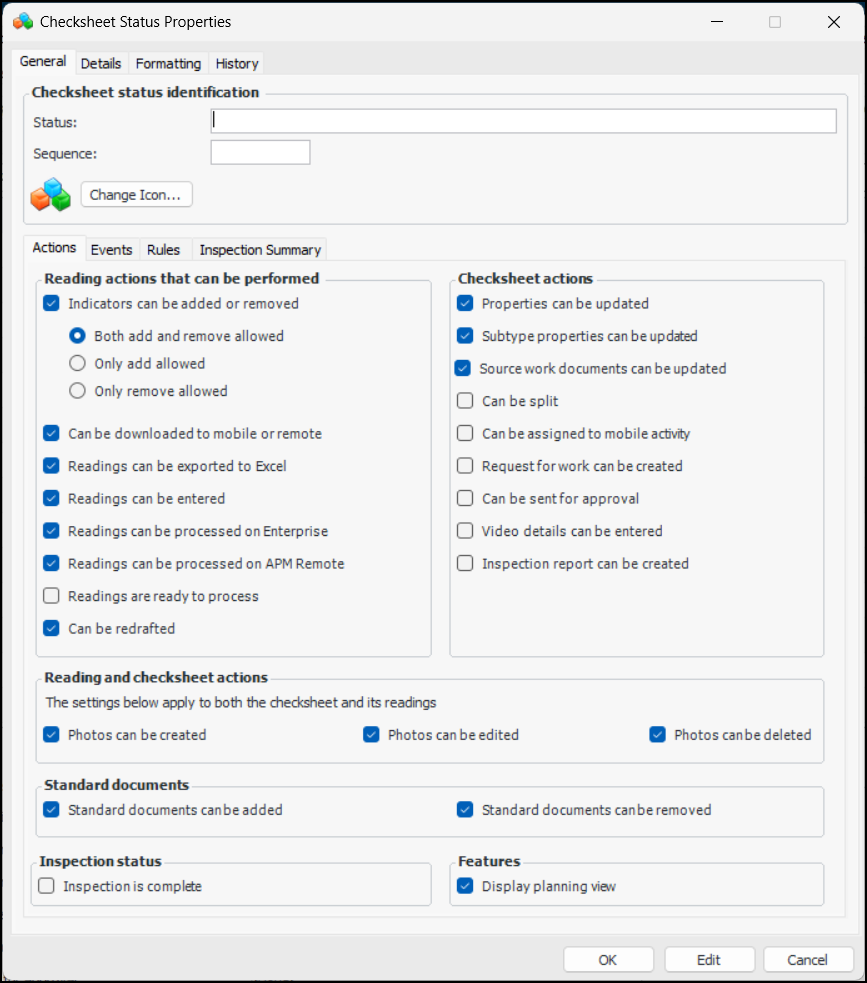
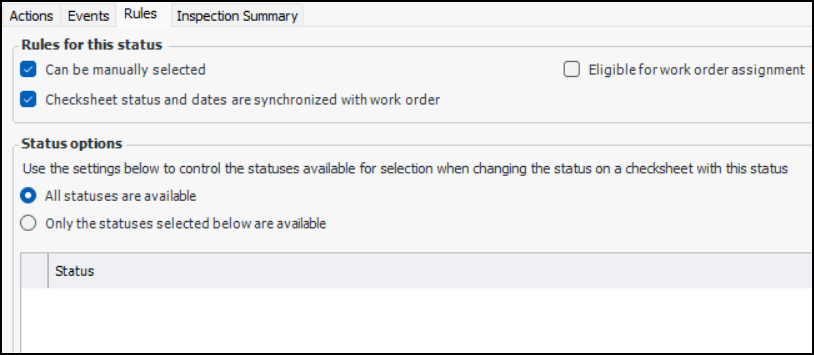
To Set up a Checksheet Status

1.
From the Site window, select the Inspection Management view, the Settings tab, and then the Checksheets tab. Select the Checksheet Settings node in the tree.
Tip: You can also click the Administration menu, Inspection Management Settings, and then Checksheet Settings. The Checksheet Settings window appears.
2.
Select the Checksheet Statuses tab.
This tab lists the checksheet statuses for the enterprise.
3.
To edit a status, double-click it in the list. To create a status, click New. In both cases, the Checksheet Status Properties dialog appears. Here is a new status:
4.
5.
6.
To select a different icon for the status, click Change Icon. Select the new graphic and click OK.
7.
In the Actions tab, select the appropriate options:
Note: Control of redrafting a checksheet based on checksheet status is generally available. You must first enable feature 109 to use the functionality in APM. In the Enterprise window, select the Features view and the Enabled Features tab. Click Browse, select “Prevent redrafting of a checksheet based on the checksheet status” and click OK. If APM is running as a smart client, click Refresh Enabled Features on the server. Then restart the client to use the functionality.
8.
In the Checksheet actions area, select the appropriate options:
9.
In the Reading and checksheet actions area, select the appropriate options:
10.
In the Standard documents area, select the appropriate options:
11.
In the Inspection status area, specify if the status marks that the inspection is complete.
12.
In the Features area, review this option:
When this option is selected, checksheets with this status display the Planning view. The checksheet must have been generated from a standard task and the checksheet type must support the feature.
13.
Select the Events tab.
14.
15.
On the Rules tab, select the rules that apply to this status:
16.
17.
In the Inspection Summary tab, select the settings that apply:
When this option is selected, checksheet inspection notes (Checksheet window, Readings view, Inspection Notes tab) can be updated.
When this option is selected, the Modification Inspection view appears in the Checksheet window.
18.
Select the Details tab.
19.
If appropriate, select Allow work order to be matched to a checksheet with this status. You can alter the default time span for matching.
20.
By default, the Fluid Sample tab is not displayed in the indicator reading until an indicator state has been selected. To allow users to update fluid sample information before selecting the state, click Display fluid sample information prior to the reading being taken.
21.
Select the Formatting tab.
22.
23.
Click OK. The dialog closes and the status is added to the list.

To Set the Default Checksheet Statuses for the Site

1.
From the Site window, select the Inspection Management view, the Settings tab, and then the Checksheets tab. Select the Checksheet Settings node in the tree.
Tip: You can also click the Administration menu, Inspection Management Settings, and then Checksheet Settings. The Checksheet Settings window appears.
2.
Select the Checksheet Statuses tab.
3.
Click Edit to modify the site settings. The Edit button is replaced by the Save button.
Note: The approval work flow events are enabled when the site’s approval settings specify that checksheets are subject to the approval process.
4.
5.
Click Save.