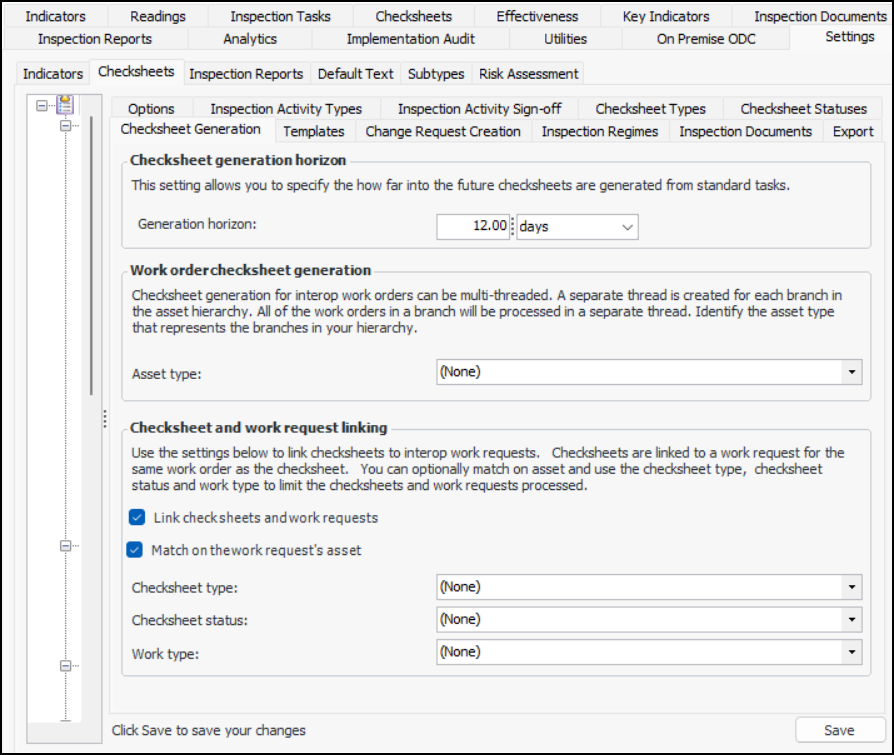
Setting up Checksheet Generation Options

Checksheets and mobile inspection activities can be generated from standard tasks using scheduled actions and manual procedures. Links between checksheets and interop work requests can also be generated. At the site level, you can set the following options:
Note: When AWEIS is active, you can set the generation horizon for creating checksheets from interop work orders. See Setting up Site Interoperability Profiles for AWEIS.
This topic explains how to set the options for checksheet generation.

To Set up Checksheet Generation Options

1.
From the Site window, select the Inspection Management view, the Settings tab, and then the Checksheets tab. Select the Checksheet Settings node in the tree.
Tip: You can also click the Administration menu, Inspection Management Settings, and then Checksheet Settings. The Checksheet Settings window appears.
2.
Click Edit to modify the site settings. The Edit button is replaced by the Save button.
3.
Select the Checksheet Generation tab:
4.
In the Checksheet generation horizon area, specify how far into the future checksheets can be generated for standard tasks.
5.
In the Work order checksheet generation area, select the asset type that represents branches in your asset hierarchy. A separate thread is created for each branch when checksheets are generated for interop work orders.
6.
In the Checksheet and work request linking area, click Link checksheets and work requests to enable the functionality. When the linking process is triggered for the site (either manually or automatically by a scheduled action), APM creates links between checksheets and work requests that have matching work orders and assets.
7.
Click Match on the work request’s asset to match checksheets to interop work requests based on their assets.
Note: This functionality is generally available in APM. To use it, you must first enable feature 69. In the Enterprise window, select the Features view and the Enabled Features tab. Click Browse, select “Ability to link checksheets and Interoperability work requests”, and click OK. If APM is running as a smart client, click Refresh Enabled Features on the server. Then restart the client to use the functionality.
8.
9.
Click Save.