|
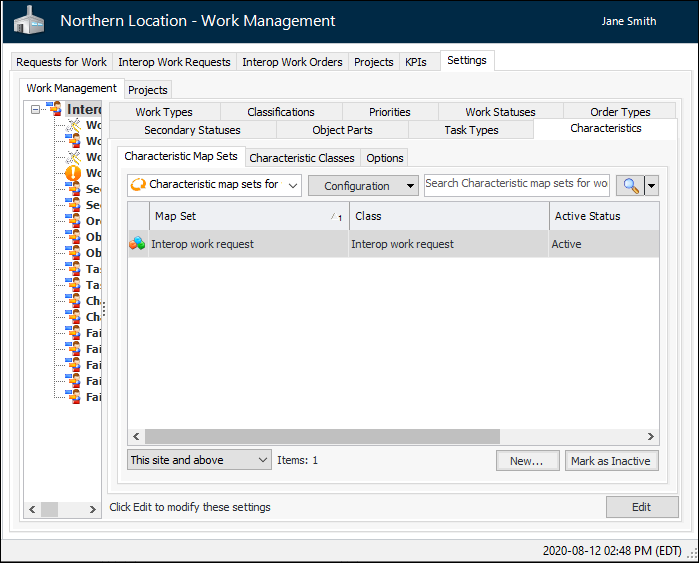
Setting up Characteristic Mapping for Interop Work Documents
•
•
•
• In the Site Interoperability Profile, identify the map sets to use with the different work document types. See To Select Characteristic Map Sets for Work Documents in “Setting up Site Interoperability Profiles for AWEIS”Be sure to set up the “Map Characteristic Values to Work Document Properties” scheduled action to execute regularly (at least once a day) to keep the values current. For more information, see Scheduling Actions.If map sets are not selected in the Site Interoperability Profile, characteristic values will not be communicated between the CMMS and APM, or vice versa. If this step is missed, a message is displayed in the work documents’ Characteristics tabs in APM. For example, if a map set has not been selected for requests for work, in all Request for Work windows, the Characteristics tab displays a message in the banner, as well as the Edit Settings button. Using the settings dialog, you can select the map set. If needed, you can define characteristic classes, add characteristics, and select default characteristic classes for sites using this dialog.
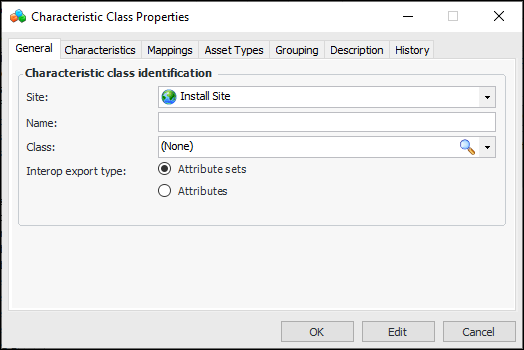
To Create a Characteristic Class and Add Characteristics
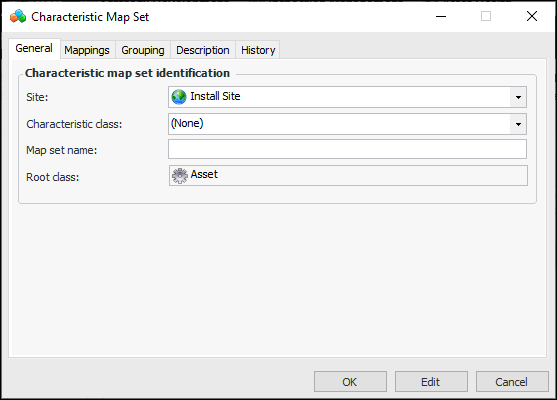
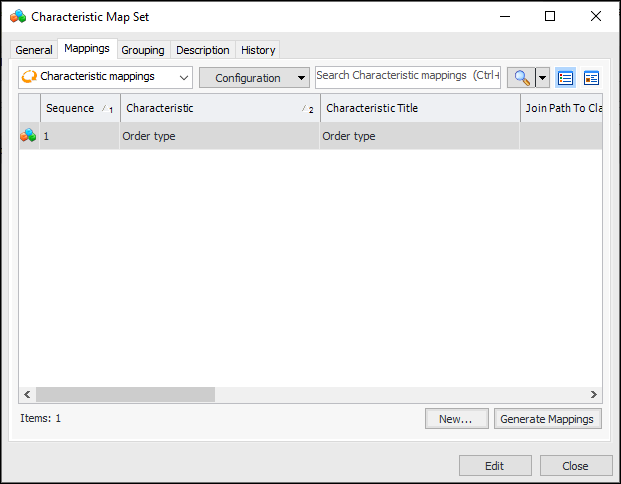
1. In the Site window, select the Work Management view, the Settings tab and then the Characteristics tab. For example:Tip: You can also create characteristic classes, characteristics, and map sets at the enterprise level. In the Enterprise window, click the Administration menu and then Application Settings. In the Application Settings window, select the Characteristics tab.
2. Select the Characteristic Classes tab and click New. The Characteristic Class Properties dialog appears:
6. Set the interop export type. The default selection, Attribute sets, is appropriate for most implementations of characteristic export. The Attributes option exports characteristics as unrelated attribute elements. This mechanism is typically used to extend the Mimosa schema beyond the predefined fields.
7. Select the Characteristics tab.
8. For each characteristic that you wish to add, click New. The Characteristic Properties dialog appears. For example:
12. In the Quantity and durations area, you can set options that determine how exported information is presented in the CMMS characteristic:
• Default units – If the characteristic value uses a number format, select the unit of measure to be used for this characteristic’s values
• Export option – You can specify whether only the number is exported or the number and its unit of measure are exported
13. Select the Description tab to add more information about the characteristic.
14. Click OK to save the characteristic and close the dialog. The characteristic is added to the table.
15. When you have added all of the characteristics, click OK to save the class and close the dialog.To Create a Map Set
1.
2.
3. On the General tab, the top site is selected so that the map set is available for all child sites. You can select another site, if required.
6. Select the Mappings tab and click Generate Mapping. APM creates mappings for the characteristics identified in the characteristic class. For example:
7. Open each Characteristic Mapping dialog and click Edit. For example:
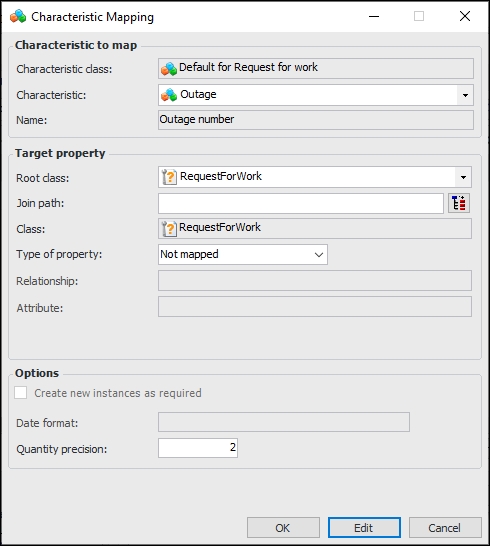
8.Outage number (Interop Request for Work)
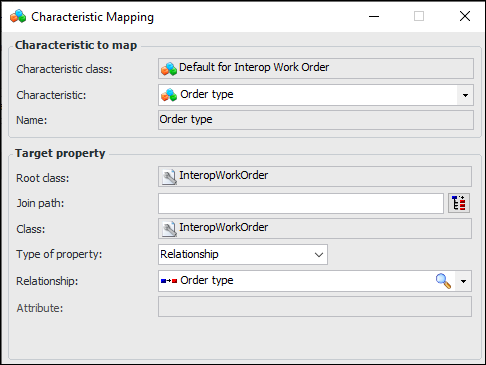
Order type (Interop Work Order)
9. In the Options area, select settings as appropriate to the mapping:
• Create new instances as required is available for a relationship to a class that is owned or scoped by Enterprise or Site, for example, Material type or Work center.
• Date format is available when the target property is an attribute that uses the DateTime data type. You can enter any format that complies with standard or custom .NET formatting rules. For example:See the Microsoft topics for Standard date and time format strings and Custom date and time format strings.Note: The default values for these options are set for the enterprise in Application settings. In the Enterprise window, click the Administration menu and then Application Settings. In the Application Settings window, select the Characteristics tab and then the Options tab.
• Quantity precision is available for Quantity and Duration attributes. You can specify the number of decimal places supported:
10. Click OK to close the mapping dialog.
11. In the Characteristic Map Set dialog, select the Description tab to add more information.Tip: The History tab displays information about the map set’s creation and modifications.
12. Click OK to close the map set.
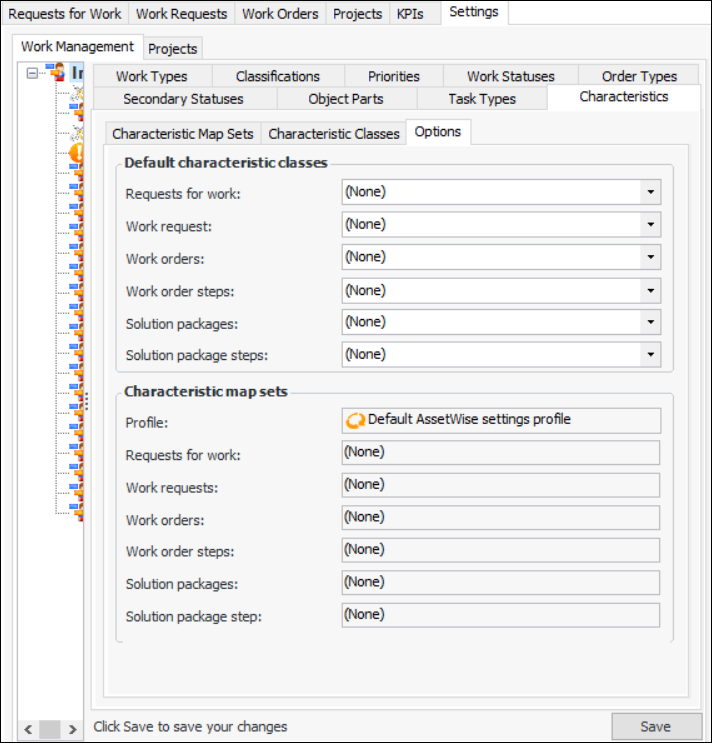
To Set Default Characteristic Classes for the Site
1.
2. Select the Options tab.
3. The Characteristic map sets area shows the settings in the current site interoperability profile.
5. Click Save.