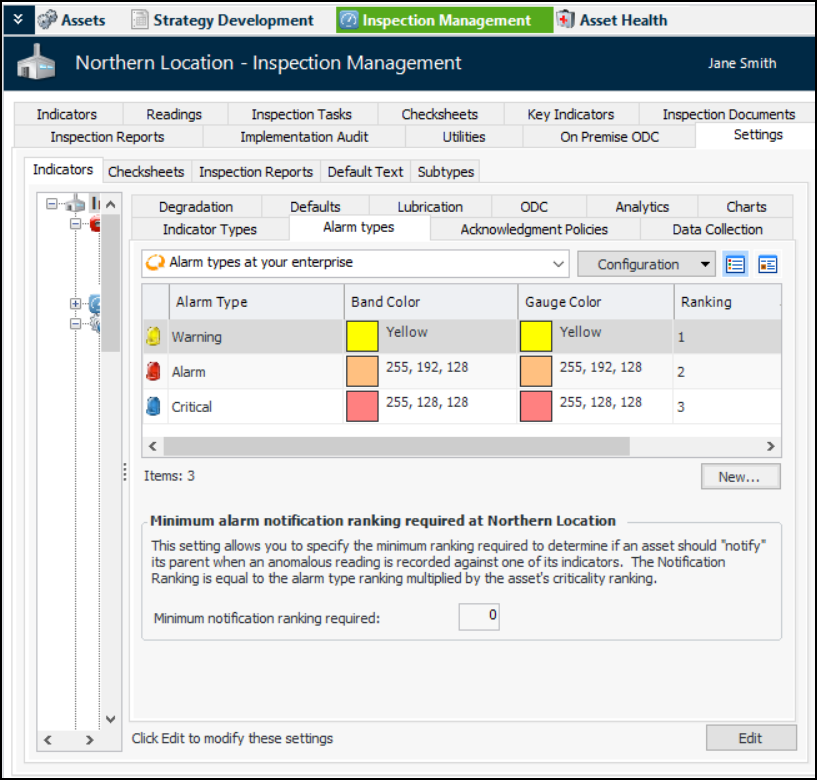
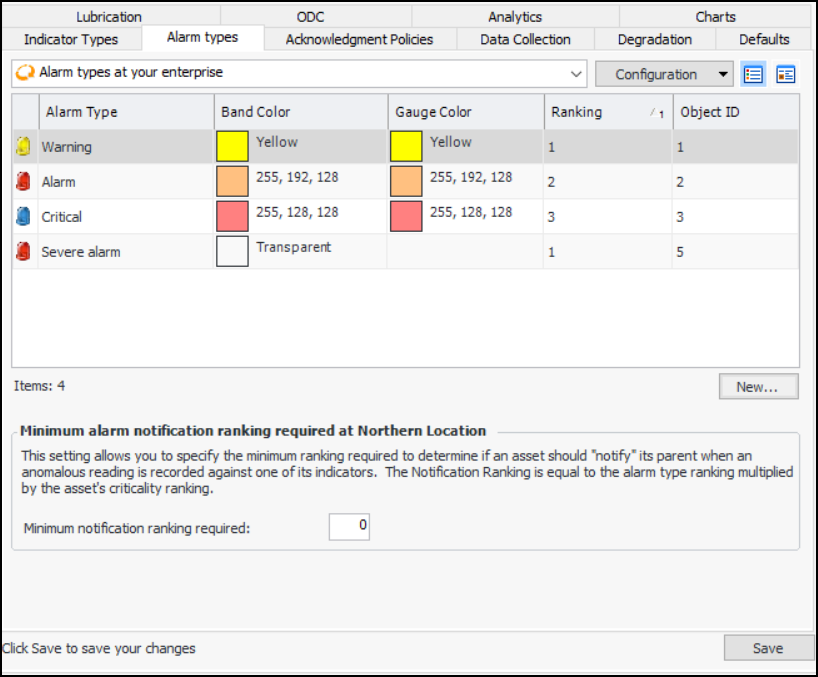
Setting up Alarm Types and Notification Ranking

An alarm type describes the severity of the state of an indicator and ranks it numerically relative to the other states.
APM comes with three alarm types already defined in the Install database (Warning, Alarm, and Critical). You can edit the existing alarm types and add new ones for your organization.
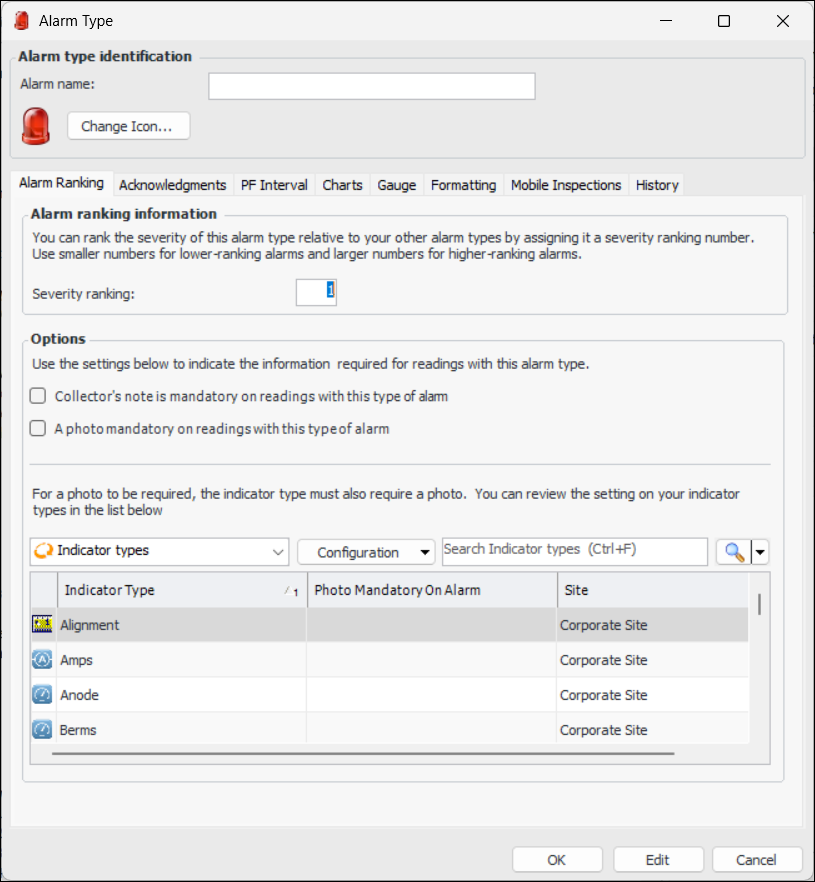
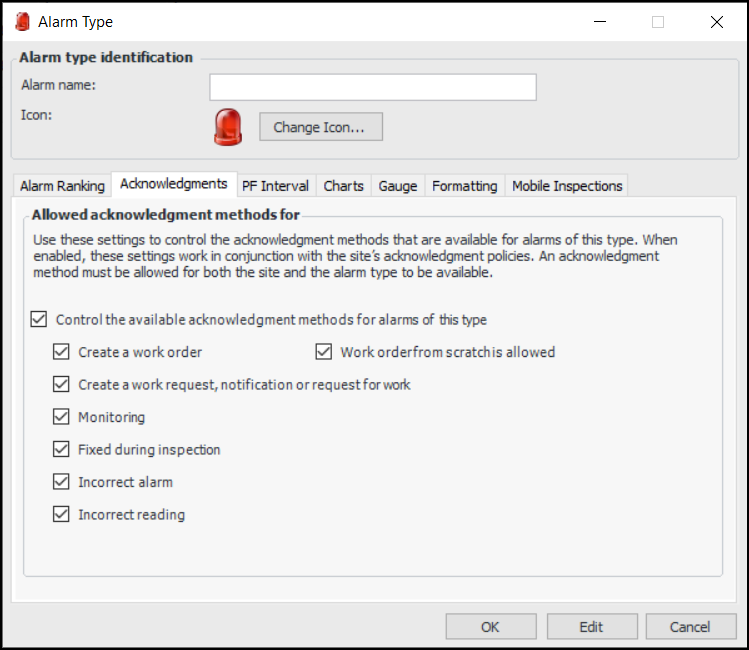
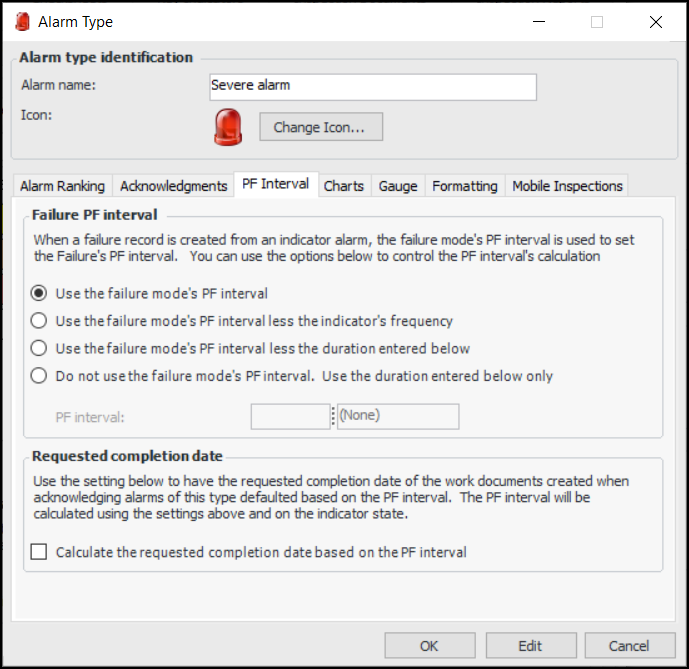
The minimum alarm notification ranking allows you to determine whether or not indicator alarms are displayed on parent assets. APM calculates the notification ranking for each alarm by multiplying the alarm type’s ranking with the asset’s prioritization ranking. For more information, see Alarm Notification.
By default, a new alarm type uses the acknowledgment methods allowed at the site level. You can fine-tune methods for individual alarm types. For example, you can turn off “Monitoring”, even when it is allowed in the site options. However, the “Monitoring” option will not be available on the alarm type if it is not enabled for the site.
In the process of setting up an alarm type, you can set failure options. When acknowledging an alarm includes creating a failure record, you can select a related failure mode. By default, the failure mode’s PF interval determines the PF interval on the new failure record. Alarm type options provide alternatives for calculating the failure record’s PF interval. You can select one of the following:
You can also use the PF interval to calculate the requested completion date on the work document created from an acknowledgment.
This topic explains how:

To Set up Alarm Types

1.
From the Site window, select the Inspection Management view, the Settings tab, and then the Indicators tab. Select the Indicator Settings node in the tree.
Tip: You can also click the Administration menu, Inspection Management Settings, and then Indicator Management. The Indicator Settings window appears.
2.
Select the Alarm Types tab. This tab shows a list of the existing alarm types.
3.
Click New. The Alarm Type dialog appears.
4.
To change the icon, click Change Icon. Select the new icon and click OK.
5.
On the Alarm Ranking tab, enter a number that represents the severity of this alarm in relation to the other alarm types. Use smaller numbers for less severe alarms and larger numbers for more severe alarms.
APM multiplies the ranking of an indicator alarm by an asset’s consequence priority ranking number to calculate the alarm notification ranking. The alarm notification ranking determines whether or not the alarm is shown on parent assets in the indicator monitoring panel.
6.
Select the Acknowledgments tab:
7.
8.
Select the PF Interval tab.
9.
Note: The alarm type’s rule for setting the failure’s PF interval can be overridden on the indicator state, where a PF interval can be entered directly. For more information, see Adding States and Alarms to an Indicator or Template.
10.
11.
Select the Charts tab and provide the following information in the Chart banding with numeric indicators section and the Chart banding with descriptive indicators sections:
12.
Select the Gauge tab and provide the following information:
Note: In table configurations where you want to use this feature, you must set the appearance properties for the grid. Select the Formatting tab, and select the join path to the alarm type’s font and color control attribute.
13.
On the Mobile Inspections tab, you can select background colors to highlight the alarm in mobile inspections.
14.
Click OK to save the alarm type and close the dialog.

To Set the Minimum Notification Ranking for Indicators

1.
Select the Alarm Types tab.
2.
Click Edit to modify the site settings. The Edit button is replaced by the Save button.
3.
4.
Click Save.