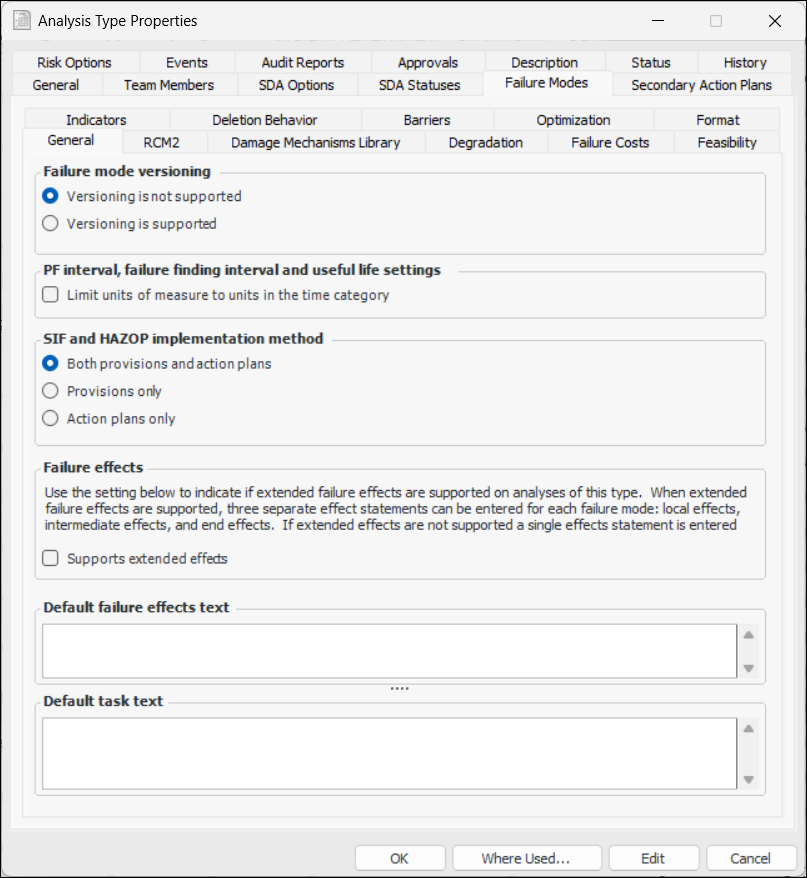
Setting Failure Mode Options for Analysis Types

An analysis type is a collection of preferred settings for strategy development analysis. The settings range from specifying how analysis titles are defaulted, to how avoidance savings are recorded on failure modes, to how risk analysis is performed (if at all), to whether analyses must be sent for approval. Selecting an analysis type on an analysis quickly ensures that its settings are correct and consistent with your organization’s standards.
When defining an analysis type, you can specify the kinds of analysis it can be used with: MTA2, RCM2, RBI, CPR, SIF, HAZOP, Design FMECA, or a combination. For example, you could create two types for MTA2, one with risk analysis and one without. Or you could create a type that applies to both MTA2 and RBI analyses.
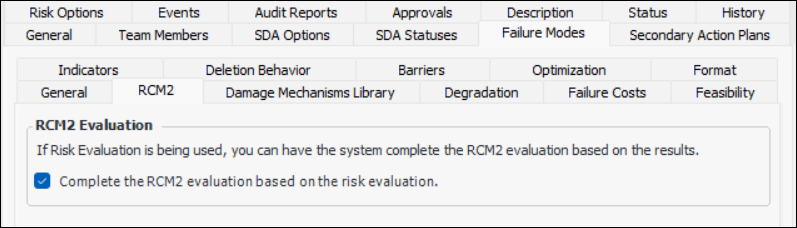
Note: The tabs and options available vary depending on the kinds of analysis that the type works with. For example, if the analysis type supports CPR only, the Failure Costs tab is not available. This topic assumes that all analyses are selected except prioritization and condition analysis.
This topic explains how to set the failure mode options for an analysis type. These options include:
Note: For each of the severities defined for Health and Safety, Environmental, and Economic consequences, be sure to set the RCM2 option appropriately. As an example, for the “Severe” health and safety severity, select Represents Health and Safety consequences for RCM2 purposes. For the “Low” health and safety severity, clear this option.
Using the integration functionality in APM, you can export failure modes from MTA2 and RCM2 analyses to the Isograph® Availability Workbench (AWB), where you can analyze and optimize the data. You can then import optimization results into the APM analysis, review the recommendations in the Optimization view, and make appropriate changes to the action plans.
Note: Before you can export failure modes, you must have installed the Availability Workbench. The Reliability Strategy Development and Implementation and Performance Management modules must be active on the sites where you want to use the functionality.
Hide or show the Failure mode note sidebar in Maintenance Action Plan windows
For information about setting up general, analysis, and audit report options, see Setting up Analysis Types. To set risk analysis options, see Setting Risk Analysis Options for Analysis Types.
This topic explains how:

To Set Failure Mode General Options

1.
2.
Click Edit to modify the analysis type.
Note: The tabs and options available vary depending on the varieties of analyses selected. For example, the Damage Mechanism Library and Barriers tabs are available only when RBI is selected. This topic assumes that all analyses are selected except asset prioritization and asset condition analysis.
3.
On the General tab, set the following options:
4.
In the Default failure effects text box, you can enter text that will automatically appear in the Failure Effect box of new failure modes.
5.
In the Default task text box, you can enter text that will automatically appear in the Task boxes for new failure modes.

To Set the RCM2 Option

1.
On the Failure Mode Options tab, select the RCM2 tab.
2.
On the RCM2 tab, the following option is selected by default:

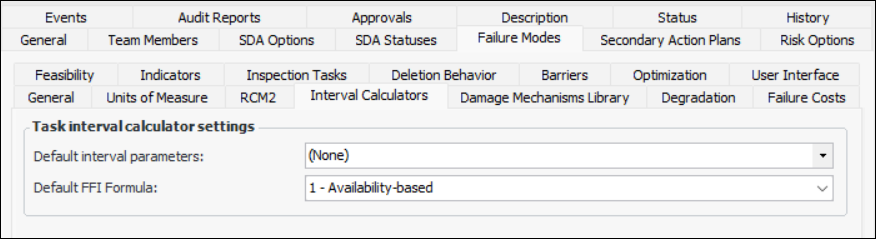
To Set Options for Failure-Finding Interval Calculators

1.
2.
3.

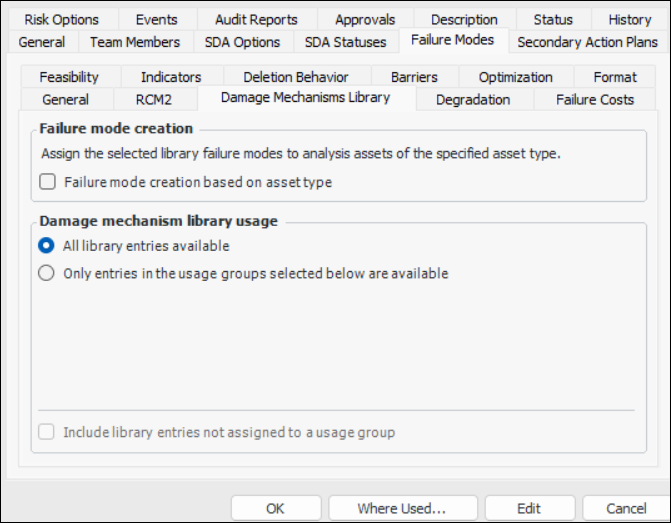
To Set Damage Mechanism Library Options

1.
Select the Damage Mechanism Library tab. This tab is only available when the analysis type applies to RBI analyses.
2.
To limit the use of library failure modes to assets of the type specified in the library entry, select Failure mode creation based on asset type. The library failure mode’s usage options specify the appropriate asset types for the entry. This means that when a library failure mode is added to an RBI analysis, it is assigned to analysis assets of the specified type(s).
3.
To employ usage groups to limit the library entries used to create failure modes, select Only entries in the usage groups selected below are available. Select the usage groups that apply. This means that, when you browse for library entries to add to an RBI analysis, entries with the selected usage groups are included in the list to select from. Usage groups that are not selected are not included in the list.
4.

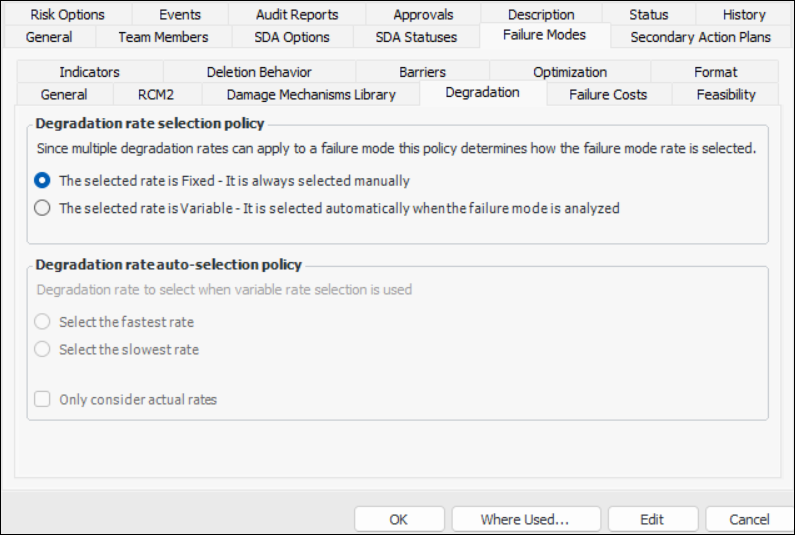
To Set Degradation Options

1.
Select the Degradation tab. This tab is only available when the analysis type applies to RBI analyses.
2.
The selected rate is fixed – the rate is always set manually
The selected rate is variable – the rate is set automatically whenever rates are calculated. Choose the auto-selection policy.

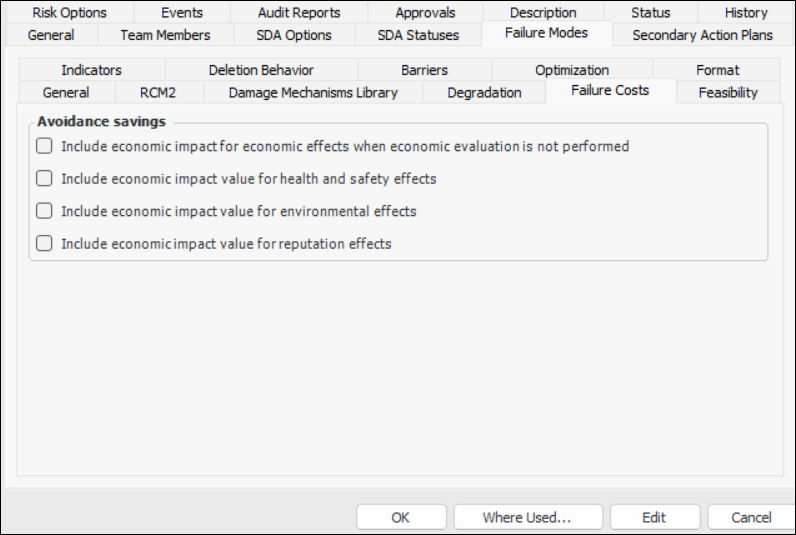
To Set Failure Costs Options

1.
On the Failure Mode Options tab, select the Failure Costs tab.
2.

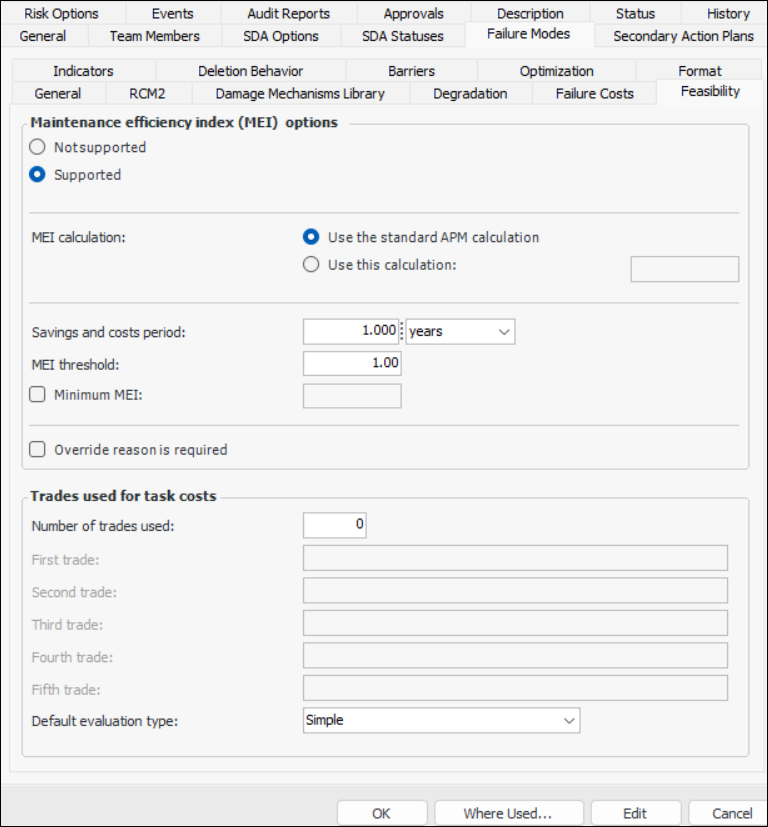
To Set Feasibility Options

1.
On the Failure Mode Options tab, select the Feasibility tab. Options on this tab are available if SIF and HAZOP analyses are not supported.
2.
Select Supported.
3.
Use the standard APM calculation – The calculation supplied by APM
Use this calculation – Select the custom calculation from the list
4.
5.
Simple – The evaluator can select one statement for each category on the form.
Detailed – The evaluator can select two statements for each category on the form.
Tip: If you wish to use a custom MEI calculation, create a triggered calculation in the Customization Center. Set the triggering method to Through a program. When defining the attribute to calculate, set the options as follows:
Class – Maintenance action plan
Contained class – Maintenance feasibility
Attribute to update – Maintenance efficiency index
Data type – Float magnitude
Result value type – Derived value
In case of failure – Leave value unchanged

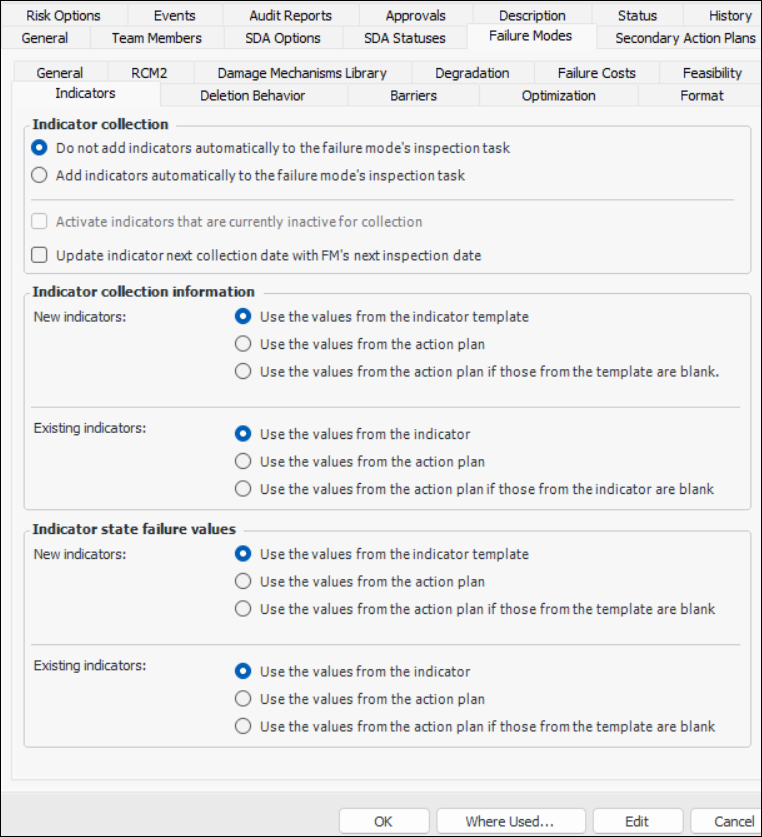
To Set Indicator Options

1.
On the Failure Mode Options tab, select the Indicators tab.
2.
Add indicators automatically – when an inspection task is added, indicators currently on the action plan are added to the standard task, if they are not there already. When indicators are subsequently added to the action plan, they are automatically added to the standard task.
3.
4.
For RBI analyses, you can select Update indicator next collection date with FM’s next inspection date. Analysts can calculate the next inspection date on a failure mode and then update the indicators’ next reading dates. Indicators are updated when the action plan is marked “Facilitation Complete”. On the indicator, “Next reading due” is set to the failure mode’s next inspection date. The Next reading date source box displays “Failure mode degradation rate”.
5.
Note: When you create an indicator based on an indicator template, the system checks to see if the asset already has an indicator based on that template. If such an indicator exists, it is used in the analysis, and a new indicator is not created. In this situation, the indicator is not affected by the options described above. If you want the indicator to be updated with the action plan’s values, be sure to set the appropriate option for adding existing indicators to analyses, as described next.
6.
7.
8.
Note: If indicators are to be updated, they are modified when the action plan’s status changes to “Implementation completed”.

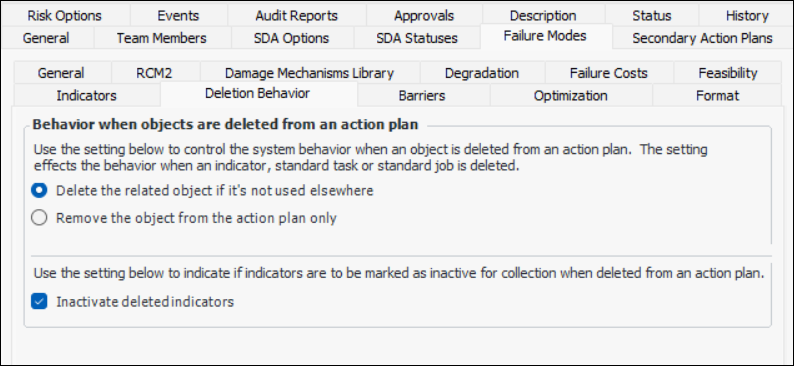
To Set Deletion Behavior Options

1.
Select the Deletion Behavior tab.
2.

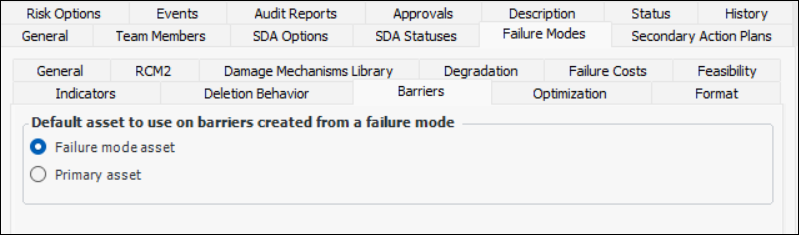
To Set Barrier Options

1.
2.
Failure mode asset – the barrier is assigned to the asset on the failure mode by default
Primary asset – the barrier is assigned to the primary asset on the analysis by default

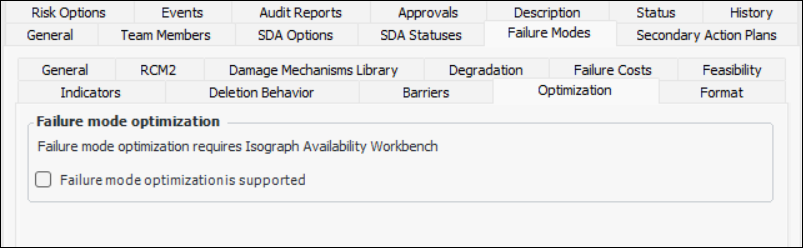
To Enable Optimization

1.
2.
Select Failure mode optimization is supported. When this option is selected, the Optimization view is available in the analysis window.

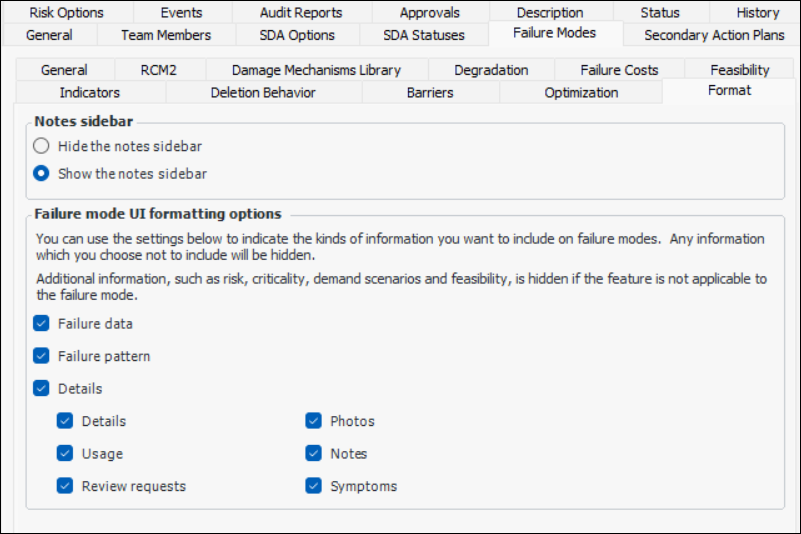
To Set Format Options

1.
Select the Format tab.
2.
Hide or show the Analysis note and Evaluation comments areas in the Maintenance Action Plan window.
Tip: The analyst can add information to the Analysis Note and Evaluation Note tabs located in the Details view, if available.
When this option is selected, the Failure Data tab appears in the Maintenance Action Plan window.
When this option is selected, the Failure Pattern tab appears in the Maintenance Action Plan window.
When this option is selected, the Details tab appears in the Maintenance Action Plan window.
When this option is selected, the second Details tab appears on the Details tab in the Maintenance Action Plan window.
When this option is selected, the Usage tab appears on the Details tab in the Maintenance Action Plan window.
When this option is selected, the Review Requests tab appears on the Details tab in the Maintenance Action Plan window.
When this option is selected, the Notes tab appears on the Details tab.
When this option is selected, the Symptoms tab appears on the Details tab in Maintenance Action Plan windows.
3.
When you are finished setting options, click OK to save your changes and close the Strategy Development Analysis Type dialog.