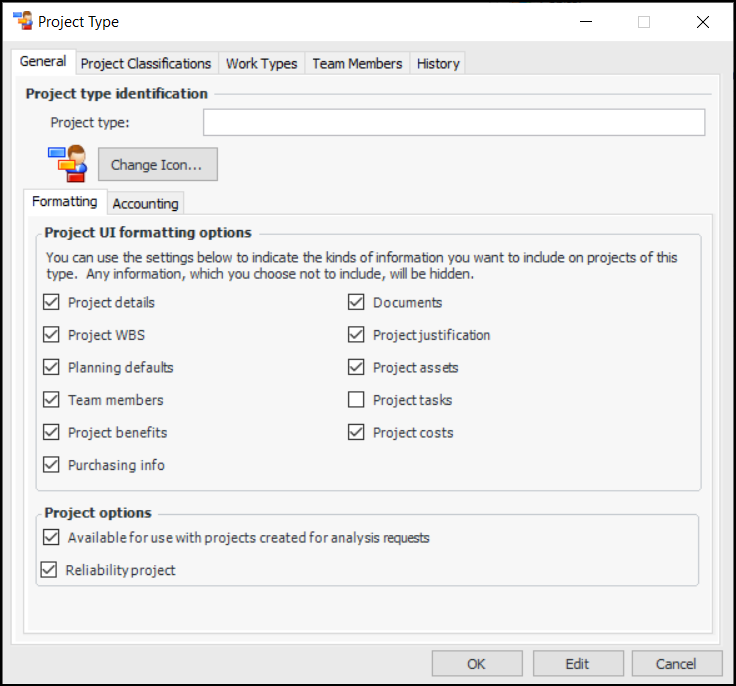
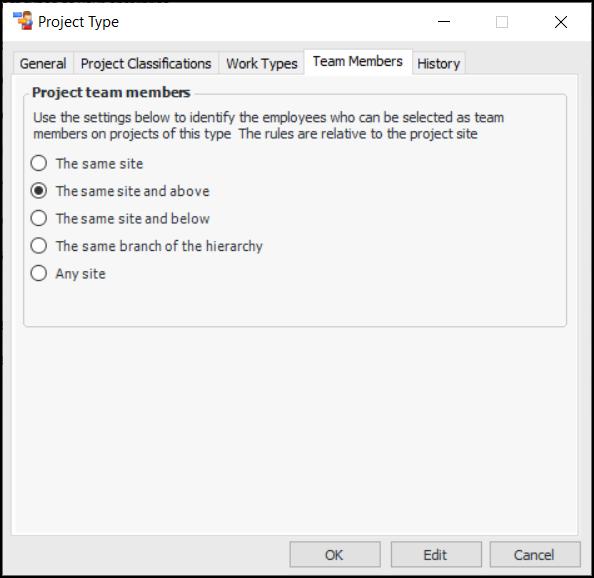
Setting up Project Types

Project types are used to classify your projects into logical groups and to control the types of information that appear on project records.
For each project type you can define the following:
General properties: The project name and icon, the types of information recorded in the project, and whether projects of this type are available for analysis requests and reliability projects
Accounting: Whether the project is a capital expenditure or an operational expense and whether the costs of the project are charged to a single GL account or to a number of different GL accounts
Project classifications: The project classifications that can be used with projects of this kind
Work types: The work types that can be used on work order tasks charged to this project
Team Members: Whether team members can be employees from the analysis site only or from the analysis site and its ancestor, child, or peer site. You can also specify that employees can be drawn from any site

To Set up a Project Type

1.
From the Site window, select the Work Management view and the Settings tab. Select the Projects tab and the Project management settings node in the tree.
Tip: You can also work with project settings in the Strategy Development, Reliability Program, or Performance Management views. Select the Settings tab and then the Projects tab.
2.
Select the Project Types tab and click New. The Project Type dialog appears.
3.
4.
On the Formatting tab, select the appropriate formatting options for projects of this type.
Controls whether or not projects with this project type will display the Details tab. This tab contains settings for the estimated cost, project dates, and return on investment.
Controls whether or not projects of this type will display the Defaults tab. The settings on this tab set the default values for work order tasks for the project.
Controls whether or not the Team Members tab will be displayed for projects with this project type.
Controls whether or not the Benefits Achieved view appears in the Project window. The view allows you to describe improvements achieved.
Controls whether the Purchasing Activity view is displayed in the Project window, listing RFQ requests, purchase requirements, RFQs, purchase order lines, and invoice lines.
Controls whether the Documents tab is displayed on projects of this type.
Controls whether or not the Justification tab will be displayed for projects assigned this type. On this tab, users can enter a project justification description and the expected benefits for the project.
Controls whether or not the Assets tab is displayed on projects assigned this type.
Controls whether the Costs view is displayed in the Project window, summarizing planned, actual, and remaining costs. The view also displays charts showing costs by cost type and month, as well as a table of cost information.
5.
In the Project Options area, you can select the following:
6.
Select the Accounting tab. Select the appropriate GL account rule:
A whole GL account is entered on the project: Projects of this type will need to have a whole GL account number selected. All costs associated with the project will be charged to this whole account.
An account segment is entered on the project: Projects of this type will need to have a GL segment selected. The project GL account segment will then be combined with the “Cost Type to Charge” account segment for each transaction to form the derived accounts.
7.
Select the Project Classifications tab.
8.
Tip: To add a project classification, click New. Name the classification and click OK.
9.
Select the Work Types tab. Select the work types that will be available for work orders assigned to projects of this type.
Tip: To add a work type, click New.
10.
Select the Team Members tab.
11.
12.
Click OK to save the project type.