|
|


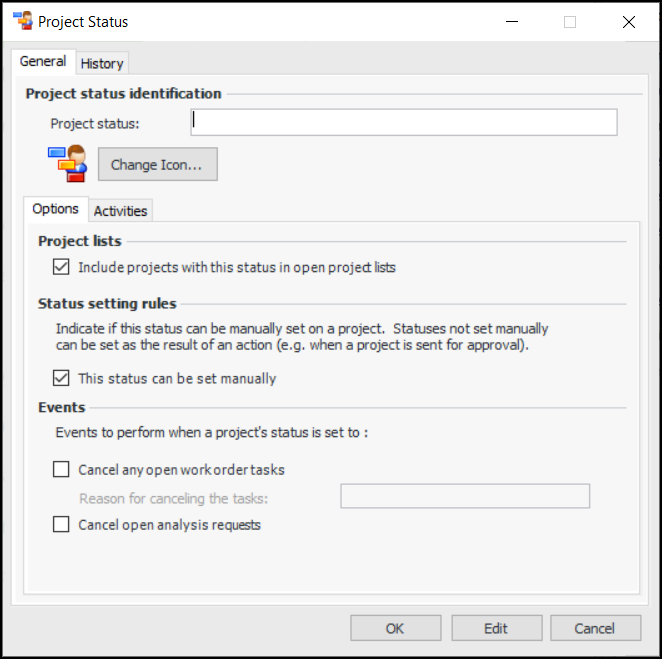
Setting up Project Statuses
This topic explains how to create project statuses. For information on suggested project statuses, see Capital and Operational Project Management.Setting up Project Statuses