|
Setting up Sample Types and Statuses
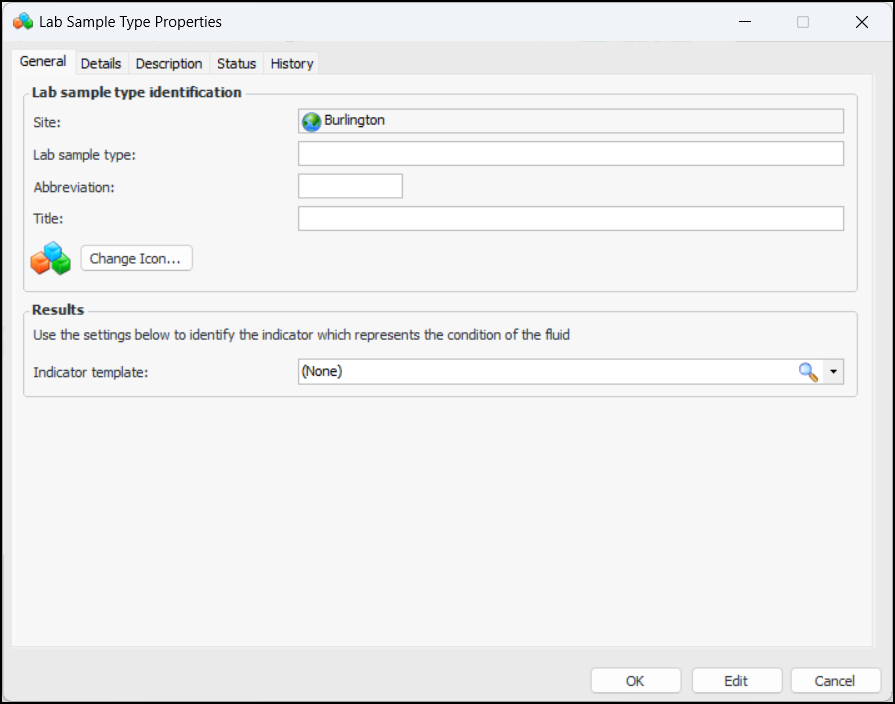
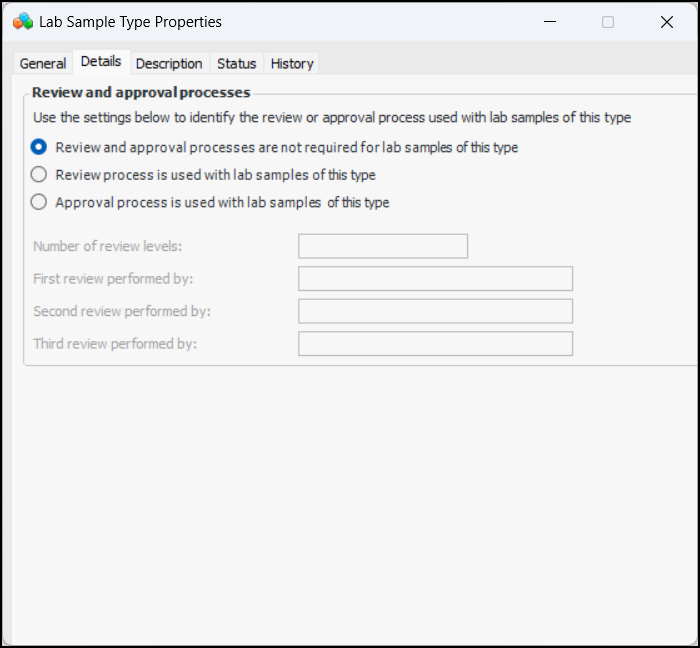
To Set up a Sample Type
1. From the Site window, select the Fluid Condition view, Settings tab. Select the Fluid Condition Settings node in the tree.Tip: You can also click the Administration menu and Fluid Condition Settings. The Fluid Condition Settings dialog appears.
2. Select the Lab Samples tab and then the Sample Types tab. This tab lists the types defined for the site and above:You can mark a type as inactive until it is ready to be used. Select the type in the table and click Mark as Inactive. The Mark as Inactive/Active dialog appears, where you can enter a comment. When you click OK, a confirmation message appears. Click OK. When you are ready, click Mark as Active to make the type available for use.
3. Click New. The Lab Sample Type Properties dialog appears:
4. In the Lab sample type identification area, provide the following:
5. If you wish to change the image that represents the type in tables and charts, click Change icon, select a different graphic, and click OK.
6. In the Results area, browse for and select the indicator template that will be used to create the indicator to record the results of testing.
7. Select the Details tab.
8. In the Review and approval processes area, select an option for test result review or approval. The options are:
10. Select the Description tab to add more information.
11. Click OK to close the dialog. The type is added to the Lab fluid sample types table.
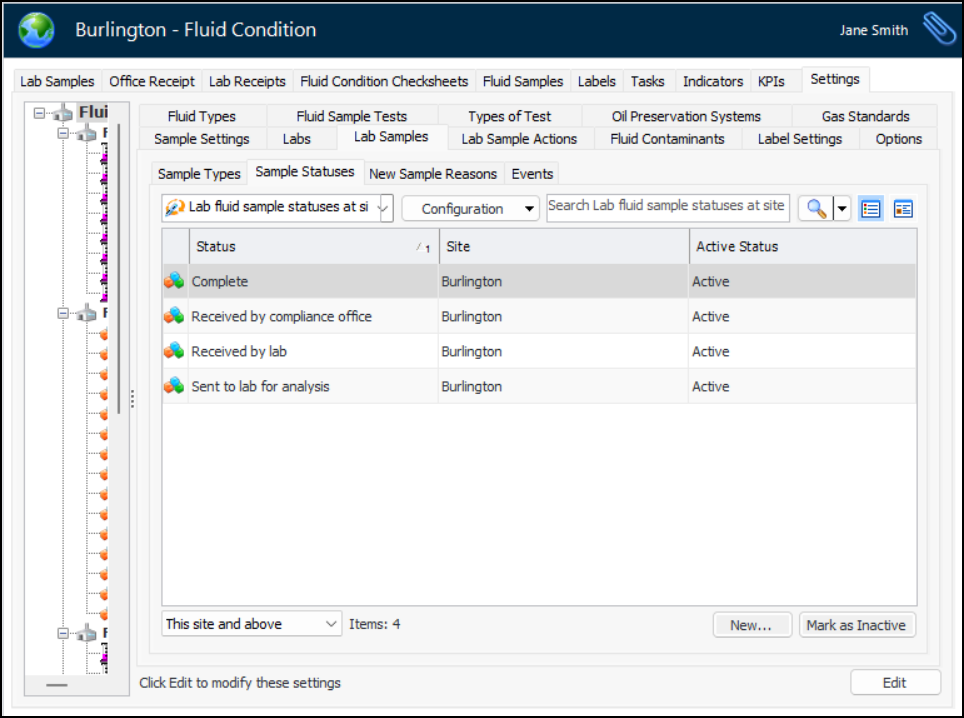
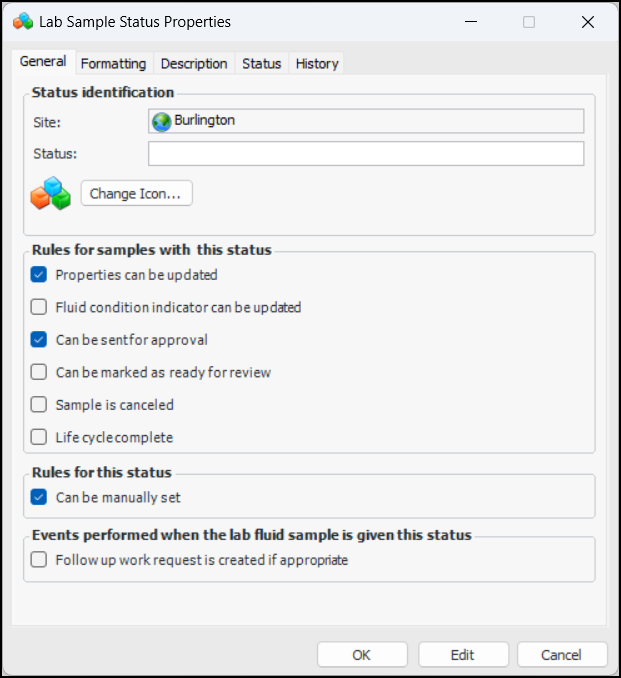
To Set up a Sample Status
1. In the site’s Fluid Condition view, Settings tab, select the Lab Samples tab and then the Sample Statuses tab. This tab lists the statuses already defined for the site and above.
2. Click New. The Lab Sample Status Properties dialog appears:
4. In the Rules for samples with this status area, select the appropriate options.
5. In the Rules for this status area, you can clear Can be manually set. In that case, the status can only be changed by system events.
6. Select Follow up work request is created if appropriate to have work requests created for samples with this status.
7. Select the Formatting tab, where you can set the font, text color, and background color for samples shown in tables and charts.
8. Select the Description tab to add more information.
9. Click OK to close the dialog. The status is added to the Lab fluid sample statuses table.
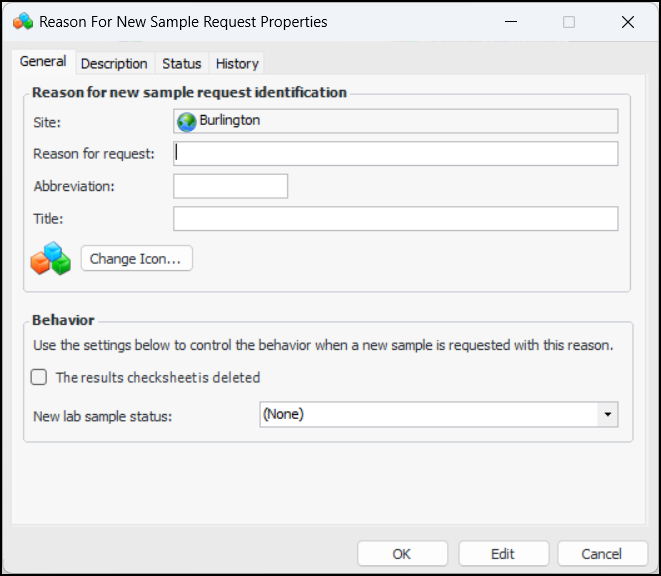
To Add Reasons for New Sample Requests
1. In the site’s Fluid Condition view, Settings tab, select the Lab Samples tab and then the New Sample Reasons tab.
2. Click New. The Reason for New Sample Request Properties dialog appears:
4. If you wish to change the graphic that represents the reason in tables and charts, click Change Icon, select another icon, and click OK.
6. Select the Description tab to add more information.
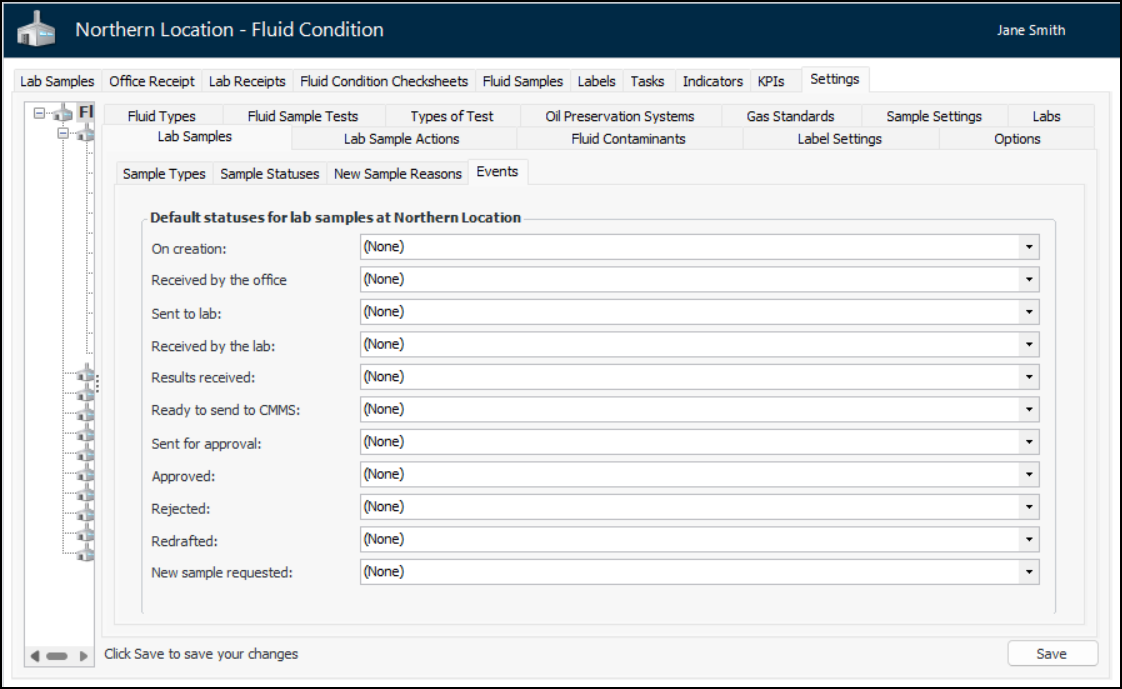
To Set Statuses for Samples in Response to Events
1. In the site’s Fluid Condition view, Settings tab, select the Lab Samples tab and then the Events tab.
2.
4. Click Save.