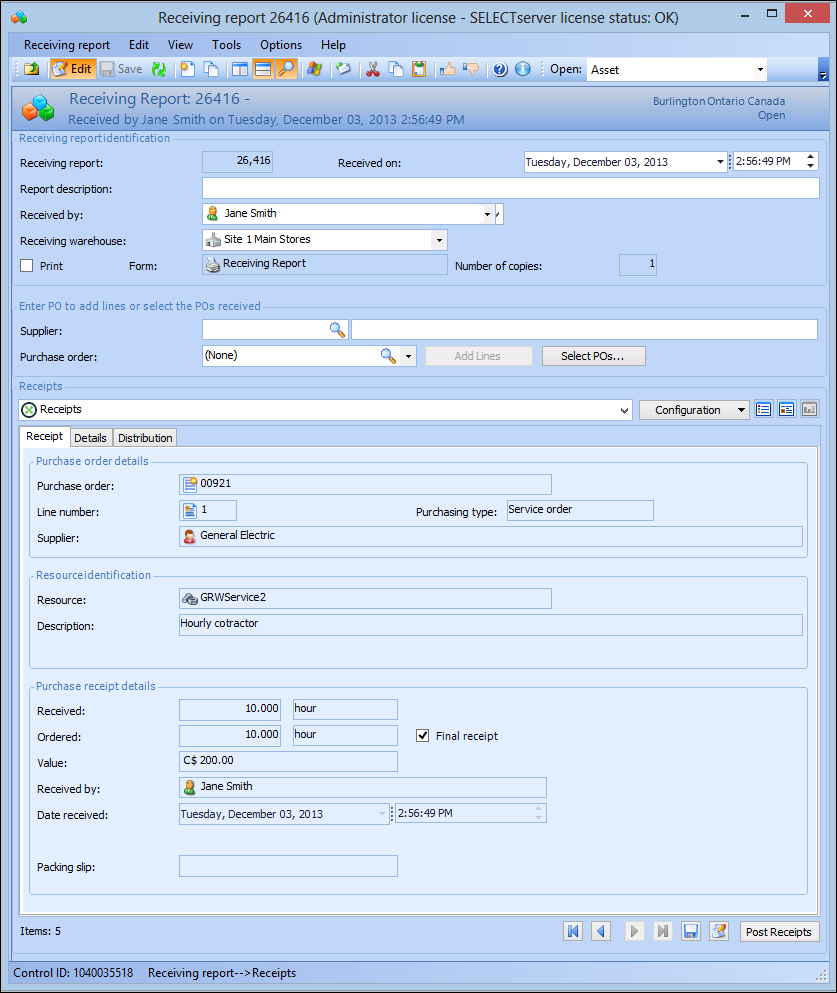
Receiving Purchased Materials

When you receive material ordered through a purchase order, you must mark it as received in the APM system.

Overriding GL Accounts

APM automatically derives a GL account for charges to an asset or work order task based on the site’s accounting settings. You can override the derived maintenance GL account for labor, direct purchases, and inventory usage charged to an asset or work order. When the account number is overridden, the replacement account number is used on subsequent documents and transactions (work order requirements, timecards, issue transactions, purchase order lines, and receipts). The option to override a GL account is available only if the work type has been set up to allow the override.
For information about receiving serialized inventory, see Receiving New Serialized Resources and Receiving Repaired Resource Units.
If you are receiving consignment inventory, see Replenishing Consignment Inventory Using Purchase Orders and Receipts.

To Receive Materials

1.
In the Site window, select the Resource Management view and then the Inventory tab.
2.
On the Warehouses tab, double-click to open the warehouse that you want to receive materials or tools for. The Warehouse window appears.
3.
Select the Transactions view, Purchase Receipts tab. This tab shows a list of all of the materials received for the warehouse.
4.
Click New Receiving Report. The Receiving Report window appears.
5.
Enter a Report Description and select the person the items are Received by and the Receiving warehouse.
6.
If you want to print the report, select Print. This option can be automatically selected, depending on the settings for your site. Ensure that the correct Receiving report form is selected, the output destination (Default Printer or File), and any attachments to be included in the report. The report is printed when you post the receipt transactions.
Tip: For more information about printing options, see Printing Documents.
7.
Enter the number of the supplier in the first part of the Supplier box or the name of the supplier in the second part of the box. Then select one of the supplier’s purchase orders or blanket releases from the Purchase order box and click Add Lines.
Enter the number of the purchase order or blanket release in the Purchase order box or click Browse to select from a list. Then click Add Lines.
To select multiple orders, click Select POs. In the Browse Purchase Orders to Receive dialog, select the purchase orders or blanket releases you are receiving and then click OK. The lines from the selected orders are added to the Receipts section.
8.
To review the receipt individually, click the View as Form icon. The window switches to form view, displaying the first purchase order line on the report.
9.
Enter the Quantity received, select whether or not this is the Final receipt, and select the employee who received the items and the date. If applicable, enter the Packing slip number.
10.
11.
When you are finished reviewing the lines, click Post Receipts. APM saves and posts the transactions. If you have selected to print the report, APM prints it now.
Note: If the system displays “unable to post” messages for any of the purchase order lines, you might need to verify the cost type and work order, asset, or GL account to charge on those lines. To do this, click View as List and then double-click a line. The Resource Transaction dialog appears. If necessary, you can verify the cost type and account number on the Distribution tab.
12.