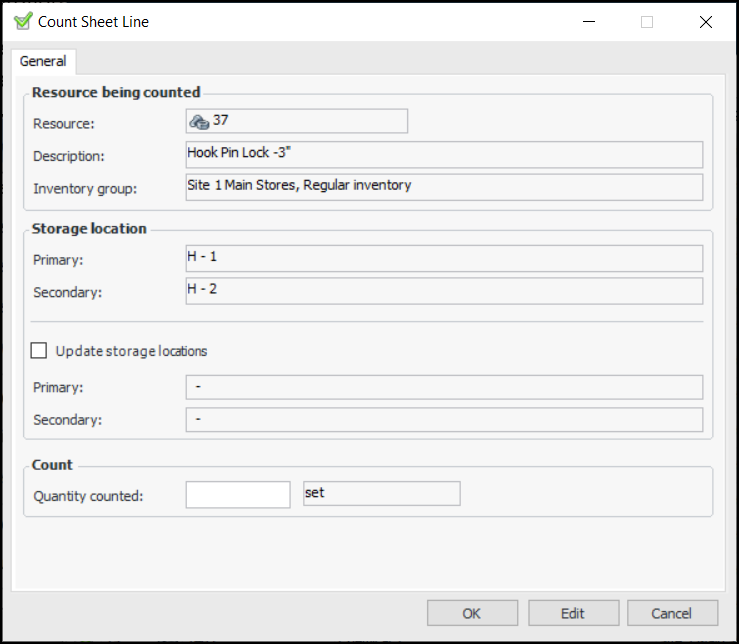
Entering and Processing Inventory Count Results

A count sheet is a report that lists parts to be counted. You can print the count sheet, count the items, and then enter the results into the system.
Once the count has begun, the items identified on the count sheet are locked in APM and cannot be issued from inventory. Any transactions for the items are held until the count has been completed.
After you have entered the results, you can process the count sheet. APM then uses adjustment transactions to update the inventory values.
If the warehouse’s properties are set to review count adjustments, the adjustment transactions are not posted when the count sheet is processed. This allows you to review the adjustment transactions before posting them. If the warehouse’s properties are also set to allow charging adjustments to other accounts (including work order or assets), you can change the charging account on each adjustment transaction before it is posted. When reviewed, the transactions must be posted manually.
Note: You must click Begin Count on the count sheet before you complete these steps.

To Enter and Process Inventory Count Results

1.
In the Site window, select the Resource Management view and then the Inventory tab.
2.
On the Warehouses tab, double-click the warehouse that you want to count materials in. The Warehouse window appears.
3.
Select the Count Sheets view, and double-click the count sheet that you want to enter results for. Its status must be “Count in progress”.
4.
5.
Select the Count Sheet Items view. You can view the warehouse items to be counted either by count sequence (Count sheet items by count sequence configuration), or by count group (Count sheet items by count group configuration).
6.
7.
Optionally, select Update storage locations and revise the text in the Primary box, Secondary box, or both. When the count sheet is processed, the warehouse item is updated.
Note: The update storage location functionality is generally available. You must first enable feature 105 to use the functionality in APM. In the Enterprise window, select the Features view and the Enabled Features tab. Click Browse, select “Support the ability to update a warehouse item’s storage locations when counting the item” and click OK. If APM is running as a smart client, click Refresh Enabled Features on the server. Then restart the client to use the functionality.
8.
Enter a value in the Quantity Counted box.
9.
Tip: You can also enter the results by selecting a part and pressing F2. The Quantity Counted box becomes open for editing.
Enter the quantity for the part. Press the Tab key. The Quantity Counted box for the next part becomes open for editing.
Repeat these steps until you have finished entering count results. If you do not enter a value for an item, it will not be processed as counted on this sheet.
10.
When you are finished entering count results, click Process Count Sheet. APM processes the results and creates adjustment transactions, where necessary.
11.
To see where adjustments were made as a result of the count, select the Adjustments view. This count sheet view shows a list of adjustment transactions that resulted from the count. If the warehouse’s properties are set to review count adjustments, the adjustment transactions will not yet be posted. For more information, see Reviewing and Posting Count Adjustments.