Modification and Repair Inspection Checksheets

Modification and repair inspection (MRI) checksheets are used to inspect an asset after a major construction project has reached a milestone or completion. Inspection activities ensure that the modifications or repairs are done according to the appropriate standards and codes.
The printed MRI form allows the manufacturer, inspection team, and regulatory inspector to sign off on the activities and add remarks. You can record information from the form in the checksheet, as well as enter the summary, analysis, recommendations. When the inspection is complete, mark the checksheet as closed.

Inspection Activities

Inspection activities are one-time tasks associated with an individual project. In this way, inspection activities are different from asset indicators, which are collected at a regular frequency and can be trended, used to calculate degradation rates, track asset condition, and generate warnings and alarms.
The following information can be entered for an inspection activity:
If appropriate, indicator readings can be collected on the MRI checksheet in addition to the inspection activities.

MRI Checksheet Workflow

MRI checksheets represent one-time inspections, so they are typically created from scratch. However, they can also be created from a standard job, task, or template, if required. When creating the checksheet from scratch, you will select a checksheet type that supports MRI and provides default inspection activities. Selecting an asset for the checksheet is optional.
In the Checksheet window, select the Modification Inspection view. For example:
You can record detailed information about the inspection process:
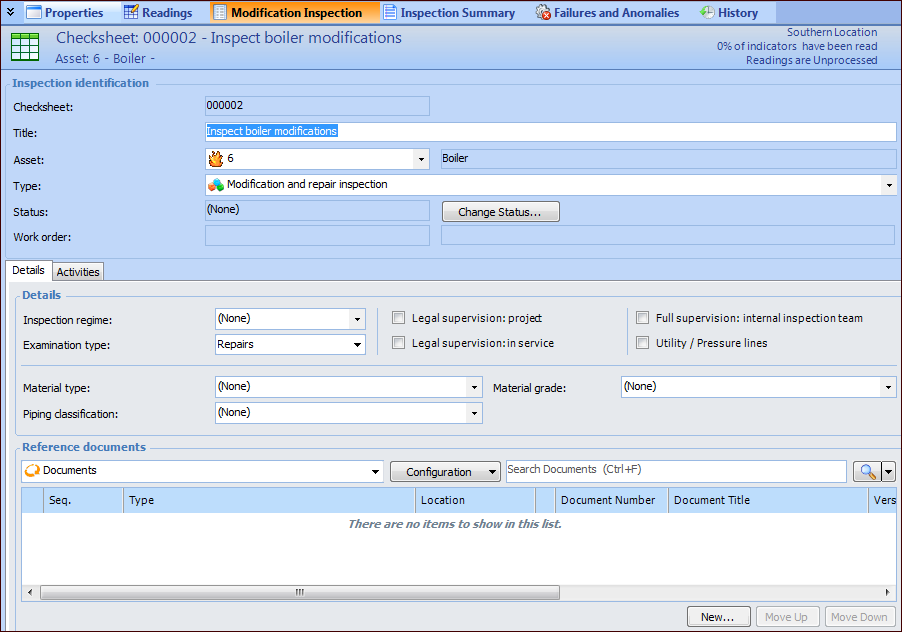
Select the Activities tab to work with the inspection activities assigned to the checksheet type. For example:
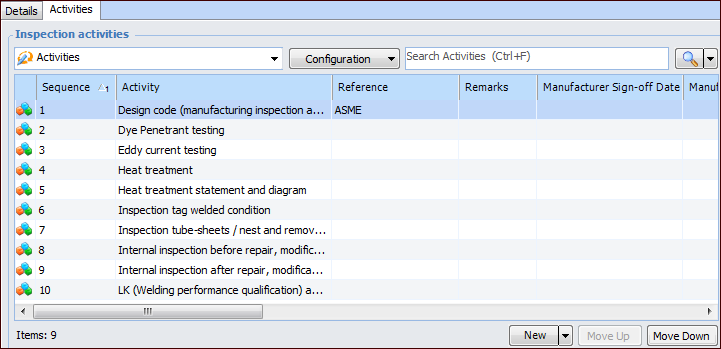
You can add new or existing activities as required. Review the activities and add references, remarks, and sign-off statuses. In the Activities tab, use in-line editing to enter values, or double-click an activity to open its dialog. For each activity, you can record:
The next step is to print the Modification and Repair form. In the Checksheet window, click the Checksheet menu, Print, and then Modification and Repair Inspection.
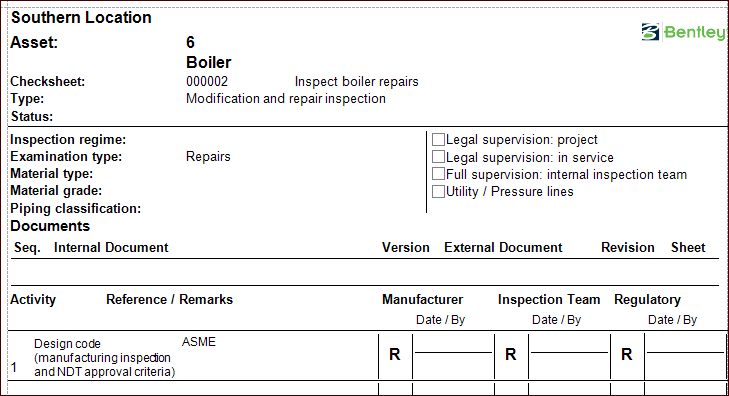
The form’s introduction includes the information that you entered on the Details tab. The activities are listed in the order of their sequence numbers, along with their references, remarks, and status abbreviations. Each activity has space for sign-off information for each of the inspection groups. For example:
As each of the activities are signed-off or when the sign-off status changes, you can return to the checksheet in APM and enter information. For each activity, record:
When the inspection is complete, you can attach the completed MRI form to the checksheet.
At any point in the inspection’s life cycle, you can use the checksheet’s Inspection Summary view to record the inspection analysis, summary, and recommendations.
When appropriate, mark the checksheet as closed by changing the checksheet status.
For detailed information about working with MRI checksheets, see Modification and Repair Inspection Checksheets.

Setting up APM for MRI Checksheets

Setting up APM for MRI checksheets involves creating:
Checksheet types – A checksheet type can specify that MRI is supported for checksheets assigned the type. This adds the Modification Inspection view to the Checksheet window. The inspection activities assigned to the type are copied to the checksheets. Note that MRI functionality can be enabled on checksheets without an assigned type
For detailed information, see: