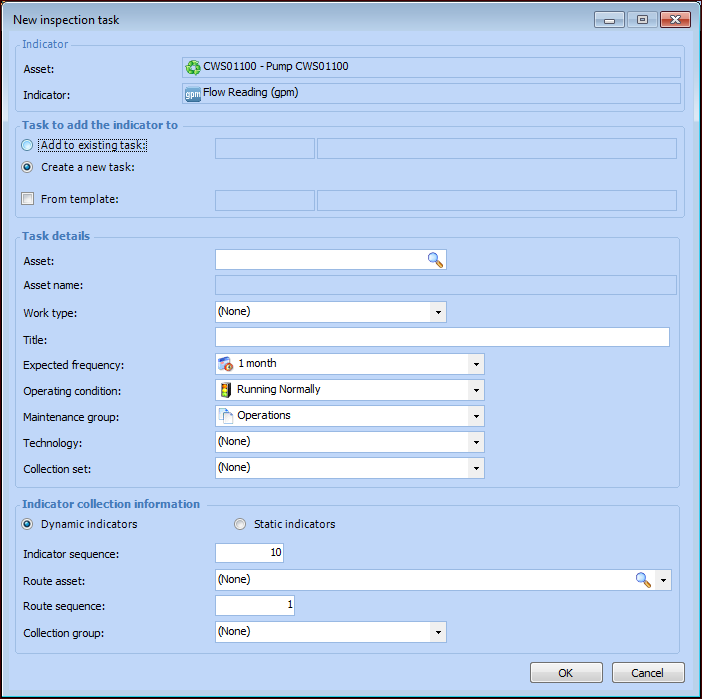
Adding an Indicator to an Inspection Task

From a manually-collected indicator, you can add the indicator to an existing standard task. Alternatively, you can create a standard task from scratch or a template, adding the current indicator to it in the process. This topic explains how to add the current indicator to an existing or new task.
For detailed information about creating standard tasks, see Setting up Standard Tasks.

To Add an Indicator to an Inspection Task

1.
2.
In the Indicator window, click the Tools menu and then New Inspection Task. The New Indicator Inspection Task dialog appears. For example:
3.
Click Add to existing task.
Enter a task number or click the browse icon to open the Standard Task Selector dialog. Select a task and click OK. The standard task number and name are shown in the New Indicator Collection Task dialog.
Skip to Step 7 to select the indicator collection information.
4.
To add the indicator to a new task, click Create a new task. You can create the task from a standard task template or from scratch.
5.
Click From Template. Enter the template number or click the browse icon () to select a template. The template number and name are shown in the dialog.
Select a collection set from the Collection set list, if appropriate. A collection set is one of the matching criteria that can be used to select indicators for a standard task’s dynamic inspection route.
Skip to Step 7 to select the indicator collection information.
6.
7.
In the Indicator collection information area, select whether dynamic or static indicators are added to the task:
8.
Click Dynamic indicators.
9.
Click Static indicators.
10.
Click OK. The new standard task window appears. You can edit the task as required.