|
Changing an Indicator’s Degradation Rate
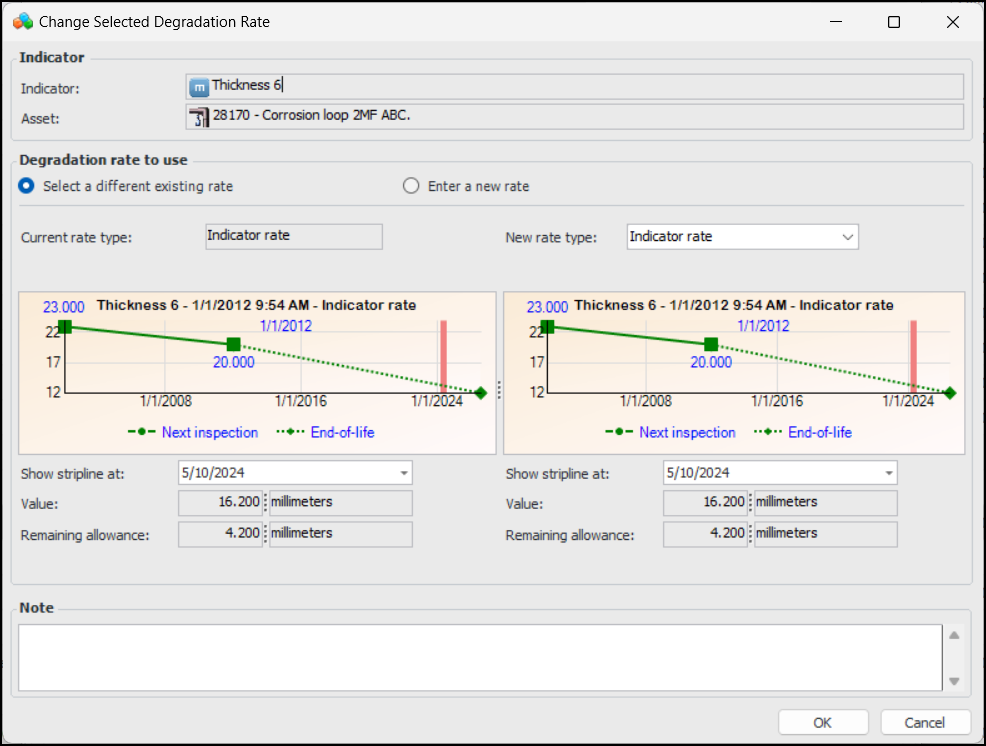
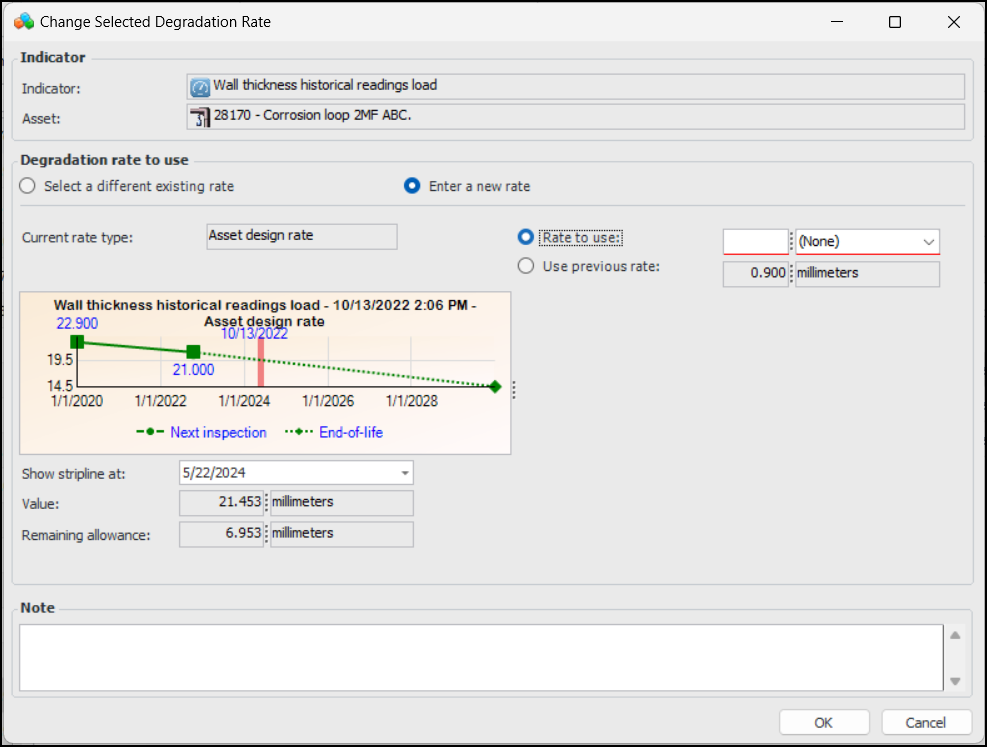
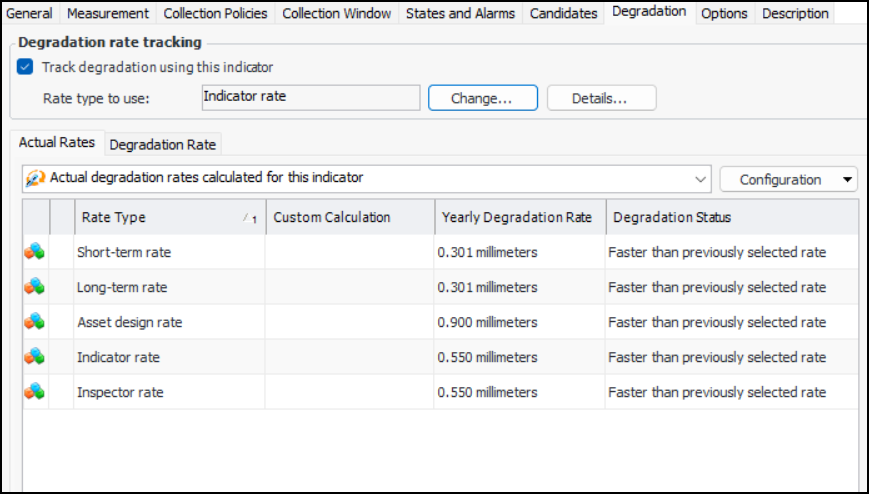
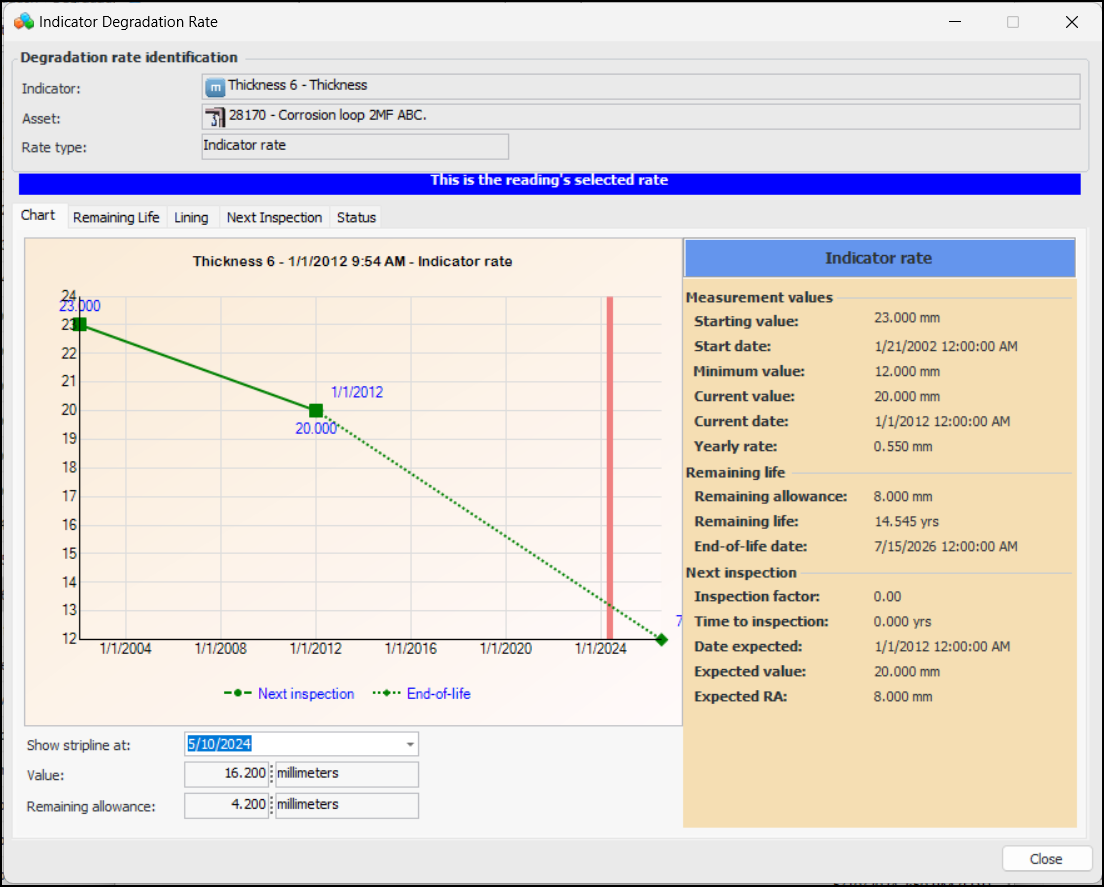
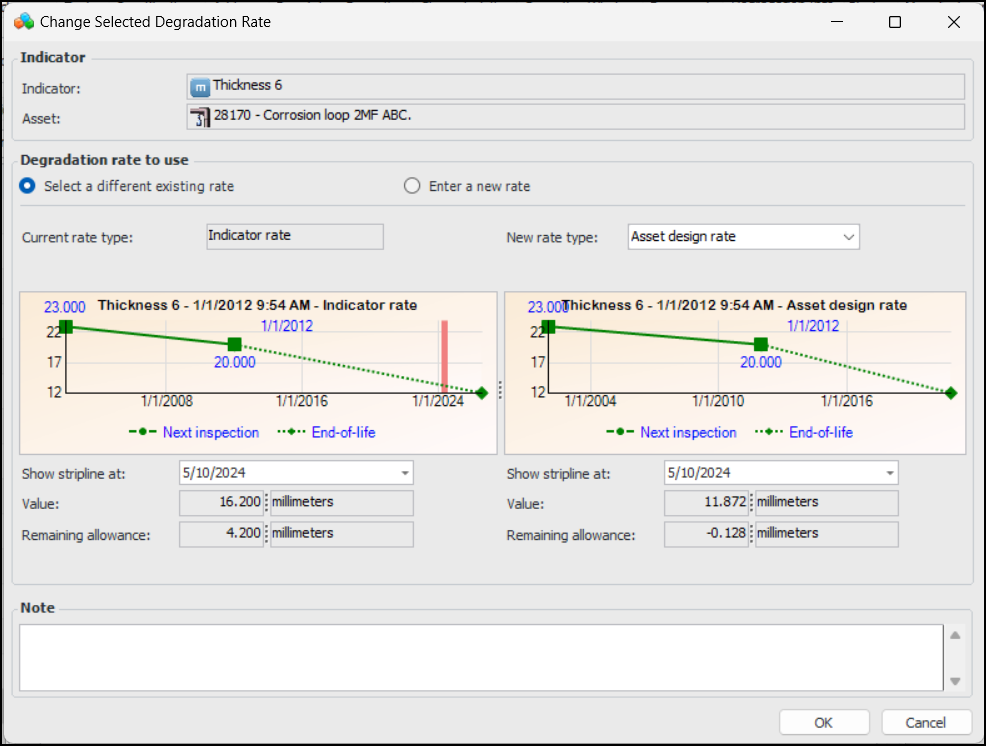
Numeric indicators that track degradation information provide detailed information about the selected rate type, actual and expected rates, remaining life, and next inspection dates. In the Indicator window, Properties view, select the Degradation tab and the Actual Rates tab. For example:Note: You can also reset the start date for degradation on an indicator. For more information, see Resetting an Indicator’s Degradation Rate.You can switch to a different rate type to use by clicking Change. The Change Selected Degradation Rate window provides charts to test the effect of the change before committing to it. For example:To Change an Indicator’s Degradation Rate
1.
3. Click Change. The Change Selected Degradation Rate dialog appears. For example:By default, the current rate is selected in the New rate type list.
• To select a different existing rate, select a rate type from the New rate type list. If you select “Custom rate”, select a custom calculation from the list provided.
• To select an inspector rate, click Enter a new rate. The dialog changes as follows:Either enter a value in the Rate to use box or select Use previous rate. The rate used in the previous reading is selected.Note: Use previous rate is not available when the indicator’s degradation rate has been reset.
5. Add more information in the Note box, if appropriate.
6. Click OK. The dialog closes and the Rate type to use value changes accordingly. Values such as end of life date, remaining life, and next inspection date are updated.