|
|


Entering Readings on a Checksheet
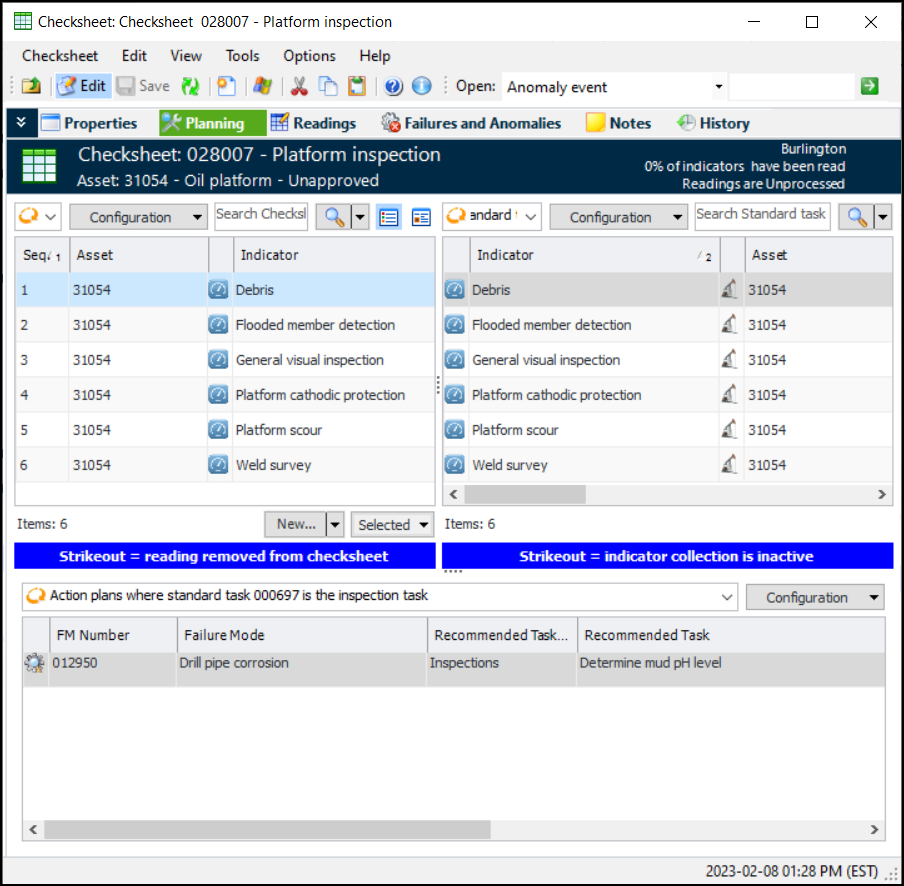
A checksheet is a form that allows you to enter a set (or sample) of indicator readings in APM. The checksheet form contains information about the origin of the indicators, the list of indicators to be read, and space to record readings, make notes, and add inspection photographs and documents. You can create checksheets from a standard task, standard job, PM route, or work order task. You can also create ad hoc checksheets from a Site or Asset window and add the indicators to read.For more information, see Creating Checksheets and Printing a Checksheet Form or Inspection Summary Report.You can also add failure or anomaly records to a checksheet, as well as view failures created from the alarm acknowledgments for the checksheet’s indicators. For more information, see Creating a Failure Record from a Checksheet.You can add one or more requests for work to a checksheet. For more information, see Creating a Request for Work from a Checksheet.Checksheet Planning View
The Planning view is available in the Checksheet window for checksheets that have been generated from a standard task. The checksheet type and checksheet status must support the Planning view feature.The Planning view shows three tables: indicators in the checksheet, the standard task’s indicators, and maintenance action plans that cite the checksheet’s standard task as their inspection task.Adding and Removing Indicator Readings
Conditional Indicator Readings
When the Asset is Unavailable
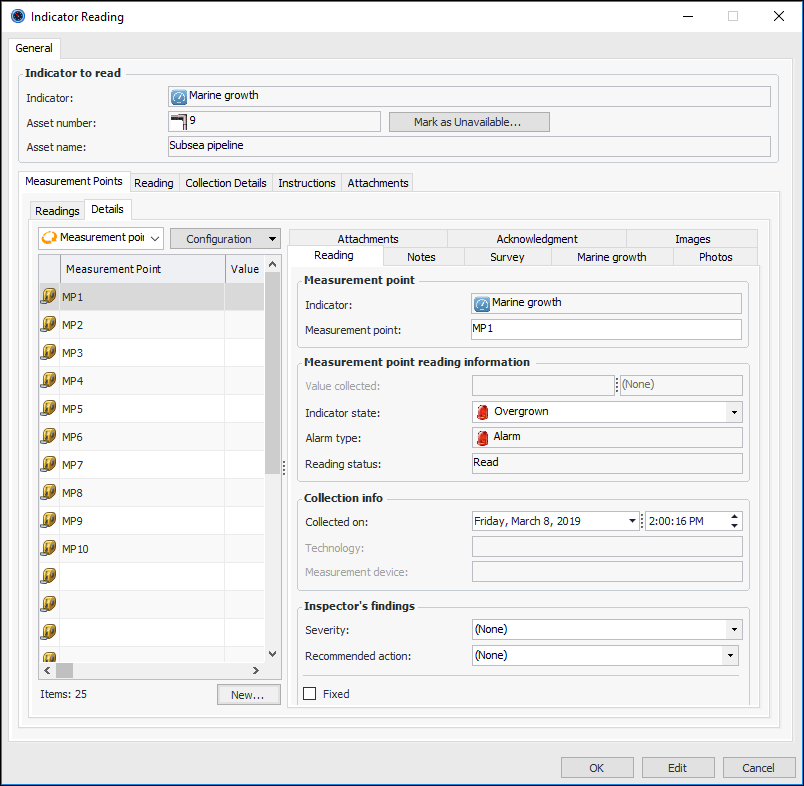
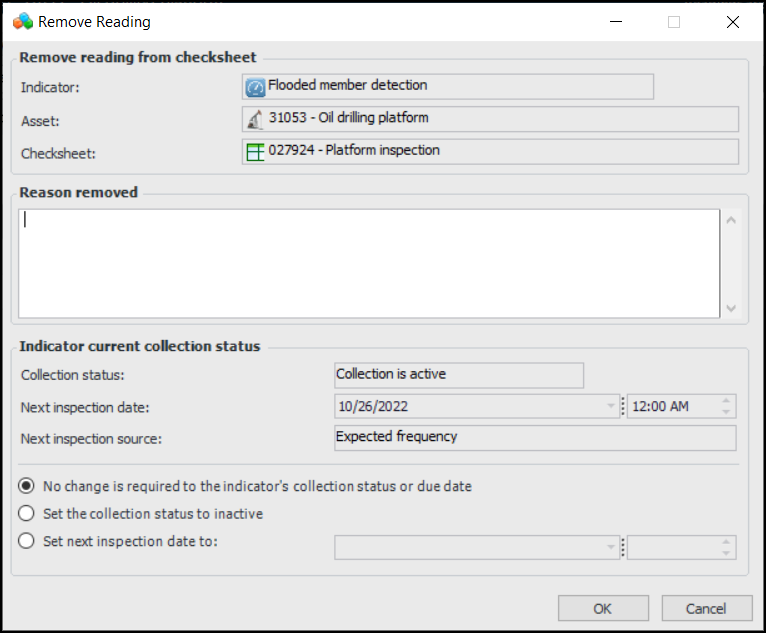
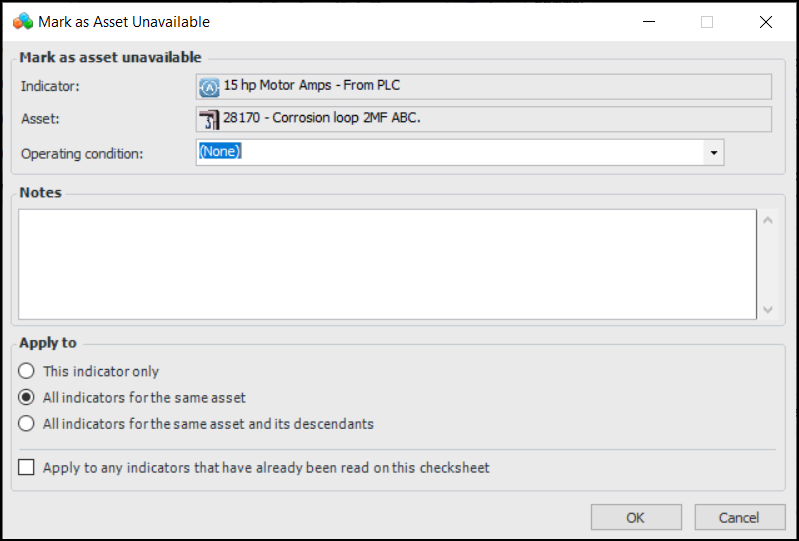
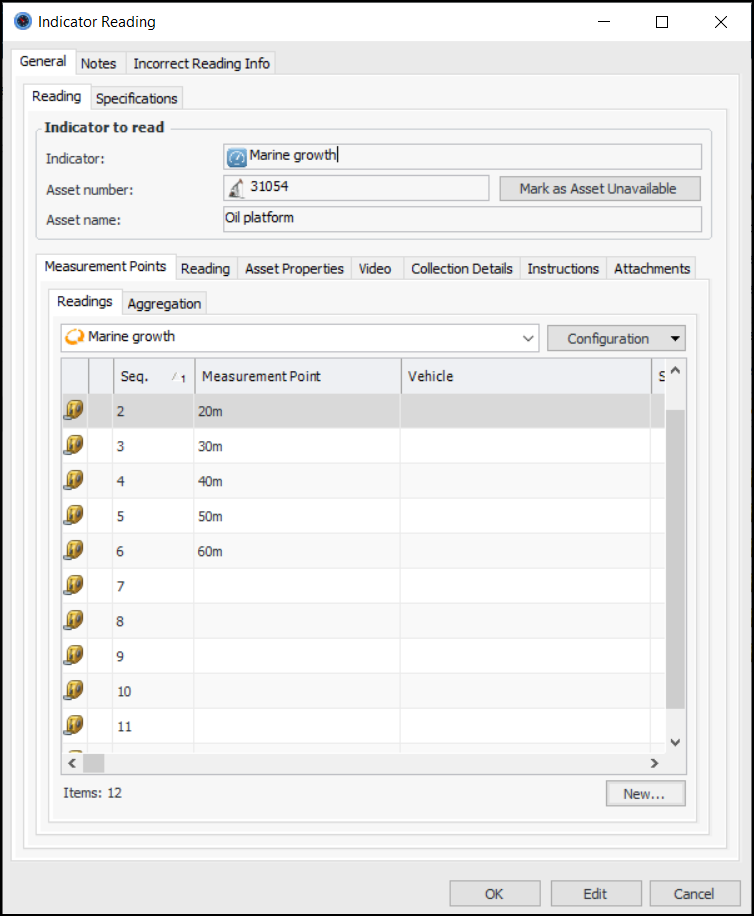
If an indicator reading cannot be taken at the time of collection, you can specify that the asset was not available to be read and select the asset’s operating condition at the time. For example, if an asset must be operating normally for the reading to be taken and the asset is shut down at the time, you can select Asset unavailable for reading and select the asset’s current operating condition. When the reading is processed, the indicator is registered as having been read, allowing you to complete the checksheet. However:To view “asset unavailable” readings at the site level, select the Inspection Management view and the Readings view and tab. In the Configuration list, select “Asset unavailable”.To view “asset unavailable” readings for an indicator, open its Indicator window and select the Readings view. The “Readings history” table displays “asset unavailable” readings as gray text. The “Asset Unavailable” column displays a check mark. In chart view, “asset unavailable” readings are identified by blue markers.Minimum Number of Readings
The standard task from which a checksheet is created can specify the minimum percentage of indicators that must be read. That percentage of readings must be recorded before you can process the checksheet. The minimum percentage of readings requirement is shown in the Checksheet window in the Properties view, General tab, Processing Status tab.Mandatory Readings
The standard task or work order task from which a checksheet is created can specify that one or more indicators are mandatory. This means that the checksheet cannot be processed until readings exist for all mandatory indicators. The checksheet’s Indicator Readings tab contains a Mandatory column. If an indicator is mandatory, you will see a check mark in this column.ODC Checksheets
Readings Entry Style
Checksheet properties include the readings entry style, which is either defaulted from the checksheet type or set manually on the Details tab. The options are:
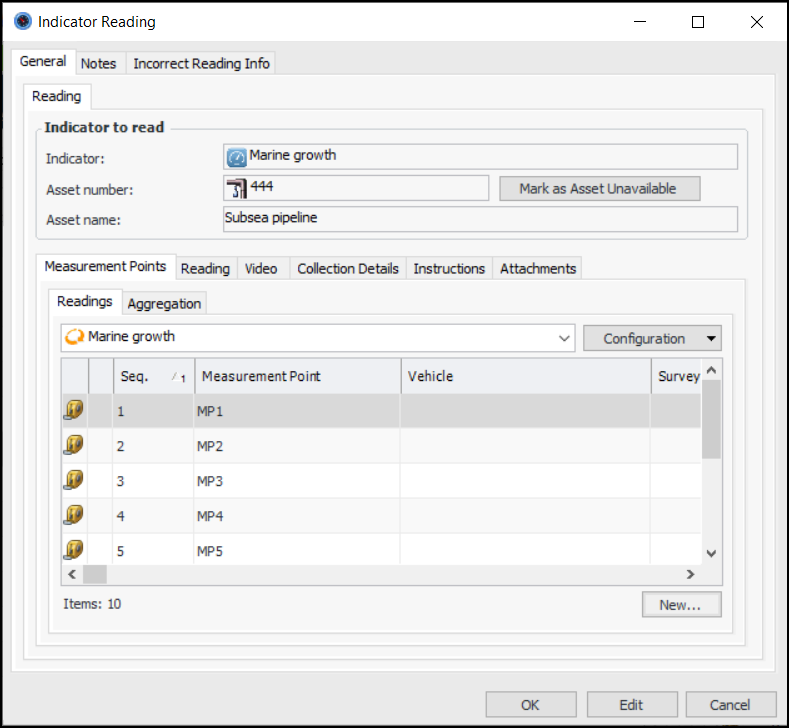
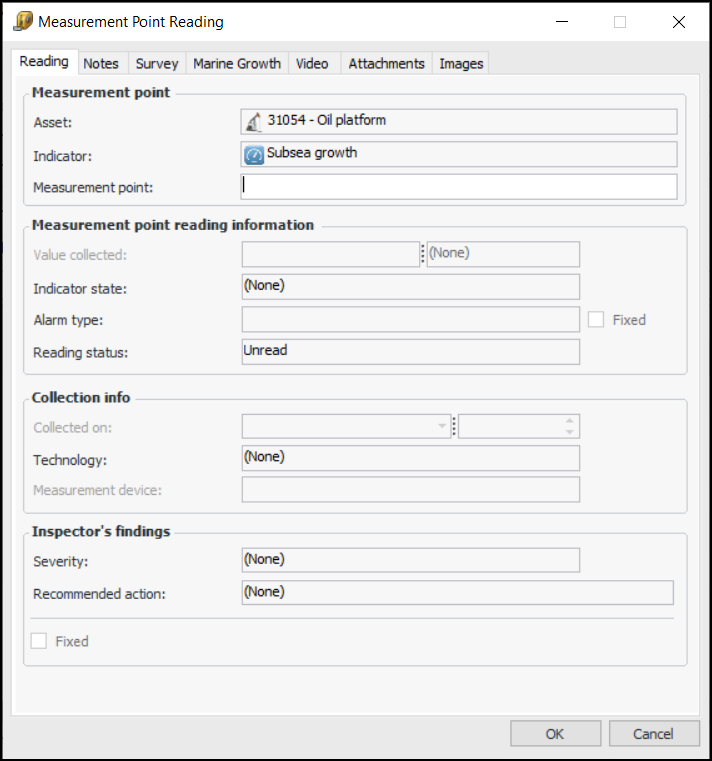
Measurement Point Readings
To Plan a Checksheet
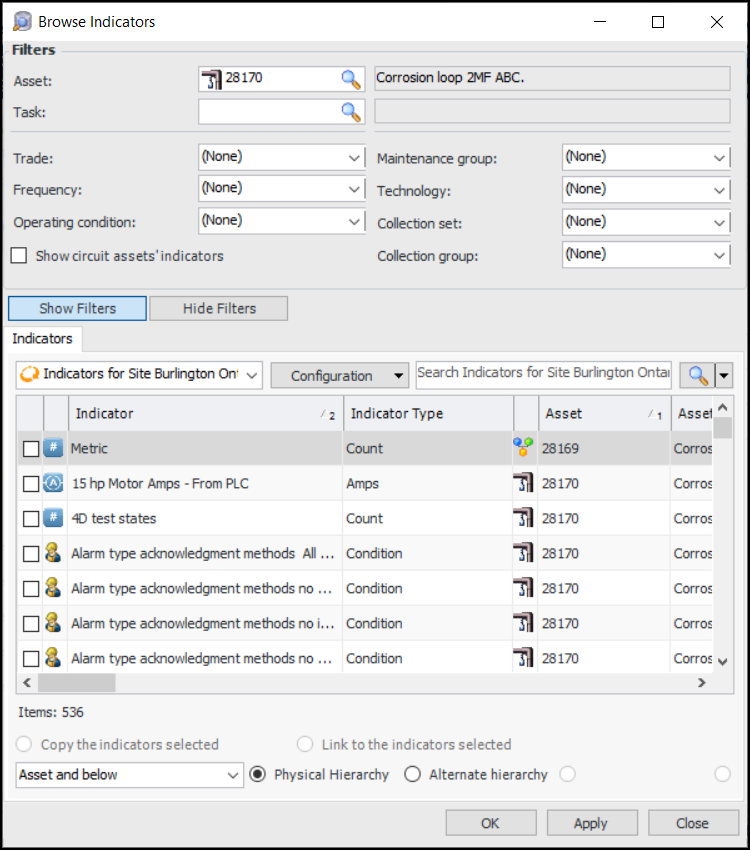
In the Checksheet window, select the Planning view. This view is only available in checksheets generated from a standard task. The checksheet type and checksheet status must support the feature.Use the New list to browse for indicators to add or to add a new reading for the selected indicator. Use the Selected list to remove the selected indicator from the checksheet.To Add Indicators to a Checksheet
To Remove an Indicator Reading from a Checksheet
To Mark an Asset as Unavailable
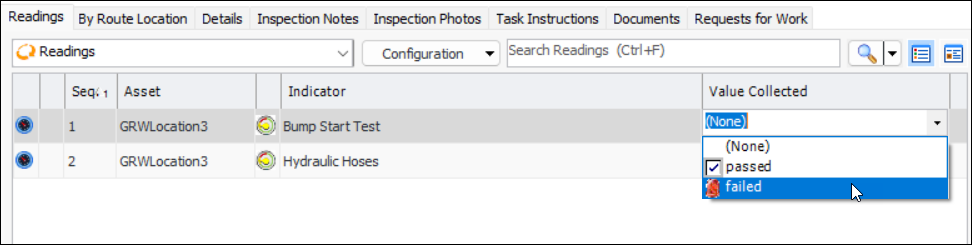
To Enter Indicator Readings on a Checksheet
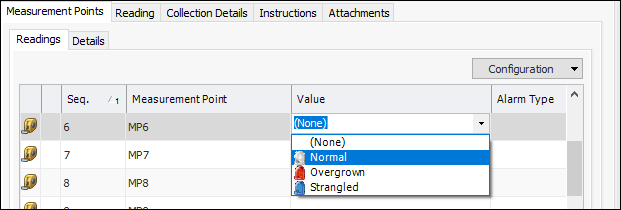
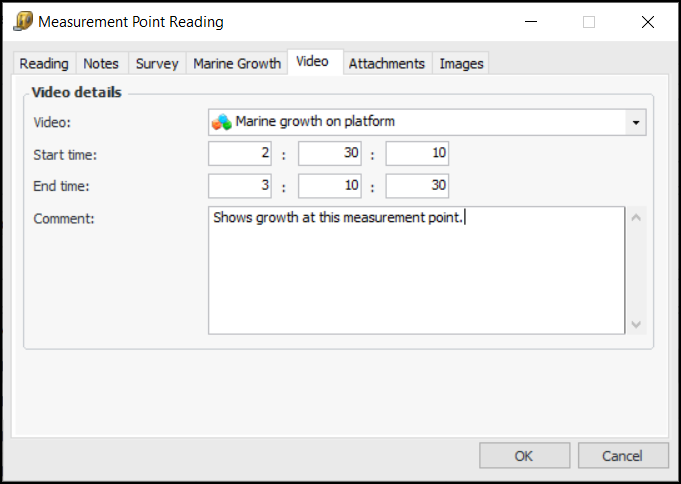
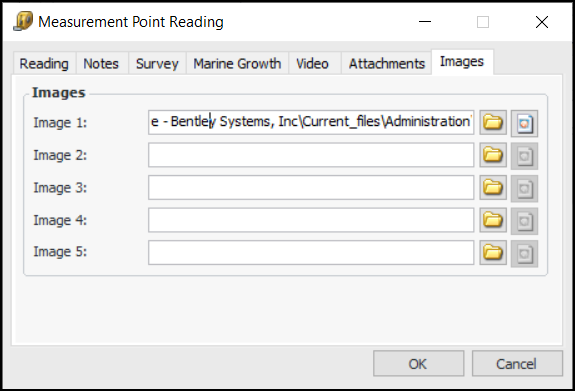
To Enter Measurement Point Readings
. You can view the image by clicking
. The path to each file is shown. For example: