|
|


Overview of Fluid Condition Tracking
Note: Recording fluid samples on indicator readings and tracking fluid condition test results are “generally available” product features. You must first enable features 53 and 54 to use the functionality in APM. In the Enterprise window, select the Features view and the Enabled Features tab. Click Browse, select “Fluid condition tracking and results” and “Fluid sample support” and click OK. If APM is running as a smart client, click Refresh Enabled Features on the server. Then restart the client to use the functionality.Fluid Sample and Condition Tracking Process
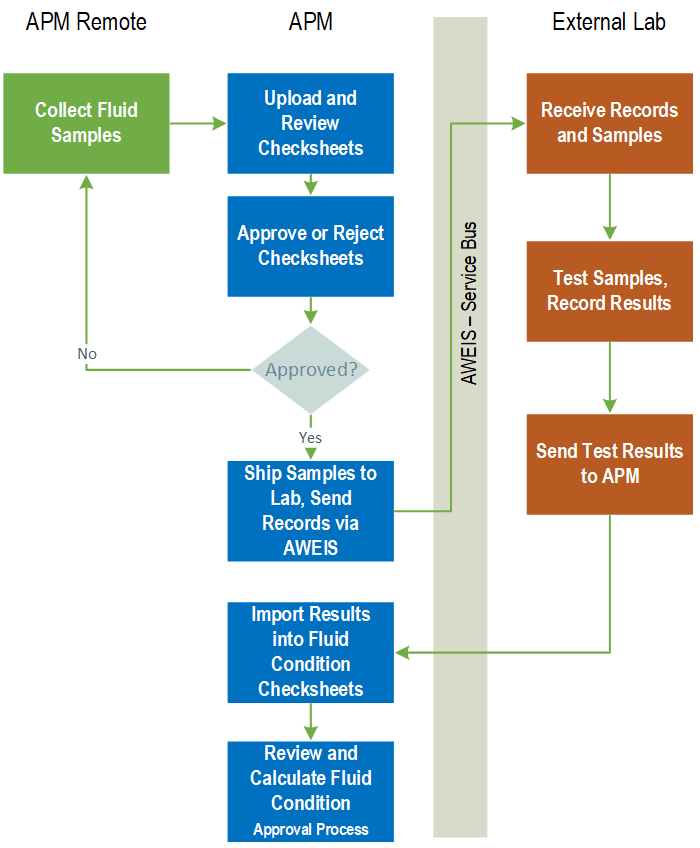
Step 1 - Take Fluid Samples
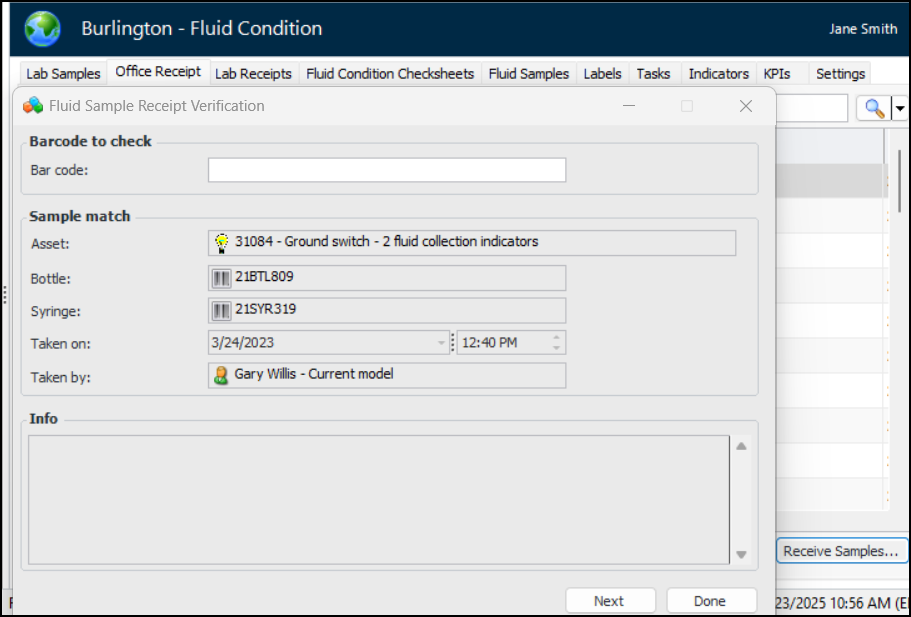
Step 2 - Create Fluid Sample Receipts
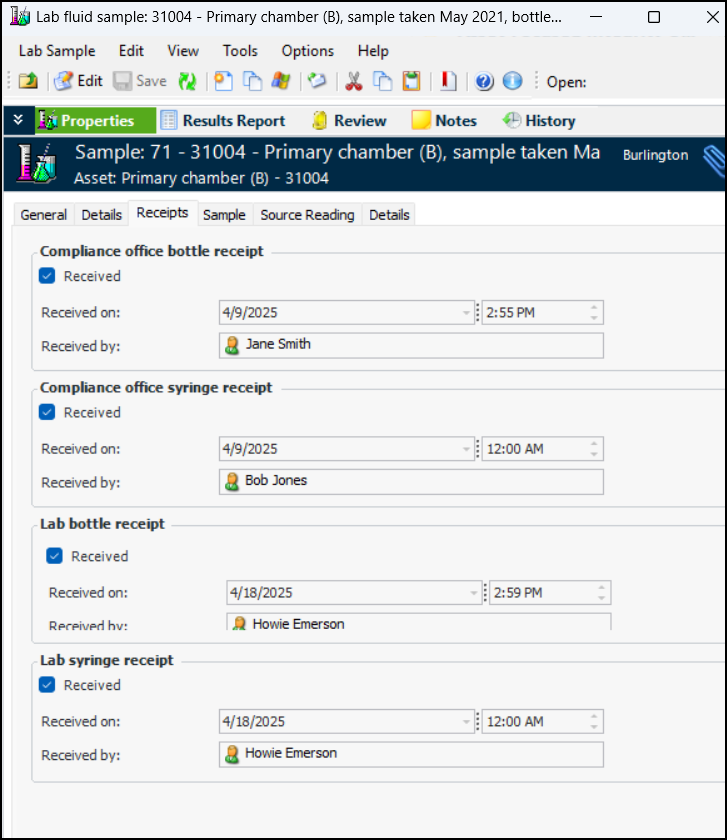
Before the samples are sent to the lab, the internal compliance officer verifies the information on each bottle and syringe, generating a receipt on the lab fluid sample. In the site’s Fluid Condition view, select the Office Receipt tab. The default table configuration lists samples that are “Waiting for office receipt”.Click Receive Samples to open the Fluid Sample Receipt Verification window. When you scan (or enter) a bar code, APM checks that a matching bar code exists in the system, that the bar code has been assigned to a sample, and that it was not previously received. For example:Continue scanning bar codes until you run out of bottles and syringes. When you click Done, the window closes and the samples you scanned are moved to the “Ready to send to lab” configuration.On the Office Receipt tab, select the “Ready to send to lab” configuration and click Send to Lab. The Send Fluid Samples window appears, where you can select the lab, browse for samples to send, and click OK.If testing is performed in a lab within your organization that has access to APM, lab personnel can receive and verify samples. In the site’s Fluid Condition view, select the Lab Receipts tab. Click Receive Samples to open the Fluid Sample Receipt Verification window. As you scan bar codes one after the other, APM matches the codes and records the receipt.You can view a fluid sample’s receipts in the Lab Fluid Sample window. Select the Properties view, Receipts tab. For example:Step 3 - Lab Tests - Import Results
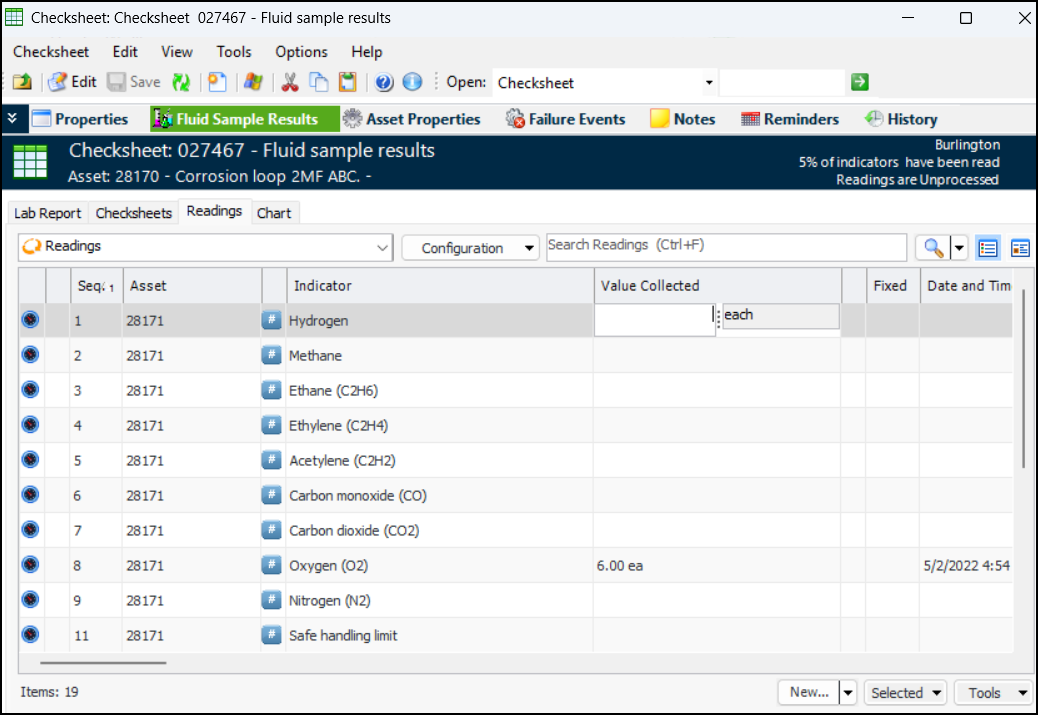
Internal labs can also record test results as indicator readings in the checksheet. In the site’s Fluid Condition view, select the Fluid Condition Checksheets tab and open a checksheet. In the Checksheet window, select the Fluid Sample Results view and the Readings tab. Press F2 to edit a row. For example:Step 4 - Evaluate Fluid Condition
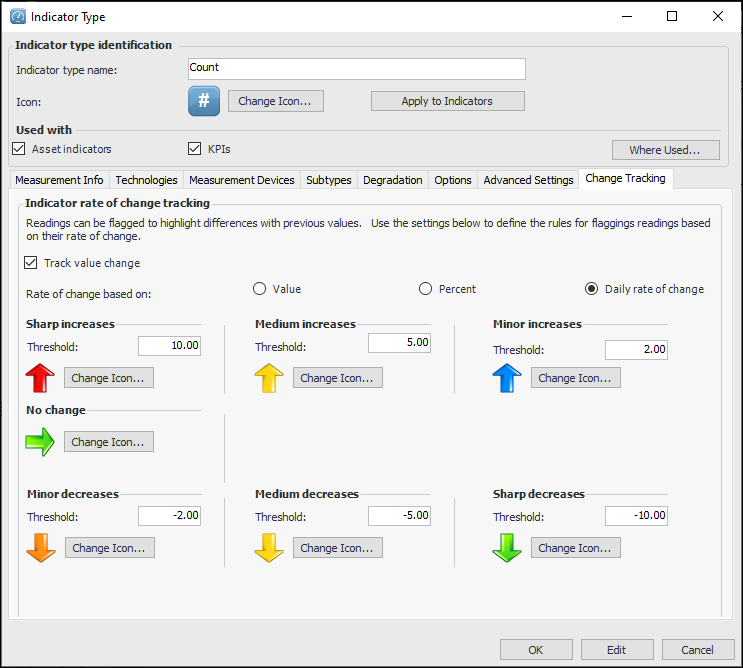
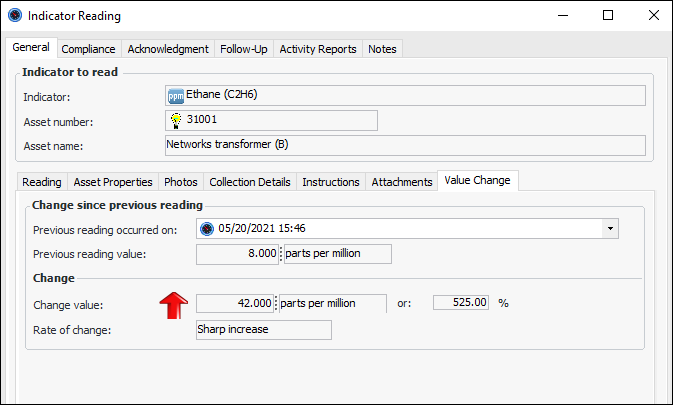
Change Tracking
In an indicator reading, the Value Change tab displays the change since last reading:After implementing the functionality on an indicator type, you can calculate change values for indicators with existing readings. In the Site window, select the Inspection Management view and Readings tabs. Select one or more readings, right-click, and click Calculate Change Value.Review and Approval Processes
Printing Bar Code Labels