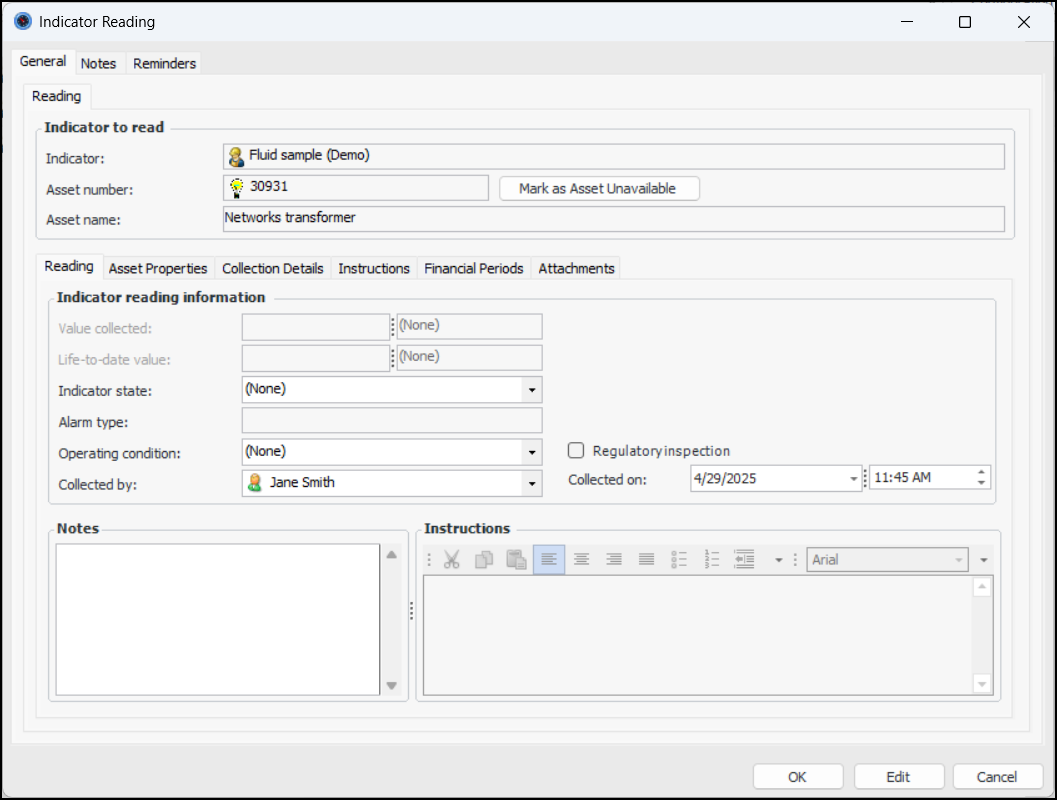
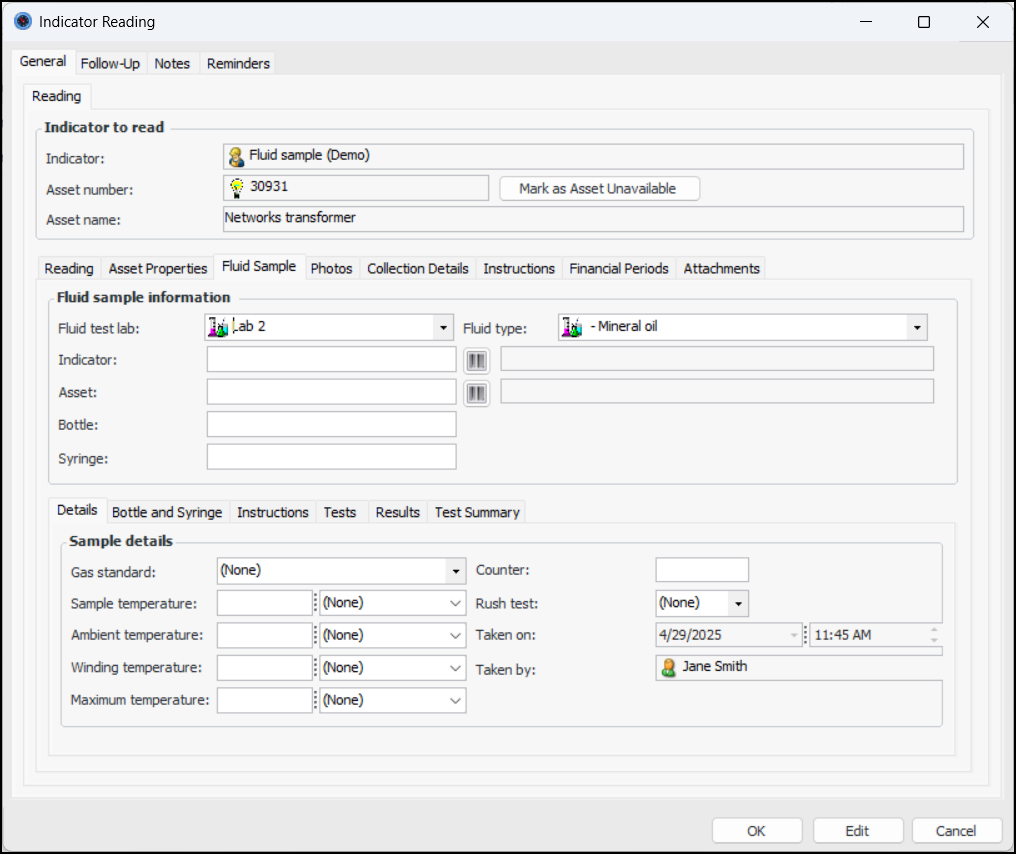
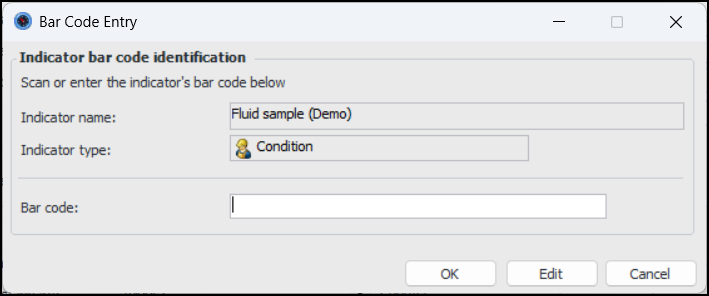
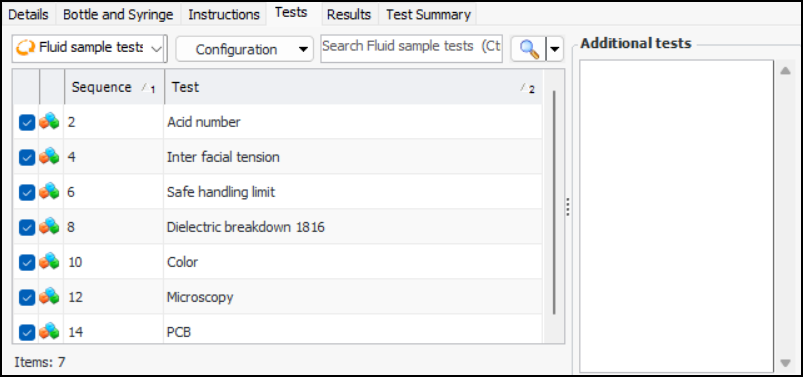
Entering Fluid Sample Indicator Readings

This topic explains how to use a checksheet to enter indicator readings that capture fluid sample information.
For general information, see Entering Readings on a Checksheet.

To Enter Fluid Sample Indicator Readings

1.
Open the checksheet. For example, select the site’s Inspection Management view, Checksheets tab. Locate the checksheet and open it.
Tip: To create a checksheet from a standard task, select the site’s Reliability Program or Fluid Condition view, Tasks tab. Locate the task, right-click, click Create, and then click Checksheet.
Tip: In the Checksheet window, select the Fluid Types view, if it is available, to see a list of the fluid types associated with the checksheet readings. Support for the view is enabled on the checksheet type.
2.
In the Checksheet window, Readings view and tab, double-click the reading to open the Indicator Reading window. For example:
3.
In the Indicator state list, select the appropriate option, for example, “Sample taken”.
4.
In the Collected on fields, select the date and time of collection.
5.
Select the Fluid Sample tab. For example:
Default information is provided by the indicator’s fluid type and fluid samples settings. For example, the indicator can specify the fluid type or that the asset’s fluid type is defaulted.
6.
Scan or enter bar codes in the Indicator, Asset, Bottle, and Syringe fields, as required.
Tip: If the asset or indicator does not yet have a bar code, you can add it from this location. Click to open the Bar Code Entry window. Here is the window for an indicator bar code:
Enter or scan the bar code and click OK. The bar code is added to the indicator and the fluid sample information.
7.
In the Details tab, select the gas standard.
8.
9.
10.
11.
Maximum temperature typically refers to the highest temperature recorded in previous readings for the asset.
12.
If a rush test is required for either the bottle or syringe samples, you can select a value from the Rush test list. The setting determines the Bottle results required in and Syringe results required in values.
13.
Select the Bottle and Syringe tab. The results “required in” durations are defaulted from the fluid type. You can adjust values as needed and APM calculates the “required by” dates.
14.
Select the Instructions tab to provide information for the lab.
15.
Select the Tests tab to view the lab tests assigned in the indicator’s sample settings (type of test). Select the tests that you want to be performed by the lab. You can also note additional tests. For example:
16.
Select the Results tab to view the task template that will be used to generate the fluid condition checksheet when the collection checksheet is processed.
17.
Click Close to save the indicator reading.
18.
A supervisor or specialist can now open the checksheet and review the readings, changing default values and adding tests, if needed, before the checksheet is sent for approval or review or before the readings are processed.
Process the readings by marking the checksheet as completed. For each reading, APM copies fluid information to a new lab fluid sample and fluid condition checksheet to record lab test results.