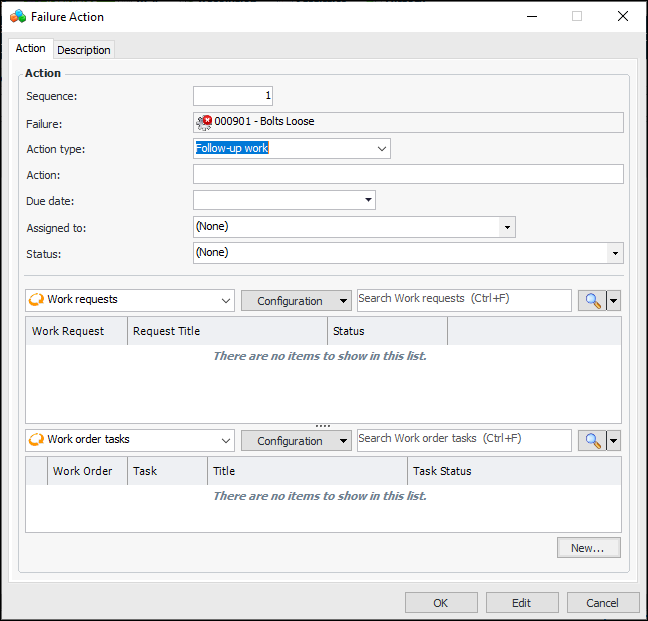
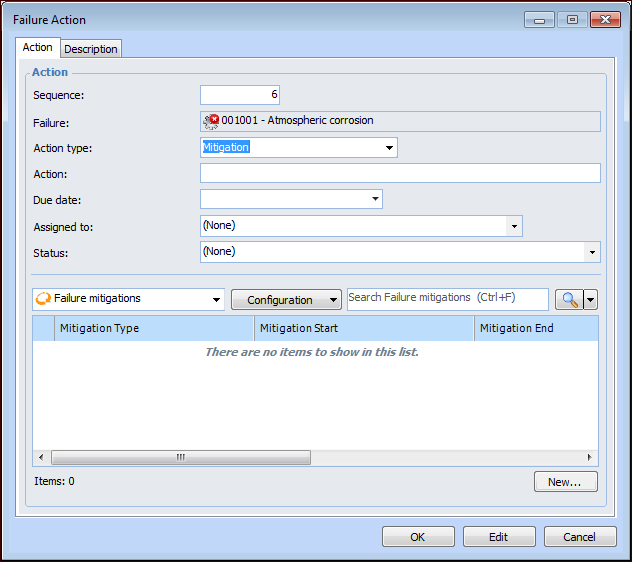
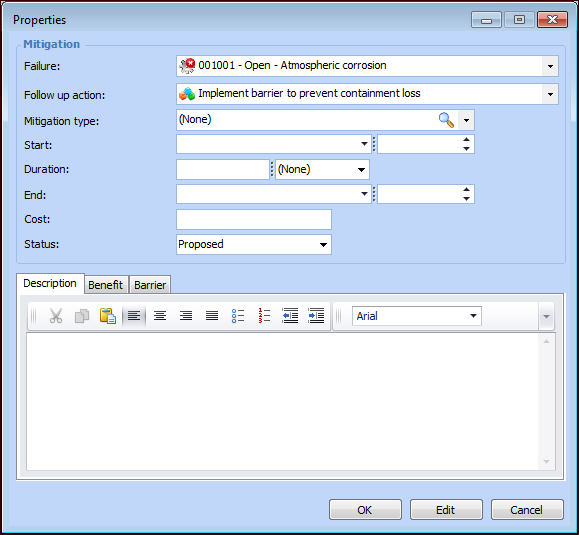
Adding Mitigation Actions to Failure Records

The objective of a mitigation action is to provide a temporary fix while analysis is completed and a solution implemented. The mitigation record describes the temporary action and any asset barrier to be employed. It includes the starting date and duration of the action, the costs of the action, and the cost benefit.
The statuses available for mitigations reflect the process of selecting one: Proposed, Accepted, Canceled, In Place, Completed, and Other. Typically, the team proposes a mitigation action, selects the best one, implements it, and records when its use has ended.
You can define mitigation actions in the Failure or Anomaly window’s Activities view. You can create and manage mitigation actions using failure follow-up actions. Each action includes a sequence number, action type, description, due date, employee assignment, and action status. The document thus provides a record that can be tracked by due date, owner, and status.
Each failure follow-up action is categorized by type:
Mitigation action properties include a link to the source follow-up action.
Tip: You can view a list of failure follow-up actions for the site. In the Performance Management view, select the Failures and Downtime tab, and the Failures tab. Select “Failure actions by due date” in the configuration list.
This topic explains how to add a mitigation action from a failure follow-up action. You can also create mitigation actions from the Mitigation tab and select an existing follow-up action.

To Add a Mitigation Action to a Failure Record

1.
Open the Failure or Anomaly window. On the Activities view, select the Actions tab.
2.
Click New. The Failure Action dialog appears. Here is an example where APM work documents are used:
3.
Tip: In the Activities view, the Actions tab provides Move Up and Move Down buttons to change the order of the actions as well as their sequence numbers.
4.
In the Action type list, select “Mitigation”. The Failure Action dialog changes as follows:
5.
In the Action box, provide a brief description of the required action.
6.
7.
Select the Description tab to provide more information about the failure action.
8.
In the Action tab, click New. The Properties dialog appears.
9.
The Failure and Follow-up action boxes display the source of the mitigation action. If needed, you can change these references.
10.
11.
In the Start boxes, select the date and time when the action will be implemented.
12.
In the Duration boxes, enter the amount of time the temporary fix will be in place.
13.
14.
In the Cost box, enter the monetary cost of implementing the fix.
15.
16.
On the Description tab, provide information about the mitigation action.
17.
Select the Benefit tab to enter the cost benefit and a description.
18.
Select the Barrier tab to select a barrier type, its start and end dates, and duration.
19.
Click OK. The Properties dialog closes and the mitigation action is added to the Failure Action dialog.
20.
When you have finished adding mitigation actions, click OK. The Failure Action dialog closes and the follow-up action is added to the table in the Actions tab. The Mitigation tab displays the mitigation actions.