|
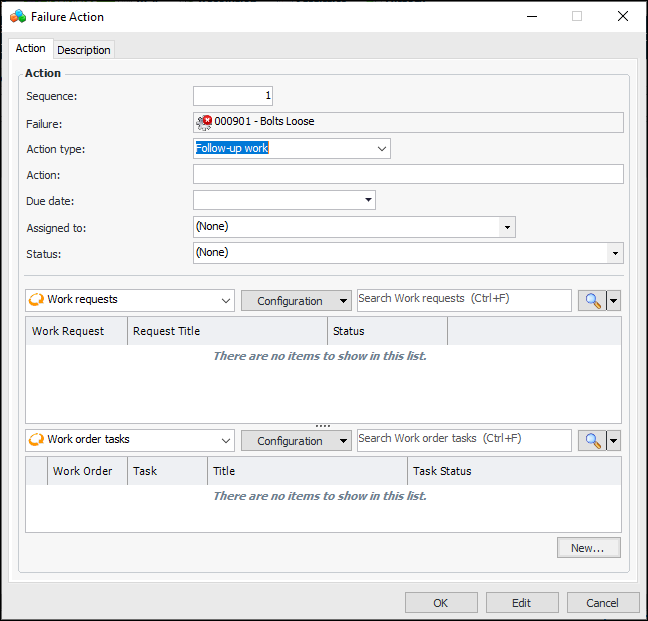
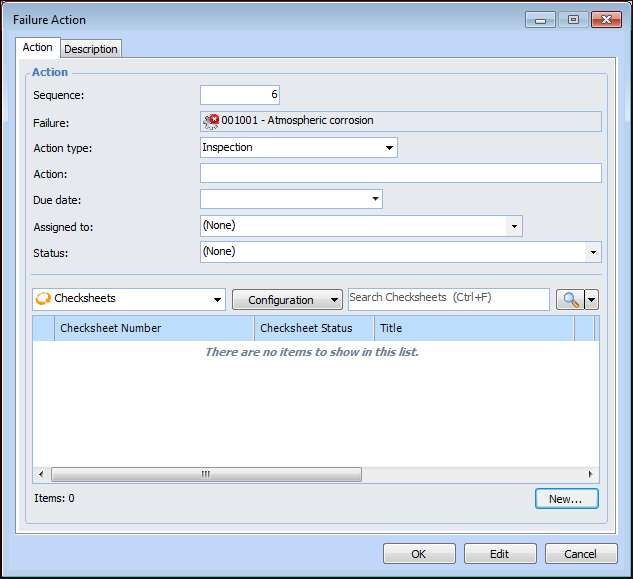
Adding Inspection Tasks to Failure Records
•
•
• When you add a checksheet as a follow-up action on a failure record, the checksheet’s Properties view, Source tab displays the failure record and action type.Tip: You can view a list of failure follow-up actions for the site. In the Performance Management view, select the Failures and Downtime tab, and the Failures tab. Select “Failure actions by due date” in the configuration list.
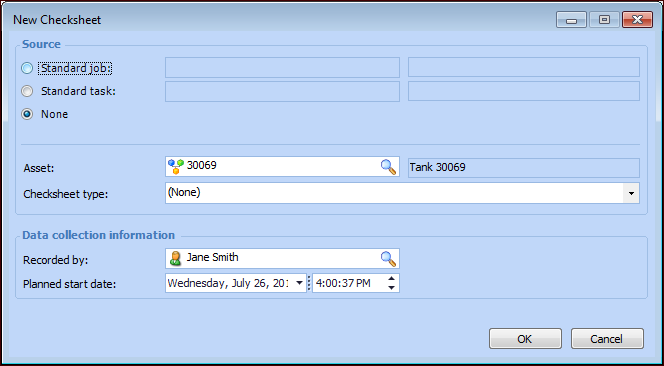
To Add a Checksheet to a Failure Record
1.
2. Click New. The Failure Action dialog appears. Here is an example where APM work documents are used:Tip: In the Activities view, the Actions tab provides Move Up and Move Down buttons to change the order of the actions as well as their sequence numbers.
4. In the Action type list, select “Inspection”. The Failure Action dialog changes as follows:
5. In the Action box, provide a brief description of the required action.
7. Select the Description tab to provide more information about the failure action.
8.
• To create checksheets for all of the tasks on a standard job, select Standard job and click. The Standard Job Selector dialog appears. Select the standard job and click OK.
• To create a single checksheet from a standard task, select Standard task and click. The Standard Task Selector dialog appears. Select the standard task and click OK.
• Select None to create an ad hoc checksheet. In the blank checksheet, you can select the indicators to read. You can also link the checksheet to a work order task on the Properties view, Source tab.
10. The Asset box is available when the source is a standard task or “None”. If you selected None, the failure’s asset is selected. You can browse for an asset if needed.
12. By default, the Recorded by box displays the employee who reported the failure. You can clickto open the Employee Selector dialog, listing only employees with the Inspector, data collection role. Select the employee to collect the indicator readings and click OK.
13. The Planned start date box shows the current date and time by default. You can change this information, if required.
14. Click OK. The New Checksheet dialog closes and the checksheet is listed in the Failure Action dialog.
15. When you have finished adding checksheets, click OK. The Failure Action dialog closes and the action is added to the tables in the Actions tab. The Inspections tab lists the checksheets.