|
Creating a Failure Record From Scratch
•
•
• Note: After saving a failure record, you must use the Change buttons or the commands on the Tools menu if you wish to change the following information: asset information, failure dates, severity level, PF interval. You cannot simply enable editing to change this information because the failure statistics for all affected assets might require recalculation. For more information, see Editing Failure Records.To Provide General Information About the Failure
1.
2. Click New. The Failure or Anomaly window appears.Tip: You can also create a failure record from an asset. Open the asset, select the Performance Management view, Failures tab. Click New. The asset information is displayed in the failure record automatically.The example above is taken from APM when AWEIS has been implemented to exchange data with an external CMMS. Consequently, the Related Failures tab is available to list secondary failures, and you can select object part, damage, and activity codes on the Failure Codes tab.Information about the asset appears on the Asset tab, including the consequence priority, ancestor system or subsystem, function group, primary function, and component information, if applicable.
4. Select a failure mode or problem:
• If failure modes have been defined for the asset, you can select a suitable one from the Failure mode list. Its description, failure type, and failure classification are copied to the failure record and shown in the General tab. Any indicators assigned to the failure mode are also copied to the record. The Effects tab appears in the dialog, displaying information from the failure mode.If AWEIS is active, the object part group, object part, damage code, and activity code are copied from the failure mode to the Failure Codes tab.
• If the failure is associated with a problem defined for the asset type rather than a failure mode, select the Details tab. Select a problem from the list and, if appropriate, the cause and remedy. The selected problem’s description, failure type, and failure classification are copied to the failure record and shown on the General tab.
5. Note: At this point, the failure record’s status is “Open”. Other statuses are “Resolved” and “Canceled”.
6. On the General tab, the Failure title box is populated with information from the failure mode or problem. You can modify the title as needed.
7. You can select up to three failure subtypes, if applicable. A specification tab is added to the window for each subtype, for example, Loss of Containment, where you can provide additional detail.
• Total: the asset’s performance has decreased to a point where the asset no longer performs at its required level. The asset has completely failed.
• Partial: the asset’s performance has decreased to a point where it no longer performs one of its functions at the specified levels. The asset is still functioning.
• Potential: a condition has been noticed that would result in a failure if the problem is not resolved. Potential failures are most often reported when an indicator reading raises an alarm against the asset.
9. Select Preventable if you wish to indicate that the asset’s reliability program needs review.
11. In the Responsibility area, select the organizational asset and employee responsible for tracking the failure. This information is independent from the employee who reported the problem.
13. On the Description tab, enter or modify the description of the failure as needed.
14. On the Project tab, you can add the record to a reliability project and associate the record with a project task. Reliability projects are typically used to organize and track analyses and objects. They usually use project tasks rather than work orders.
15. If it is available, you can select the Failure Codes tab to view and adjust the object part group, object part, damage code, and activity code.
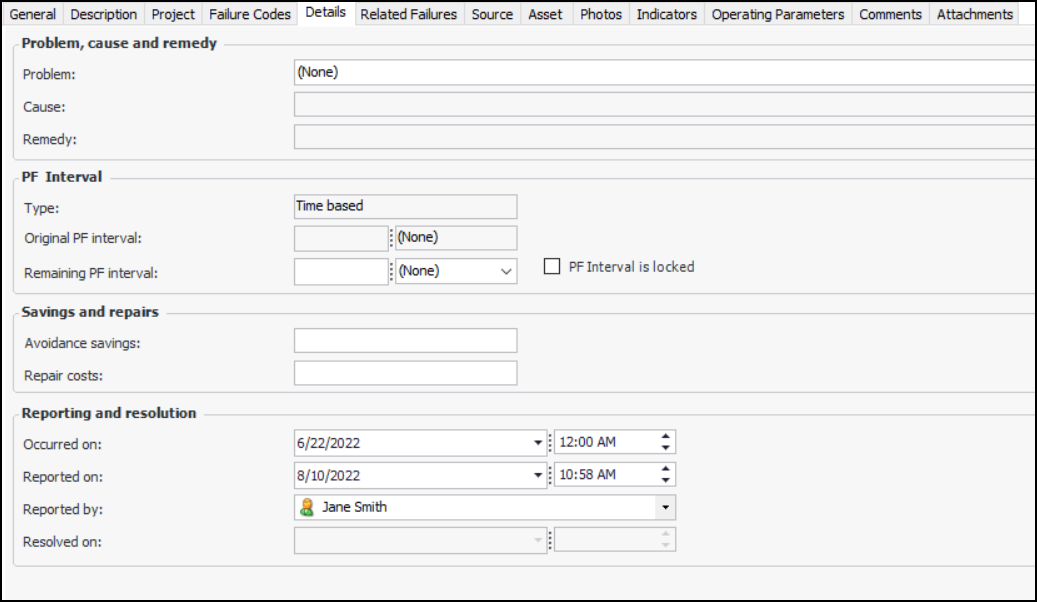
To Provide Details About the Failure
1.
• When you specify a PF interval, APM periodically recalculates the time remaining until a full failure can be expected. If you wish to prevent APM from changing the PF interval, select PF Interval is Locked. The PF interval remains at its current level until it is changed manually.
4. In the Repair costs box, you can enter the estimated costs to repair the equipment.
5. In the Reporting and resolution area, the date and time that you created the failure record are shown by default. You can change the value in the Reported on box to reflect the time when the failure was reported.
6.To Document the Failure
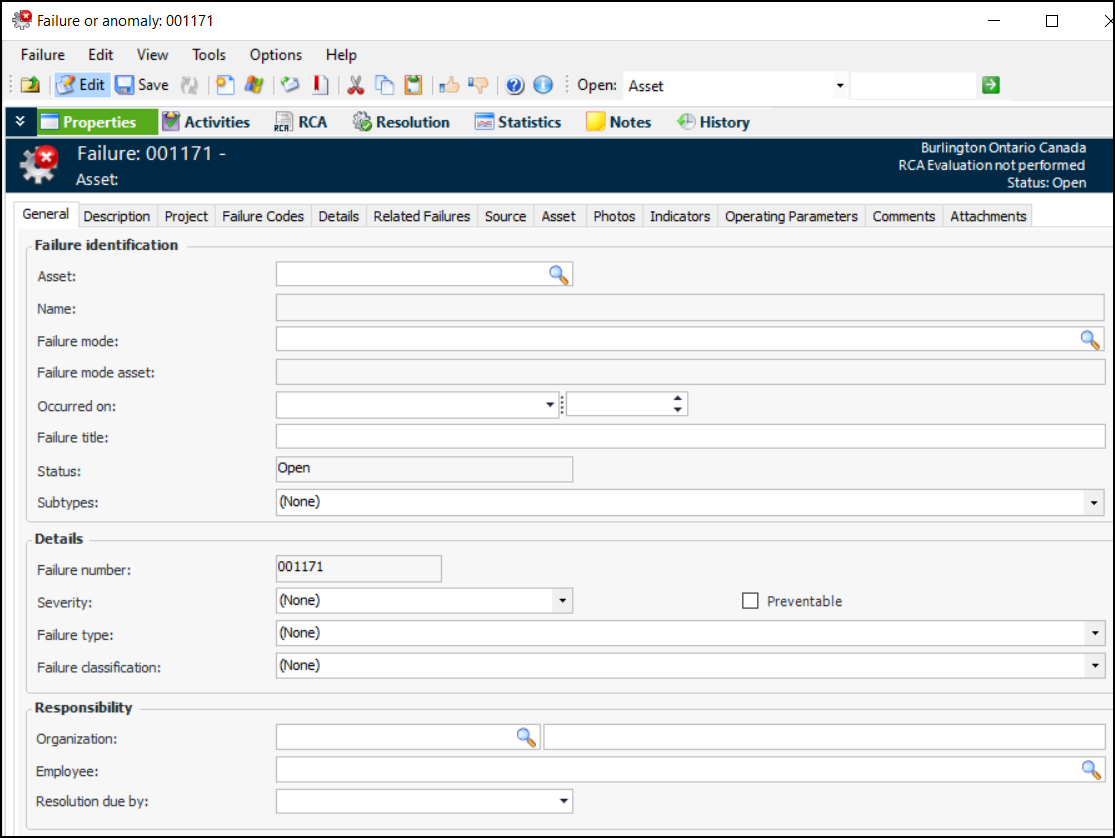
1. Select the Photos tab to attach inspection photographs to the failure record. For more information, see Adding Inspection Photographs to Objects.
2. Select the Comments tab to create and respond to comments. For more information, see Entering and Reviewing Comments on a Failure.
3. To attach a document (for example, a report or spreadsheet) to the failure record, select the Attachments tab. For more information about attaching documents, see Adding Attachments to Objects.