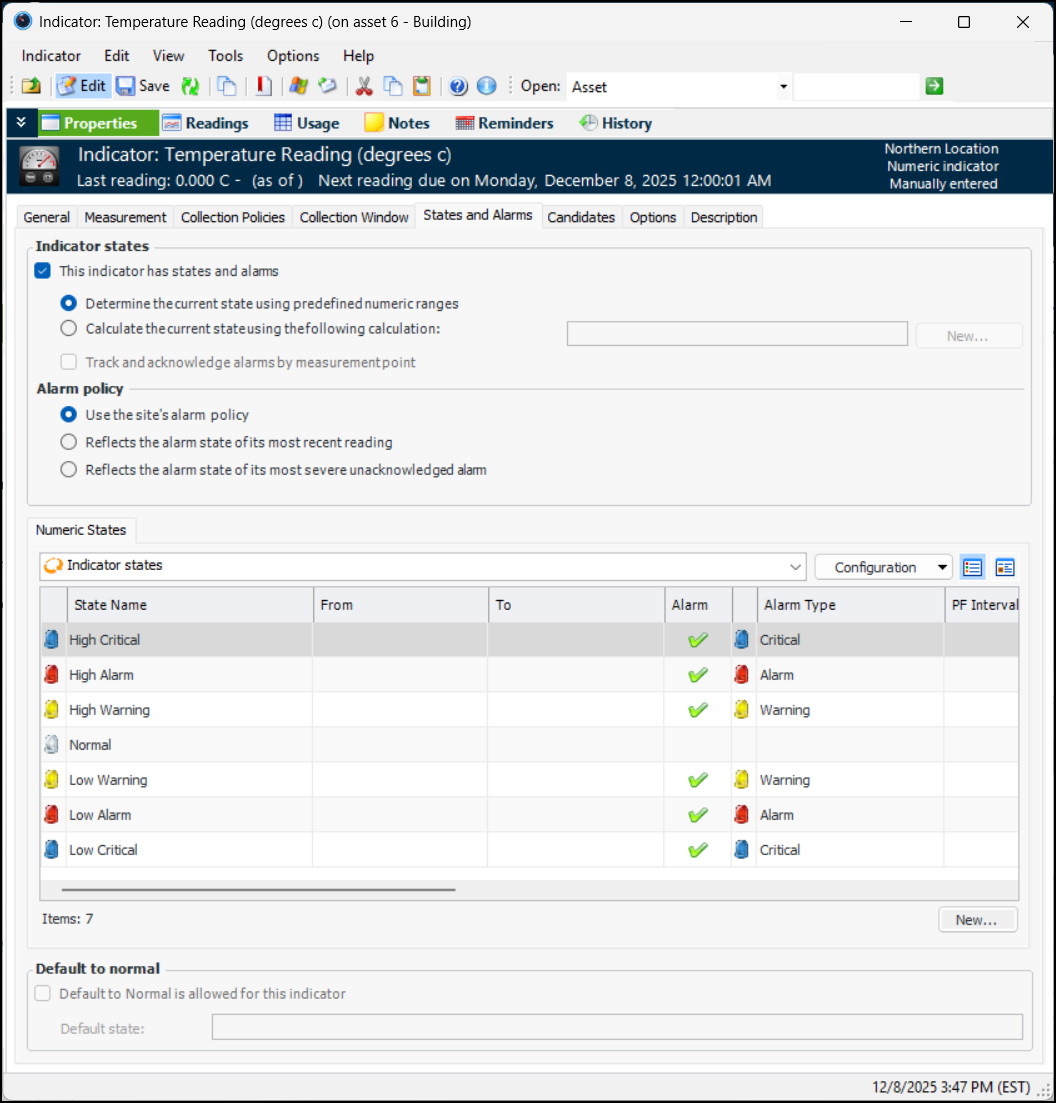
Adding States and Alarms to an Indicator or Template

There are two types of states for an indicator: normal states and alarm states. Alarm states occur when an indicator has a reading that is outside of the defined normal state for the indicator.
For example, you might have a temperature indicator with the following states and alarms:
If an indicator reading of 75° is recorded, APM triggers the low critical alarm.
You can add states and alarms to numeric, descriptive, calculated, and performance indicators or indicator templates. Descriptive indicators have possible values, which are similar to states, and can also be linked to alarms. Rule-based indicators have only two states: true or false. You can select an alarm to be triggered when APM evaluates the rule as true.
Note: To add states to a descriptive indicator, see Creating a Descriptive Indicator.
You can track and acknowledge alarms for each measurement point individually. When acknowledging alarms in this manner, the indicator’s current alarm value will be the highest ranking outstanding alarm of all of its measurement point readings. When all outstanding measurement point reading alarms have been acknowledged, the indicator alarm is removed.
If AWEIS is active on the site, you can specify that a work document be created with readings with this state. You can also set up automatic acknowledgment of readings and select default information for work documents. For more information, see Setting up Indicator States to Create Requests for Work.
You can add a message to an indicator state so that, when a user saves a reading with the state, APM displays a warning dialog with the message. The user clicks Yes to close the dialog.
If your APM environment is set up to track failures, you can set options to automatically create failure records and downtime incidents when users acknowledge alarms. You can provide default values for the failure mode and PF intervals, and failure severity on generated failure records.
You can add conditional indicators to alarm states. A conditional indicator reading is added to a checksheet when an alarm reading has already been recorded and the indicator’s alarm state specifies a conditional indicator list. Readings are added for the conditional indicators so that additional checks or readings can be recorded on the checksheet.
This topic explains how to add states and alarms to an existing numeric indicator or indicator template. It explains how:

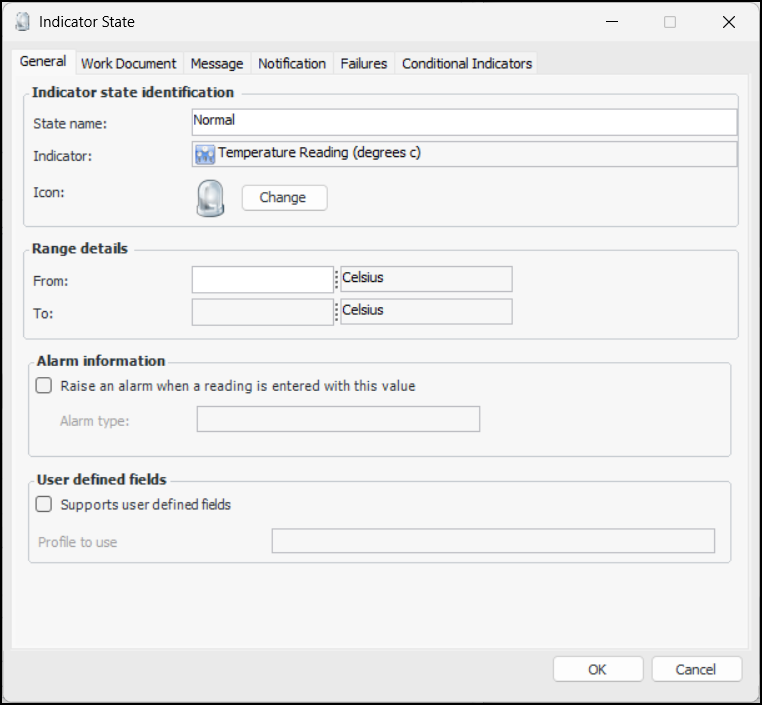
To Add States, Value Ranges, and Alarm Types to Indicators

1.
2.
3.
On the Properties view, select the States and Alarms tab and then select This indicator has states and alarms.
By default, APM creates one normal state. For example:
Tip: If APM provides a state that you do not want to use, you can remove it. Right-click the state and select Remove. A confirmation message appears. Click Yes.
4.
To determine the current state from a calculation, select Calculate the current state using the following calculation and then either select a calculation from the list or click New to create an indicator reading state calculation. For more information, see Creating an Indicator State Calculation Record.
5.
If the indicator allows multiple measurement points, select Track and acknowledge alarms by measurement point to allow alarms for each measurement point to be acknowledged individually.
Note: This option is not available when the Calculate option is selected.
6.
You have the choice of setting the alarm acknowledgment policy on the indicator or on the site. In the Alarm policy area, the default selection is Use the site’s alarm policy. You can choose to have the policy based on the alarm state of the indicator’s most recent reading or that of its most severe unacknowledged alarm:
Note: A subsequent higher-severity reading puts the indicator back in an alarm state and triggers the need for re-acknowledgment even though the work order or work request used to acknowledge the previous reading is still open.
For related information, see Setting Acknowledgment Policies.
7.
8.
9.
Enter the lower value of the normal range in the From box. You cannot enter a value for the upper limit of the normal range; APM calculates this value once you have defined the rest of the states.
10.
Click OK to save the state and close the dialog.
11.
12.
Enter the lower value of the state’s range in the From box. You cannot enter a value for the upper limit of the state’s range; APM calculates this value once you have defined the rest of the states. Note that you cannot enter a lower range for the most severe “low” alarm; the lower range for this state is automatically set to negative infinity.
13.
For non-normal (alarm) states, if AWEIS is active for the site, you can specify that a work document is created for readings with this state. You can also set up automatic acknowledgment of readings with this state and select default information for work documents. For more information, see Setting up Indicator States to Create Requests for Work.
When you save and close the state, go on to the next abnormal state. When you have finished entering ranges for all of the states, APM calculates the other end of the range for each state.

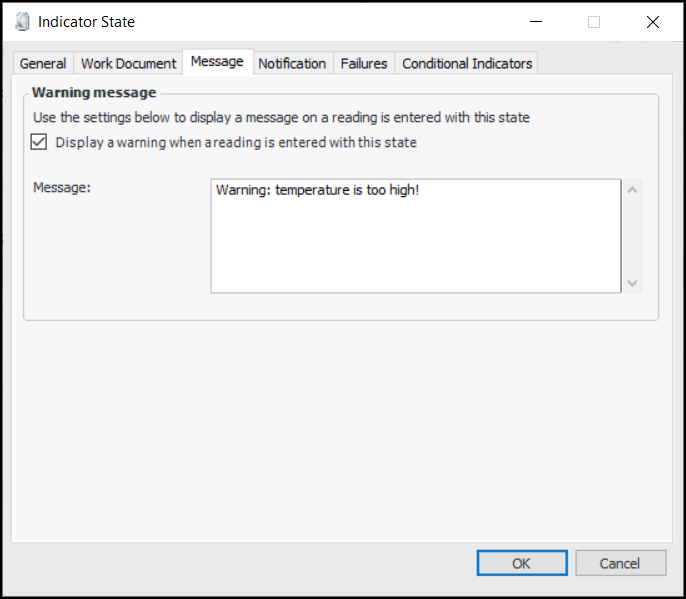
To Add a Message to an Indicator State

1.
Select the Message tab.
2.
Select Display a warning when a reading is entered with this state and enter to message. For example:
When the user saves a reading with this state, the message dialog appears.

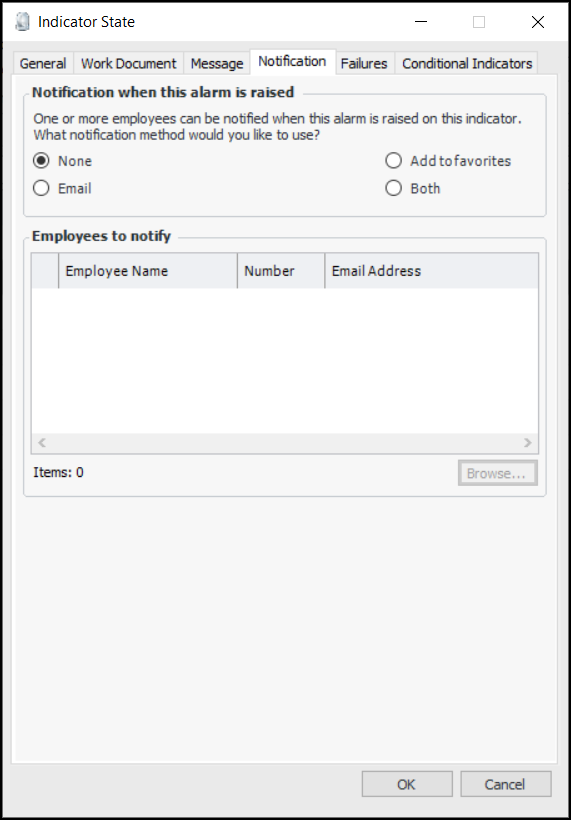
To Select Notification Methods for an Alarm State

1.
Select the Notification tab. APM can send an email and/or a favorite to one or more employees when this indicator is in this alarm state.
2.
None: No notification will occur.
Email: Notify employee(s) with an email.
Favorite: Notify employee(s) with a favorite.
Both: Notify employee(s) with both an email and a favorite.
3.
Click Browse to select one or more employees.
Note: For this feature to work, the employee must be a domain user with a valid email account. This email account must be added to the employee record in APM.
You can now set failure options for the state or click OK to save the state and close the dialog.

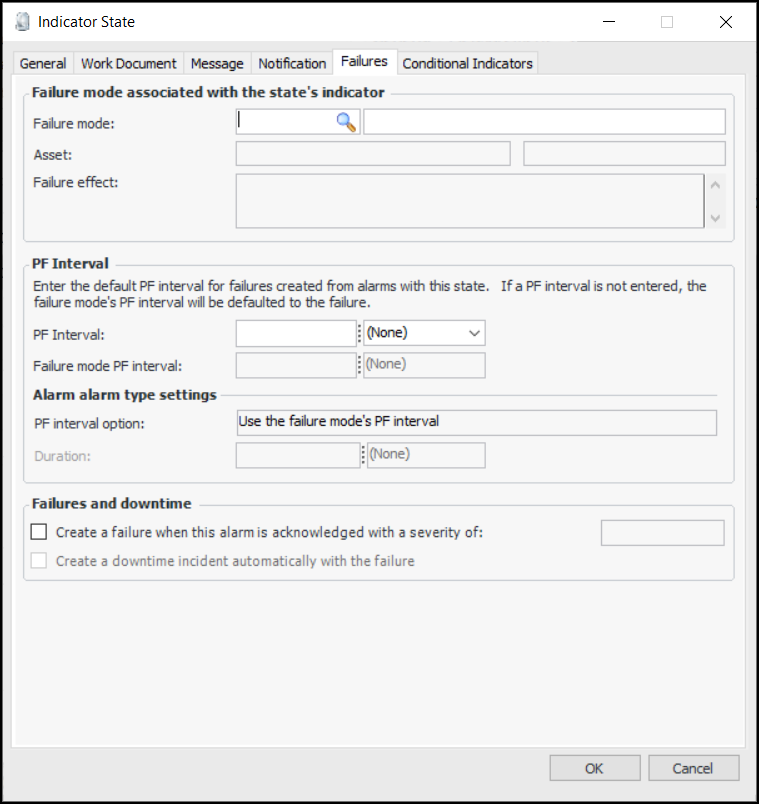
To Select Failure and Downtime Options for an Alarm State

1.
Select the Failures tab. On this tab, you can select options to have failure records and downtime incidents automatically created when users acknowledge alarms with work orders, work requests, monitoring, or by marking the alarms as being fixed during inspection. For example:
2.
To associate one of the asset’s failure modes with the indicator state, click the browse icon, select the failure mode, and click OK in the selector dialog. If failure records are created automatically when an alarm is acknowledged, the records display this failure mode.
3.
Set the PF interval directly by entering a value and unit of measure in the PF interval boxes. You can do this if a failure mode is not selected or to override the selected failure mode’s PF interval.
4.
To have failure records created automatically, select Create a failure when this alarm is acknowledged. Select the failure severity to assign to the failure record.
5.
Note: The site’s Acknowledgment policies determine which acknowledgment methods allow a failure record to be created. For more information, see Setting Acknowledgment Policies.

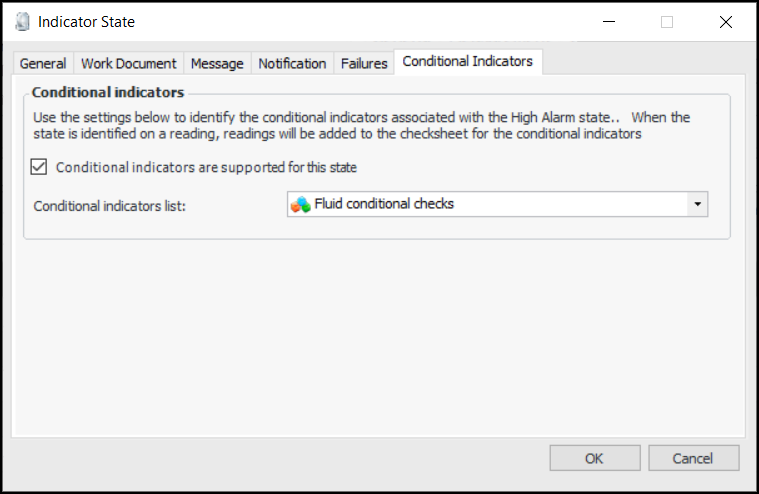
To Add Conditional Indicators to an Indicator State

1.
Select the Conditional Indicators tab.
2.
Select Conditional indicators are supported for this state.
3.
In the Conditional indicators list, select a list. For example:
4.
When you are finished, click OK to save the state and close the dialog.