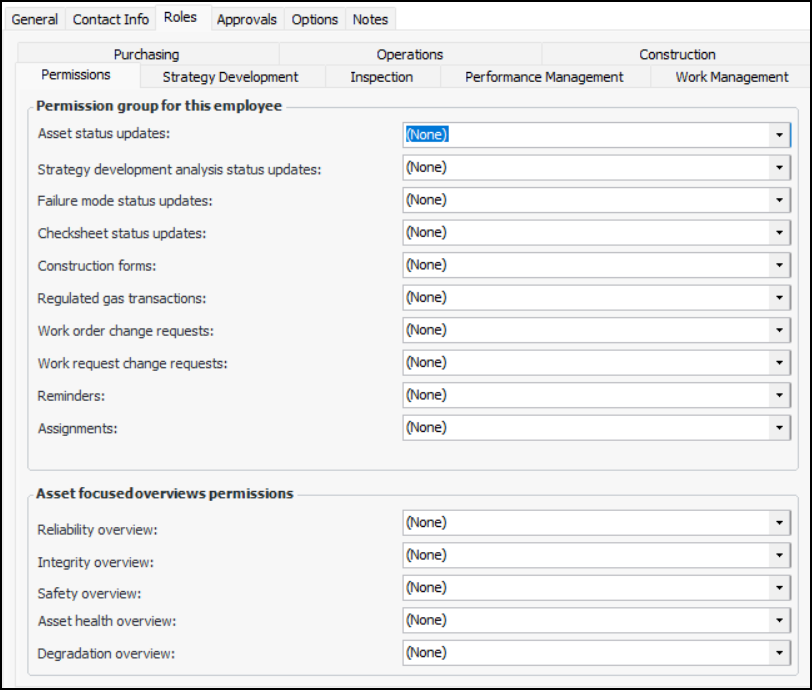
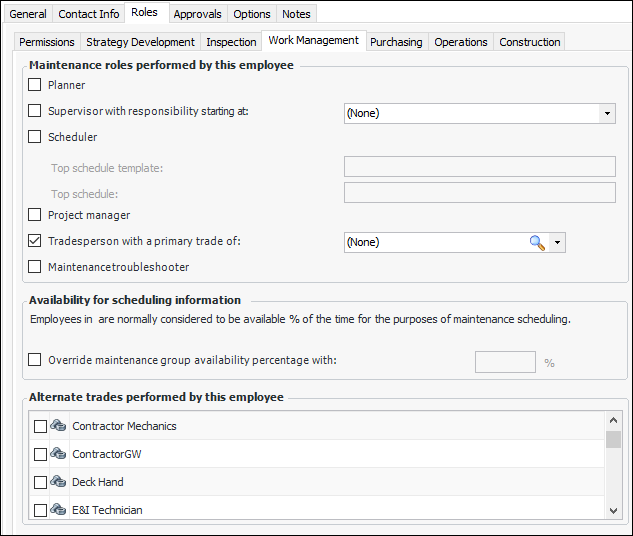
Selecting Roles and Permissions for an Employee

In addition to maintaining general information about the employee (user ID, title, contact information, and so on), the employee record determines the roles and permissions that an employee has in the system. Roles enable employees to carry out their assigned tasks in APM. For each employee, you should select appropriate roles.
For example, if James Brown is a tradesperson, select the Tradesperson role, as well as the trades that he can perform. This will allow him to be assigned work and added to work schedules. If Mr. Brown is also a member of a maintenance group, specify the group name and his availability for scheduling purposes.
Employee permission groups allow you to control APM users’ access to specific functionality. In the case of status updates for assets and construction forms, group members can only change an object’s status when the object’s current status permits it. The permission group can also determine the statuses available for selection when the object’s status is updated.
In the case of regulated gas transactions, group members can select only the specified gas and transaction types when entering gas transactions. For example, the “Electrician” permission group might be restricted from entering gas recovery transactions for SF6 gas. When a group member creates a transaction, “Gas recovery” is not available in the Transaction type list and “SF6” is not available in the Gas type list.
Note: We recommend using security profiles to identify employees who have the authority to perform actions. Employee permission groups allow you to fine-tune security by restricting access at a more granular level. For more information, see Security.
This topic explains how to select roles and permission groups for an employee.
For information about setting up permission groups, see Setting up Employee Permission Groups.

To Select Roles and Permissions for an Employee

1.
From the Site window, select the Personnel view, Employees tab, and Listing tab. By default, this tab lists all employees for the site and below.
2.
3.
4.
Select the Roles tab and the Permissions tab.
5.
6.
7.
Select the Strategy Development tab. If the employee is not allowed to create and update a type of analysis or template, clear the option for that type.
8.
Select the Inspection tab. Select the appropriate options:
9.
Select the Performance Management tab. If your APM environment is configured to use AWEIS and anomaly risk assessment integration, you can select owners for anomaly events. Select Can own anomaly events to include the employee in selection lists.
10.
Select the Work Management tab. For example:
11.
Maintenance supervisors can be referenced on construction forms. The site’s Construction Management view, Review tab provides a configuration for displaying construction forms by maintenance supervisor.
Tip: The Construction form review panel can be added to a My Desk dashboard, and then the dashboard can be added to a My Desk set. When the employee logs on to APM, the site’s My Desk view displays a review pane showing construction forms that are ready for his or her review. See Setting up My Desk Views.
This schedule template hierarchy will appear on the employee’s My Desk view. If a schedule template is not selected, the schedule template hierarchy will not appear on this view.
Select the schedule that will be the top parent schedule for the employee’s schedule hierarchy. This schedule hierarchy will appear on the employee’s My Desk view. If a top parent schedule is not selected, the schedule hierarchy will not appear on this view.
Note: Only trades that are set to have either Maintenance only or Both maintenance and purchasing as an Available source will be available for selection.
12.
On the Roles tab, Purchasing tab, enter the following information:
13.
On the Roles tab, Operations tab, enter the following information:
14.
Select the Options tab and then the Workflow tab, and enter the following options:
15.
On the Roles tab, select the Construction tab.
16.
Select Construction supervisor if the employee monitors and approves construction activities. The employee can be referenced on construction forms. The site’s Construction Management view, Review tab provides a configuration for displaying construction forms by construction supervisor.
Tip: The Construction form review panel can be added to a My Desk dashboard, and then the dashboard can be added to a My Desk set. When the employee logs on to APM, the site’s My Desk view displays a review pane showing construction forms that are ready for his or her review. See Setting up My Desk Views.
17.