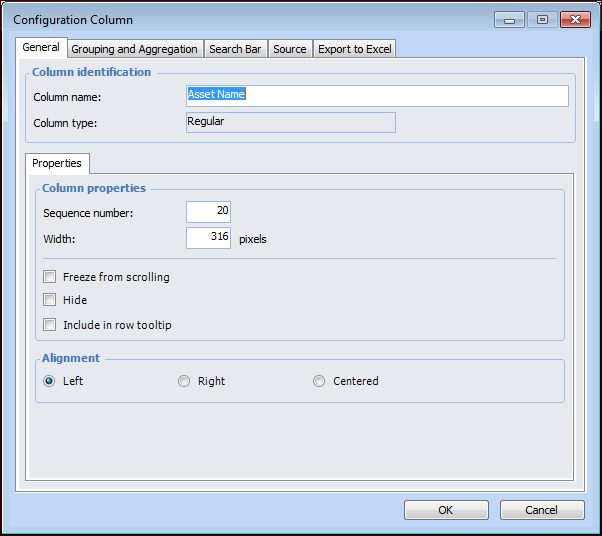
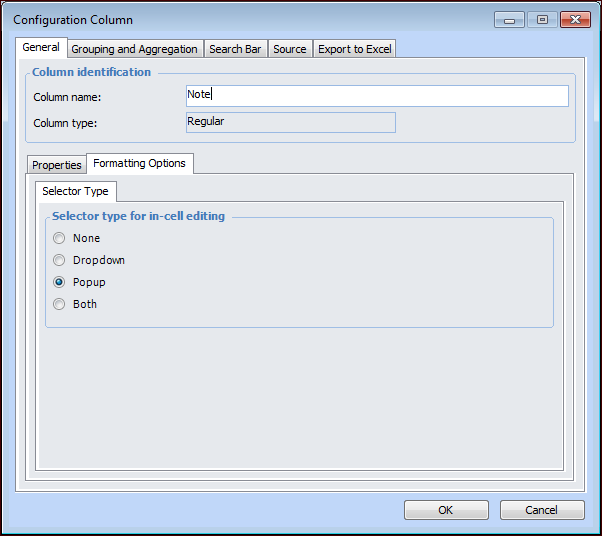
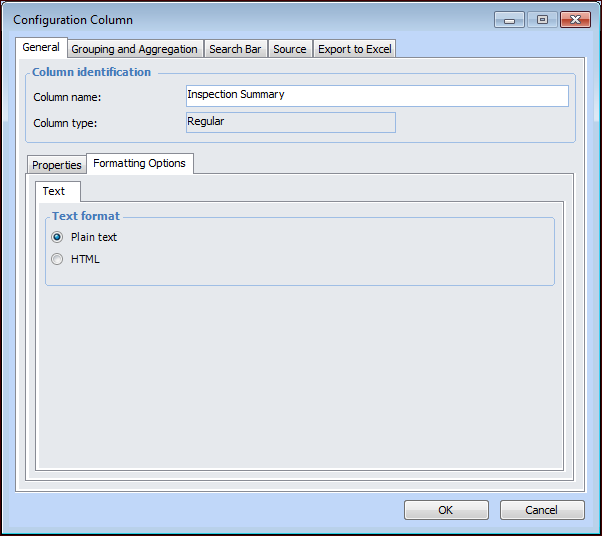
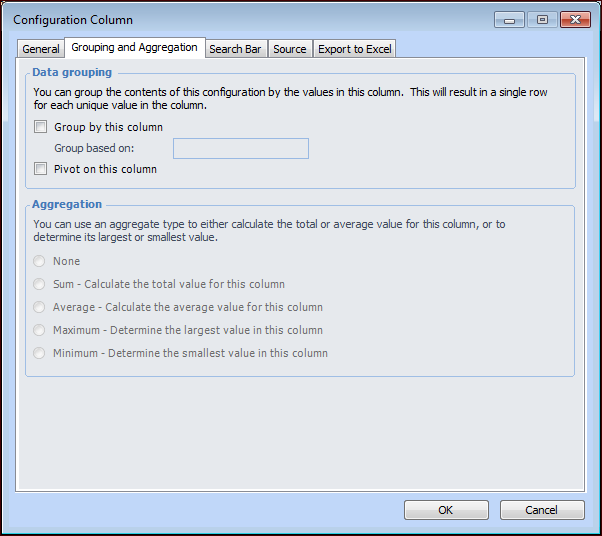
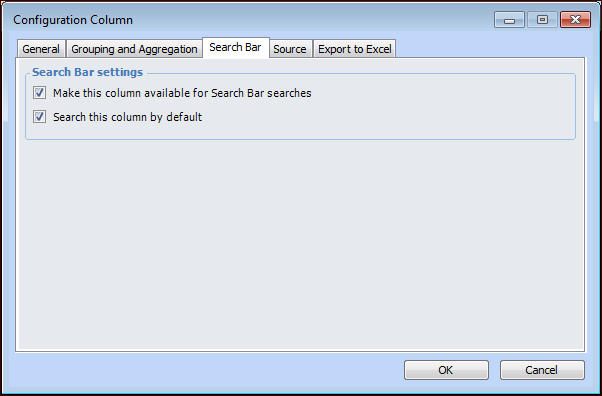
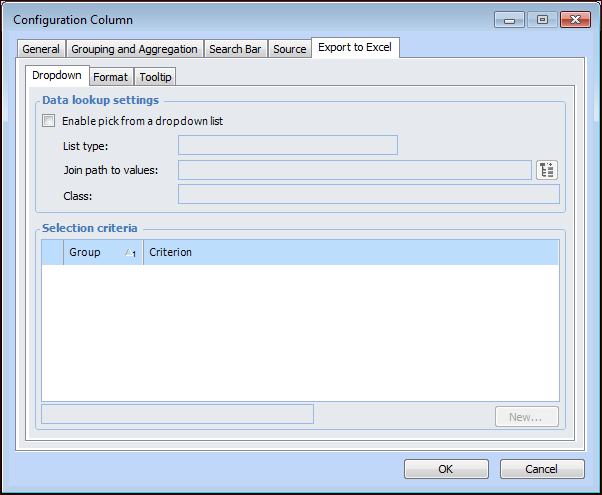
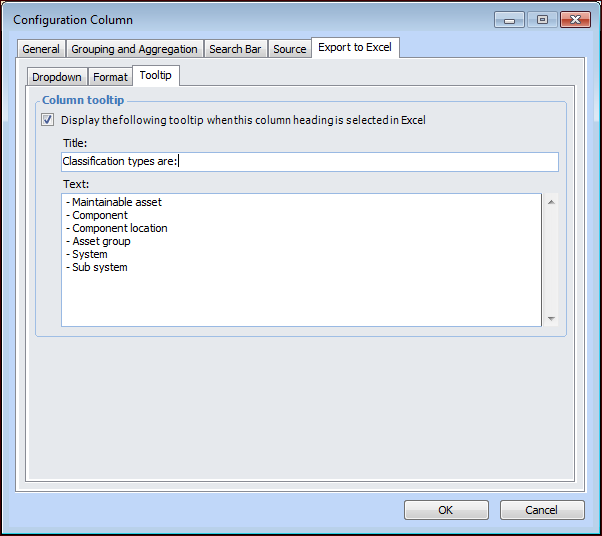
Editing Column Properties in Table Configurations

You can edit column properties in a table to establish the width of the column and whether or not it stays visible as you scroll, to align data within the column, to sequence columns, and to define behavior when exporting to Microsoft Excel®.
This topic describes how to edit column properties.

To Edit Column Properties

1.
2.
Click Configuration and then Open. The Configuration dialog appears, open to the Columns tab.
3.
4.
On the Properties tab, enter the appropriate information.
When the Freeze option is selected, the column appears frozen at the left of the table configuration. Freezing the column enables you to see the information it contains as you scroll across to view other columns. Any column to the left of the frozen column will also be frozen.
5.
Select the Formatting Options tab. This tab is available for column types that support it, for example, icon, strings that support in-cell editing, date and time, and HTML text. The options available on the tab differ according to the column. Here is an example for a string column that supports in-cell editing:
None - you cannot edit data within the table configuration.
Dropdown - you can open a list of items from the table cell to select the correct one.
Popup - a dialog appears from which you can select the correct item.
Both - you can use either a drop-down list or a popup dialog to select the correct item.
Here is an example for the icon column type:
Here is an example for a column that supports HTML text:
Text can be formatted in this column type as either plain text or HTML.
Tip: If the column contains graphics or photographs, you can display them in tables as HTML. Select HTML and click OK. In the table, the content of the column is rendered as HTML. For example:
6.
Select the Grouping and Aggregation tab to set options for data groups. Once you have created a data group, you can include a summary of any numeric data available for the items in the group. For example, in a table configuration of assets, you might group the assets by asset type. If you include the Priority Ranking column in the configuration, you could then include the average priority ranking in the group summary. For more information about data groups and aggregations, see Creating Data Groups in Table Configurations.
None: No data aggregation is displayed for this column.
Sum: All of the values in the column are added together to produce a total value.
Average: All of the values in the column are added together and divided by the total number of rows to produce an average value.
Maximum: The highest value in the column is selected.
Minimum: The lowest value in the column is selected.
7.
Select the Search Bar tab.
 
8.
Select the Source tab to view the source of the column. For example:
9.
Select the Export to Excel tab to view options for exporting to Microsoft Excel. For example:
For more information about exporting tables, see Exporting Table Configurations to Excel.
10.
The Dropdown tab is available when the property’s values are already defined in APM. Select Enable pick from a dropdown list and select the list type and join path to values. Then click New to define the dropdown selection criteria. Repeat for each dropdown selection criteria.
11.
Options on the Format tab are available for complex data types, such as duration, quantity, and currency amount. Enter the following:
Export all parts merged into a single column: Both the value and unit of measure are exported together in a single Excel column.
Export the number only: Only the value is exported.
Export all parts as separate columns: The value and unit of measure are exported into separate Excel columns.
12.
Select the Tooltip tab to include information in the exported Excel file. Users can hover the cursor over the comment flag in the column heading to view the tooltip. For example:
13.
Select Display the following tooltip and enter a title and text. Only basic formatting is supported, and text is restricted to 900 characters. For example:
14.
When you have finished editing column properties, click OK to save the changes and close the Configuration Column dialog.