Introduction to Data Loading

APM data loading simplifies the process of populating an APM database with records from another system. When you wish to add multiple assets to APM, for example, data loading provides an alternative to manual data entry: you can import the assets from a Microsoft Excel® workbook using the Import Data wizard.
Data loading is a two-step process:
1.
2.
Note: Each row in an Excel spreadsheet could represent a different site and time zone. The time zone information is saved as-is in the staging table. Only when APM objects are updated with the imported data is the date and time data saved to the database as UTC. The dates and times are displayed in APM objects with their original time zone abbreviations.
For more information, see UTC, Enterprise Time, and Site Time Zones.
Note: The availability of individual data loaders is often controlled by product features. If a data loader does not appear in the appropriate tab in the Data Loaders view, be sure to check for, and enable, its feature in the Features view. For more information, see Features Management.
This topic explains the following:

Data Loaders

The following table lists data loaders for APM in the order of tabs in the Enterprise window, Data Loaders view.
For information about the data loaders used for SAP data, see APM Interoperability Guide for SAP Plant Maintenance.
Note: Some data loaders have been fully implemented and verified, but others are available in technology preview. “Technology Preview” appears in their configuration names.
 

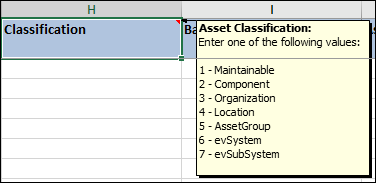
Import Templates and Tooltips

In APM, you can generate Excel workbooks to populate with data for import. Each workbook is created with the columns and formatting required by its staging table. The rows in the spreadsheet are blank.
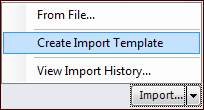
In the Enterprise window’s Data Loaders view, each staging table tab has an Import list. Select the appropriate table configuration, click the Import list, and click Create Import Template:
You can populate columns that support enumerated lists or boolean values with either the exact text or a number that represents a valid value. In the Excel files, these columns have comments that list acceptable values: both their numbers and text. Hover the cursor over the heading to see the comment. For example:
In this example, you could enter “1” or “Maintainable” in the “Classification” column.
For more information, see Creating Import Templates.

Process Jobs

A process job identifies a staging class and parameters that are used to match import data against APM requirements. Process jobs are created automatically when you use the Import Data wizard. You can also create them manually to process staging table records that have not been assigned to a job.
Note: Process jobs offer the option of increasing the maximum concurrency when processing the import job. By default, the value is “1”, which means that data is processed sequentially. You can increase this number to improve processing speed for large jobs on computers with the appropriate capacity.
When you use the Import Data wizard to import information from an Excel file, you can select an option to process imported data immediately. In this case, the data is imported into the staging table, a process job is created automatically, and the data is validated and processed. Valid data is imported into the APM database. Invalid data remains in the staging table until it is either reprocessed or deleted.
The process job provides a record of the import request and process statistics. It also lists the objects, their attributes, statuses, and messages. Process jobs can be revised and reprocessed.
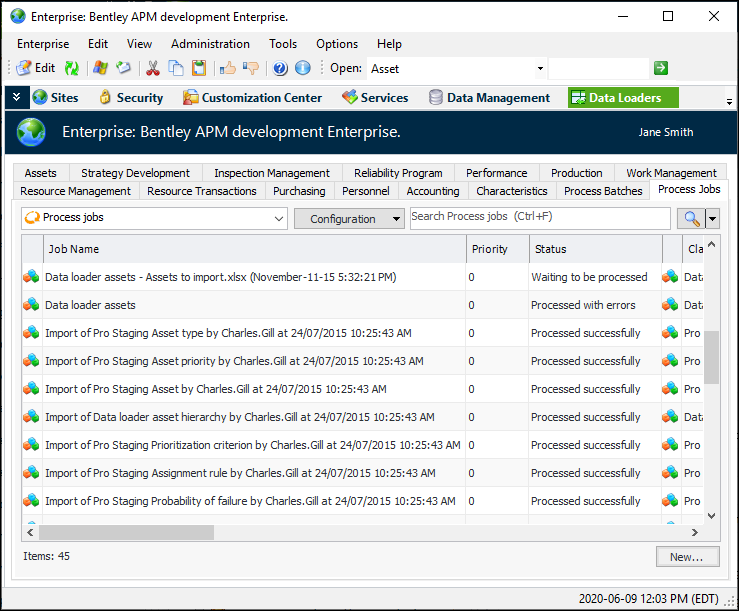
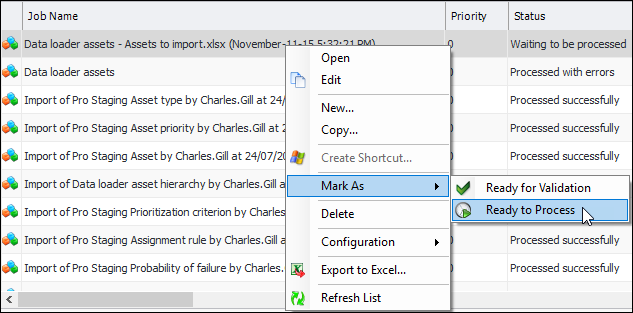
In the Enterprise window, Data Loaders view, the Process Jobs tab provides a list of the jobs, their statuses, and more. For example:
Tip: You can also monitor process jobs using the APM Web Monitor.
If you choose to defer processing, the job is created and queued with the status “Waiting to be processed”. To process the job manually, right-click it in the Process Jobs tab and mark it as “Ready to Process”. For example:
For more information, see Working with Process Jobs.

Process Batches

A process batch contains one or more jobs. It can be set to automatically process imported data at regular intervals.
You can create a batch to process existing process jobs, for example, the jobs that are created automatically when data is imported from Microsoft Excel® worksheets into APM staging tables. In this case, define the batch and reference it on the individual process jobs.
You can also create a batch to process records in the staging table that are not assigned to a process job, for example, data that has been added to the staging table using another interface or process. In this case, define the batch and add one or more jobs that identify the staging classes.
In either case, you can specify job dependencies, set the order in which jobs are processed, and set up a recurrence pattern for repeated processing.
For more information, see Creating Process Batches.

Validation and Reprocessing

Processing includes validation. But, before processing a job or batch, you can validate it in a separate step by marking it as “Ready for Validation”. APM matches the properties of the import objects against the requirements of the APM site. For example, if the Excel worksheet contains an asset with a classification that has not been defined in APM, the row in the staging table is red, its status is “Errors detected”, and the appropriate error message is shown. The job or batch status changes to “Validated with errors”.
To correct errors in data, you can use in-line editing to revise values in the staging table (for example, select the Assets tab and the “Assets - Errors” configuration). Then mark the row as “Ready to Reprocess” and mark the process job as “Ready to Process”.
Alternatively, you can add values to APM to match those in the staging table and then reprocess the job. Another option is to revise the original Excel worksheet and re-import it.

Audit Records for Assets, Indicators, and Standard Tasks

Audit records for assets, indicators, and standard tasks include information specific to data loaders. For example, the audit records show the user who initiated the process from the client.
Note: This feature is available for technology preview. You must first enable feature 138 to use the functionality in APM. In the Enterprise window, select the Features view and the Enabled Features tab. Click Browse, select “Provide visibility to the user who initiated the processing of a data loader” and click OK. If APM is running as a smart client, click Refresh Enabled Features on the server. Then restart the client to use the functionality.
In the Asset window, History view, the Data Loaders tab displays tabs for each of the these data loaders:
In the Indicator window, History view, the Data Loaders tab displays tabs for each of these data loaders:
In the Standard Task window, History view, the Data Loaders tab displays tabs for each of these data loaders: