Creating Import Templates

In order to import data into APM, you must first create the Microsoft Excel® workbook and populate it with the import data. The workbook can be created through APM, using an external application, or manually in Excel.
This topic explains how to create an import template in APM for any type of supported import data. A workbook is created with the columns and formatting required by the staging table.
Note: You can populate columns that support enumerated lists or boolean values with either the exact text or a number that represents a valid value. In the Excel files, these columns have comments that list acceptable values: both their numbers and text. Hover the cursor over the heading to see the comment. For example:
In this example, you could enter “1” or “Maintainable” in the “Classification” column.

Pick Lists

Several data loader import templates provide pick lists so that you can easily select values in columns for related properties. For example, in the Assets worksheet, you can select Site name, Asset type, Asset status, Consequence priority, and so on.
In the Excel workbook, place the cursor in the row below the column heading and click the drop-down list arrow:
Select a value from the list to populate the cell.

Entering Non-List Values

In a column with a pick list, by default, you cannot type values that are not in the list. You can allow new entries to be added to a cell (and still keep the pick list).
In the Excel workbook, select the cells in a column. Select Data in the ribbon, click 
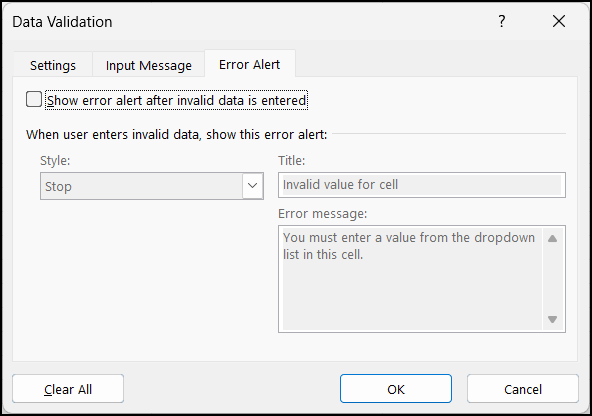
Data Validation to open the Data Validation window. Select the Error Alert tab. Clear Show error alert after invalid data is entered.
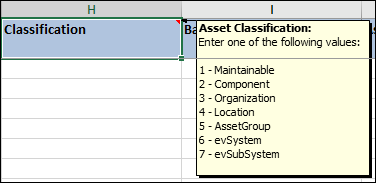
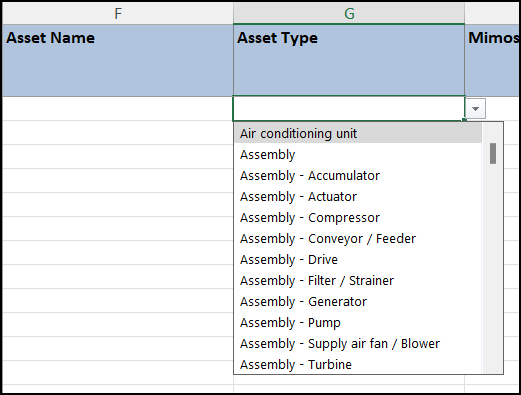
Click OK. You can now enter your own values or select values from the pick list.

To Create an Import Template

1.
2.
Select the Data Loaders view, and then the tab for the type of data, for example, Strategy Development.
3.
4.
In the Import list, click Create Import Template. A new read-only Microsoft Excel worksheet opens, based on the format of the staging table. You can now “save as” the book in the location and with the name of your choice.
5.