Creating an Enumerated List

An enumerated list consists of a set of constant values. Enumerated list attributes are based on either APM or custom enum types. The enum type defines which values are available in the enumerated list.
For example, if your object requires that a user enter a day of the week, you may want to create an enum type for days of the week. At run-time, the user is restricted to selecting one of the values that are defined in the enum type from either a dropdown list or a radio group. Once you create an enum type, you also need to create a new attribute enum type on your custom class. Placing the attribute on the user interface provides access to the enumerated list.
Note: You must launch the product as an APM administrator.
This topic explains how to create a new enum type and add an enumerated list attribute to an existing custom class.

To Create a Custom Enumerated List Attribute

1.
2.
Select the Customization Center view.
3.
Click Lock for Customization. The APM icon in your Task bar now has a key on it:

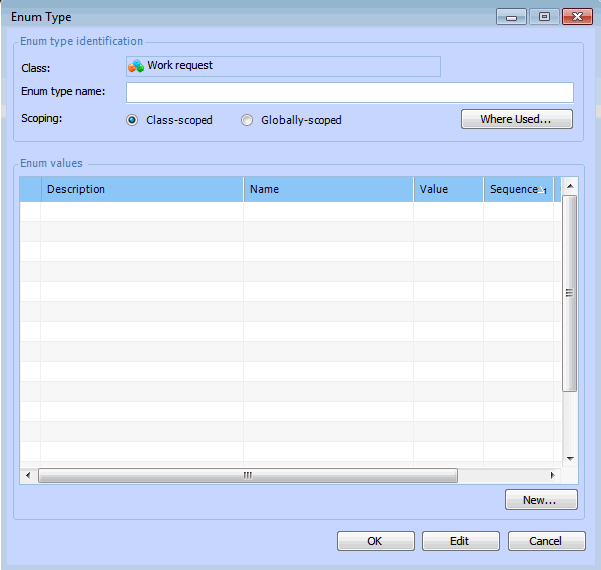
Creating the Enum Type

4.
Tip: You can review the list of existing enum types in the Custom Enum Types tab. To see all available enum types, select the Custom and APM enum types from the dropdown.
5.
From the Add menu, select Enumerated List. The Enum Type dialog appears.
6.
In the Enum type name box enter a name for the list. APM automatically adds the prefix “ec” to your enum type name.
7.
Select a Scoping option. Class-scoped enum types are only available to be used in the class within which they were created. Globally-scoped enum types may be used in any custom class.
8.
Add the options (or values) to the list type. In the Enum values section, click New. The Enum Value dialog appears.
9.
In the Description box enter the name of the value. This is the description that will appear in the user interface.
APM automatically enters an enum value name, with the prefix “ev”. Typically, you will not change the default name.
10.
You can enter a Value and a Sequence number. The sequence number determines the order in which the values are listed in the user interface.
11.
12.
Repeat steps 8 to 11 to add the rest of the options to the list.
13.
Click OK on the Enum Type dialog.

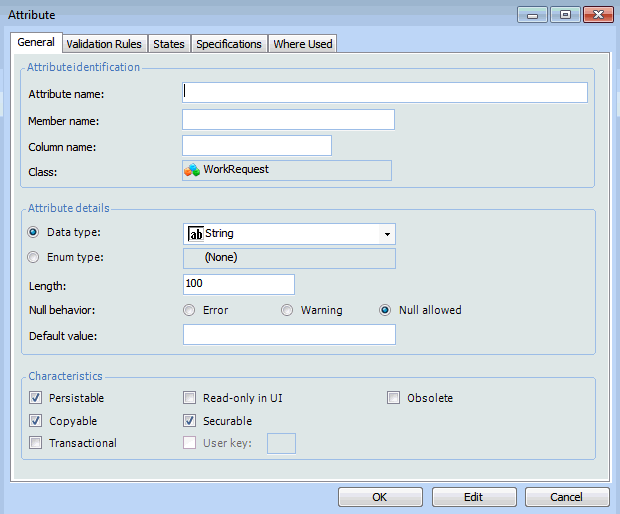
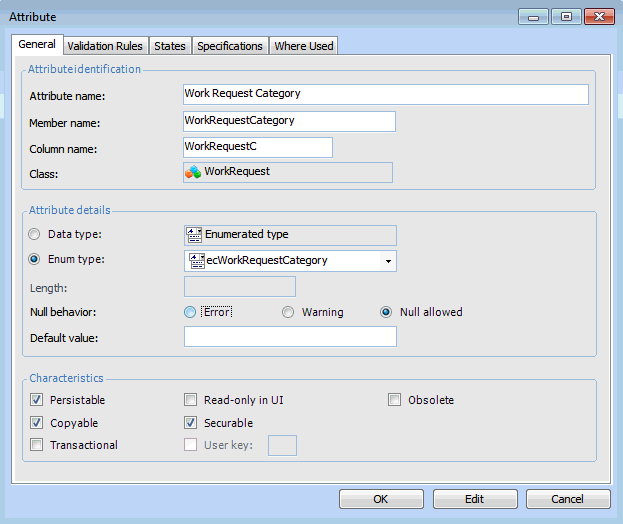
Adding an Enum Attribute to the Class

14.
On the Data Members view, Custom Attributes tab, click New. The Attribute dialog appears.
15.
In the Attribute name box, enter the name of the attribute.
16.
In the Attribute details section, select the Enum type option.
17.
In the Enum type list, select the enum type that you just created.
Tip: Custom enumerated types all begin with the letters “ec”. APM enumerated types begin with the letters “eg”. Older enum types have no prefix.
18.
19.
Click OK to save the attribute.
20.

Adding the Enum Attribute to a View

21.
22.
Tip: You can click the expander 
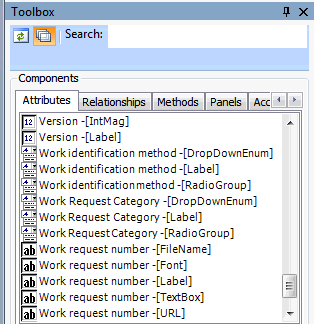
icon in the Toolbox to see the full details of the attributes, such as whether the attribute is a DropdownEmun, a TextBox or a Label. This helps in selecting the right attribute to add to the view. Click the icon again to hide the attribute details.
23.
24.
25.
In the Customization Center, click Unlock System. The system should regenerate schema and cache files. This may take a few minutes.
Note: If the system does not automatically generate the schema and cache, click Generate and then Schema, and Generate and then Cache Files in the Customization Center.
26.

Changing the Enum Type

If you want, you can change the style of an enum list. For example, you change an enum list from a drop-down to a radio button group; however, this cannot be done to a list that is already included on the view. You will have to remove the enum list from the view and replace it with an enum that is formatted as a radio group.
1.
2.
To remove the enum list, right-click on the enum attribute on the layout panel and click Delete. Be sure to delete the corresponding enum label as well.
3.
In the Toolbox, click the Attributes tab and the expander icon. Locate the enum attribute that has the format that you want. For example, select the RadioGroup format.
4.
5.
6.
In the Customization Center, click Unlock System. The system should regenerate schema and cache files.
If the system does not automatically generate the schema and cache, click Generate and then Schema, and Generate and then Cache Files in the Customization Center.
7.